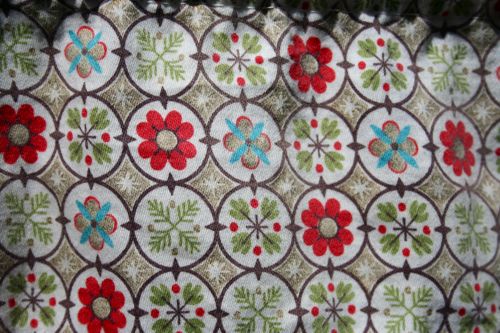
Digital Scrapbook Papers are not only for scrapbooking. You can use them for a a lot of different craft projects.
Where To Get Them
- Digital Scrapbook Place: You must register to gain access to their freebies page, which offers a myriad of digital papers
- Crafts Beautiful: this British DIY site provides a ton of tutorials. Every month Crafts Beautiful introduces a new set of “backing papers.”
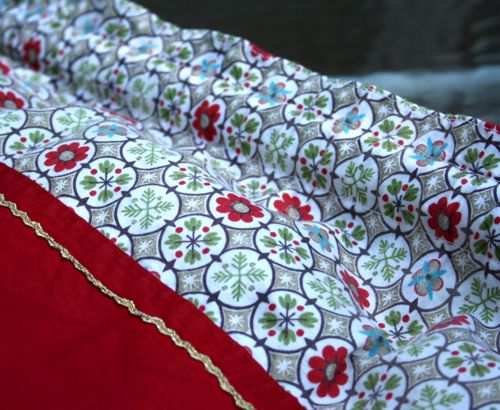
- Shabby Princess: Here you can find gorgeous sets of papers and embellishments. I used the 2005 holiday sampler for the projects on this post
What To Do With Them
- Print on paper and make paper beads, paper boxes (Mirkwood Designs has nice templates), envelopes, stationary

- Print on fabric using either inkjet fabric sheets or, for larger pieces of fabric, have your designs printed by Spoonflower and make appliques, key chains, napkins

- Print on shrink film (Shrinky Dinks) to make tags, earrings, charm bracelets, mobiles, drink charms

- Print on iron on transfers and decorate onesies, T-shirts, did I mention napkins?

- Create cross-stitch patterns using a tool like Artopik

What do you like to do with these papers?
P.S. Thank you to Meggie Cat who inspired this post with her collection of online tools and freeware.
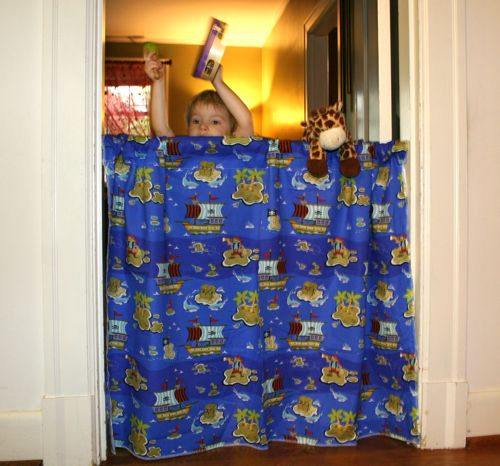
]]>I am all about- what can you make with 1 yard, 1 skein, etc. And so in a pinch for a gift I used one yard of fun fabric to make a doorway puppet show curtain.
With a $4 tension rod and 1 yard of fabric we have already had hours of fun around our house playing with puppets and stuffed animals, having musical concerts, and using as a special door into my son’s room with a “doorbell” you have to ring.
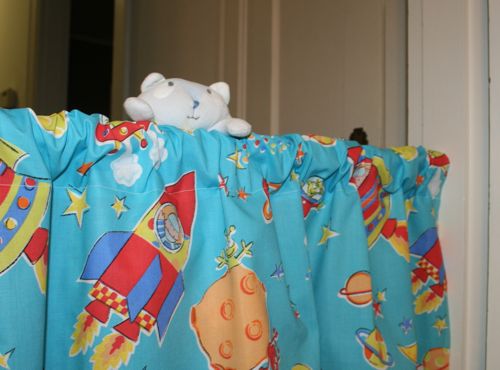
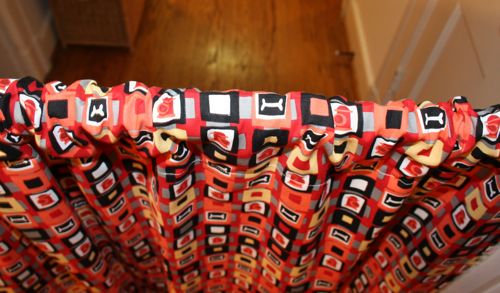
Two of the sides of fabric didn’t even need hemming because they were the finished edge off the bolt and the other 2 ends I serged and turned over and hemmed across to make a casing for the rod. I have specialized curtains too by “monogramming” with a large felt letter sewn on and sequin ribbon stripe near the top, to make it more girly. There is so much you could do to personalize this to your child’s taste, like the different fabrics shown that I have used. And with it less that 3 feet tall it is perfect for a toddler to stand behind or an adult to sit behind.
I love a 10 minute project that can really spark his imagination and turn our ordinary hallway into a fun place!
]]>
It’s 90 plus degrees and I could be sorting out summer clothes and putting winter stuff away, however, I’d rather be sewing! While attempting to deal with such mundane chores, I found a pair of Elizabeth’s jeans. While they are way to short for her, the waist still fits perfectly for my skinny child so they became the object of another refashioning exercise.
Part 1: Cutting up the Jeans

- Lay out the jeans and cut off the legs right below the crotch. This will be the top tier of the skirt.

- Open up the seam between the legs.
- Look at the top part of the jeans and measure the distance from the waist to about one inch below the zipper of the jeans. In my case that was 6.5 inches/16.5 cm.
- Mark this distance all around the tier.
- Even out the bottom of the tier by cutting along your mark.


Part 2: The Math
Calculate the Width of the Ruffles
- Decide how long you want the skirt to be and subtract the length of the jeans top tier from this number.
- Divide the remainder by the number of ruffles you wish to add for ruffles of equal width. This skirt is 16.5 inches long. 16.5 – 6.5 inches for the top tier = 10 inches. 10 inches divided by 2 ruffles = 5 inch width per ruffle.

Calculate the Length of the Ruffles
- Measure the circumference of the bottom edge of the top tier and multiply this number by two. This is the length of the second tier ruffle.
- Multiply the length of the second tier ruffle by two. This is the length of the third tier ruffle.
These calculations will give you two fairly full tiers of ruffles. If you want the skirt two be less full, make the ruffles a little shorter.
Part 3: Cut the Fabric
With these measurements, cut your ruffles. You may have to join one or more strips of fabric to get the requisite length. For example, my first ruffle had to be 50 inches long and the fabric was 45 inches wide, so I had to cut another 5 inch strip to make up the 50 inches.
Part 4: Ruffle the Ruffles
- For each ruffle, join the lengths of fabric you cut out to make a long strip.
- Use your preferred method to finish the raw edges of the strips. I sewed a zigzag stitch along the edges.
- For each ruffle, sew the long strip together to make a loop.
- Ruffle the second tier ruffle by sewing long basting stitches along the top edge of the fabric.
- Mark each quarter of the top jeans tier, e.g., front middle, left side, back middle, right side.
- Repeat this for the second tier ruffle.
- With right sides together, pin the second tier ruffle to the top jeans tier matching the quarter markings.
- Gather the fabric between the markings by pulling the top thread of the basting stitch.
- Evenly distribute the gathers.
- Sew the second tier ruffle to the top jeans tier. Repeat this process for the next ruffle(s).


Part 5: Finish the Skirt
At this point you should have attached all the ruffles.
- Hem the bottom tier.
I’m currently infatuated with bias tape hems. This skirt features homemade tape made out of matching fabric. For instructions on making this tape check out Step Four of the cashmere blanket tutorial. You could also just make a traditional double fold hem. (Fold the bottom edge to the inside and press, fold again, press and stitch.)
Dance the night away. This is the perfect party skirt.
]]>I bought a pair of vintage curtains at an antique shop and want to use them in my kitchen. But what seemed like 2 really long panels at the store are only enough to span 2 of my 3 windows.
So I am asking for HELP in any of these ways!
1) You have some of this fabric in a bag from grandma and you would like to send it to me (or sell it to me)!
2) You have seen it for sale somewhere and how to contact the shop.
3) You know of any website that will help you find the pattern/number/code to identify old fabric so you can look it up to buy. I have tried to look for any such sight or discussion board but they are mostly about identifying the type of fabric (ie. wool, wool blend…)
I know this may be a long-shop but any suggestions or leads would be great! Thanks!
]]>
The teacher appreciation luncheon for our school is coming up and we were in need of favors for the teachers. Back in December I saw this tutorial from Creative Outlet Designs in a Sew Mama Sew round up and suggested that we could make these lavender scented wheat sacks for the teachers. You use them as hot or cold compresses by heating up the bag in the microwave or keeping them cold in the freezer.
100 lbs of bulgur wheat

8 yards of fabric

1.5 oz of lavender oil
75 yards of ribbon
73 eyelets, cards, and plastic baggies later, they are finally done:

Thank you to Kerry, Laura, Meg, and Kirsten for supporting me in my crazy crafting endeavors.
Now I just need suggestions how to get 100 lbs of inert mass from my apartment to the school. Any ideas?
]]>
. . . a.k.a. Stencils
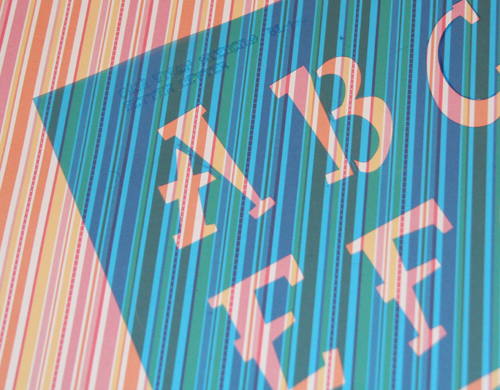
I bought a set of these stencils for a beach bag project and have gotten quite a bit of use out of them. Two years ago, we rented a beach house with two other families. In anticipation of the toys that would soon be all over the rental, I wrote each child’s name on a tote bag using the stencils and fabric markers hoping that it would make it easier to organize their stuff.
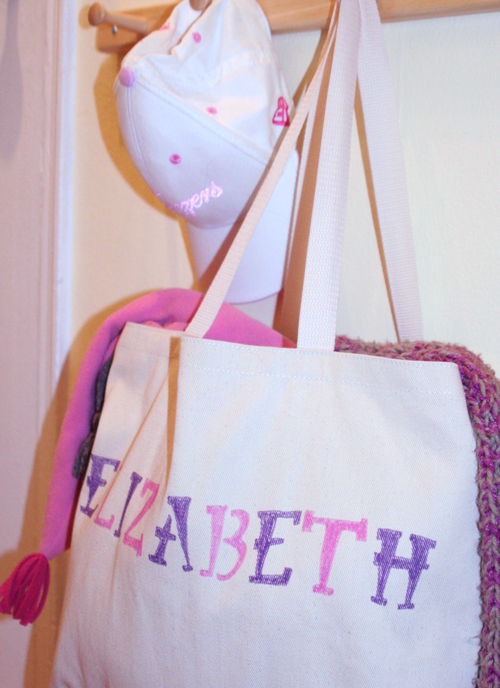
The organizational aspect of that project was a total failure, but the kids were excited about seeing their name “in print.”
Recently, I used the stencils for a treasure box a la Amy Karol for a special girl’s birthday present.
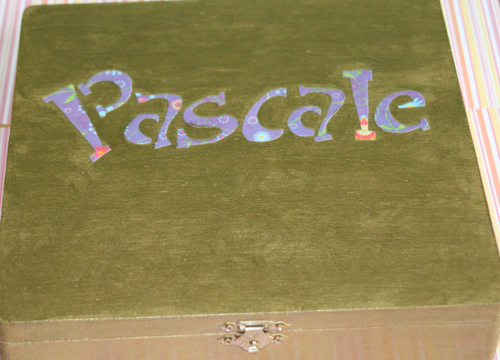
The letters are cut out of scrapbook paper, glued onto the box, and covered with several layers of varnish.
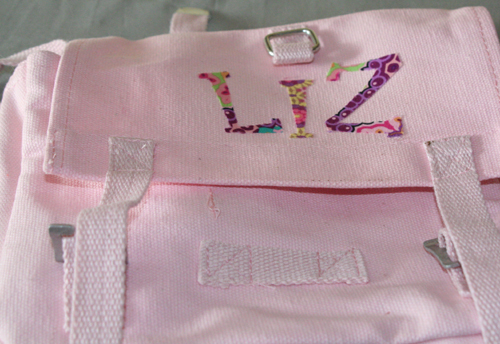
And here, finally a work-in-progress. When I visited my parents in Hamburg last summer, I saw all these army surplus canvas bags with lettering at different craft markets.
With my handy-dandy stencil set I traced a certain little girl’s name on fusible web, ironed it on some scrap fabric and fused the letters onto the bag. Now they just need some blanket stitching and other decorations and Elizabeth’s handful of Pokemons will have a fashionable and comfortable mode of transportation to Grandmother’s house.
]]>
I grew up in Germany and advent calendars were always a big deal in my family. I remember this beautiful embroidered calendar my mother made for my aunt with all kinds of interesting little packages attached to it. My brother and I would discover calendars made out of matchboxes and walnut shells or just wrapped up little packages tied together with string. Last year, my mother even put together a calendar for my brother’s dog. So in the spirit of the season, I went online to browse for some inspiration for this year’s calendar.
Paper Calendars
Kids Craft Weekly explains how to put together a cute origami cup calendar. You could also make little origami boxes as explained by Lisa Lam from U-handblog, or just simple cones and fill them with goodies.
Another fun idea from Kinder Stadt is to use toilet paper rolls and to turn them into snowmen, Santa Clauses, or penguins. 
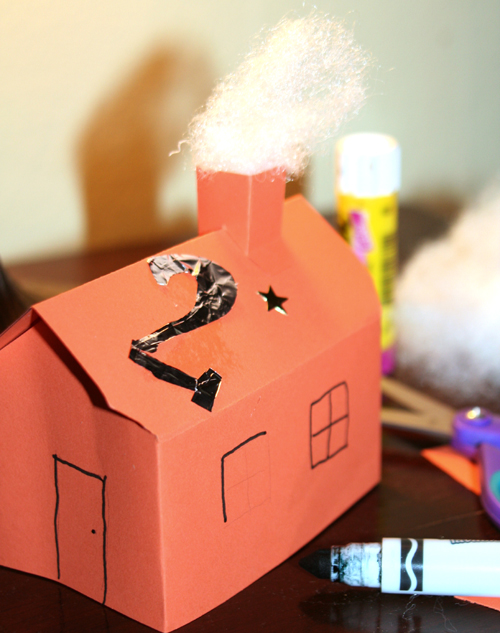
If you have the space you could create a whole village of 24 houses. Marilyn Scott-Waters of The Toymaker has a great template for a house complete with chimney.
Fabric
Jenny B. Harris of Allsorts just reposted instructions for her felt pocket calendar. I think you could also re-purpose her elf shoes. You could make 12 pairs of shoes and hang them from a clothesline.
Last year, Susie of Susie’s Country Garden made a garland of little stockings.
Eldrid Røyset Førde from Bremanger, Norway has English instructions for a different stocking type calendar.
I also like this quick calendar by Shizzyknits.
Other Materials
Splitcoaststampers has a tutorial for a calendar using little favor tins.
Miniature terracotta pots are another popular starting point for advent calendars. Turn them upside down, add a Styrofoam ball for a head, and paint them to make Santas, elves, snowmen, etc. Then either glue them on top of the box that will contain the gift, or cover the bottom with felt and/or cardboard to hide the gift in the pot itself. Here is a German tutorial from Creadoo with pictures of “potty” creatures to give you some ideas.
I’ve finished my calendar what do I put inside?
If you are still recovering from a Halloween candy hangover and are worried about lead levels in gum ball machine toys, you may want to consider filling your calendar with different activities. Kiddley has a list of activities you could use. You could also put pictures of friends and family in your calendar and put together a progressive collage, or collect or make some ornaments to hide in the calendar and then hang off a branch or your tree.
For more inspiration, go to flicker and search for pictures in the adventcalendar cluster.
]]>I know I may be way behind the times but I still keep finding gadgets and ideas at the craft store that amaze me. This week I tried out the fabric button makers I had bought 6 months ago. They were very simple to make and now I want to look around the house and see what keepsakes I could make buttons out of. I am considering: an old, favorite shirt or baby shirt, vintage towel or handkerchief, old ties, prom dress, etc. to make a button for a bag or pillow that would be better used there than thrown out. What a sweet memory to carry a bag with a peice of baby’s first clothing! I can’t wait!
So, first, using the pattern on back of package cut out pattern. I cut my circle out of the paper so you can perfectly center and choose the picture that you want.
Cut out fabric circle and center around button half with teeth. Press around the circle, catching the fabric on the teeth all the way around.
Next, put the flat button half down on top of your fabric button and press into place by pressing down with a spool. Be sure to put the side down that sticks out farther.
All done! 2 minutes! And now you have a button that perfectly matches what you have sewn!
This was my favorite example of this- a bag I received in our Summer swap. LOVE it!
A few tips:
Be careful, you can hurt your fingers on those teeth!
If you fabric is too thin, use iron-on interfacing so that the silver button cannot be seen through the fabric.
First of all – I want to thank the girls of Crafty Daisies for inviting me to guest blog this week! I don’t get the chance to blog about crafting very often, but I love to craft/sew/knit/etc! So I’m looking forward to sharing some of my projects with the readers here at this great creative space!
As an avid reader of Crafty Daisies, I have noticed a lack of quilting posts thus far, so I thought I would post about some of my quilting projects. I started quilting about two years ago, teaching myself out of a book – Quilting 101: A Beginners Guide to Quilting (one of the current reads on this blog!!). I highly recommend this book for beginning quilters. If you do not have a lot of sewing experience, it gives you a rundown on how to use your machine. It is spiral bound and opens easily for use while sewing. Also it is full of some great and easy quilting projects to get you started.
As usual, when starting a new hobby, I had to get all of the equipment. Quilting requires you to buy quite a few things that I, at least, did not have on hand in my sewing materials:
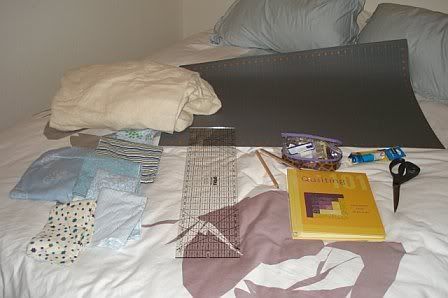
Cutting board, special ruler, special pencils and pins, rotary cutter, book, tons of batting, and fabric!!!!!!! One of my favorite things to shop for.
Since I already knew how to use my sewing machine, I skipped a lot of the easier projects, like quilted pillows and potholders, and jumped right into my first quilt – a flannel lap quilt. And I fell in love with it! It is such a fun project. The whole thing can be put together in just a couple of days. Also, when you buy the fabric the first time, you end up with enough for the top of two quilts, which is great!
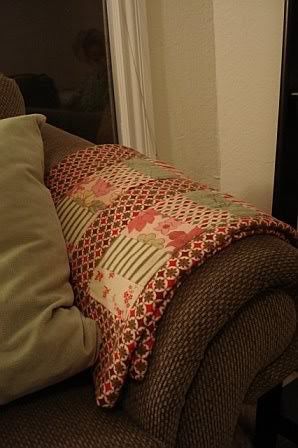
I started off making a quilt for myself:
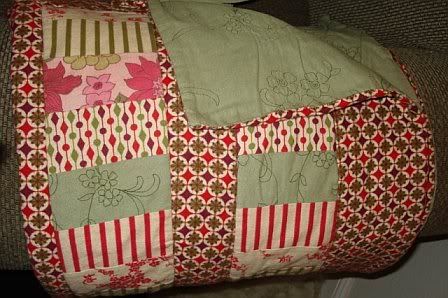
I fell in love with all of these great, pretty, pink and red flannels. The quilt is really warm, cozy, washes well, and looks great on my couch!
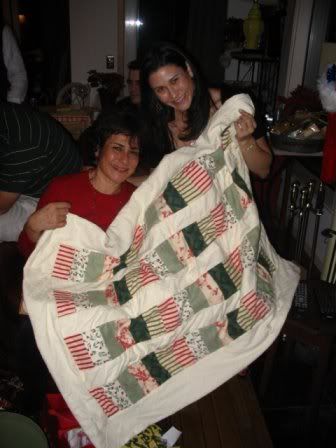
I loved making this so much that I made several as gifts for others. I made one for my Aunt for Christmas, in reds, greens, and whites/creams (edited to add that I am not in that picture – my Aunt and Cousin are holding up the quilt):
And one of my favorites, a baby quilt with a barn animal theme:
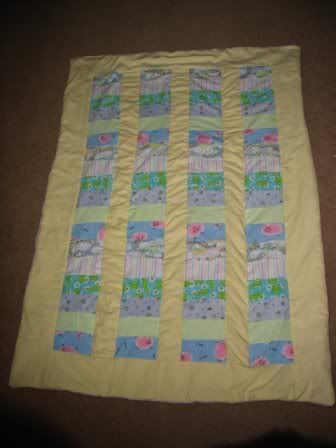
Hard to see in the picture, but there are patches of pigs, lambs, frogs, and ducks. So cute and the baby now drags it around, which I love to see!
So that is my first adventure in quilting. I recommend trying something out in flannel – it is really cozy and there are a lot of fun prints you can use. Plus the fabric is pretty forgiving! Puckering around seems is part of an old-fashioned looking quilt, especially in flannel, so minor mistakes just add to the charm of the quilt. I hope to work on some more complicated projects in the future, but I think this was a great first quilting experience!!!
Emily
]]>I’m a thrifty shopper and crafter, so I’m always looking for a good bargain. This always leads me to the remnant / discount section of my local fabric store. Unfortunately, they are all labeled as remnants, with no indication of the fabric content listed on them anymore.
I had bought a few really cute prints that I wanted to use as outers on fitted diapers, but I had no idea if they were cotton or polyester or a mixture of the two. A quick internet search led me to this great page, and I was able to identify my fabric contents in no time at all!
How to determine fabric content by using the burn test.
Snip a piece of fabric equivalent to 1″ square. Using a butane lighter and holding the fabric with a pair of tweezers ignite the fabric over a non-flammable surface in a well ventilated area.Examine the quality and color of the flame, the odor produced, and the quality of the resulting ash or cinder. Use this table to help determine your fabric’s content.
FABRIC FLAME
QUALITYODOR ASH
QUALITYCOMMENTS WOOL orange color
sputteryburning hair
or feathersblackish
turns to powder
when crushedflame will self extinguish
if flame source is removed
no smokeSILK burns slowly burning hair
or feathersgrayish
turns to powder
when crushedburns more easily than wool
but will self extinguish is flame
source removedCOTTON yellow to orange color
steady flameburning paper
or leavesgrayish, fluffy slow burning ember LINEN yellow to orange color
steady flameburning paper
or leavessimilar to cotton takes longer to ignite than cotton but otherwise very similar RAYON fast orange flame burning paper
or leavesalmost no ash ember will continue to glow after flame source removed POLYESTER orange flame, sputtery sweet or fruity smell hard shiny black bead black smoke ACETATE burns and melts,sizzly acidic or vinegary hard black bead will continue to burn after flame source removed NYLON burns slowly and melts, bluse base and orange tip, no smoke burning celery hard grayish or brownish bead self extinguish if flame source removed ACRYLIC burns and melts, white-orange tip, no smoke acrid black hard crust will continue to burn after flame source removed
A couple other sites I read noted that if you have a blend of fabrics (ie 50/50 cotton polyester) then you will see a combination of both types of flames / burning properties. While this wont tell you the exact percentage, at least then you know that it is a blend.
I thought this was a great resource, and I hope it can help someone else identify their unknown fabrics!
]]>