How to Make and Use a Floor Loom
Wednesday, July 23rd, 2008Bree of hotteaapparel.blogspot.com is today’s guest contributor with this amazing loom. So simple, so cool. This is a great way to reuse end-of-season t-shirts to make a comfy bathroom rug to greet fall.

When I was a teenager I’d spend two weeks of each summer at Swedish Language camp. My absolute favorite arts and crafts activity was weaving on a beautiful floor loom. I’ve longed to weave rugs ever since, but the price tag on such looms is prohibitive. I came across a book in the library that inspired me to make my own, simpler loom: Twined Rag Rugs: Tradition in the Making by Bobbie Irwin.
To make the same loom, you will need:
4 flat corner irons (metal in the shape of an L with holes) and screws
2 pieces of lumber (I used 1″ x 2″) 4 feet long
2 pieces of lumber measuring 28-1/4″ long
52 screws (no longer than 3/4″) for the warp
Drill and bits
Tape measure or ruler
Strong string, twine, or yarn (I used heavy-weight nylon upholstery thread)
I was lucky to move into a home with a pile of leftover lumber and found a nice long piece of 1×2 lumber (which actually measures 1-1/2″x3/4″) which I cut into two 4-foot lengths using a simple hack saw. You can cut your own lumber with any number of different saws (please use appropriate safety precautions when using tools) OR you can ask the lumber/hardware store if they can make the cuts for you. I then cut a piece of leftover trim from a vanity (which was basically another 1×2) into 28-1/4″ length and happened to have another 1×2 of that size available. Once you have your four pieces of lumber, you can put together the frame.

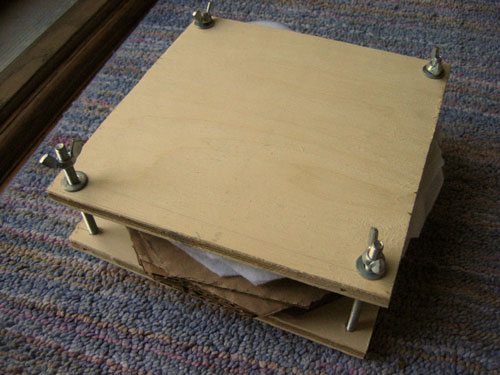
Place the two long boards on the ground parallel to each other. Fit the two shorter boards inside the longer boards; one at the top, one at the bottom. Place the corner irons at each of the four corners and mark the holes. Remove the brackets and pre-drill the holes with a small drill bit before screwing on the brackets. Also, make sure the screws do not drill all the way through the lumber. You don’t want sharp points sticking out of your loom.
Your loom is beginning to take shape now and you should be able to pick it up and carry it in one piece. It may shift a bit out of square when you move it around, but as long as it’s holding together well, it’s fine.
Flip the loom over so that the brackets are on the floor/ground. (Note: this is an upgrade from the loom I made – as you can tell, I placed the screws on the same side as the corner iron and had to use one of the corner iron screws for my warp.) You are going to pre-drill holes for the screws that will hold your warp (the parallel strings that you will be weaving into). You will use 26 screws at both the top and bottom of the loom (the top and bottom are the shorter boards). I recommend cutting a piece of scrap paper that is the length of the shorter boards (28 inches is fine) to make a template for your screw locations. You may have to tape some newspaper together to get the length. Starting from about 1/8″ from the edge of the paper, make a dot every 1-1/16″ (or just barely past the 1″ mark on the ruler) until you have 26 dots. This should give you a nice even spacing for your screws. Tape the ends of the paper on the top of the loom and pre-drill your holes right through the paper into the wood. Remove your template and tape it on the bottom of loom and repeat. The one trick is to make sure you aren’t drilling into a screw from your corner iron on the back. Check to make sure and if it IS lining up with the L-bracket screw, move only that pre-drill dot just enough to avoid the screw. Ideally this won’t be a problem.

Now you can screw in your 52 screws, but don’t screw them in all the way. Leave them sticking out about 1/4″ because these are your pegs for wrapping the warp.
You are now done drilling! Hooray, the loom is finished. Bring it to a comfortable working spot. Mine is leaning up against my fireplace because it’s in the living room and we’re not currently using the fireplace. I do recommend leaning it up against a wall where you can sit in front of it either on the floor or in a chair.
To get started making your first rug, you will need to thread the warp. The warp will be your string of choice. You will need quite a length for this, so keep the string in a ball and unwind as you go. First, tie the end of the string to the left-most screw on the bottom. Then bring the string up to the left-most screw on the top. Keep the string taut and bring it up and over that first screw and over the second screw and down to loom to the second screw on the bottom. Bring it under the second screw and under the third screw and up to the third screw on top. Keep the string taut at all times. You should see the pattern now and continue this until you have come to the final screw. Tie off your string on the final screw. Your warp is done!
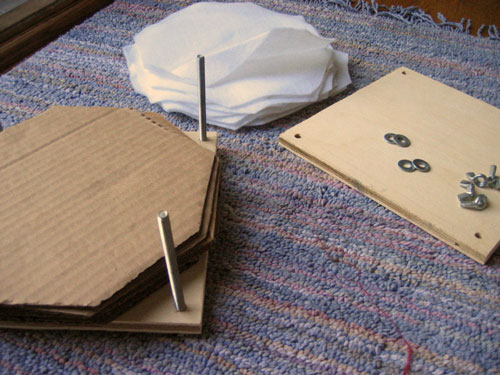
The warp string will be used when you are finished weaving to tie the wefts tight. For this reason, you do not want to start weaving at the very bottom of the loom or you won’t have enough string to tie off. So, to make sure I didn’t end up with the weft (the fabric you use to weave in and out of the warp) at the bottom, I cut out some pieces of cardboard (from a cereal box or tissue box – anything you might have lying around) that were about 3″ wide. I weaved these through the warp at the very bottom of the loom. This is a place holder to make sure your weaving doesn’t slip down to the bottom of the loom.
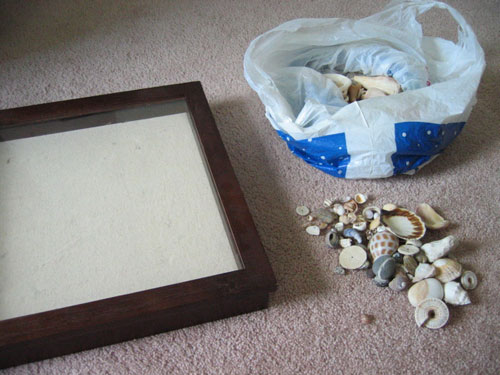
Now you are ready to begin making a rug from scrap fabric. You can use any type of fabric, but keep it consistent. If you want to use jersey knit, continue using jersey knit for the whole rug. If you are using cotton quilting fabric, keep using that type of fabric. Have fun with this part and think of other cool options to weave with like plastic bags, rubber tire tubes, ribbon, etc. Cut strips of material as long as possible and at a consistent width. Thinner pieces will require more weaving for a finished product, thicker pieces will weave up faster and make a thicker rug.

You have a choice now in how to weave your rug. You can use a plain weaving, a simple under-over-under-over technique, which will result in a loosely woven rug (but is the best choice if you are using stiff material like rubber or thick leather) or you can make tighter weave (and thicker rug) using the twining method. Twining requires that you use two strands simultaneously and criss-cross them between each warp string (like twisting twine). I have chosen to use jersey fabrics with the twining method (which you can see in the photos).

Happy weaving!