
When I was a teenager I’d spend two weeks of each summer at Swedish Language camp. My absolute favorite arts and crafts activity was weaving on a beautiful floor loom. I’ve longed to weave rugs ever since, but the price tag on such looms is prohibitive. I came across a book in the library that inspired me to make my own, simpler loom: Twined Rag Rugs: Tradition in the Making by Bobbie Irwin.
To make the same loom, you will need:
4 flat corner irons (metal in the shape of an L with holes) and screws
2 pieces of lumber (I used 1″ x 2″) 4 feet long
2 pieces of lumber measuring 28-1/4″ long
52 screws (no longer than 3/4″) for the warp
Drill and bits
Tape measure or ruler
Strong string, twine, or yarn (I used heavy-weight nylon upholstery thread)
I was lucky to move into a home with a pile of leftover lumber and found a nice long piece of 1×2 lumber (which actually measures 1-1/2″x3/4″) which I cut into two 4-foot lengths using a simple hack saw. You can cut your own lumber with any number of different saws (please use appropriate safety precautions when using tools) OR you can ask the lumber/hardware store if they can make the cuts for you. I then cut a piece of leftover trim from a vanity (which was basically another 1×2) into 28-1/4″ length and happened to have another 1×2 of that size available. Once you have your four pieces of lumber, you can put together the frame.

Place the two long boards on the ground parallel to each other. Fit the two shorter boards inside the longer boards; one at the top, one at the bottom. Place the corner irons at each of the four corners and mark the holes. Remove the brackets and pre-drill the holes with a small drill bit before screwing on the brackets. Also, make sure the screws do not drill all the way through the lumber. You don’t want sharp points sticking out of your loom.
Your loom is beginning to take shape now and you should be able to pick it up and carry it in one piece. It may shift a bit out of square when you move it around, but as long as it’s holding together well, it’s fine.
Flip the loom over so that the brackets are on the floor/ground. (Note: this is an upgrade from the loom I made – as you can tell, I placed the screws on the same side as the corner iron and had to use one of the corner iron screws for my warp.) You are going to pre-drill holes for the screws that will hold your warp (the parallel strings that you will be weaving into). You will use 26 screws at both the top and bottom of the loom (the top and bottom are the shorter boards). I recommend cutting a piece of scrap paper that is the length of the shorter boards (28 inches is fine) to make a template for your screw locations. You may have to tape some newspaper together to get the length. Starting from about 1/8″ from the edge of the paper, make a dot every 1-1/16″ (or just barely past the 1″ mark on the ruler) until you have 26 dots. This should give you a nice even spacing for your screws. Tape the ends of the paper on the top of the loom and pre-drill your holes right through the paper into the wood. Remove your template and tape it on the bottom of loom and repeat. The one trick is to make sure you aren’t drilling into a screw from your corner iron on the back. Check to make sure and if it IS lining up with the L-bracket screw, move only that pre-drill dot just enough to avoid the screw. Ideally this won’t be a problem.

Now you can screw in your 52 screws, but don’t screw them in all the way. Leave them sticking out about 1/4″ because these are your pegs for wrapping the warp.
You are now done drilling! Hooray, the loom is finished. Bring it to a comfortable working spot. Mine is leaning up against my fireplace because it’s in the living room and we’re not currently using the fireplace. I do recommend leaning it up against a wall where you can sit in front of it either on the floor or in a chair.
To get started making your first rug, you will need to thread the warp. The warp will be your string of choice. You will need quite a length for this, so keep the string in a ball and unwind as you go. First, tie the end of the string to the left-most screw on the bottom. Then bring the string up to the left-most screw on the top. Keep the string taut and bring it up and over that first screw and over the second screw and down to loom to the second screw on the bottom. Bring it under the second screw and under the third screw and up to the third screw on top. Keep the string taut at all times. You should see the pattern now and continue this until you have come to the final screw. Tie off your string on the final screw. Your warp is done!
The warp string will be used when you are finished weaving to tie the wefts tight. For this reason, you do not want to start weaving at the very bottom of the loom or you won’t have enough string to tie off. So, to make sure I didn’t end up with the weft (the fabric you use to weave in and out of the warp) at the bottom, I cut out some pieces of cardboard (from a cereal box or tissue box – anything you might have lying around) that were about 3″ wide. I weaved these through the warp at the very bottom of the loom. This is a place holder to make sure your weaving doesn’t slip down to the bottom of the loom.
Now you are ready to begin making a rug from scrap fabric. You can use any type of fabric, but keep it consistent. If you want to use jersey knit, continue using jersey knit for the whole rug. If you are using cotton quilting fabric, keep using that type of fabric. Have fun with this part and think of other cool options to weave with like plastic bags, rubber tire tubes, ribbon, etc. Cut strips of material as long as possible and at a consistent width. Thinner pieces will require more weaving for a finished product, thicker pieces will weave up faster and make a thicker rug.

You have a choice now in how to weave your rug. You can use a plain weaving, a simple under-over-under-over technique, which will result in a loosely woven rug (but is the best choice if you are using stiff material like rubber or thick leather) or you can make tighter weave (and thicker rug) using the twining method. Twining requires that you use two strands simultaneously and criss-cross them between each warp string (like twisting twine). I have chosen to use jersey fabrics with the twining method (which you can see in the photos).

Happy weaving!
]]>I made this little story booklet for my sisters 20th birthday which was last week and thought I should make a tutorial at the same time. This little booklet is a great gift idea for the young and old, or it can just be a little book of your illustrations or poetry. Have fun!
First of all you need to do the pages (unless you are making a blank book to draw and write in later then skip this part). I started with an A4 page of watercolour paper and divided it into 15 equal rectangles. Draw your little illustrations in pencil then paint them or colour them with your choice of paints.
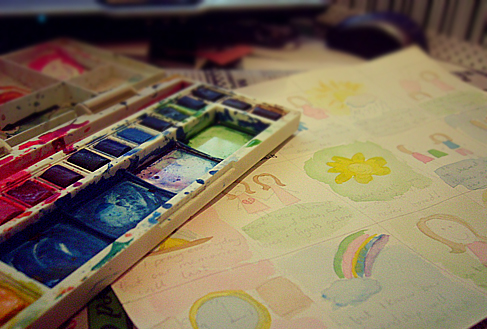
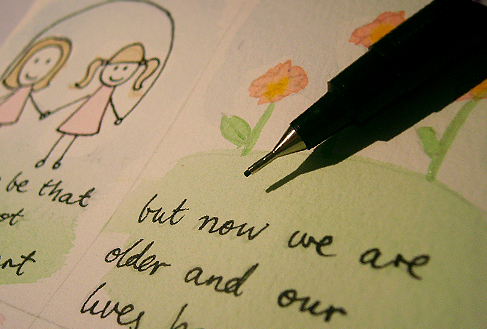
Once you have done your little drawings and the paint is dry, outline them in black felt tip marker and write the poem or story in.
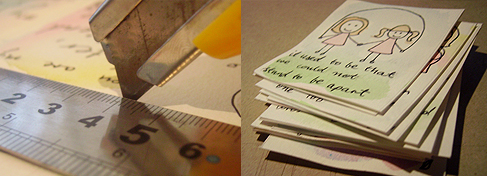
Once that’s all done you can cut out the pages neatly with a scalpel and ruler. Don’t cut yourself!
Now comes the fun part. Cut out some strips of paper for the binding. The pieces I used were about 8×4 cms but it really doesn’t matter what size as long as it is smaller than the actual pages. Now fold the strips of paper and glue one side of the fold to one side of a fold on another piece. Keep gluing the folded parts together until you get what looks like a mini book.
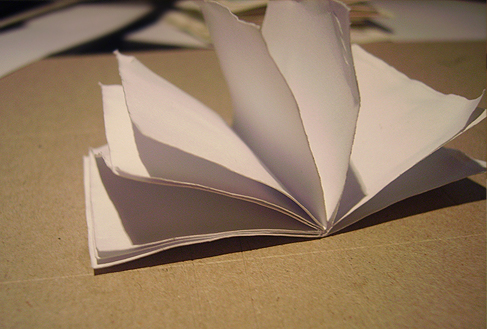
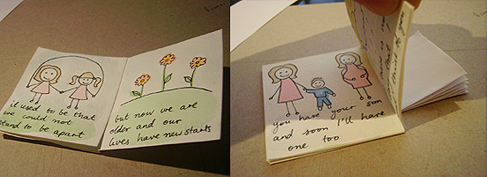
Now start gluing the back of the watercoloured pages to the mini book like in the image below. If this doesn’t make sense please let me know-I am terrible at explaining. Keep gluing each page until the book is all glued together. Remember to keep the pages in the right order you wanted and remember that some pages will be back to back.
Now that the booklet is almost done it needs a cover. I cut a piece of cardboard scrap I had lying around. Glue the last two paper strips to the cardboard. The cover is one piece of cardboard not two pieces. Once glued fold it like in the picture. You might need to hold it under some weight (such as another thick book) to help it keep its shape.
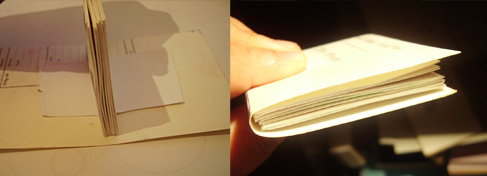
Now all you have to do is line the cover with some pretty paper. I chose this gorgeous scrapbook paper that has glittery accents on it. Line both the inside and outside of the cover.
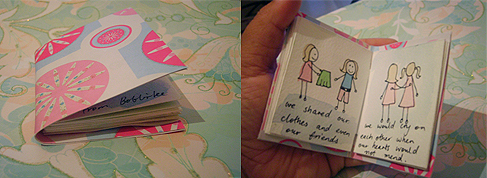
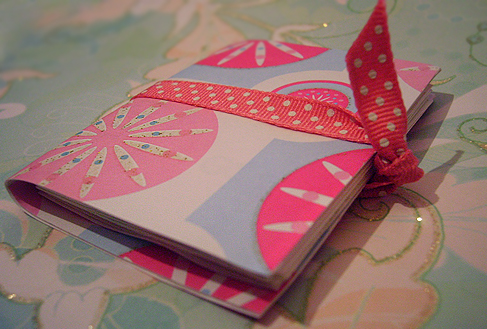
Now you have a cute little story booklet. I tied it with pretty ribbon to give it something extra. You can print a title on the cover, use transfers or stickers or add some beads and ribbon. It’s up to you.

Max is here!! Congratulations to our fellow daisy Candace and her family. On Thursday she gave birth to Max. Check out his cool nursery on his Mom’s blog laughingdaisies.com.
Now, moving on to business:
Top 10 Reasons
to Become a Crafty Daisies Guest Contributor
10 You don’t have a blog, but you would like to write about this project you’ve been obsessing over and that none of your friends want to hear about anymore.
9 You have a blog, but you are too embarrassed to post something about your newly found love for amigurumi on your motorcycle blog.
8 You have a blog, and see this as a way to invite other people to visit your place on the Web.
7 You need a writing sample to document your blogging experience.
6 You figured out how to explain the German Twisted Cast On in three sentences or less.
5 You never forgave the middle school teacher who gave you a D in home ec/shop/art and you wish to show that person that, yes, you can create some amazing things with a glue gun.
4 You found this really cool crafting/knitting/sewing/decoupage/[fill in the blank] book, tutorial, video, [fill in the blank] and you want to share it.
3 I asked you to write for us and you haven’t gotten back to me yet!
2 You were very impressed with the benefits and compensation package we offered you in exchange for your contribution (Not!).
1 It’s fun to hang out with your virtual crafty friends.
So, if you are interested in becoming a guest contributor, send us an email to craftydaisies(at)gmail(dot)com with a brief description of the topic you would like to write about. For past contributions, check out the Guest Contributor category on this blog.
]]>Start with 2 squares of wood (approximately 8″ across), 4 bolts (approximately 4″ long), 8 coordinating washers, 4 coordinating wingnuts, and several squares of cardboard and felt, with the corners trimmed. I have 7 cardboard pieces and about 10 pieces of felt – these are used to separate the layers of the flowers you press and to provide cushioning.

You simply drill 4 holes near each corner of each square and assemble: bolt, washer, one square of wood, cardboard, felt, paper, flowers, paper, felt, cardboard (etc), board, washer, wingnut. You add layers of plain white paper around the flowers to prevent them sticking to the felt, and it also allows for easy storage later on — I keep mine either in a folded piece of paper or inside envelopes. Screw the wingnuts on tight to press the layers together and compress your flowers. Then you wait for a week or so to allow the flowers/leaves to dry and flatten.

Pay attention to the layout of your flowers and leaves when you are pressing – you want to make sure that it will look how you want it to when it’s flat. Leaves are easy, but be careful with multiple petal layers – sometimes they bend oddly when you press them, and the result is not pretty.
Simple flowers work well though. Pansies are gorgeous:

I’ve also done marigolds, lilac, roses, several kinds of leaves, irises, even a butterfly. If your garden is large, you can have lots of fun playing around with the press and trying different layouts.
Once you have your array of pressed flowers, you can paste them into a frame:

I just used regular Elmer’s and glued the marigold and the butterfly onto thick white paper (I think mine is designed for painting). Tweezers can be helpful in arranging delicate pieces, such as the butterfly – sometimes your fingers are just too sticky. These flowers would be lovely on cards, too, if you enjoy making your own. Let me know of other fun ways to use them – I’m just beginning my foray into paper crafts ![]()
This guest post comes from Gina – thanks so much for your contribution, Gina!
]]>There are lots of ways to display shells – on countertops, in bowls, etc. But I wanted a way to look at the special ones all at once without them taking up too much space or requiring much dusting. So I decided to create a seashell shadow box.
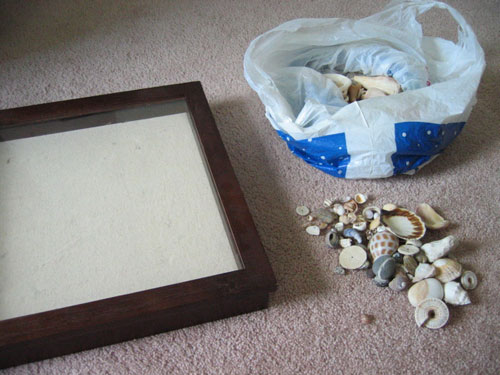
To begin, you need your collection of shells, your trusty glue gun, and a shadow box. Mine has a lovely dark wood frame and a neutral linen background that mimics sand:
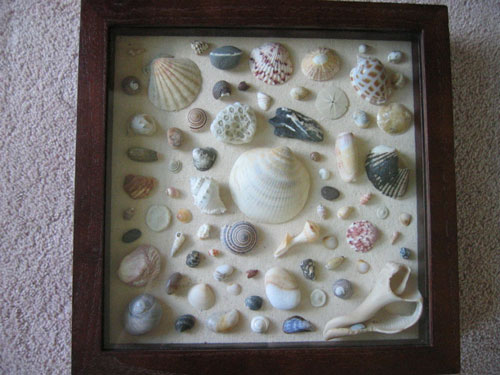
Next, you lay your shells in a pleasing pattern. You could go with a more random arrangement if you like, but I preferred to arrange them so that I could balance shape, color, and size:

Then you glue! Most of mine were light enough not to require much glue, but obviously rocks or large, heavy shells will need more. Make sure when you’re gluing (and when you lay everything out) that your shells all fit when the lid is closed. One of mine (the large on in the bottom right corner) was oddly shaped and would only balance on one edge, so I paid attention to that while gluing to ensure I glued the correct edge.

I love the finished product! I had tons of shells left over, but I liked keeping some space between the shells. I think a tighter arrangement could also be lovely, though.
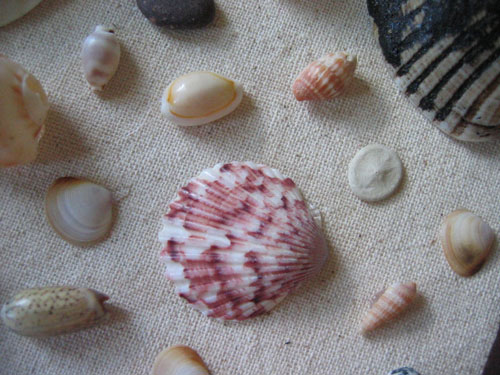
Here are close-ups of the shells and the linen background of the shadow box:

So have fun with your shells! I’m sure everyone has a collection of sorts that would fit nicely into a shadow box, even if it isn’t seashells.
]]>Benjamin: Yes, sir.
Mr. McGuire: Are you listening?
Benjamin: Yes, I am.
Mr. McGuire: Plastics.
–The Graduate
My name is Simone, and lately I’ve become completely obsessed with plastic shopping bags. I think it started when I couldn’t stuff another bag into the bottom of my holder without pushing fifteen more out of the top. On the other hand, I also could not bring myself to toss them because, after all, they were perfectly good bags. I then stumbled upon crocheting strips of plastic into, you guessed it, another bag. Since one tote-sized, crocheted bag takes at least 30 to 50 shopping bags, this project did make a dent into my collection.
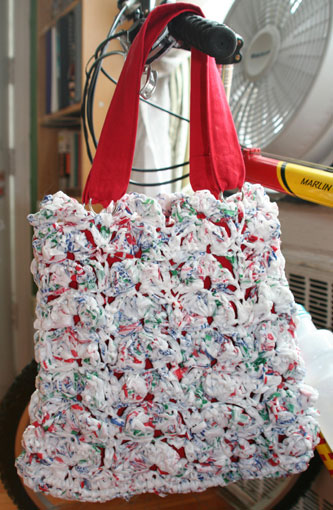
Oft cited My Recycled Bags.com provides excellent instructions on how to prepare recycled plastic yarn from shopping bags and shares some crochet patterns for this kind of yarn. Once you have a ball of plastic “yarn,” you can also mix it with other materials. For example, I made this bag by alternately crocheting rounds of plastic yarn and yarn made out of denim strips.

I think it would be kind of fun to follow the Daisies’ crochet instructions, make different kinds of plastic squares, and sew them all together into. . . a bag. (If anyone can come up with something else to crochet besides a bag, please let me know. A rain poncho perhaps?)
Recently, I saw a posting about fusing plastic bags to make a plastic fabric. That inspired me to make plastic beads out of fused plastic bags.

You use the same technique you would apply to making paper beads, i.e. cut a triangle out of the “fabric” and roll it up from the broad to the narrow end. You may encounter more resistance from the plastic than you would from paper. I first roll up a bead without applying glue. I then unfurl the bead, apply the glue (Uhu Mosaic) and roll it up again. Like paper beads, you can leave the bead like that or apply a layer of lacquer.
Lastly, I decided to make a wallet out of two ‘I Love NY’ bags and a white trashbag without any print on it.
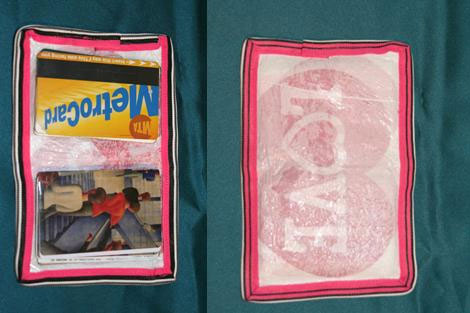
* I fused the three bags together and cut out a 6 1/2″ x 4 3/8″ rectangle.
* I then cut out two 4 3/8″ x 2 5/8″ rectangles out of clear vinyl left over from some bedding packaging that I had saved for just such an occasion. These will become the inside pockets on the left and the right side of the wallet.
* I then basted the pockets to the left and the right of the rectangle with a glue gun to keep everything in place.
* To finish it off, I trimmed the wallet with a 31″ long piece of 7/8 inch ribbon. The ribbon is folded in half and sewed on around the wallet through the fused plastic and the vinyl with a top stitch.
Start to finish the whole project took me a little over an hour. You could add a velcro closure to the wallet to keep everything in place, if you don’t stuff it with as many random pieces of plastic as I tend to do.
Now I’m worried that New York will encourage businesses to cease the use of plastic bags. In that case, where will I get my raw materials? Have fun with plastic. Let me know if you have any other ideas of what to do with this stuff.
]]>
My name is Jennifer, and I love all things having to do with paper. But recently journals that I see in stores just haven’t been doing it for me. I don’t want just lined paper, scrapbook paper or watercolor paper… and I don’t want 15 different journals going all at once (though I must stress I have no problem with owning 15 journals at one time).
With this in mind I started to ponder making my own book. What better way to solve my dilemma than to make something with whatever kind of paper I wanted. I started to read and read on book binding, but I didn’t want to invest in an entirely new hobby, not yet anyway… I simply wanted to try it.
So I took all of this information that I gathered and made my very own mini journals. My supplies were as follows:
- ~ paper (of all kinds)
- ~ ruler
- ~ yarn
- ~ embroidery thread
- ~ sewing and embroidery needles
- ~ a Popsicle stick
- ~ heavy books (I used Shakespeare’s Complete Works and a Norton Anthology)
- ~ buttons
- ~ other random crafty bits
I picked my size of paper (6×6 in this case) and cut the paper I had chosen to fit. I used all sorts of paper… from notebook paper to fancy scrapping paper to card stock. I also ended up using multiple sizes of paper- some 3×3 or 4×3. This created an interesting layering effect in the finished journal.

Once I cut my paper I folded it in half using my trusty Popsicle stick to make a proper fold. I then used my ruler to measure and punch 8 holes in the center of the fold. I used the needles to make the holes. Then came the fun bit of assembling the book. I put the paper together and then used my yarn and embroidery needle to sew the book together. Once it was together I placed the book under the heavy books and waited…… The next morning my lovely little journals emerged in all their splendor. I then used buttons, paper and chip board letters to decorate the covers of the journals.
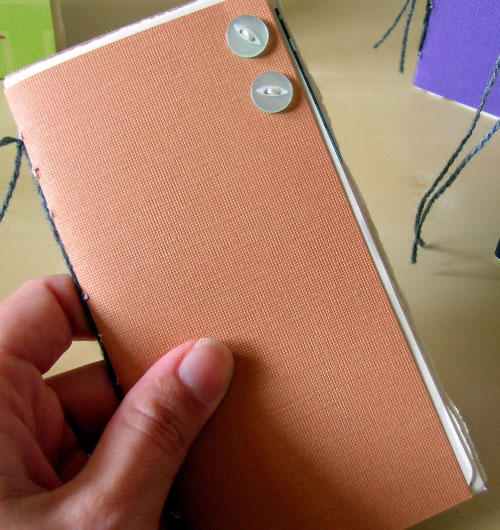
I may end up becoming more serious about book binding at some point, but for now this is a lovely and inexpensive way to try your hand at book binding and to have a journal that is uniquely yours.
To learn more about the proper way to bind a book take a look at this website, which is truly informative and offers some excellent tips that can be used in any paper binding experience.
]]>First, gather your supplies:
- ~ Paper scraps with a matte finish (newspaper, tissue paper, construction paper or junk mail but try to avoid the glossy ads)
- ~ Several towels you don’t mind getting dirty
- ~ Blender
- ~ Deckle (this is what you use to strain the pulp, more on that later)
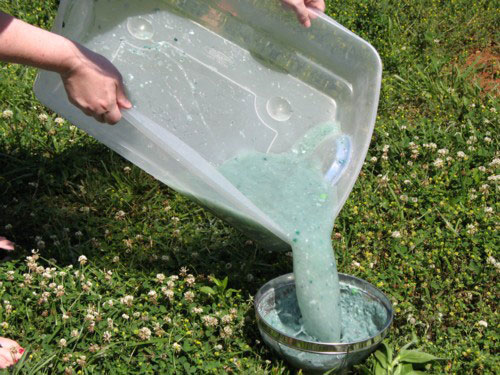
- ~ Container large enough to fit your deckle (my deckle makes a letter sized sheet of paper so I have found a large plastic storage bin works for me)
- ~ Sponge
- ~ Iron (optional)
To begin, you have to make your pulp:
1. Fill your plastic container with several inches of water. You need enough to submerge the deckle completely.
2. Tear your papers into small pieces about 1 inch square and add to the water.
3. Let soak until all of your pieces are completely wet. Any dry pieces will not break up entirely and will leave specks in your finished product. This can be desirable so feel free to vary your soaking times until you get the look you want.
4. With the blender 2/3 full of water, add your soaked pieces of paper and blend until smooth. This also varies the look of the finished product so feel to play with your blending times. Just remember that the smoother the pulp, the smoother the finished product.
5. Return processed pulp back to the plastic storage bin, stir to evenly distribute.
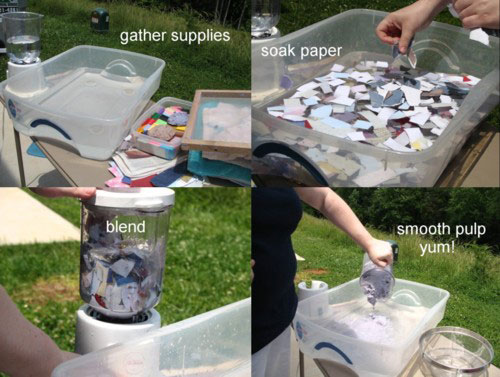
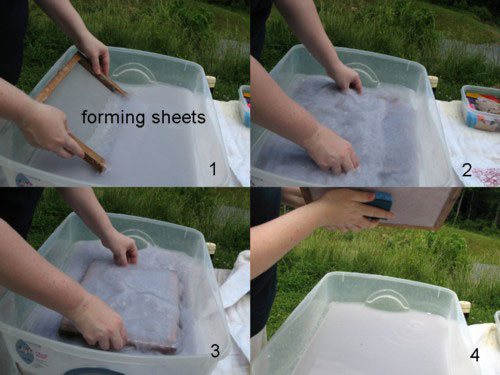
Next, you need to form the sheets. The shape of your deckle will determine the shape of your paper. I purchased mine at my local craft store but you can also make your own by using window screen stapled to a wood frame. I have never tried this so let me know how it turns out if you do!
1. Hold your deckle at an angle as you slide it into the pulp mixture. I go straight to the bottom of the container.
2. Swish it around while it’s submerged. This ensures an even layer of pulp covers the deckle.
3. Keeping the deckle horizontal, remove it from the water and let it begin draining. At this point you can move the pulp around if you need to.
4. Using the sponge, wipe across the screen side of the deckle to remove excess water. Take care how much you tilt the deckle as the pulp can still slide around.
5. I set my deckle on the side of the container to drain while I get the next step set up.
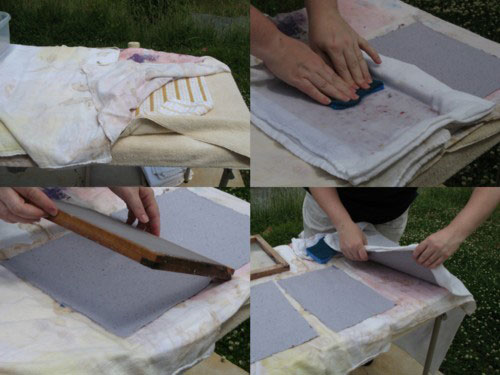
The next step is called couching (pronounced cooching)
1. Place a layer of towels on your surface.
2. Place the deckle screen side down onto the towels.
3. Lay another towel over top of the formed sheet (will be against the pulp) and press with your hands and the sponge to remove additional water.
4. Turn out sheet onto first layer of towels. Sheet should be dry enough to just fall off the deckle. If not, flip and press again. If this makes you nervous, leave the towel on the pulp and turn out the sheet onto it.
5. Layer sheets between towels and press to remove additional water.
6. Remove sheets and lay flat to dry.
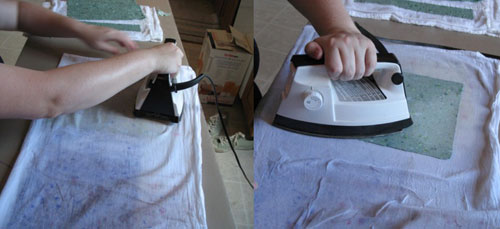
The last step is drying the sheets with an iron (which is optional). I like to iron my sheets dry not only because I’m horribly impatient but because the iron gives the paper a smooth finish.
1. With iron on high, start ironing the wet sheet while still sandwiched in between a towel.
2. Iron until towel starts to feel dry (enjoy the steamy facial in the process!)
3. Pull back top layer of towel and iron sheet itself. When the iron skips right across the sheet you’ll know it’s ready to be ironed directly. It will stick and pull the pulp if it’s not ready.
4. Iron until sheet is crisp and dry.
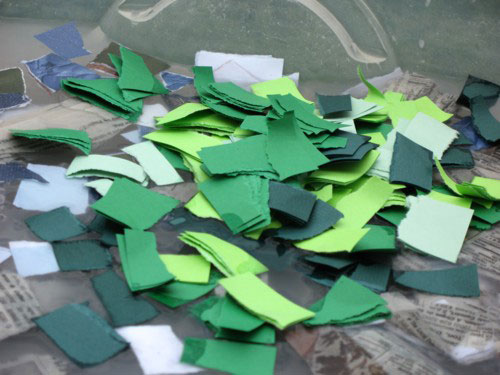
A note about colors:
The pulp will always be a few shades darker than the finished product. I like to use solid colored cardstock or tissue paper color the pulp. Since it’s heavier, the cardstock adds a nice speckle to the finished paper. Take care when using strong colors as the dyes can stain clothing.
Clean up:
I like to do this outside because I make a mess whenever I do anything crafty. Since I’m already outside, I just dump the any left over pulp mixture in the yard when I’m finished (the pulp hangs around for a bit so choose an out of the way place for this). If you’re inside, strain the mixture before dumping it down the drain. Even outside, sometimes I will still strain it to save the unused pulp, especially if I liked the color. Once strained, press the pulp to remove as much water as possible and then let dry. The resulting chunk can be broken up and added to your next batch or add some white glue and sculpt with it!
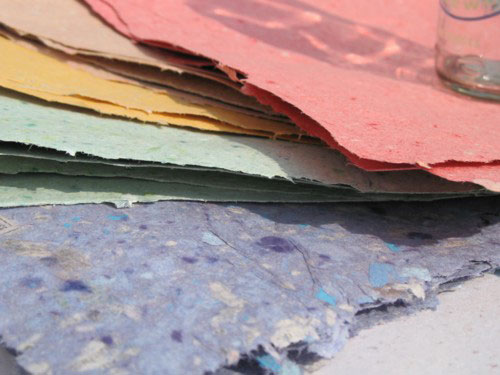
Here’s a sample of a few different textures and colors I’ve made recently. I simply varied the weight of the paper and how long it was processed in the blender.
As an avid reader of Crafty Daisies, I have noticed a lack of quilting posts thus far, so I thought I would post about some of my quilting projects. I started quilting about two years ago, teaching myself out of a book – Quilting 101: A Beginners Guide to Quilting (one of the current reads on this blog!!). I highly recommend this book for beginning quilters. If you do not have a lot of sewing experience, it gives you a rundown on how to use your machine. It is spiral bound and opens easily for use while sewing. Also it is full of some great and easy quilting projects to get you started.
As usual, when starting a new hobby, I had to get all of the equipment. Quilting requires you to buy quite a few things that I, at least, did not have on hand in my sewing materials:
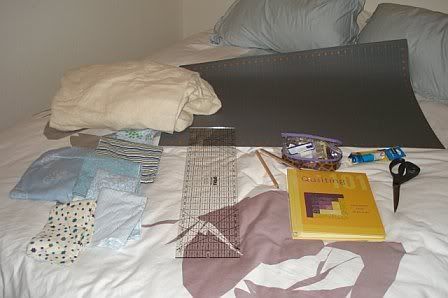
Cutting board, special ruler, special pencils and pins, rotary cutter, book, tons of batting, and fabric!!!!!!! One of my favorite things to shop for.
Since I already knew how to use my sewing machine, I skipped a lot of the easier projects, like quilted pillows and potholders, and jumped right into my first quilt – a flannel lap quilt. And I fell in love with it! It is such a fun project. The whole thing can be put together in just a couple of days. Also, when you buy the fabric the first time, you end up with enough for the top of two quilts, which is great!
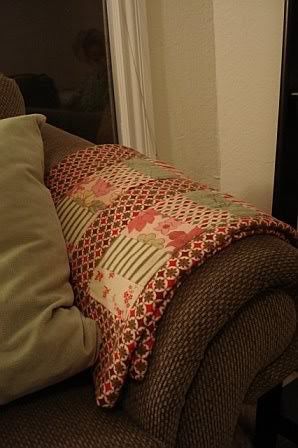
I started off making a quilt for myself:
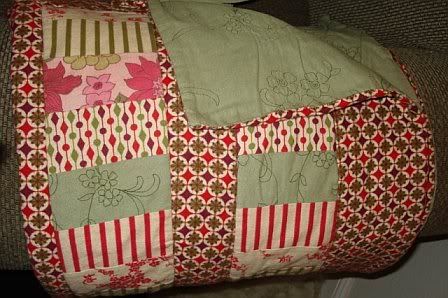
I fell in love with all of these great, pretty, pink and red flannels. The quilt is really warm, cozy, washes well, and looks great on my couch!
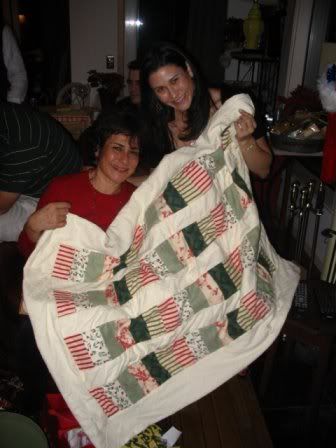
I loved making this so much that I made several as gifts for others. I made one for my Aunt for Christmas, in reds, greens, and whites/creams (edited to add that I am not in that picture – my Aunt and Cousin are holding up the quilt):
And one of my favorites, a baby quilt with a barn animal theme:
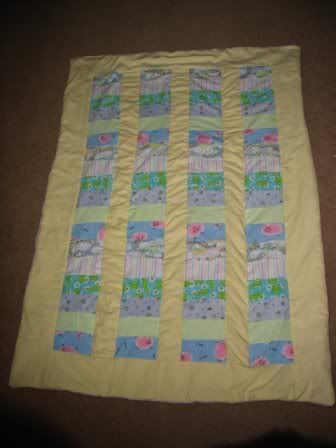
Hard to see in the picture, but there are patches of pigs, lambs, frogs, and ducks. So cute and the baby now drags it around, which I love to see!
So that is my first adventure in quilting. I recommend trying something out in flannel – it is really cozy and there are a lot of fun prints you can use. Plus the fabric is pretty forgiving! Puckering around seems is part of an old-fashioned looking quilt, especially in flannel, so minor mistakes just add to the charm of the quilt. I hope to work on some more complicated projects in the future, but I think this was a great first quilting experience!!!
Emily
]]>