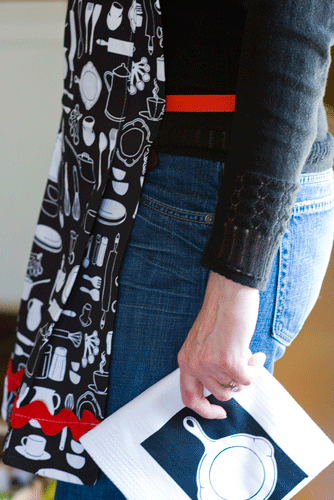
This towel set came folded in thirds so I used the pleats to narrow this towel to better fit as an apron. I made a 2″ overlap from the pleat on the right and left and pinned the neck strap within the pleats. Then sewed across the top, securing the neck straps. Next I measured 15″ down from the top and sewed down the pleats. This left it to flair like a skirt a little at the bottom.
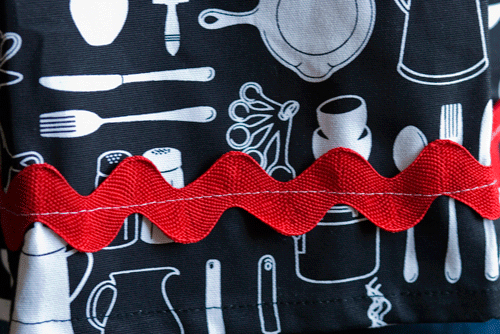
I tucked the ric rac ends under on the back side and sewed down the middle of the ric rac on the front. This would be such an easy way to make any color combination to match any kitchen.
I used grosgrain ribbon for the waist ties. I burned the ends slightly so that they wouldn’t fray and just sewed on the back side along the edge seam higher than where the sewn pleat ended. Super quick and easy!
This apron can be found at my shop in black and red.
]]>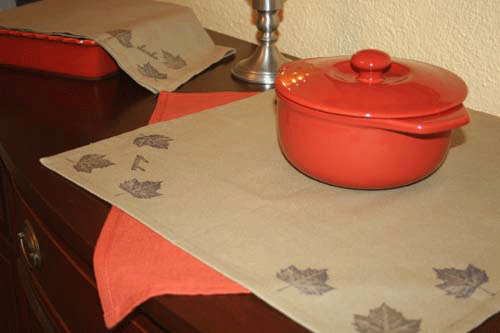
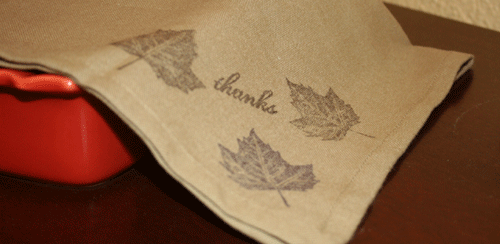
I borrowed this idea from an old Martha magazine – stamping napkins, tablecloths, or towels for the holidays. These large napkins could make lovely certerpieces or could line the table length or buffet that you serve from. A great, quick hostess gift or decoration for any holiday!
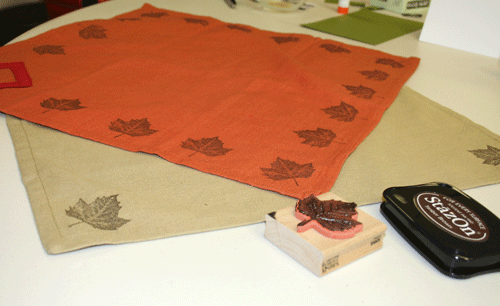
This is one of those perfect projects: Cheap, Quick, Simple, and Not Messy! Literally, a 5 minute project. As you can see some are stamped all the way around, in the corners only, or clustered around the corners. All these looks using only one stamp!
Needed:
Package of Cloth napkins
Stazon permanent ink pad
Holiday picture stamps or messages
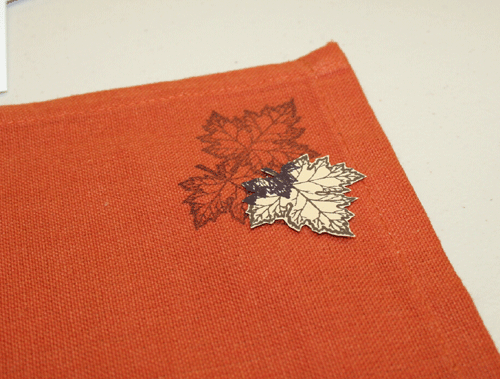
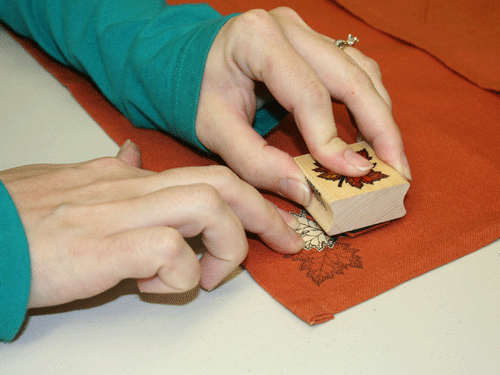
My friend also cut stamped a leaf and cut it out in order to stamp the leaves clustered in a corner without overlapping the leaves. The paper leaf blocks the ink to keep each leaf looking crisp.
Note that I am only using Brown and Plum Stazon ink and one stamp so you can obviously be alot more creative with this idea! I am hoping to find holly leaf or star stamps to decorate for Christmas.
]]>
Though I love the first apron I made, I found a much quicker formula. I simply converted a kitchen towel into a full apron. This is a quick 30 minute project and who can resist with such cute prints out there!
First, Run a needle and thread in and out evenly very close to the trim and draw it to the tightness of gathering you like. I loved this towel because it had the rust colored trim on the top and bottom already.
Then pin your ribbons (20") in place and sew over the gathering, making sure it IS wrinkled under the needle and that the fabric doesn't flatten out. I also burn the edges of the ribbon with a lighter so that is does not unravel, very lightly so you don't change the color of the ribbon.
Last, I measured 2 ribbons 28" inches long and measured where at my waist I wanted to tie the apron. Again, I burned the ends of the ribbon and pinned them into place along the back right and left edges of the towel and sewed just over the ribbon, along the original towel seam.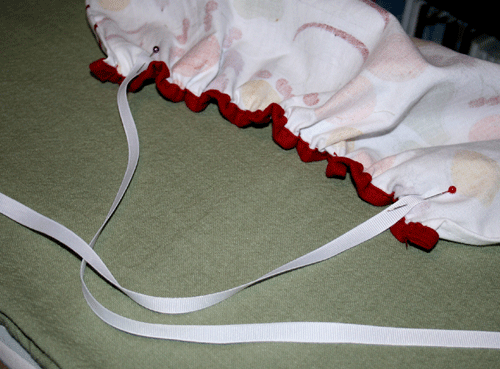
Voila! So cute and automatically comes with a matching towel! This would be a great, quick, housewarming gift!
If this fruity set is perfect for your kitchen I have a couple of sets available here!

In an attempt to go a little more green around our house I decided to make up a bunch of cloth napkins in fabrics I liked. The only frustrating part was trying to press, pin, and sew corners that never came out straight. There is always that little corner that sticks out like a tongue at me! Until I learned a better way to fold and sew them, (Thanks Mom!) and I wanted to share tips from my sewing misadventures with you.
1. Snip off a little diagonally in each corner. (You may find this step in unnecessary but it ensures a neater fold as you get to Step 4.)
2. Pretend that you have not snipped the corner and fold and press a 90′ “triangle”. You want this to be the width of turning your fabric over twice the width that you desire.
3. Now turn the edge over two times until the sides and ends match up to peak at a perfect triangle. This may take a little trial and error. You can see where I pressed the sides and unfolded the edge again.
4. I use an iron to do a lot of my sewing. Ironing really helps you to get your hem straight and with no pins! So once you have this lined up just right you can just sew across your hem.
I feel great when my homemade napkins look just as good as the ones I have bought! Great for tablecloths, tablerunners, placemats, etc. too.
]]>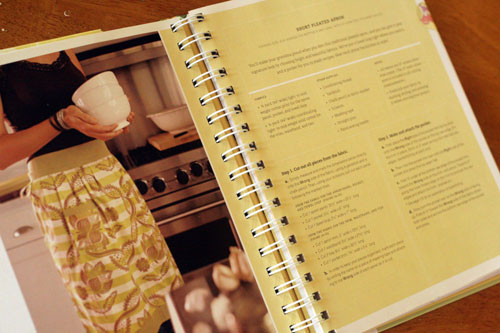
I fell in love with a pattern for an old-fashioned apron from Amy Butler’s “In Stitches” book. But let me tell you it was not as easy as it looks. What I thought was going to be a hour project turned into one that lasted on and off from late afternoon to midnight! But I am very pleased with what I learned and with the outcome. I am only an intermediate sewer and have never followed a pattern from start to finish so that was my first accomplishment. But I also learned to: fold the trim over evenly with the fabric to get the most height out of my trim, measure my pleats (instead of sewing random ones), and do this tricky wrong sided sewing that overturned to show a finished waistband. So check out it out if you are interested in sharpening these skills. The book’s directions and diagrams were pretty clear and I can’t wait to make another, which should go much faster!
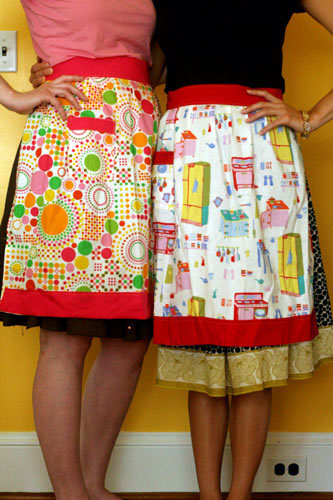
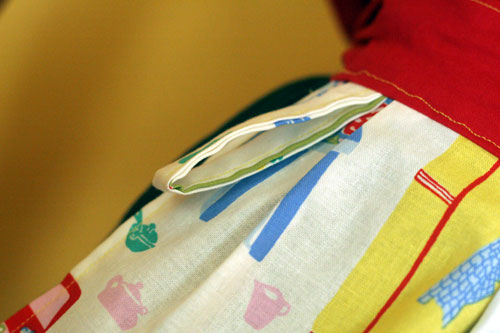
My cousin Roxannah (who is a novice at sewing but still turned out a rockin’ apron) and I were pretty tired but excited about the finished product that we twirled around to show off! Please notice the towel loop above the pocket and the pleated front!
Notice, please, we spent all night sewing these aprons! Then woke up early to bake for breakfast of course! Grandma would be so proud!
]]>This is what it looked like.

He suggested we get a bigger trash can and just put a flap up there. You know like a fast food restaurant? We popped the wooden piece out. It was just clipped in and I made a flap that can Velcro in. This is what it looks like. I just sewed some thick fabric together and glued some piece of drywall I had laying around on the back of it to make it close..

Now all we need is a Thank You sign on it. So random, but it works. He was thrilled and so proud of our little trash flap. Love coming up with this stuff with you baby. ![]()


In addition to being a craft-nazi, I also love to bake. So when you love to be in the kitchen and have limited funds, making food gifts is the way to go. With Valentine’s Day just a few days away, you can make some easy and delicious cookies, and package them in boxes and bags perfect for the holiday.
The box is made from posterboard and then covered in scrapbooking paper. The template I used I found here and just made it for how big I needed it. Then I glued scrapbooking paper to the outside once the box was assembled.

The cookies pictured here are sugar cookies and they are the easiest and yummiest cut-outs I’ve ever tried. The icing recipe that follows dries hard and shiny, making it a perfect recipe to stack your cookies. If you’re really not a fan of cooking or labor-intensive items, this cake cookie recipe is super easy, and takes no time and effort at all. Really really not a fan of cooking? Then head to your local bakery and snatch up some goodies and put them in homemade packaging. Your recipients will still thank you.

Cut-Out Sugar Cookies
1 cup butter, softened
3 3/4 cups all-purpose flour
1 cup white sugar
1/4 cup heavy whipping cream
2 eggs
2 tsp baking powder
1 tsp vanilla extract
In a large bowl, cream together the butter and sugar. Add the eggs one at a time, then the vanilla and mix until smooth. Sift together the flour and baking powder and stir into the creamed mixture alternating with the heavy cream. Cover the dough and chill for 2 to 3 hours.
Preheat oven to 350 degrees F (175 degrees C). Grease cookie sheets.
On a lightly floured surface, roll out the dough to 1/4 inch thickness. Cut into desired shapes with cookie cutters and place them 1 inch apart on the baking sheets. Bake for 12 to 14 minutes, until bottoms and edges of cookies are light brown. Remove from baking sheet and cool on wire racks. Makes approx. 4 dozen cookies.
Sugar Cookie Icing
1 cup confectioners’ sugar
2 tsp milk
2 tsp light corn syrup
1/4 tsp vanilla or almond extract
food coloring
Combine the sugar and milk until smooth, then add the corn syrup and extract until the icing becomes stiff. Add more sugar to thicken or more milk to thin. Divide into seperate bowls and tint with food coloring. Let dry atleast an hour before stacking.
]]>
