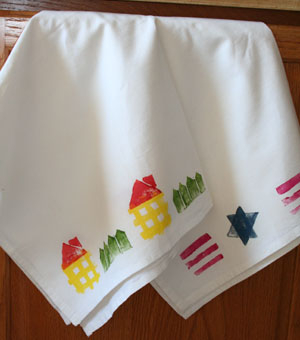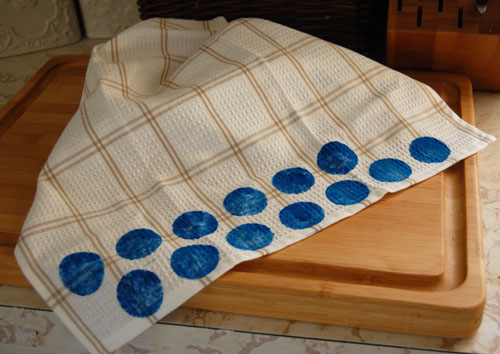
Stencil created using card stock and circle hole punch by pldover12
When I first got this book, I thought “Hmm, $19.95 (actually $11.61 from Amazon) not much to it for just seven techniques. ” I am now completely hooked on potato and leaf printing and have come to truly appreciate this little gem. This is the kind of crafting book I will pick up seeking inspiration and not necessarily instruction. It covers:
- Rubber Stamping
- Iron-on Printing
- Leaf Printing
- Stenciling
- Potato Printing
- Lino Block Printing, and
- Screen Printing
In addition it is filled with gorgeous pictures of completed projects and inspiration tablets that give you a little insight in Lotta’s design process.
Layout
The layout is calm and dominated by pictures. Instructional text is unobtrusively arranged in narrow columns accompanying the pictures.
Instructions and Projects
The instructions are very precise and clear. Seasonally appropriate, my daughter and I first delved into leaf printing. Together, we printed up a whole bunch of greeting cards, and Elizabeth made small prints for a special notebook.

The following day I tried leaf printing with fabric paint, again with terrific results.
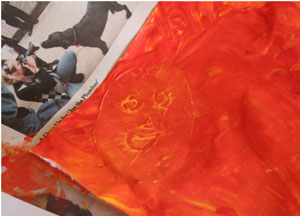
Next we started carving up potatoes with our newly acquired linoleum cutters. While I was working with putting together simple shapes. Elizabeth decided to channel Marla Olmstead. Her print did end up with a spooky potato impression.
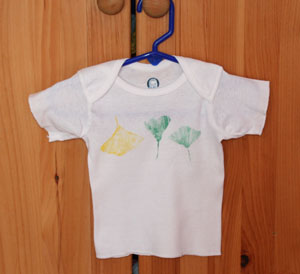
Potatoes don’t last more than a day. Really. Today I carved up a new batch and printed some onesies

and dish towels.
I think what I like best about this “medium” is how forgiving it is (I know you are not supposed to play with food), and how it encourages you to work with very simple shapes.
Now, I’m very tempted to move on to linoleum printing–heck, I’ve got the cutters–but I think this will have to be tabled until next year. Too many projects, not enough time.
If you’d like to share your Lotta projects with your review, add them to the Crafty Daisies Book Club Flickr pool.
Change of Venue for the Next Book Club
Speaking of projects, I currently have a little giveaway of the printed tea towels on craftevolution.com where the next book club will meet. On Wednesday, December 3rd we will discuss
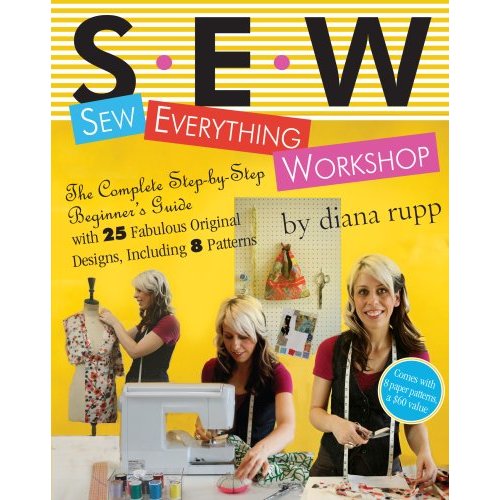
Sew Everything Workshop by Diana Rupp, ISBN-10: 0761139737, ISBN-13: 978-0761139737 and meet at craftevolution.com.
]]> 
Hamburg-Schnelsen is a sedate part of my childhood town where the butcher shop is about to celebrate its 40th anniversary and my brother’s kindergarten buddy took over the family pharmacy business. So my mother was excited to tell me about a new shop on our main street. “The woman who runs it just reminds me so much of you,” she said. And that’s how I met Alexandra in her store Das Kleine Koenigreich. The little kingdom over which she presides is filled with pretty pink and blue linens, fabrics, and other treasures she crafts in her studio in the back of her shop. Of course I had to stop by for a chat to find out how she became our new-girl-in-town.
So how did you get here?
It all started five years ago when my mother gave me a sewing machine for Christmas. I had never sewn before and started to teach myself while my toddler daughter was napping. A few months later, I was leafing through a magazine and found a pattern for a patchwork blanket. And that’s when I had this epiphany; I thought ‘I’d like to make this and sell it in my store.’ Of course there wasn’t a store, but the idea became my vision statement.
How did you make the jump from a hobby to a business?
First I sold my collection out of a stall at the Isemarkt. After a while, some stores around town picked up my products, but every delivery reminded me that my original goal was to have my own shop. My first location was in a shopping mall in downtown Hamburg. I had to close it, but was able to re-open this neighborhood shop. My present storefront works out much better for me. I’m only five minutes from my home. Whenever I have a sudden inspiration that needs to be executed immediately I can just stop by the workshop.
What inspires you?
My ideas seem to strike me out of the blue, but I also read a lot of home design magazines. My personal style tends to be cozy and Scandinavian.
What advice do you have for someone interested in starting this type of business?
You have to have realistic expectation and a certain level of financial security. For example, the closing of the first location could have had disastrous consequences if I had overextended myself. In the end, although it sounds like a cliche, you have to have a positive attitude and believe in yourself.
You can visit Alexandra at her online shop www.daskleinekoenigreich.de and take a look at the linens, pillows, bags, and musical pull toys she’s designed. Google Translate can help you with the German.
Also check out my post about alternatives to business cards to promote your crafting enterprise on craftevolution.com.
]]>
First off, Jeannie of whatthehay is sharing a tutorial on sewing your own cribsheets. She writes:
After finding out that we were pregnant with our first baby, I began the long and fun process of collecting all of the things that a new human needs to survive. First on the list? A CRIB of course! Beyond the crib (which we found at a consignment sale, along with the crib mattress) a baby needs crib sheets. Happily, Rosie has a talented grandma who was more than happy to provide her with many of the essentials of baby survival – a quilt (with strict instructions to USE it), a few totally cute outfits and 4 crib sheets.
Rosie’s Grandma is a sewing kind of lady and back when I was a kid, money was tight and so, well, she sewed. Beyond making nearly all of our clothes that weren’t hand-me-downs, she also devised a pattern for a crib sheet. Back in the day, people actually made their own sheets for their big beds, too, and she adapted this pattern from one of those patterns.
If you have a baby shower coming up, check out her crib sheet tutorial for a very useful, unique gift.
Secondly, I started another blog called craftevolution.com. It’s still in early development, but come visit to see some ideas for Halloween costumes based on basic sewing patterns and let me know what you think about the blog.
]]>
Digital Scrapbook Papers are not only for scrapbooking. You can use them for a a lot of different craft projects.
Where To Get Them
- Digital Scrapbook Place: You must register to gain access to their freebies page, which offers a myriad of digital papers
- Crafts Beautiful: this British DIY site provides a ton of tutorials. Every month Crafts Beautiful introduces a new set of “backing papers.”
- Shabby Princess: Here you can find gorgeous sets of papers and embellishments. I used the 2005 holiday sampler for the projects on this post
What To Do With Them
- Print on paper and make paper beads, paper boxes (Mirkwood Designs has nice templates), envelopes, stationary

- Print on fabric using either inkjet fabric sheets or, for larger pieces of fabric, have your designs printed by Spoonflower and make appliques, key chains, napkins

- Print on shrink film (Shrinky Dinks) to make tags, earrings, charm bracelets, mobiles, drink charms

- Print on iron on transfers and decorate onesies, T-shirts, did I mention napkins?

- Create cross-stitch patterns using a tool like Artopik

What do you like to do with these papers?
P.S. Thank you to Meggie Cat who inspired this post with her collection of online tools and freeware.
]]>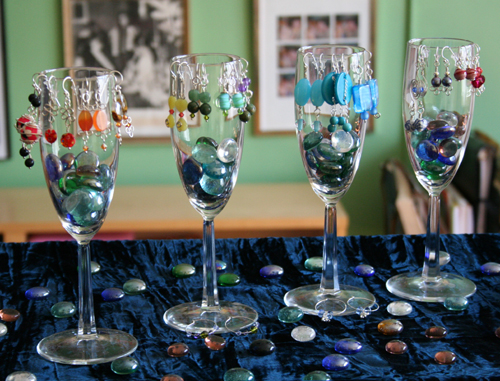
To show off the earrings, I’m using cheapo champagne glasses filled with glass chips from the dollar store. They are positioned on a bed tray covered with a velvet remnant. I tried to follow the rainbow spectrum (Roy G. Biv) in lining up the earrings. The height of the bed tray lifts the display a little closer to the customer.

For this display I painted clothes pins and their holders, slipped the rings over these newly fashioned “ring holders,” added a doily, and lined them all up on a cake stand. I’m planning on putting little stickers with the ring size on the bottom of the pins. Not quite sure what Plan B will be if it’s a really windy day. Maybe I should bring a little basket with me in case the wind decides to bowl over the pins.
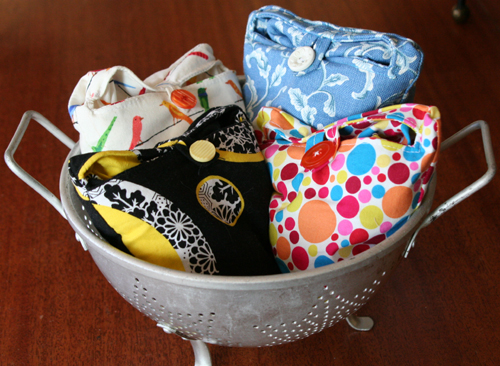
Speaking of baskets, this colander holds to-go-shopping bags. In their rolled up state, these bags reminded me of owls, which in turn made me think of nests, causing me to rustle around my house for something nest shaped to hold the bags.
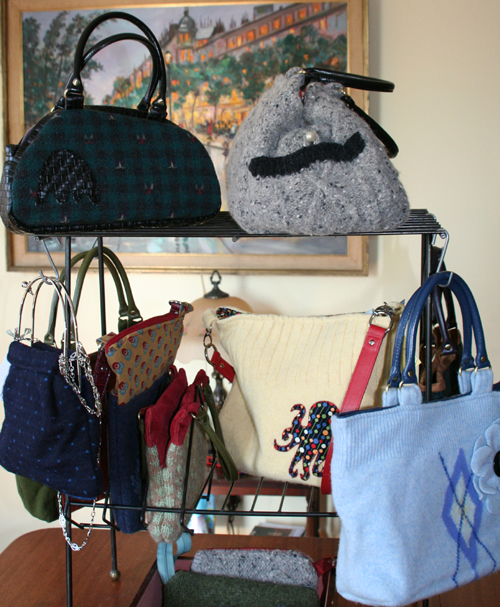
Yes, dumpster diving is a worthwhile activity. This display is a record player stand I found on the street. The larger bags can be suspended with S-hooks and the LP holder section supports smaller bags.
How do you like to display your wares?
]]>
With her first book, Kayte shares a glimpse of her crafty life by introducing us to basic embellishing techniques and demonstrating how to apply them to enhance clothing, accessories, and home furnishings. The comprehensive Tools and Techniques section of the book is a great resource. Kayte covers embroidery, crochet, trims, felting, beads and sequins, applique, fabric printing, and painting and etching. This is followed by the Projects section where she seeks to inspire you to combine these techniques and create your own, unique style.

1. Romance Skirt, 2. Glasses, 3. Victoriana Cardigan, 4. Lampshade
I took on this challenge by first shopping in my crafting stash (fabric from curtains sewed in 1993 and felted sweater remnants from a purse project) and then at the Salvation Army ($3.99 cardigan). The result is this flirty, girly cardigan based on the instructions for Kayte’s Victoriana Cardigan.

Needless to say, I love my new jacket! My version has a crew neck instead of a V-neck. I used some leftover tape I had made for this project to embellish and clean up the edge around the cardigan and then added the ruffle. Needle felting is a new craft for me and I’m not quite ready to embark on it, so I decorated my flower with a button covered in the tape fabric. Instead of sewing the flower to the jacket, I attached it to a pin back for those days when I don’t feel quite so bloomy. At a later date, I may shorten the sleeves of the jacket and add some ruffles there, but for now I’m very excited about my new treasure.
If you want to find out more about Kayte Terry, you can read her interviews on the Craftzine blog and the Etsy Storque, and visit her blog at thisisloveforever.com. By the way, Kayte was also the fashion/prop stylist for Sew Everything Workshop, our December book club selection.
]]>
During the last couple of months I added some Japanese sewing books to my collection. I love the clean designs of the dress styles and home accessories depicted therein. Although the instructions are often accompanied by detailed drawings that allow one to follow along without having to read the actual descriptions of the steps, I’ve decided that in order to make something like the dress above, I’d like to have a better idea of what I’m supposed to do. Luckily some very generous people have posted translations of Japanese sewing and knitting terms.
Sewing
Moving Hands has an initial collection of terms and also refers those of you who read French to Japan Couture Addict’s. This blog documents its members’ Japanese sewing adventures. In the sidebar you can find an additional collection of links to sewing terms (including Batty Chan’s excellent collection of Japanese terms translated into English), as well as book and fabric sources. For those of you interested in making softies, My Little Mochi has a list of related terms.
Knitting
A comprehensive guide to Japanese knitting terms and charts is available at www.tata-tatao.to. This site covers Japanese needle sizes, yarn related terms, and includes a Japanese-English knitting dictionary. Ravelry maintains a Japanese knitting and crochet group where you can discuss your knitting experiences. Rhonda of Japanese Knitting Patterns chronicles her experiences with Japanese knitting patterns and provides links to further resources. Finally, the Needle Arts Book Shop offers a free 8-page pdf brochure with detailed steps on how to decipher a Japanese knitting pattern.
Crochet
I wasn’t able to find a collection of crochet abbreviations. Does anyone know of a resource?
Finding Patterns
Crafting Japanese is a good place to start to look at some crafting books. This blog lists pattern books by ISBN number together with pictures of completed projects. You can browse for and purchase books in the hobby/lifestyle/home arts section of YesAsia an Asian online bookstore. Ebay also turns out to be a good resource. Many vendors display several pages of the books for sale giving you a better idea of the kind of patterns you might find. If you are in an enterprising mood, you can also search Amazon.co.jp with the help of Google’s web page translator. Just type in the URL of the page you wish to translate in the “Translate a web page” box and select the appropriate language.
Finally there is Flickr; in addition to the pictures, the Japanese Sewing group has good resources in the discussion section. The Crafting in Japanese group shares a variety of different crafts and again provides good information in the discussion section.
]]>
1. paper doll dress bookmark, 2. Match Stick Holder Bottom, 3. Paint Chip Bookmarks, 4. Match Stick Holder
Wow, thanks for all your discussions and submissions for the last book club. For descriptions of some of the projects go visit the Crafty Daisies Book Club Flickr group. If you’ve since tackled other projects from the Big-Ass Book of Crafts, please continue to add them to the group.
The next Crafty Daisies book club will discuss Lotta Jansdotter’s book Lotta Prints: How to Print with Anything, from Potatoes to Linoleum, ISBN 081186037X, ISBN13 978081186037.

Thank you to Sarah and Josh for suggesting this book. We will meet in six weeks on Wednesday, October 22.
If you need to plan ahead, the book for our third meeting will be Sew Everything Workshop by Diana Rupp, ISBN-10: 0761139737, ISBN-13: 978-0761139737 and will meet on Wednesday, December 3.

For those of you new to the book club, here are the mechanics of our discussions:
How it Works
Every 4-6 weeks we “discuss” a craft book as follows:
- Make one project out of the book that is due for the next book club meet-up
- Explain why you chose that project
- Discuss the clarity of the instructions, the layout of the book, the illustrations, other projects in the book, and whether you liked the book or not
- Suggest one book for the next book club
You can submit your discussion either as a comment the day of the book club meet-up or by email (craftydaisies(at)gmail(dot)com). If you have pictures of your projects that you would like to share, email them to me or submit them to the Crafty Daisies Book Club Flickr group.
Finding the Book
As with any book club, this is not an endorsement of the featured book (of the ten or so books I read for my fiction book club I only liked three). If you already own the book under discussion, great, take a picture of your project and send me an email. If you think you want to join this endeavor, here are some ways to shop around for the book:
- See if a friend already owns it and lets you borrow the book
- Check with your local library (mine had three copies of this month’s book across the borough)
- Compare prices (I bought this month’s book at list price, but have since seen it significantly cheaper online)
In other words, I don’t want you to get mad at me in case you buy the book and take an extreme dislike to it.
]]>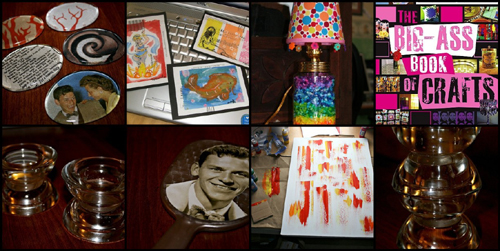
1. Glass Paper Weights, 2. Subscription Card Artwork, 3. Mason Jar Lamp, 4. Big-Ass Book of Crafts Cover, 5. Candle Holders, 6. Frankie Mirror, 7. Drag Art. Pg. 6, 8. Candle holder
Where to begin? The Big Ass Book of Crafts by Mark Montano is certainly big with 377 pages and a corresponding weight.
Organization
The projects are divided into 21 categories by type of object, in other words, desk top decorations are collected under Bored at My Desk, Let Me Entertain You discusses place mats, napkins, refrigerator magnets, and coasters, you get the picture. Each category is color-coded. I like that feature because it does help you orient yourself within this vast sea of projects, which brings me to the layout.
Layout
I experienced the layout to be somewhat in my face. A look at the cover gives you an idea of what to expect inside, namely a barrage of colors, pictures, and text. These are arranged on the page in a fashion that does have some method to its madness, but is difficult to follow when you are just casually leafing through the book. Then again, I’m sleep deprived.
I would recommend setting an hour aside, picking up your drink/snack of choice, and slowly going through the book with some post-its to bookmark your favorite projects. Minor pet peeve: Not every page has a page number; and sometimes it’s not even every other page. I need my page numbers, otherwise I get lost and bad things happen when I get lost. . .
Projects
As with any large collection of projects there are some that appeal to me more than others. For instance, I shy away from anything that involves saws or power tools, but love playing with glue and paper. Also, some of the projects may be familiar (searching Flickr for “pencil roll” renders 1390 results), but sometimes it is nice to have instructions for a project in a format other than stapled 8 1/2 X 11 pieces of paper.
Generally, the instructions were pretty clear. Whitney of sewtrashy.com can certainly attest to that because she truly tested this book. Regarding her Drag Art project (p.6) she writes:
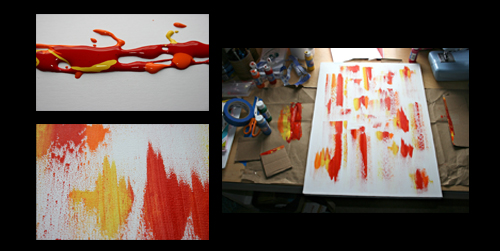
I had such a hard time picking just one project from this book. There were a lot I would still like to try, but this one stuck out for its simplicity. It seemed to have some potential. Also, it was super-duper easy! Just throw some paint down and drag your cardboard through it. Instructions were clear. I’m pleased with how mine turned out, although I will continue to push this method in the future. I don’t like painting with a brush, so this suited me quite well!
The only thing I did differently than the instructions in the book: I put my paint down on another surface and dabbed the cardboard in it BEFORE dragging it on the canvas. I wanted a little cleaner look than in the book.
Would love to see your attempts! Give it a try, super easy, and a quick result. You are bound to have the minimal supplies lying around to try this project. I did!
In addition, Whitney also made glass candle holders inspired by the three-tiered tray (p. 207), paperweights based on the glass chip magnets (p. 219) and a Frank Sinatra mirror influenced by the Japanese hand mirror (p. 230). She used whatever materials she happened to have on hand and substituted Mod Podge for some of the specified glues. You should definitely check out her detailed project descriptions in the book club Flickr pool.
I think that’s what I liked best about the book: You are encouraged to use the crafts and instructions as inspirations for very personal projects.
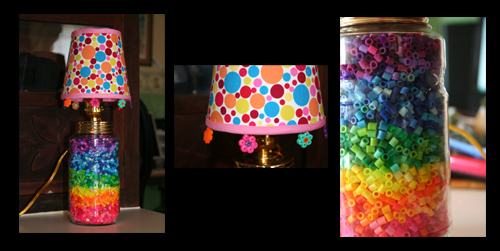
For my project I chose the marble mason jar lamp (p. 76). After perusing local hardware stores for the necessary lamp wiring equipment, I cheated and ordered an already assembled mason jar lamp kit. Then I snuck into my daughter’s room to “borrow” some marbles (“Mom, what are you doing with my marbles and where are you going with my nightlight bulb?”) and this is where I ran into trouble with my 5-minute project. You need more than 160 marbles to fill a mason jar and the lamp kit blew out the low wattage bulb. To restore the family peace, my daughter and I spent a few team-building hours sorting perler beads into rainbow colors to fill the jar and making the little flowers adorning the lampshade.
If I were to make this type of lamp again, I would add a lamp harp to the fixture that could support a slightly larger shade. In the meantime, I’m thinking of other designs like a jar filled with nuts and bolts and a classy black shade, or a jar filled with buttons and a lampshade decoupaged with old patterns.
What was your experience with the book?
Suggestions for the next book club so far are:
- Craftivity, 40 Projects for the DIY Lifestyle, by Tsia Carson
- Cute Stuff, by Aranzi Aronzo (not to be confused with Let’s Make Cute Stuff by the same authors)

As you may have noticed by now, we are a Pokemon household. So when my daughter’s teacher specified a zippered, soft pencil case as part of the school supply list, we obviously couldn’t just buy one. What do you think about our cooperative effort?
Materials
To make this pencil case you need:

For the applique:
- an Image
- Transfer Paper
- White Fabric
- Fusible Web
- Fabric Markers
For the pouch:
- 2 10″x 6″ pieces of fabric, I used denim remnants from another upcycling project
- a Zipper
- optional: 2 9″x 5″ pieces of heavyweight fusible interfacing, 2 10″x6″ pieces of lining fabric.
Because the denim felt a little floppy, I used fusible interfacing to give it more body and added a lining.
Creating the Applique

To do it the right way, i.e. not the way I ended up doing it, cut the fusible web to approximately the size of the applique you want to make. Iron it to the left side of the white fabric. Leave the second backing of the fusible web on for now. Then transfer your image to the right side of the fabric and color it with fabric markers. Cut out your applique and set it aside.
Preparing the Fabric

If you are using fusible interfacing, follow the manufacturers instructions and iron it onto the left sides of the outer shell fabric.

Turn the fabric around. Remove the paper backing from your applique and iron it onto the right side of the fabric. Using the zigzag setting on your sewing machine, stitch all around the image. I set the width to 0.5 and the length to 2, but play around with it until you get the effect you like.
Inserting the Zipper

If you are not using a lining, switch to your zipper foot, align the right side of the zipper with the right side of the top of one of the fabric pieces and sew it together on the left side. Repeat this with the other side of the zipper and the second piece of fabric. If your zipper is longer than your fabric, just let the bottom end stick out. On the right side of the fabric sew a top stitch along both sides of the zipper.
If you are using a lining and have never done this before, take a look at Lisa’s Sewing zippers in bags tutorial at U-Handblog starting with Step 4. She has great instructions and is my crafting hero.
Here it goes:

As Lisa puts it, you make a sandwich. This is the order when the right side of your outer fabric faces up: right side up outer fabric–wrong side up zipper–wrong side up lining. (My picture ended up being the reverse of Lisa’s, so if you are looking at both tutorials, you are thoroughly confused by now.) Put the sandwich together and sew along the top edge through the lining, zipper, and outer shell fabric. If you unfold the whole thing, it should look like this:

Repeat with the other side.
Sew a top stitch alongside the zipper on the right side of the outer fabric through the fabric, zipper and lining. Repeat on the other side.
Putting It All Together
Very Important: Open the zipper at least halfway.
If you are not using a lining, put the right sides of the fabric together and on the left side of the fabric, sew the sides and the bottom of the pouch together. If you wish, you can square the bottom of the pouch using these instructions. Turn the whole thing right side out. Phew, you are done.

If you are using a lining, remember to open the zipper at least halfway. Put the right sides of the lining together and the right sides of the outer fabric. Pin the whole contraption together and leave an opening at the bottom of the lining. Start at the beginning of the opening in the lining and sew all around the side of the lining, outer fabric, other side of the lining, ending at the other end of the opening in the lining. Again, if you want to square the bottom of the fabric and lining, you can do that now following these instructions.
Then, turn the whole thing right side out through the opening in the lining. (By the way, if you didn’t keep the zipper open, you are now saying some not so very nice words.) With everything turned right side out, close the opening in the lining, stuff the lining inside the pouch, close the zipper, and you are done. Yay!
]]>
