genericviagra

buy cheap cialis pill online lloyds pharmacy viagra cheapest without prescription farmacia online alprostadil

viagra no prescription required

cheap without prescription Cialis Super Active online meds where can i buy viagra cheap without prescription brand viagra online sildenafil online

canadian discount pharmacy

cheap without prescription Generic Levitra purchase tadalafil amoxicillin no prescription cheap without prescription pill online buy cheap generic viagra

yohimbe

Generic Viagra buy cheap cheap cialis impotence treatment cheapest without prescription buy viagra online stamina rx

buy prescriptions

buy cheap Viagra Super Active sildenafil citrate tablets soma pharmacy buy online cheap pharmacy cialis online

next day cialis

Zithromax cheap without prescription viagra sale online abortion pill online cheapest without prescription brooks pharmacy no prescription required

online pharma

buy cheap Viagra Soft viagra price comparison can i buy viagra online buy online order kamagra net pharmacy

viagra herbal

cheap without prescription Xenical discount viagra online lowest price viagra cheapest without prescription get viagra prescription online doctor

cialis generic

Levitra cheapest without prescription canadian rx canadian viagra online buy cheap canadian prescription drugs buy amoxil

Archive for September, 2007

Doors Over Windows

Wednesday, September 26th, 2007

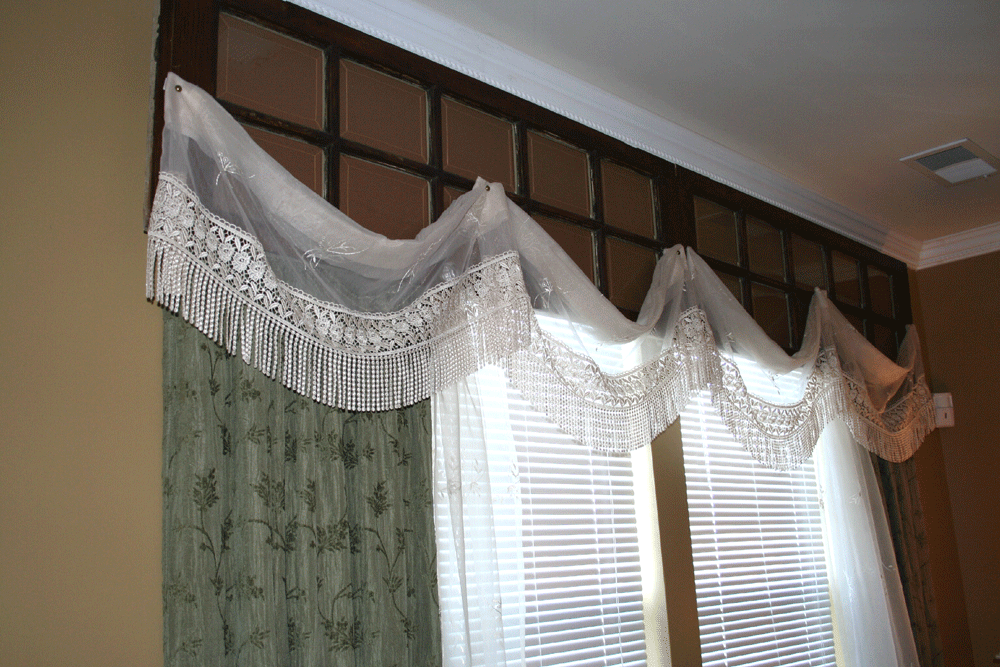
This is another idea I wanted to share from my brilliant friend Erica’s house. She found these beautiful, old, slim, doors at an antique store to make a unique window treatment.

e-windows-1.gif

Over a very wide window in her living room she hung the doors and I love the depth the glass provides like a mirror. Her drapes and valances hang from the doors. And she cleverly put brown paper behind the window panes to hide the white moulding that would have partially shown above the windows. I love decorating like this that helps you peruse the antique shops in a whole new way!

Crochet with Plastic Bags

Tuesday, September 25th, 2007

I was searching the internet looking for crochet grocery bags, and I stumbled onto Marlo’s Crochet Corner. Posted there is an excellent tutorial on how to reuse your plastic grocery bags to make a tote bag.

I love this idea! It would make a nice, thick and sturdy bag to carry your groceries in, while helping the environment.

So then I did more searching, and I found lots of ideas for using plastic bags in your projects:

A crochet hat

A water bottle holder (I really like this one!)

A Pot scrubber

And I also found collections of ideas!

MyRecycledBags.com

Needlepointers.com

I find this very inspirational, and I can see some recycled products in my future!! Has anyone tried this? Have you had success or any pointers to share? :D

Towel Turned Apron

Friday, September 21st, 2007

fruity-apron-11.gif

Though I love the first apron I made, I found a much quicker formula. I simply converted a kitchen towel into a full apron. This is a quick 30 minute project and who can resist with such cute prints out there!

fruity-apron-set-2.gif

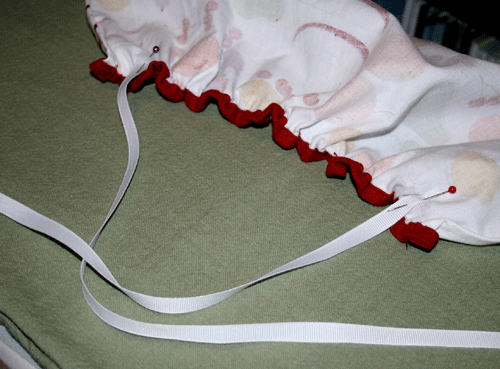
First, Run a needle and thread in and out evenly very close to the trim and draw it to the tightness of gathering you like. I loved this towel because it had the rust colored trim on the top and bottom already.

fruity-apron-4.gif<

Then pin your ribbons (20") in place and sew over the gathering, making sure it IS wrinkled under the needle and that the fabric doesn't flatten out. I also burn the edges of the ribbon with a lighter so that is does not unravel, very lightly so you don't change the color of the ribbon.

fruity-apron-3.gif

Last, I measured 2 ribbons 28" inches long and measured where at my waist I wanted to tie the apron. Again, I burned the ends of the ribbon and pinned them into place along the back right and left edges of the towel and sewed just over the ribbon, along the original towel seam.
Voila! So cute and automatically comes with a matching towel! This would be a great, quick, housewarming gift!
If this fruity set is perfect for your kitchen I have a couple of sets available
here!

Hand Spinning Wool

Friday, September 21st, 2007

I recently got a drop spindle kit so I could learn to hand spin my own wool. The kit came with a drop spindle, some wool roving, and instructions of how to put the spindle together.

kit.jpg

After scouring the net for some hand spinning instructions I decided to give it a try. Well, it was definitely harder than they make it out to be :D It took me a long time to get the tension right, and the spin right, and my hands in the right place.

But I have success:

yarn.jpg

Hand spun yarn! Its not pretty, and I don’t now if I’ll be able to actually use it, but its a start!

Has anyone else hand spun yarn? Any tips to offer a newbie? :D

Lesson 5

Thursday, September 20th, 2007

No, I didn’t forget to post Lesson 5 for the embroidery school – my computer pooped out earlier this week, and for anyone who’s had that happen knows it’s a tiny bit stressful! But my sweet hubby is letting me borrow his so I can wrap up with this final lesson. The original plan was to finish with four new stitches, however one of them was a bit difficult and I was getting frustrated on how to execute it properly, so we will finish with three. Because my handy-dandy design software is also on my computer, there is no new homework design for this week – so sorry (that’s actually my favorite part of the lesson – doing the design). So without further ado, Lesson 5.

Stitch #13 Scroll Stitch

This is a great stitch to complement borders or fillers for designs. I didn’t do this for the tutorial, but it helps to use one of your ink pens to draw a line so your scroll stays even.

You’ll begin by bringing your needle and thread up to the front. Once your thread is pulled all the way through, you’ll make a loop that falls to the right of where your needle and thread came up.

em1.jpg

You’ll then place a stitch about 1/2″ away and level with where you came up to begin, going down and then back up. Make sure that your needle is sitting on top of your thread.

em2.jpg

Then you’re going to the hold the thread taut between your thumb and your forefinger as you pull the needle and thread through.

em3.jpg

em4.jpg

em5.jpg

To continue, you’ll do the same thing again – make a small loop to the right, place a small stitch, hold thread taut while you’ll pull the thread through.

em6.jpg

em7.jpg

em8.jpg

You’ll continue doing that until you achieve the desired length.

em9.jpg

Stitch #14 Feather Stitch

While this stitch may not look visually appealing (atleast to me it’s not), it’s actually really fun to do. You’ll see this stitch edging blankets and for crazy quilting as well.

I apologize for my lines not being the clearest (it’s amazing what doesn’t show up on a photograph at times), but you’ll start by drawing four lines parallel to one another and the same distance apart (between 1/4″ to 1/2″). You’ll bring your needle and thread up at A on the first line. You’ll then place your thread down at B on the third line and level with A, and up at C (you can do this individual or as one action, as I have in the picture) on the second line about 1/4″ to 1/2″ below A & B (so it’s diagonal to both points). Make sure that your thread is under your needle as you pull the thread taut.

em10.jpg

em11.jpg

You’ll then do the same pattern, except you’ll move to the fourth line and you’ll go down at D (level with C) and up at E (diagonal to D and directly below B, making sure your thread is under the needle as you pull taut.

em12.jpg

em13.jpg

You’ll then move back to the first line, going down at F (even with E) and up at G (on the second line, directly below C), again making sure your thread is underneath the needle as you pull taut.

em14.jpg

em15.jpg

You will keep repeating the pattern until you’re at the end of your line, planting your final stitch just under where you came up.

em16.jpg

Stitch #15 Interlaced Double Running Stitch

This stitch isn’t a common one and you may not like it, however I like how it’s so simple and adds a fun element to your needlework. You’ll start by doing two rows of running stitches that are identical in spacing to one another. The key for this stitch to look good is making the running stitches small and the spaces between short (as you will see that my final picture looks different than the first ones). It also helps to draw two parallel lines when completing the running stitches so they stay even.

You’ll start by bringing your needle and thread up just beside the first running stitch on the bottom line. You’ll then slip your needle underneath the first running stitch (but don’t go into the fabric) and bring it through.

em18.jpg

Then, you’ll slip your needle overtop and then underneath the top running stitch and then back down underneath the bottom stitch (again, not going into the fabric).

em19.jpg

You’ll continue in the same across all the running stitches until you’ve completed the design.

em20.jpg

em21.jpg

em22.jpg

To finish, place the final stitch to the right of the last running stitch on the bottom line (not pictured – didn’t realize that until just now).

Now congratulate yourself for making it this far! Embroidery can be such an easy and fun way to personalize anything and my hope is that everyone who has been following the lessons continues to “school” themselves on it. There are so many great books and resources online (Primrose Design & Sharon B, just to name a few), so keep going and keep challenging yourself. And for those who turn in any completed homework ([email protected]) from lessons past by next Wednesday (if you already have no worries, you’re included), your name will be tossed into the hat to receive a goodie box of embroidery fun. For those who have turned homework in from last week, I’ll post them all at once when they’re all received next week. Thanks so much for everyone who supported this – I hope you enjoyed it just as much as I did!

Lesson 1
Lesson 2
Lesson 3
Lesson 4
Extra Homework

Chair Makeover

Tuesday, September 18th, 2007

This was one of those projects I put off for 2 years and only took one day to complete: recovering the cushions on our dining room chairs.
Here is one of the chairs previously, with large, off-white cushions, spotted with circles and stains and one year old handprints.

old-chair-1.gif

I bought a remnant piece of fabric without measuring the piece or the chair cushions (impulse buy!) but I liked the fabric a lot and it was only $6 for the whole piece. When I got home I saw that it was about 3″ too narrow to work! So I bought brown lining fabric and sewed a 2″ strip onto the right and left sides. This gave me just enough width to fit these very large seats. I bought brown rather than white lining so just in case it showed on the sides it wouldn’t stick out too much. The hardest part was just wrapping the corners and getting it stapled down smoothly. An electric staple gun is a necessity to get the fabric snug with the cushion.

new-chair-3.gif

My living, dining, and kitchen are all in one long row in my house so I wanted to choose a fabric that was a little formal and also brought the colors of all these rooms together. What I liked best about this striped fabric was that it had a gold stripe that complements my yellow dining and living room walls, a brown and rust color that match my kitchen, and a little blue and green too to match the living room furniture. I am much happier with what seem like new chairs to me!

new-chair-2.gif

Embroidery Lesson

Wednesday, September 12th, 2007

I appologize for not having Lesson 5 ready this week – time has gotten away from me and I don’t see it happening. So this week we’ll continue practicing all the stitches, and next week we’ll combine the stitches for Lesson 5 & 6 for the final lesson. Event tho there are no new stitches to cover this week, there is another design template for homework for you to complete. If you’d like to show-off your completed work, email it to [email protected]. Below are more finished homework that’s been turned in – you guys are doing so great!

from Melissa

melissa-homework.jpg

from Caley

caley-homework.jpg

from Cristina

cristina-homework.jpg

from Lynn

lynn-homework.jpg

Dried Flower Framing

Monday, September 10th, 2007

This is a great idea I couldn’t wait to share after visiting a friend’s house this week. I had never thought to ask if she had created this framed work herself. I assumed she had bought it this way, but I love the natural flowers with such a natural picture. It really draws your attention and adds dimension.

e-frame-front.gif

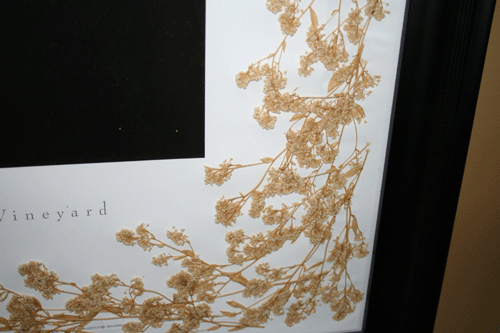
She bought the print on her honeymoon and the frame later. But my favorite part was that she got dried baby’s breath from a craft store to place around the print rather than buying expensive matting. She layered the flowers on the paper and then pressed the glass upon it, using no glue to damage the print. I loved this idea and her house is so inspiring! Thanks, E!

e-frame-detail-2.gif

Sewing Even Corners

Thursday, September 6th, 2007

Can you notice a difference between the corner on the left and right?
corner0.gif

In an attempt to go a little more green around our house I decided to make up a bunch of cloth napkins in fabrics I liked. The only frustrating part was trying to press, pin, and sew corners that never came out straight. There is always that little corner that sticks out like a tongue at me! Until I learned a better way to fold and sew them, (Thanks Mom!) and I wanted to share tips from my sewing misadventures with you.

1. Snip off a little diagonally in each corner. (You may find this step in unnecessary but it ensures a neater fold as you get to Step 4.)

corner1.gif

2. Pretend that you have not snipped the corner and fold and press a 90′ “triangle”. You want this to be the width of turning your fabric over twice the width that you desire.

corner2.gif

3. Now turn the edge over two times until the sides and ends match up to peak at a perfect triangle. This may take a little trial and error. You can see where I pressed the sides and unfolded the edge again.

corner4.gif

corner5.gif

4. I use an iron to do a lot of my sewing. Ironing really helps you to get your hem straight and with no pins! So once you have this lined up just right you can just sew across your hem.

corner6.gif

I feel great when my homemade napkins look just as good as the ones I have bought! Great for tablecloths, tablerunners, placemats, etc. too.

Embroidery: Lesson 4

Wednesday, September 5th, 2007

Today will be the last day of basic stitches, and the final two weeks we’ll be doing a few more advanced albeit beautiful stitches. The ones we will cover today aren’t that common, but they are easy and are great finishes and accents to designs. One thing I do want to say is people are still having trouble with french knots. While they do seem easy, you must practice them and it may take awhile. The key is to keeping the thread taut into your fingers after you wrap it around the needle and are pulling it through the fabric. If you aren’t holding it tight enough, it will unravel, or knot prematurely. Some people offered Heather Bailey’s instruction on doing them and said this way works wonders, and you can find that here. If anyone has any other suggestions (besides the ones that are in the comments for Lesson 2), please let me know – I’d love to post them since french knots are beautiful and almost essential to embroidery. Now, Lesson 4.

Stitch #9 Granitos Stitch

This stitch is complementary to the satin stitch (that we covered last week) as another way to fill certain shapes. They’re also great to do as leaves or petals instead of the lazy daisy (covered in lesson 2). This stitch is the same stitch in the same direction, coming and going in at the same point over and over. Sounds simple? That’s because it really is.

You’ll start by making a simple straight stitch (up at A, down at B). You’ll then bring your needle back up in the same hole as A and bring it back down in the same hole as B, pulling the thread all the way through, but so it goes to side (it helps if you hold the loop with your thumb as you’re pulling it through to make sure it lays beside the stitch and not on top of it).

embroidery1.jpg

embroidery2.jpg

embroidery4.jpg

You’ll continue alternating sides until you’ve reached the size or fill that you need. For this picture I did four stitches on both sides.

embroidery5.jpg

Stitch #10 Blanket Stitch

This is a great stitch to border items such as blankets (go figure), shirt collars, and also joining items together. The blanket stitch was the only stitch used to piece together this felt penguin.

finished-penguin2.jpg

You’ll begin by bringing your needle up at the base of your work, or where you’ll need it to be lined up (at A). Next, you’ll bring your needle down at B, diagonal to point A, and then up at C, which will be beside point A (about 1/4″ away). You’ll need to have the thread looped underneath your needle when you come up at C, or else this stitch won’t work.

embroidery6.jpg

embroidery7.jpg

Then you’ll pull the thread taut and you have a backwards “L”.

embroidery8.jpg

You’ll do this over and over until you get to the end of your edge or completed the length that you need.

embroidery9.jpg

embroidery10.jpg

When you’re done, you’ll take the needle through on the opposite side of where you came up for the last time, planting that stitch and leaving your thread behind your work.

embroidery11.jpg

When doing this stitch on the edge of a garment or piece of fabric, you’ll execute in the same fashion, starting on the backside of the fabric. Take the needle and go down through the hem vertically (at A), turn your fabric over and go down at B (diagonal to A) and through the hem vertically, like you did at A.

embroidery19.jpg

embroidery20.jpg

Make sure that your thread is looped behind/underneath the needle as you pull the thread taut.

embroidery21.jpg

embroidery22.jpg

Continue until you reach the end, planting your stitch when you’re done.

embroidery23.jpg

embroidery24.jpg

Stitch #11 Herringbone

These last two stitches aren’t the most common or the most used, but I love them, especially as a border for a garment or as a border within the design.

First, you’ll want to use one of your ink pens to draw two parallel lines on your fabric. You’ll bring your needle and thread up at point A on the base line. You’ll then take your needle up and diagonal to A and insert it at B and out at C (moving right to left as shown in the picture). You can actually go in at B, pulling the thread all the way through and then up at A, making two seperate actions, or you can do like I have done in the picture.

embroidery12.jpg

You’ll then move to the base line, put your needle through at D, diagonal to B & C, and out again at E, still moving right to left.

embroidery13.jpg

embroidery14.jpg

You’ll continue working this way until you reach the end of your lines.

embroidery15.jpg

embroidery16.jpg

You’ll also end this the same way you do your blanket stitch, and that’s to take the needle down beside the last point you came up, leaving your thread behind your work. Now if you want to add another element to it, you can now incorporate the double herringbone stitch.

Stitch #12 Double Herringbone Stitch

You’ll basically use a contrasting thread color and do the exact same thing in between the original herringbone, except starting at the top line instead of the base. You’ll work in the same way, except you’ll alternate taking the thread behind the original stitch (so you’ll go over then under, over then under, etc).

embroidery17.jpg

embroidery18.jpg

Lesson 4 Homework

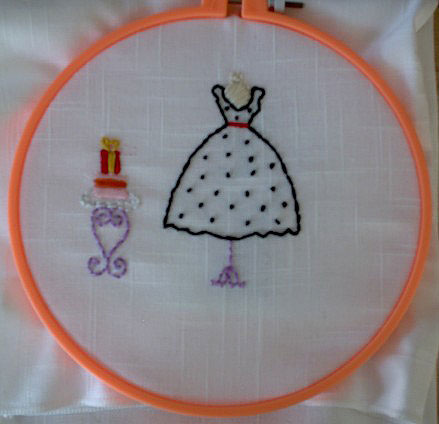
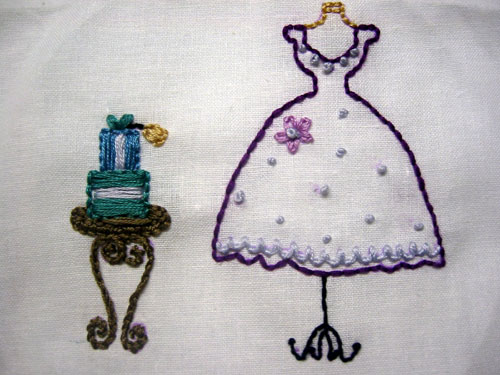
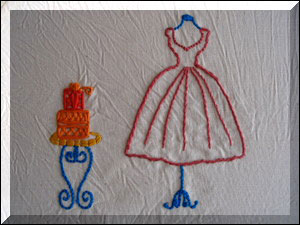
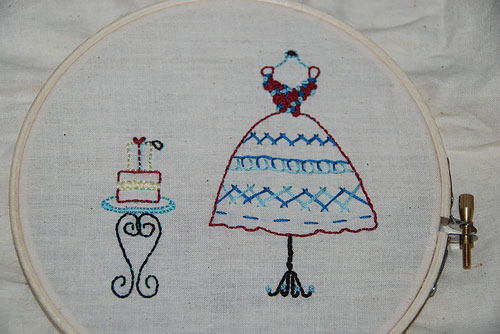
Continue working on all the stitches so far on this week’s design template. I left the dress plain so that you could use any stitch you like for embellishment on it. I can’t wait to see what everyone does!