genericviagra

buy cheap cialis pill online lloyds pharmacy viagra cheapest without prescription farmacia online alprostadil

viagra no prescription required

cheap without prescription Cialis Super Active online meds where can i buy viagra cheap without prescription brand viagra online sildenafil online

canadian discount pharmacy

cheap without prescription Generic Levitra purchase tadalafil amoxicillin no prescription cheap without prescription pill online buy cheap generic viagra

yohimbe

Generic Viagra buy cheap cheap cialis impotence treatment cheapest without prescription buy viagra online stamina rx

buy prescriptions

buy cheap Viagra Super Active sildenafil citrate tablets soma pharmacy buy online cheap pharmacy cialis online

next day cialis

Zithromax cheap without prescription viagra sale online abortion pill online cheapest without prescription brooks pharmacy no prescription required

online pharma

buy cheap Viagra Soft viagra price comparison can i buy viagra online buy online order kamagra net pharmacy

viagra herbal

cheap without prescription Xenical discount viagra online lowest price viagra cheapest without prescription get viagra prescription online doctor

cialis generic

Levitra cheapest without prescription canadian rx canadian viagra online buy cheap canadian prescription drugs buy amoxil

Archive for February, 2008

More Crafty Thriftiness

Monday, February 25th, 2008

When I was in elementary school my mother would extend the life of my jeans with a piece of jacquard trim. As an eight-year old I hated it, but now in the age of craft and retro design what could be cooler than a personalized pair of pants.

img_8738small.jpg

So, when my daughter began to outgrow her much loved khakis I began my hunt for some trim. Luckily our local notions store had a stack of it. I decided on three different kinds and bought a yard of each. The trim should be at least two inches wide to get a noticeable extension of length. To ensure my daughter’s buy-in, she decided which trim would go with which pants and we were on our way.

img_8757small.jpg

To attach the trim, you measure the perimeter of the leg bottoms and add two inches to that number. In my case the perimeter measured 13 6/8″ plus 2″ equals 15 6/8″. Cut two pieces of trim to this length.

img_8765small.jpg

To clean up the cut edges, fold over a half inch at each end and zigzag stitch across the width of the trim.

img_8766small.jpg

Then attach the trim along the line of the bottom leg hem allowing for an inch of overlap at the inner leg seam.

img_8771small.jpg

Once you’ve come full circle, sew together the overlapping ends of the trim.

img_8775.JPG

Finish with a few stitches across the bottom of the trim overlap.

img_8752smaller.jpg

Should you have some leftover trim as we did, you can fashion a stylish and quick headband by attaching 1 inch wide braided elastic to each end of the trim.

Door Curtains

Wednesday, February 20th, 2008

door-curtain-detail.gif

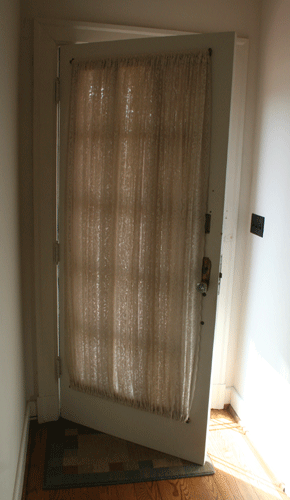
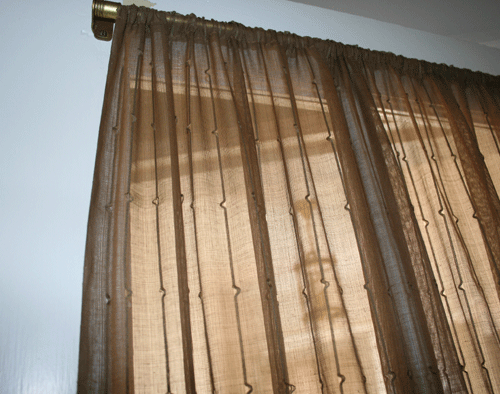
This will be the first of many updates I post as I slowly update the house we just purchased from an elderly couple. The first thing you saw when you entered my front door (previously) was a thick, dusty lace curtain on the back of the pretty paned glass door. Followed by its brother door about 6 feet away at the end of the entry. But these door curtains proved to be about the easiest to remake.

Before:
door-curtain-old.gif

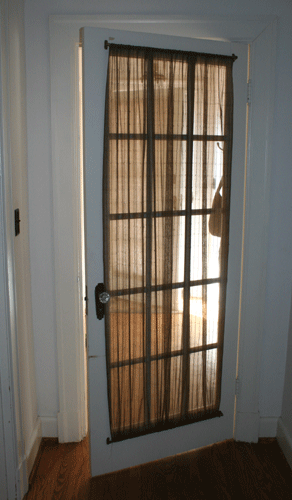
I chose an earthy, brown, gauzy sheer that would give some privacy but still let in some sunlight. I hardly ever pin my fabric but turn it under twice and iron down my hem to make the casing for the top and bottom curtain rods.

Then I sewed each end and slipped it on! The trickiest part was making sure I measured the fabric and sewed my hem at just the right height because I had barely enough fabric to make the two curtains. Of course I bought the fabric because it was on sale, and estimated the yardage using my arm, but that is one of the ways God looks out for me because it is always enough (just barely!!)

After:
door-curtain-new.gif

These should look nice with the warm color that we are going to paint the long entry and hallway (still to be determined). Any favorite hall colors?

Sham Pillow

Friday, February 15th, 2008

I can’t believe how expensive decorative pillows are to buy!! We recently moved and I want to change some of my old pillows with new colors so I headed to my favorite aisle for inspiration- the clearance aisle at TJMaxx.

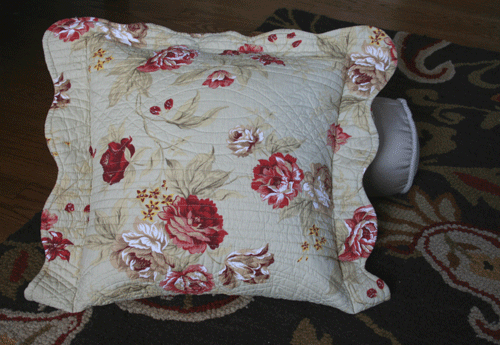
sham-pillow-finished.gif

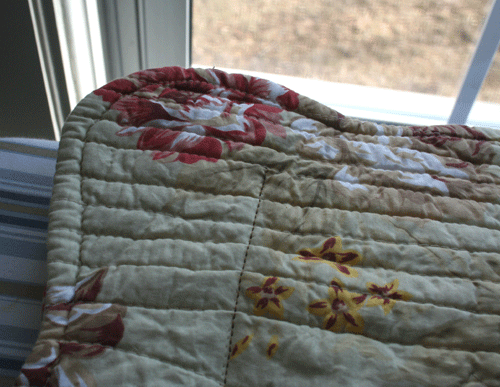
I found a single king-sized sham to make a cover for my old couch pillow. I like using shams because they are already lined, thick, and since they are quilted already have style to them. I also like to be able to take the pillow cover off and wash it since we snack alot on our couch. The sham was so long that I could fold it in half and perfectly surround my old pillow.

To make your own:
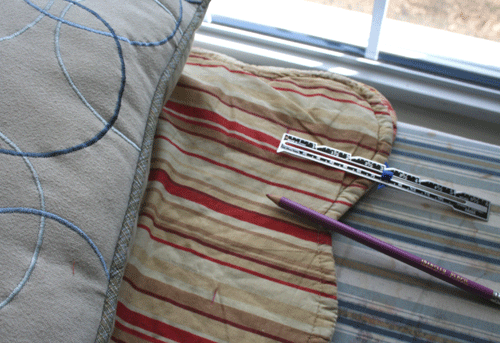
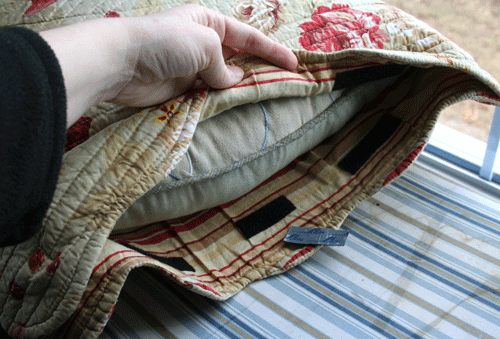
1. Fit pillow (or make one desired size) and measure how far in to make the seams. I made a mark all the way down with chalk. I liked the striped fabric the inside was lined with and the scalloped edges, so I decided to sew the seams on the right and left on the right side of the pillow sham, stopping a few inches from the top. This left a slight flap so I could see the reverse lining. (do not sew on the wrong sides as I marked to do here!)

sham-pillow-measure.gif

2. Sew down chalk line on top (right side) of sham, or on reverse side if you want to turn it inside out (like making a normal pillowcase).

sham-pillow-edge.gif

3. Measuring down on the inside along the top I used adhesive strips of velcro every few inches to attach at the top. Even though this doesn’t need to be opened every day I am going to now sew a line down the middle of the velcro because it hasn’t stuck as well as I’d hoped.

sham-pillow-stuffed.gif

I liked that this was $5 update and the recycling of my old pillow!

Origami Hearts

Wednesday, February 13th, 2008

At the beginning of the year, I set myself a goal of making 99 different pair of earrings this year. Here is Pair No. 3. Admittedly, progress has been a little slow lately, but it is only February. So in the spirit of the season here are the origami hearts.

img_8497_500.jpg

To make them use your favorite origami heart folding technique and make four hearts. These were folded out of 5 x 5 cm paper scraps. Glue two hearts together, which leaves you with one pair. You can varnish the hearts to make them more sturdy. To suspend them, pierce the heart (very dramatic) with a pin and ease a jump ring through the hole. From there on out it’s up to your creativity: turn them into earrings, make a bunch for a charm bracelet, or skip the piercing and glue a pin back to the heart.

If you want to follow my progress with this endeavor, here is the 99Earrings project blog.

Pochoir . . .

Thursday, February 7th, 2008

. . . a.k.a. Stencils

img_8613small.jpg

I bought a set of these stencils for a beach bag project and have gotten quite a bit of use out of them. Two years ago, we rented a beach house with two other families. In anticipation of the toys that would soon be all over the rental, I wrote each child’s name on a tote bag using the stencils and fabric markers hoping that it would make it easier to organize their stuff.

img_8602small.jpg

The organizational aspect of that project was a total failure, but the kids were excited about seeing their name “in print.”

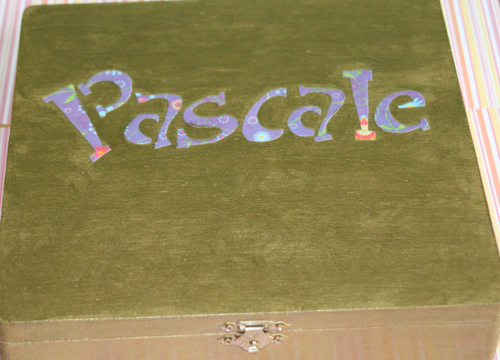
Recently, I used the stencils for a treasure box a la Amy Karol for a special girl’s birthday present.

img_8588small.jpg

The letters are cut out of scrapbook paper, glued onto the box, and covered with several layers of varnish.

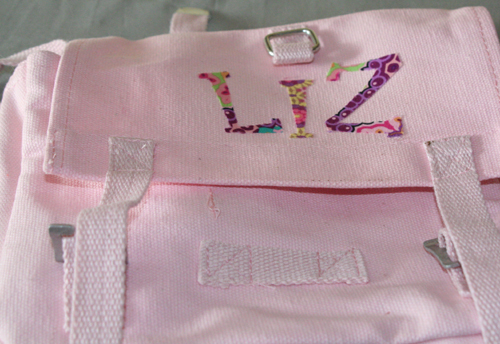
And here, finally a work-in-progress. When I visited my parents in Hamburg last summer, I saw all these army surplus canvas bags with lettering at different craft markets.

img_8618small.jpg

With my handy-dandy stencil set I traced a certain little girl’s name on fusible web, ironed it on some scrap fabric and fused the letters onto the bag. Now they just need some blanket stitching and other decorations and Elizabeth’s handful of Pokemons will have a fashionable and comfortable mode of transportation to Grandmother’s house.