genericviagra

buy cheap cialis pill online lloyds pharmacy viagra cheapest without prescription farmacia online alprostadil

viagra no prescription required

cheap without prescription Cialis Super Active online meds where can i buy viagra cheap without prescription brand viagra online sildenafil online

canadian discount pharmacy

cheap without prescription Generic Levitra purchase tadalafil amoxicillin no prescription cheap without prescription pill online buy cheap generic viagra

yohimbe

Generic Viagra buy cheap cheap cialis impotence treatment cheapest without prescription buy viagra online stamina rx

buy prescriptions

buy cheap Viagra Super Active sildenafil citrate tablets soma pharmacy buy online cheap pharmacy cialis online

next day cialis

Zithromax cheap without prescription viagra sale online abortion pill online cheapest without prescription brooks pharmacy no prescription required

online pharma

buy cheap Viagra Soft viagra price comparison can i buy viagra online buy online order kamagra net pharmacy

viagra herbal

cheap without prescription Xenical discount viagra online lowest price viagra cheapest without prescription get viagra prescription online doctor

cialis generic

Levitra cheapest without prescription canadian rx canadian viagra online buy cheap canadian prescription drugs buy amoxil

Archive for September, 2008

Kids’ Puppet Show Curtain

Thursday, September 25th, 2008

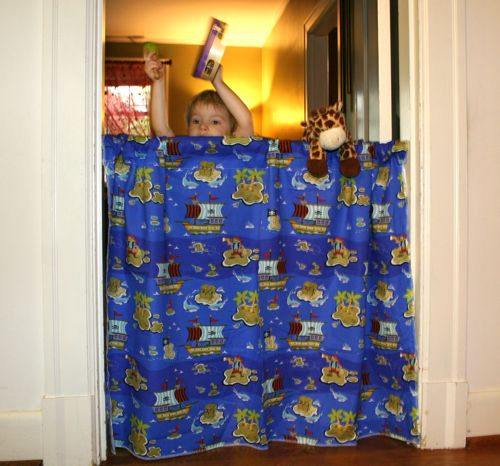
I am all about- what can you make with 1 yard, 1 skein, etc. And so in a pinch for a gift I used one yard of fun fabric to make a doorway puppet show curtain.

img_3073.jpg

With a $4 tension rod and 1 yard of fabric we have already had hours of fun around our house playing with puppets and stuffed animals, having musical concerts, and using as a special door into my son’s room with a “doorbell” you have to ring.

img_3087.jpg

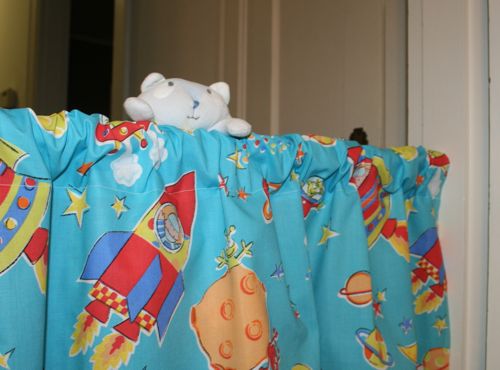
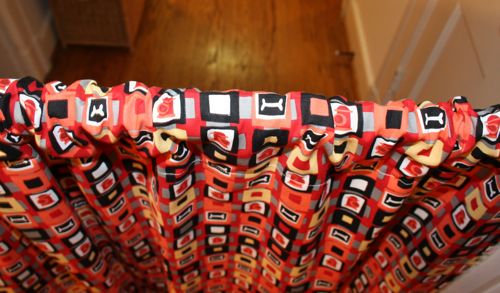
Two of the sides of fabric didn’t even need hemming because they were the finished edge off the bolt and the other 2 ends I serged and turned over and hemmed across to make a casing for the rod. I have specialized curtains too by “monogramming” with a large felt letter sewn on and sequin ribbon stripe near the top, to make it more girly. There is so much you could do to personalize this to your child’s taste, like the different fabrics shown that I have used. And with it less that 3 feet tall it is perfect for a toddler to stand behind or an adult to sit behind.

img_3107.jpg

I love a 10 minute project that can really spark his imagination and turn our ordinary hallway into a fun place!

Fair Display

Tuesday, September 23rd, 2008

I’m participating in our local street fair this weekend and am playing around with some display ideas. What do you think about these:

earrings.jpg

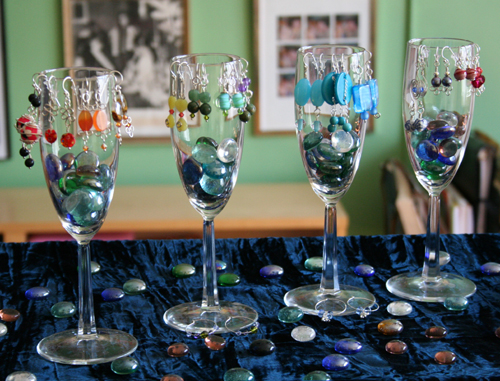
To show off the earrings, I’m using cheapo champagne glasses filled with glass chips from the dollar store. They are positioned on a bed tray covered with a velvet remnant. I tried to follow the rainbow spectrum (Roy G. Biv) in lining up the earrings. The height of the bed tray lifts the display a little closer to the customer.

rings.jpg

For this display I painted clothes pins and their holders, slipped the rings over these newly fashioned “ring holders,” added a doily, and lined them all up on a cake stand. I’m planning on putting little stickers with the ring size on the bottom of the pins. Not quite sure what Plan B will be if it’s a really windy day. Maybe I should bring a little basket with me in case the wind decides to bowl over the pins.

shoppingbag.jpg

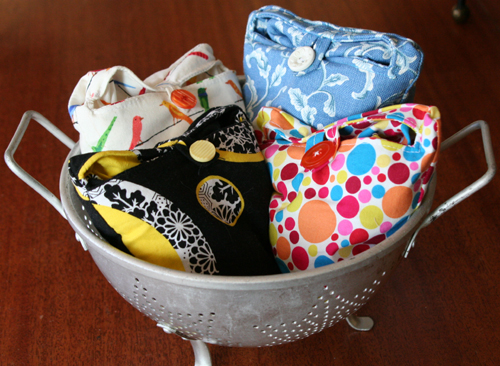
Speaking of baskets, this colander holds to-go-shopping bags. In their rolled up state, these bags reminded me of owls, which in turn made me think of nests, causing me to rustle around my house for something nest shaped to hold the bags.

bags.jpg

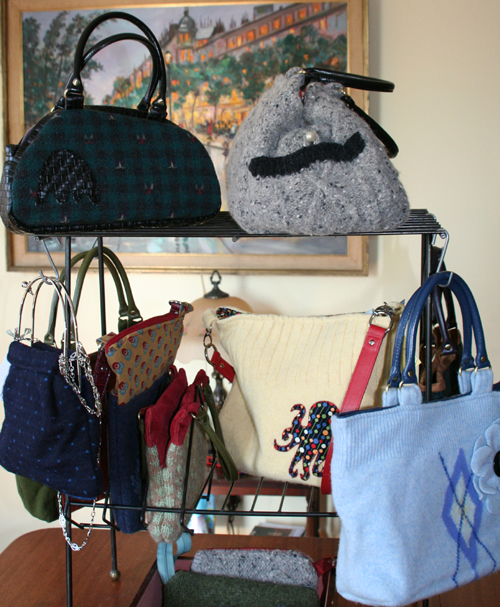
Yes, dumpster diving is a worthwhile activity. This display is a record player stand I found on the street. The larger bags can be suspended with S-hooks and the LP holder section supports smaller bags.

How do you like to display your wares?

Complete Embellishing by Kayte Terry

Thursday, September 18th, 2008

A few weeks ago, I received this gorgeous book from Kayte Terry. Kayte describes herself as a “stylist/writer/crafty lady from Brooklyn, NY”. She grew up in a household where the motto was not “Where do I buy it?” but “How do I make it?”

comleteembcover.jpg

With her first book, Kayte shares a glimpse of her crafty life by introducing us to basic embellishing techniques and demonstrating how to apply them to enhance clothing, accessories, and home furnishings. The comprehensive Tools and Techniques section of the book is a great resource. Kayte covers embroidery, crochet, trims, felting, beads and sequins, applique, fabric printing, and painting and etching. This is followed by the Projects section where she seeks to inspire you to combine these techniques and create your own, unique style.

kaytemosaic.jpg

1. Romance Skirt, 2. Glasses, 3. Victoriana Cardigan, 4. Lampshade

I took on this challenge by first shopping in my crafting stash (fabric from curtains sewed in 1993 and felted sweater remnants from a purse project) and then at the Salvation Army ($3.99 cardigan). The result is this flirty, girly cardigan based on the instructions for Kayte’s Victoriana Cardigan.

cardigan.jpg

Needless to say, I love my new jacket! My version has a crew neck instead of a V-neck. I used some leftover tape I had made for this project to embellish and clean up the edge around the cardigan and then added the ruffle. Needle felting is a new craft for me and I’m not quite ready to embark on it, so I decorated my flower with a button covered in the tape fabric. Instead of sewing the flower to the jacket, I attached it to a pin back for those days when I don’t feel quite so bloomy. At a later date, I may shorten the sleeves of the jacket and add some ruffles there, but for now I’m very excited about my new treasure.

If you want to find out more about Kayte Terry, you can read her interviews on the Craftzine blog and the Etsy Storque, and visit her blog at thisisloveforever.com. By the way, Kayte was also the fashion/prop stylist for Sew Everything Workshop, our December book club selection.

Japanese Primer

Saturday, September 13th, 2008

2318330546_6b7e0bcc30.jpg

During the last couple of months I added some Japanese sewing books to my collection. I love the clean designs of the dress styles and home accessories depicted therein. Although the instructions are often accompanied by detailed drawings that allow one to follow along without having to read the actual descriptions of the steps, I’ve decided that in order to make something like the dress above, I’d like to have a better idea of what I’m supposed to do. Luckily some very generous people have posted translations of Japanese sewing and knitting terms.

Sewing

Moving Hands has an initial collection of terms and also refers those of you who read French to Japan Couture Addict’s. This blog documents its members’ Japanese sewing adventures. In the sidebar you can find an additional collection of links to sewing terms (including Batty Chan’s excellent collection of Japanese terms translated into English), as well as book and fabric sources. For those of you interested in making softies, My Little Mochi has a list of related terms.

Knitting

A comprehensive guide to Japanese knitting terms and charts is available at www.tata-tatao.to. This site covers Japanese needle sizes, yarn related terms, and includes a Japanese-English knitting dictionary. Ravelry maintains a Japanese knitting and crochet group where you can discuss your knitting experiences. Rhonda of Japanese Knitting Patterns chronicles her experiences with Japanese knitting patterns and provides links to further resources. Finally, the Needle Arts Book Shop offers a free 8-page pdf brochure with detailed steps on how to decipher a Japanese knitting pattern.

Crochet

I wasn’t able to find a collection of crochet abbreviations. Does anyone know of a resource?

Finding Patterns

Crafting Japanese is a good place to start to look at some crafting books. This blog lists pattern books by ISBN number together with pictures of completed projects. You can browse for and purchase books in the hobby/lifestyle/home arts section of YesAsia an Asian online bookstore. Ebay also turns out to be a good resource. Many vendors display several pages of the books for sale giving you a better idea of the kind of patterns you might find. If you are in an enterprising mood, you can also search Amazon.co.jp with the help of Google’s web page translator. Just type in the URL of the page you wish to translate in the “Translate a web page” box and select the appropriate language.

Finally there is Flickr; in addition to the pictures, the Japanese Sewing group has good resources in the discussion section. The Crafting in Japanese group shares a variety of different crafts and again provides good information in the discussion section.

Crafty Daisies Book Club: “Lotta Prints” October 22

Wednesday, September 10th, 2008

babc-book-club2.jpg

1. paper doll dress bookmark, 2. Match Stick Holder Bottom, 3. Paint Chip Bookmarks, 4. Match Stick Holder

Wow, thanks for all your discussions and submissions for the last book club. For descriptions of some of the projects go visit the Crafty Daisies Book Club Flickr group. If you’ve since tackled other projects from the Big-Ass Book of Crafts, please continue to add them to the group.

The next Crafty Daisies book club will discuss Lotta Jansdotter’s book Lotta Prints: How to Print with Anything, from Potatoes to Linoleum, ISBN 081186037X, ISBN13 978081186037.

lotta-prints.jpg

Thank you to Sarah and Josh for suggesting this book. We will meet in six weeks on Wednesday, October 22.

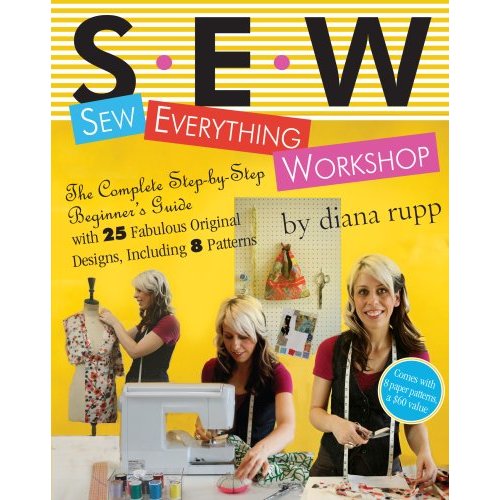
If you need to plan ahead, the book for our third meeting will be Sew Everything Workshop by Diana Rupp, ISBN-10: 0761139737, ISBN-13: 978-0761139737 and will meet on Wednesday, December 3.

seweverything.jpg

For those of you new to the book club, here are the mechanics of our discussions:

How it Works

Every 4-6 weeks we “discuss” a craft book as follows:

  • Make one project out of the book that is due for the next book club meet-up
  • Explain why you chose that project
  • Discuss the clarity of the instructions, the layout of the book, the illustrations, other projects in the book, and whether you liked the book or not
  • Suggest one book for the next book club

You can submit your discussion either as a comment the day of the book club meet-up or by email (craftydaisies(at)gmail(dot)com). If you have pictures of your projects that you would like to share, email them to me or submit them to the Crafty Daisies Book Club Flickr group.

Finding the Book

As with any book club, this is not an endorsement of the featured book (of the ten or so books I read for my fiction book club I only liked three). If you already own the book under discussion, great, take a picture of your project and send me an email. If you think you want to join this endeavor, here are some ways to shop around for the book:

  • See if a friend already owns it and lets you borrow the book
  • Check with your local library (mine had three copies of this month’s book across the borough)
  • Compare prices (I bought this month’s book at list price, but have since seen it significantly cheaper online)

In other words, I don’t want you to get mad at me in case you buy the book and take an extreme dislike to it.

Book Club Meeting: Big Ass Book of Crafts

Wednesday, September 3rd, 2008

 babc-book-club.jpg

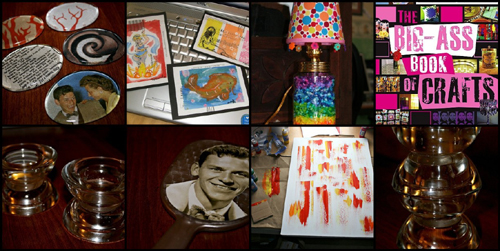
1. Glass Paper Weights, 2. Subscription Card Artwork, 3. Mason Jar Lamp, 4. Big-Ass Book of Crafts Cover, 5. Candle Holders, 6. Frankie Mirror, 7. Drag Art. Pg. 6, 8. Candle holder

Where to begin? The Big Ass Book of Crafts by Mark Montano is certainly big with 377 pages and a corresponding weight.

Organization

The projects are divided into 21 categories by type of object, in other words, desk top decorations are collected under Bored at My Desk, Let Me Entertain You discusses place mats, napkins, refrigerator magnets, and coasters, you get the picture. Each category is color-coded. I like that feature because it does help you orient yourself within this vast sea of projects, which brings me to the layout.

Layout

I experienced the layout to be somewhat in my face. A look at the cover gives you an idea of what to expect inside, namely a barrage of colors, pictures, and text. These are arranged on the page in a fashion that does have some method to its madness, but is difficult to follow when you are just casually leafing through the book. Then again, I’m sleep deprived.

I would recommend setting an hour aside, picking up your drink/snack of choice, and slowly going through the book with some post-its to bookmark your favorite projects. Minor pet peeve: Not every page has a page number; and sometimes it’s not even every other page. I need my page numbers, otherwise I get lost and bad things happen when I get lost. . .

Projects

As with any large collection of projects there are some that appeal to me more than others. For instance, I shy away from anything that involves saws or power tools, but love playing with glue and paper. Also, some of the projects may be familiar (searching Flickr for “pencil roll” renders 1390 results), but sometimes it is nice to have instructions for a project in a format other than stapled 8 1/2 X 11 pieces of paper.

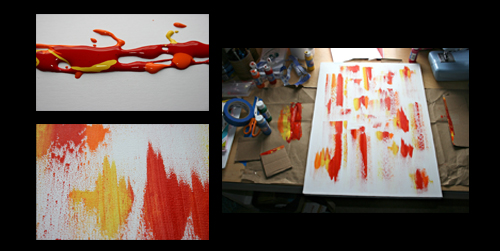
Generally, the instructions were pretty clear. Whitney of sewtrashy.com can certainly attest to that because she truly tested this book. Regarding her Drag Art project (p.6) she writes:
whitney-collage-copy.jpg

I had such a hard time picking just one project from this book. There were a lot I would still like to try, but this one stuck out for its simplicity. It seemed to have some potential. Also, it was super-duper easy! Just throw some paint down and drag your cardboard through it. Instructions were clear. I’m pleased with how mine turned out, although I will continue to push this method in the future. I don’t like painting with a brush, so this suited me quite well!

The only thing I did differently than the instructions in the book: I put my paint down on another surface and dabbed the cardboard in it BEFORE dragging it on the canvas. I wanted a little cleaner look than in the book.

Would love to see your attempts! Give it a try, super easy, and a quick result. You are bound to have the minimal supplies lying around to try this project. I did!

In addition, Whitney also made glass candle holders inspired by the three-tiered tray (p. 207), paperweights based on the glass chip magnets (p. 219) and a Frank Sinatra mirror influenced by the Japanese hand mirror (p. 230). She used whatever materials she happened to have on hand and substituted Mod Podge for some of the specified glues. You should definitely check out her detailed project descriptions in the book club Flickr pool.

I think that’s what I liked best about the book: You are encouraged to use the crafts and instructions as inspirations for very personal projects.
simone-collage.jpg

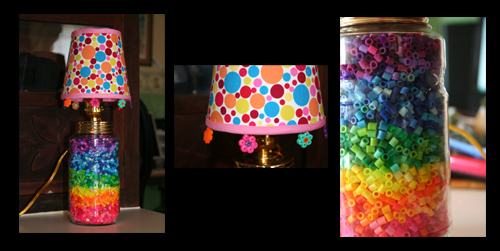
For my project I chose the marble mason jar lamp (p. 76). After perusing local hardware stores for the necessary lamp wiring equipment, I cheated and ordered an already assembled mason jar lamp kit. Then I snuck into my daughter’s room to “borrow” some marbles (“Mom, what are you doing with my marbles and where are you going with my nightlight bulb?”) and this is where I ran into trouble with my 5-minute project. You need more than 160 marbles to fill a mason jar and the lamp kit blew out the low wattage bulb. To restore the family peace, my daughter and I spent a few team-building hours sorting perler beads into rainbow colors to fill the jar and making the little flowers adorning the lampshade.

If I were to make this type of lamp again, I would add a lamp harp to the fixture that could support a slightly larger shade. In the meantime, I’m thinking of other designs like a jar filled with nuts and bolts and a classy black shade, or a jar filled with buttons and a lampshade decoupaged with old patterns.

What was your experience with the book?

Suggestions for the next book club so far are: