Archive for the 'Jen' Category

Doors Over Windows

Wednesday, September 26th, 2007

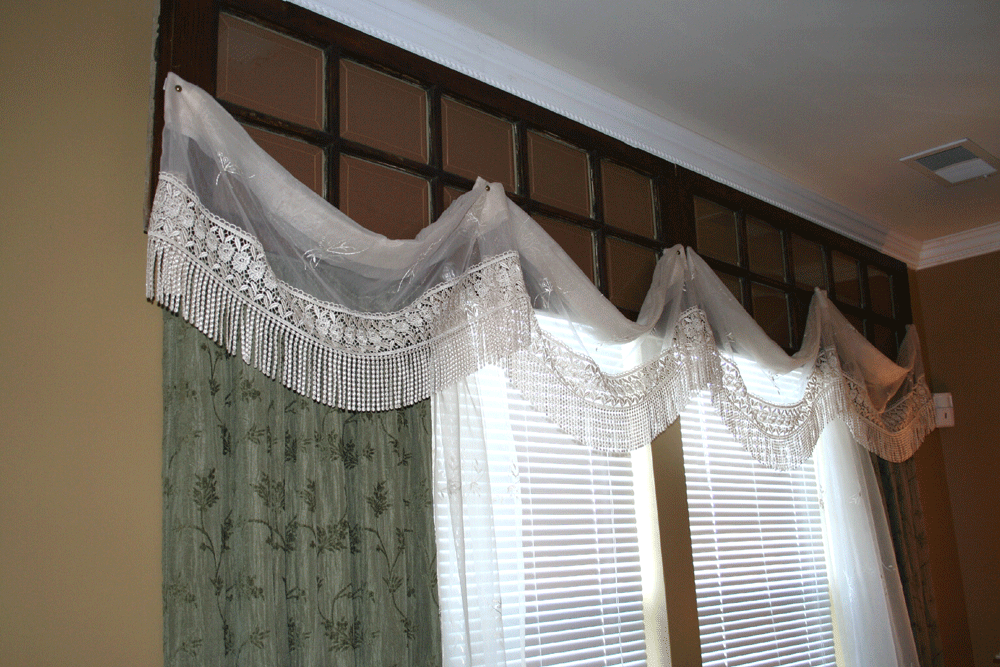
This is another idea I wanted to share from my brilliant friend Erica’s house. She found these beautiful, old, slim, doors at an antique store to make a unique window treatment.

e-windows-1.gif

Over a very wide window in her living room she hung the doors and I love the depth the glass provides like a mirror. Her drapes and valances hang from the doors. And she cleverly put brown paper behind the window panes to hide the white moulding that would have partially shown above the windows. I love decorating like this that helps you peruse the antique shops in a whole new way!

Towel Turned Apron

Friday, September 21st, 2007

fruity-apron-11.gif

Though I love the first apron I made, I found a much quicker formula. I simply converted a kitchen towel into a full apron. This is a quick 30 minute project and who can resist with such cute prints out there!

fruity-apron-set-2.gif

First, Run a needle and thread in and out evenly very close to the trim and draw it to the tightness of gathering you like. I loved this towel because it had the rust colored trim on the top and bottom already.

fruity-apron-4.gif<

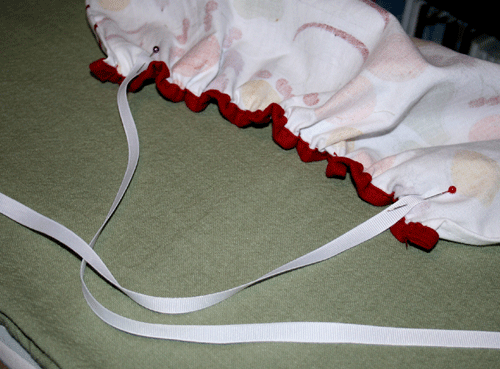
Then pin your ribbons (20") in place and sew over the gathering, making sure it IS wrinkled under the needle and that the fabric doesn't flatten out. I also burn the edges of the ribbon with a lighter so that is does not unravel, very lightly so you don't change the color of the ribbon.

fruity-apron-3.gif

Last, I measured 2 ribbons 28" inches long and measured where at my waist I wanted to tie the apron. Again, I burned the ends of the ribbon and pinned them into place along the back right and left edges of the towel and sewed just over the ribbon, along the original towel seam.
Voila! So cute and automatically comes with a matching towel! This would be a great, quick, housewarming gift!
If this fruity set is perfect for your kitchen I have a couple of sets available
here!

Chair Makeover

Tuesday, September 18th, 2007

This was one of those projects I put off for 2 years and only took one day to complete: recovering the cushions on our dining room chairs.
Here is one of the chairs previously, with large, off-white cushions, spotted with circles and stains and one year old handprints.

old-chair-1.gif

I bought a remnant piece of fabric without measuring the piece or the chair cushions (impulse buy!) but I liked the fabric a lot and it was only $6 for the whole piece. When I got home I saw that it was about 3″ too narrow to work! So I bought brown lining fabric and sewed a 2″ strip onto the right and left sides. This gave me just enough width to fit these very large seats. I bought brown rather than white lining so just in case it showed on the sides it wouldn’t stick out too much. The hardest part was just wrapping the corners and getting it stapled down smoothly. An electric staple gun is a necessity to get the fabric snug with the cushion.

new-chair-3.gif

My living, dining, and kitchen are all in one long row in my house so I wanted to choose a fabric that was a little formal and also brought the colors of all these rooms together. What I liked best about this striped fabric was that it had a gold stripe that complements my yellow dining and living room walls, a brown and rust color that match my kitchen, and a little blue and green too to match the living room furniture. I am much happier with what seem like new chairs to me!

new-chair-2.gif

Dried Flower Framing

Monday, September 10th, 2007

This is a great idea I couldn’t wait to share after visiting a friend’s house this week. I had never thought to ask if she had created this framed work herself. I assumed she had bought it this way, but I love the natural flowers with such a natural picture. It really draws your attention and adds dimension.

e-frame-front.gif

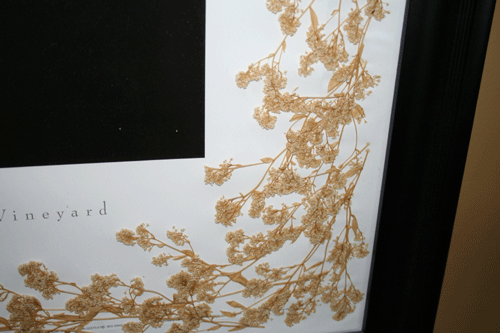
She bought the print on her honeymoon and the frame later. But my favorite part was that she got dried baby’s breath from a craft store to place around the print rather than buying expensive matting. She layered the flowers on the paper and then pressed the glass upon it, using no glue to damage the print. I loved this idea and her house is so inspiring! Thanks, E!

e-frame-detail-2.gif

Sewing Even Corners

Thursday, September 6th, 2007

Can you notice a difference between the corner on the left and right?
corner0.gif

In an attempt to go a little more green around our house I decided to make up a bunch of cloth napkins in fabrics I liked. The only frustrating part was trying to press, pin, and sew corners that never came out straight. There is always that little corner that sticks out like a tongue at me! Until I learned a better way to fold and sew them, (Thanks Mom!) and I wanted to share tips from my sewing misadventures with you.

1. Snip off a little diagonally in each corner. (You may find this step in unnecessary but it ensures a neater fold as you get to Step 4.)

corner1.gif

2. Pretend that you have not snipped the corner and fold and press a 90′ “triangle”. You want this to be the width of turning your fabric over twice the width that you desire.

corner2.gif

3. Now turn the edge over two times until the sides and ends match up to peak at a perfect triangle. This may take a little trial and error. You can see where I pressed the sides and unfolded the edge again.

corner4.gif

corner5.gif

4. I use an iron to do a lot of my sewing. Ironing really helps you to get your hem straight and with no pins! So once you have this lined up just right you can just sew across your hem.

corner6.gif

I feel great when my homemade napkins look just as good as the ones I have bought! Great for tablecloths, tablerunners, placemats, etc. too.

Sewing Machine Covers

Tuesday, August 28th, 2007

I have never shared with you pictures of my “studio” because until recently I didn’t really have one. But recently I got a great desk from my favorite antique store to put in the corner off of our living room. A permanent, beautiful desk that doesn’t fold up to be put away! Now that I am all organized with my shelves of baskets and matching bins I really want to work to keep it an attractive corner of our house. But as much as I love my sewing machine I don’t want to look at it all the time. So I made this pattern for a sewing machine cover.

black-cover1.gif

I made it reversible and heat bonded the two fabrics together so it would stand stiff. Then sewed bias tape around to edge it.
The reversed side:

black-cover-pink-side.gif

The sides tie with ribbon.

black-cover3.gif

open-black-cover.gif

It was fairly easy to make and I love to look over and see fabric that I like rather than just my machine. If you are interested you can buy my machine covers here.

This second cover is made with four panels to cover all sides of the machine and has a handy opening for the machine handle. It has pleated corners and a stripe of velvet trim. This is also available at my etsy store, and look for more colors. I was pleased with these covers which did not take much fabric, and make me smile when I walk by. Here you can get a slight glimpse of my new sewing table! The cover really finished it!

machine-cover-1.gif

cover-detail.jpg


The embroidery school is post-poned until tomorrow, so if you’re following that, please check back tomorrow morning for Lesson 3.

How to Square Bags

Friday, August 24th, 2007

I had been asked by several to explain what I meant by the term “gussetting” in several of my former projects. It’s one of those techniques that is difficult to describe in words but is really easy to do! I promise if you try this quick tutorial it will change the way you sew, especially the way you make bags!

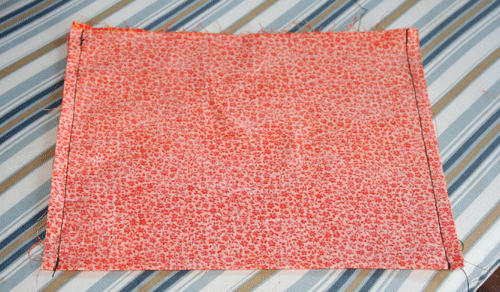
1. For my example I made a small pouch by folding my fabric in the middle (right sides together) to make the bottom of my bag, and sewing up the right and left sides.
square-1.gif

2. Then at one of the corners I put my hand inside of the bag in order to flatten it in the opposite direction.

square-2.gif

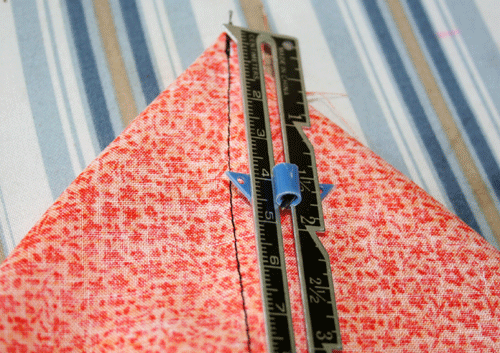
3. Now you are looking at the end of your bag and it should look like a triangle. Center your seam between the other 2 sides of the triangle and measure down from the peak the measurement of half the width you want the bottom to be when finished. Not hard math- 1 1/2″ if you want a 3″ wide bottom…it will depend on the size of your bag.
square-3.gif

4. Using ruler, mark with pencil or chalk a vertical line across your “triangle”. This the line that you sew your seam across.

square-4.gif

5. Repeat for the right and left sides of the bag. This is also how you could make ears on hats for kids, but by sewing on the right side of the fabric.

square-5.gif

6. When you turn the bag inside out it will have 2 square sides. Cover cardboard and add to the bottom to make your bag sturdy. This same technique can also be used on knitted bags, which is were I first learned to gusset.

square-6.gif

Just One Skein

Wednesday, August 15th, 2007

orange-skein-and-judah.gif

I received this cute orange speckled yarn in a swap and am looking for a pattern that calls for only one skein. Does any one have suggestions for one skein wonders?
(Knitting only please, I’m not quite a crocheter yet!)

It is: 100% cotton mercerized, 100 grams, 140 yards

Summer Headband

Monday, July 30th, 2007

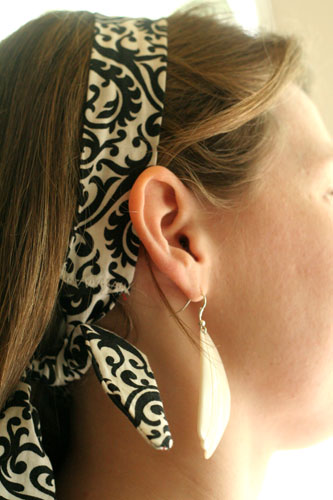
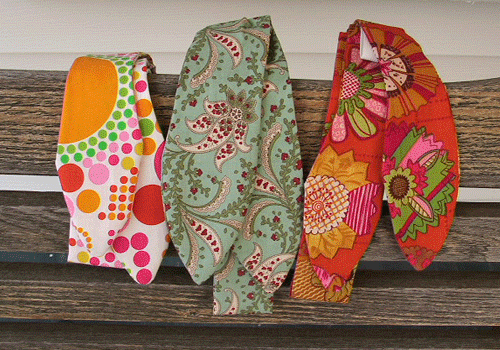
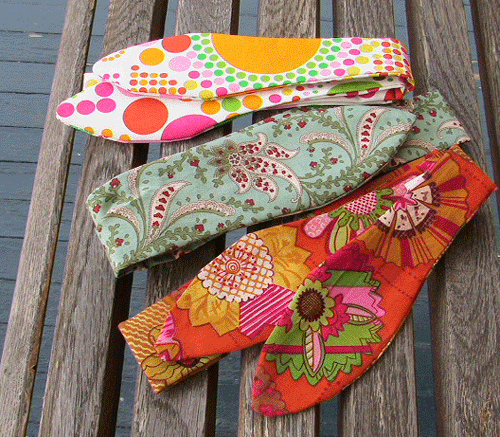
I got this pattern here from Heather Bailey’s site. My summer swap partner sent me this cute white and black headband that I really wanted to try.

jen-headband.jpg

Heather’s pattern is free to download and was very simple to use. Her directions and diagrams were great, and this is a great way to use up those skinny pieces of fabric left over. Check it out!

I made these to send off to our Joy and a few other friends who are melting in Mexico.

summer-headbands-2.gif

summer-headbands.gif

Vinyl Tablecloth Beach Bags

Monday, July 23rd, 2007

In a previous post I had toyed with using iron-on vinyl lining to make my bags waterproof, but I think I may have found a simpler, less expensive alternative- just using a vinyl tablecloth. I bought this fun fruity print off a large roll of tablecloth material. It came in a 60″ roll and I got 1 & 1/2 yds. I wanted to make a bag that was waterproof and easy to wipe off, something great to throw your wet towel or suit in after a day at the beach.

tablecloth-bag-1.gif

All you need:
(2) – 24″w x 18″h pieces, cut folded for outer bag and lining (or whatever size you desire)
(1) – 12″w x 10″h piece for outer pocket
1 yard of nylon strap
1 piece of cardboard the size of middle bottom of bag
(1) set of snaps or ribbon for closure

tablecloth-bag-2.gif

1. Fold over top edge of pocket and sew.
2. Choose a front for the bag and pin pocket into place, folding other 3 sides under and sew into place. Then I sewed a straight seam down the middle of my pocket to divide the pocket into 2.
3. Sew the bottom seam and square the corners of outer bag. Repeat for lining. (w or w/o pocket)
4. Measure piece of cardboard based on the squared bottom you now have looking down into your bag. Place cardboard piece on bottom of outer bag. Turn lining bag inside out and drop down into outer bag, lining up the bottom square over cardboard and top edges.
5. With thread and needle sew in 4 places around the outside edges of the cardboard to hold into place. Do not pull too hard on thread or the vinyl can rip. This will secure that the cardboard does not slip.
6. I hammered a silver snap toward the top middle of the bag but am a little worried this may rip when pulled open. I think I will insert ribbon in the next one to just make a center tie.
7. Your bag now is completely assembled except the the unsewn top seam. Fold bag and lining edges over 1/2″ all around, match and pin together. Cut yard of strap in half and line up your 2 straps along the top edge. Sew final seam around top of bag.

You can see that the bag is a little floppy but I used it at the beach and liked it! The fabric and strap total only cost me about $6, and I bought a few packaged vinyl tablecloths in some cool prints for only $3 that I am eager to try.