

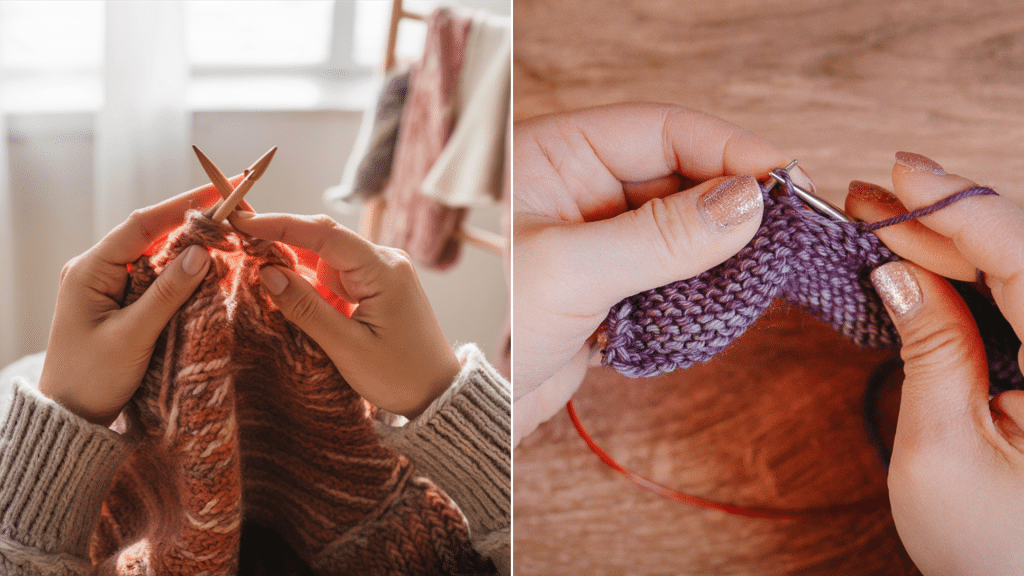
If you’re learning how to knit, you’ll quickly come across two basic stitches: knit and purl. These two stitches form the foundation of almost every knitting pattern.
Understanding how they work will help you create different textures, patterns, and even shapes in your knitting projects.
At first, knitting and purling might seem like opposites, but they are actually closely related. The way you move your yarn and insert your needle determines if you’re making a knit or a purl stitch.
Once you understand how each stitch works, you can combine them in creative ways to create ribbing, cables, and textured fabrics.
In this guide, I’ll cover everything you need to know about knitting vs. purling, including their differences, how to identify them, and when to use each one.
By the end, you’ll have a clear understanding of both stitches and how they work together.
Understanding the Basics of Knitting And Purling
Knit and purl stitches are the foundation of knitting. Once you master them, you’ll be able to create almost any stitch pattern. Let’s break them down.
What is a Knit Stitch?
A knit stitch is the most basic stitch in knitting. To make a knit stitch, you insert the needle from front to back into the stitch, keeping the yarn behind the needles.
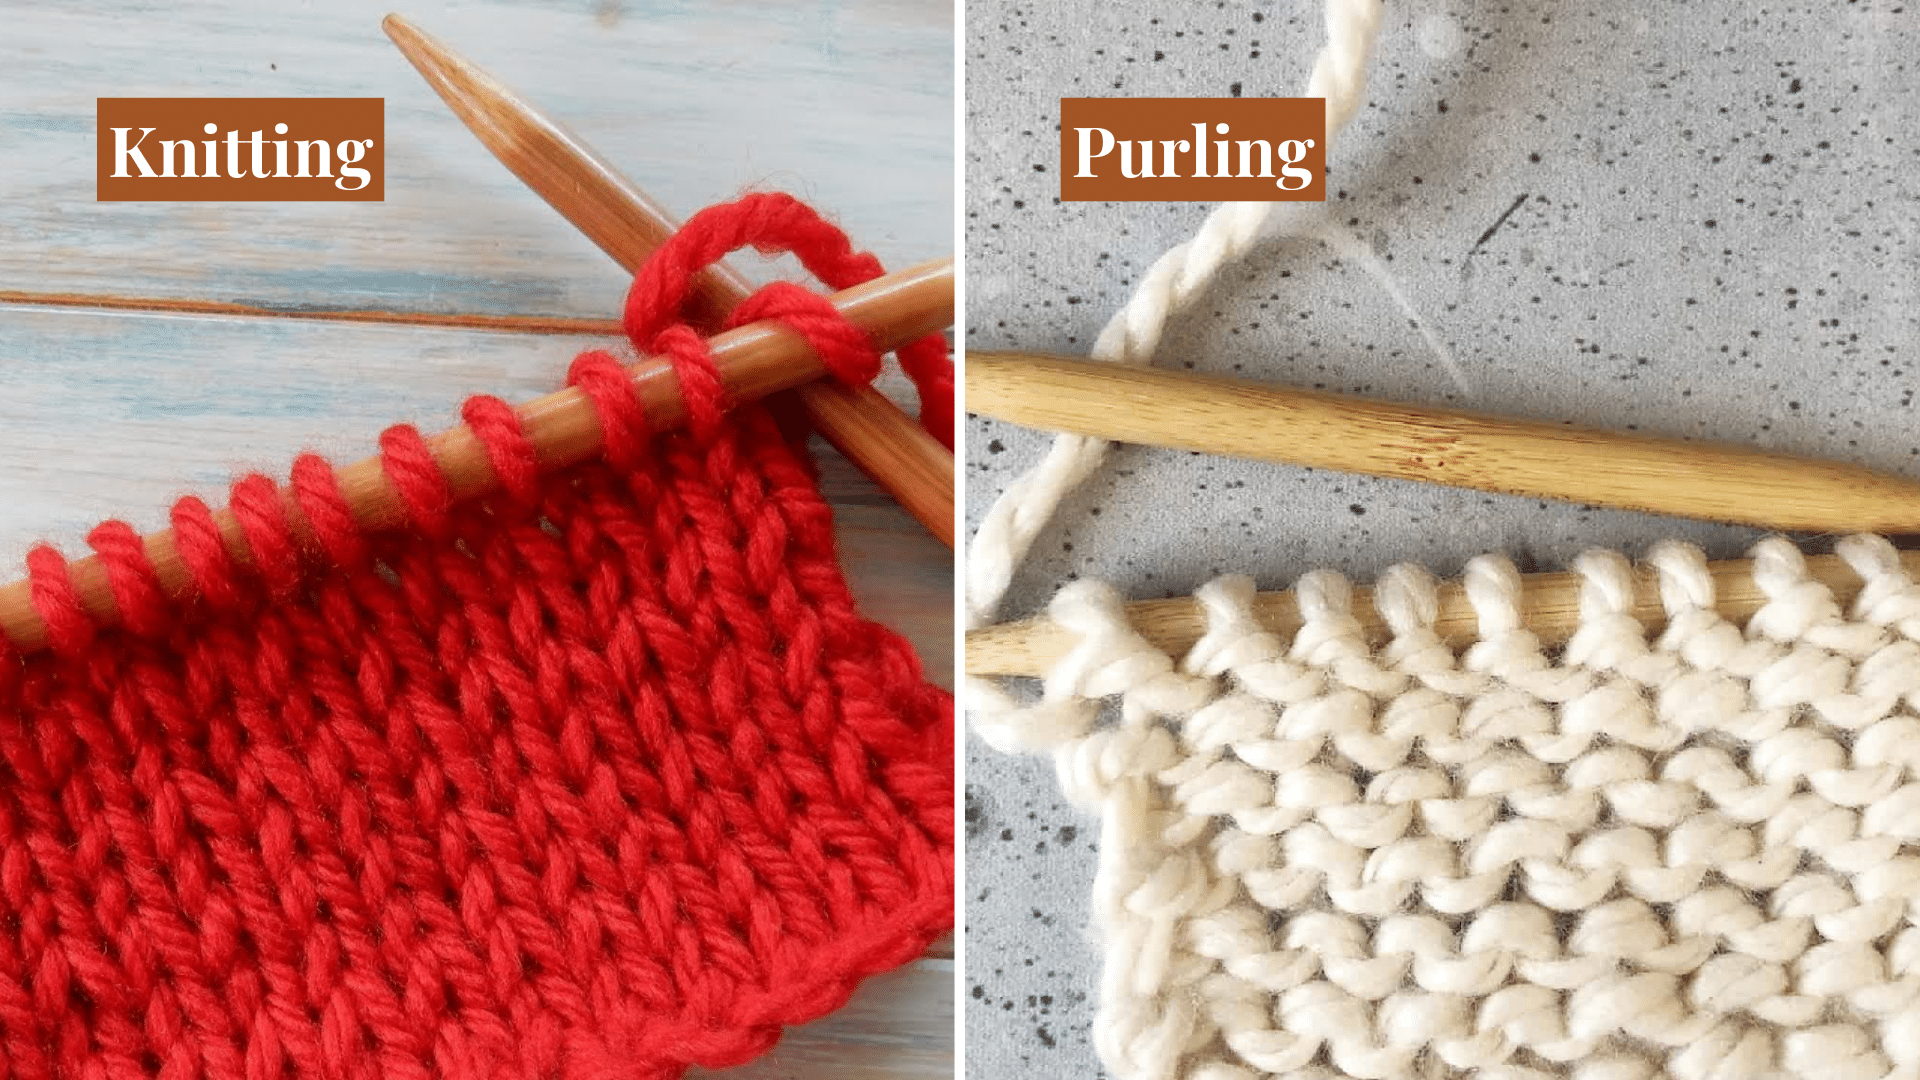
When worked in rows, knit stitches create a smooth, V-shaped texture known as stockinette stitch. If you knit every row, you get a garter stitch, which has a bumpy, textured surface that lies flat.
What is a Purl Stitch?
A purl stitch is like a knit stitch in reverse. You insert the needle from back to front instead of from front to back, with the yarn held in front of the work.
Purling creates a bumpy texture on the right side, which is the wrong side of the stockinette stitch. When you purl every row, you also get a garter stitch since it produces the same bumps as knitting every row.
Knit and purl stitches may seem different, but they work together to create different textures. Understanding them will allow you to follow patterns and make beautiful designs.
Technical Differences Between Knit and Purl Stitches
While knit and purl stitches are similar, a few key details set them apart.
1. Yarn Positioning
- Knit stitch: The yarn stays at the back of the work.
- Purl stitch: The yarn moves to the front before working the stitch.
- Keeping the yarn in the correct position prevents mistakes like unintended yarn overs or twisted stitches.
2. Needle Insertion
- Knit stitch: Insert the right needle from front to back through the loop.
- Purl stitch: Insert the right needle from back to front through the loop.
- The direction you insert the needle determines the stitch’s texture and how the fabric looks.
3. Fabric Texture
- Knit stitches create smooth, V-shaped rows on the right side.
- Purl stitches create bumpy ridges, which are visible on the wrong side of the stockinette stitch.
- Mixing knits and purls can create different patterns, such as ribbing, garter stitch, and seed stitch.
4. Stitch Pairing
- A knit stitch on one side looks like a purl stitch on the other.
- This means that when you knit one row and purl the next, you create a stockinette stitch with a smooth side and a bumpy side.
- Understanding how stitches interact helps you read your work and follow patterns more easily.
5. Ease of Knitting and Tension
- Knit stitches tend to be easier and quicker for beginners since they require less yarn movement.
- Purl stitches require moving the yarn forward, which can slow down knitting and sometimes create looser stitches.
- Beginners often struggle with purling consistently, leading to uneven tension. Practicing both stitches helps maintain even fabric.
While these differences seem small, they have a big impact on how your fabric looks and feels. Learning how to switch between the two is key to making unique designs.
How to Identify Knit and Purl Stitches?
Recognizing knit and purl stitches in your work is an important skill. It helps you track your progress, fix mistakes, and follow patterns with ease.
Since knit and purl stitches look different, knowing how to tell them apart will make your knitting experience much smoother.
Identifying Knit Stitches
Knit stitches create small, V-shaped loops that sit neatly in columns. If you’re working in a stockinette stitch, the knit side is the smooth, flat side of the fabric.
When looking at your stitches on the needle, knit stitches appear as small loops resting behind the needle.
Identifying Purl Stitches
Purl stitches create small bumps or ridges across the fabric. In stockinette stitch, the purl side is the bumpy, textured side of the fabric.
When looking at stitches on the needle, purl stitches sit with the loop in front of the needle, creating a bump.
Identifying Stitches in a Mixed Pattern
- Garter Stitch (All Knits or All Purls): Both sides have bumpy ridges because the stitches stack the same way in every row.
- Ribbing (Alternating Knits and Purls): Knit stitches form vertical “V” columns, while purl stitches form vertical bump columns.
- Seed Stitch (Alternating Knit and Purl in the Same Row): Knit stitches appear as “Vs,” while purl stitches appear as bumps, scattered throughout the fabric.
Learning to identify knit and purl stitches takes practice, but it’s a skill that will make knitting much easier.
By regularly checking your work and observing the stitch patterns, you’ll gain confidence in following patterns and fixing mistakes as you go.
When to Use Knit vs Purl?
Knit and purl stitches are the foundation of all knitting patterns. Knowing when to use each one can help you create the right texture, structure, and elasticity for your projects.
Some patterns rely heavily on knit stitches, while others require a mix of both. Here’s how to decide when to use knit vs. purl stitches.
When to Use Knit Stitches?
1. Creating a Smooth, Flat Fabric (Stockinette Stitch): Knit stitches are used on the right side of stockinette stitch to create a smooth, “V”-shaped texture. This is great for projects like sweaters, scarves, and blankets.
2. Making a Stretchy and Flexible Fabric (Garter Stitch): Knitting every row creates garter stitch, which is soft, stretchy, and lays flat. This is ideal for shawls, dishcloths, and beginner projects.
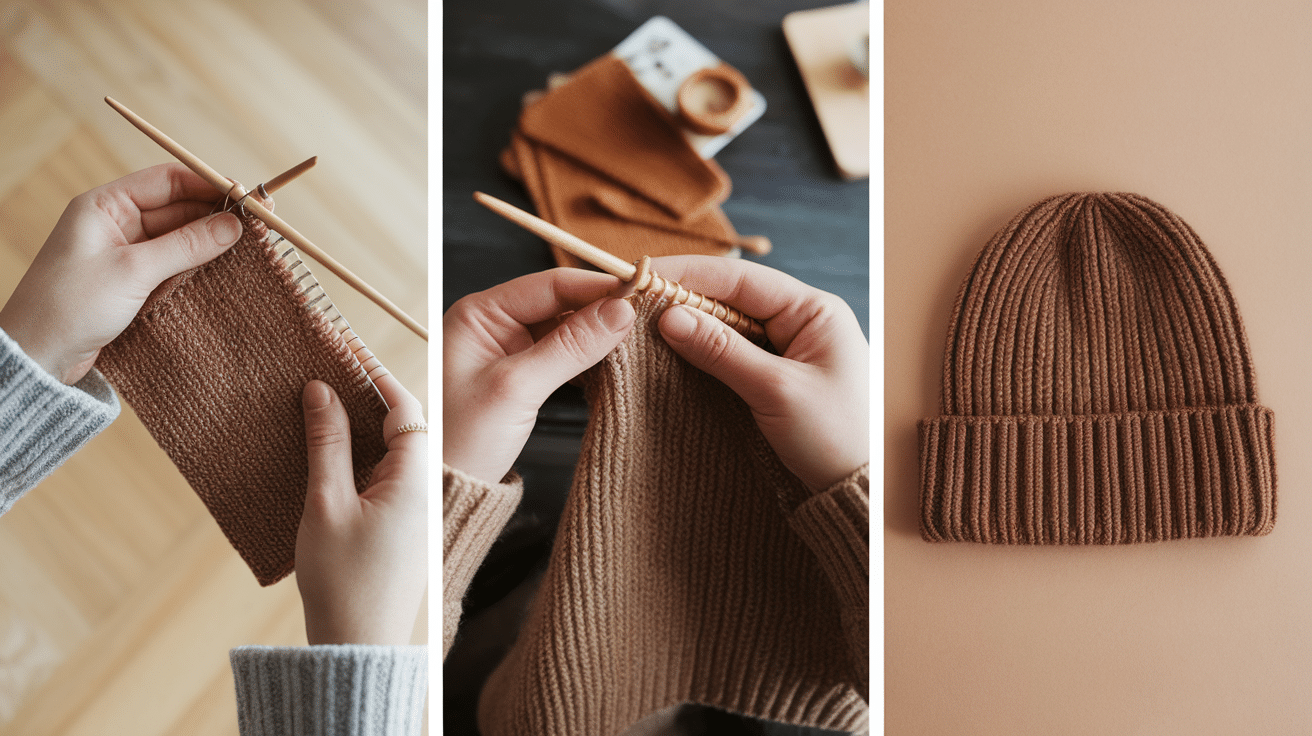
3. Building Ribbing for Edges and Cuffs: Ribbing uses alternating columns of knit and purl stitches (e.g., knit 2, purl 2). Knit stitches in ribbing create the raised sections that give the fabric its elasticity.
4. Adding Structure to Patterns: Knit stitches provide a firm, structured fabric that holds its shape. They work well for structured garments, accessories, and decor items that need a stable foundation.
When to Use Purl Stitches?
1. Creating a Bumpy, Textured Fabric: Purl stitches create bumps, which add depth to knitting patterns. If you purl every row, you also get a garter stitch, which has a rich texture perfect for cozy projects.
2. Forming the Back Side of Stockinette Stitch: In stockinette stitch, purl stitches are used on the wrong side to keep the smooth knit side facing outward. This is why many patterns alternate between knit and purl rows.
3. Making Ribbing Elastic and Stretchy: Purl stitches in ribbing help create the valleys between the raised knit sections. This combination makes ribbing more flexible and ideal for fitted clothing and accessories.
4. Enhancing Decorative Stitch Patterns: Many textured stitches, like seed stitch and moss stitch, rely on alternating knit and purl stitches. Purl stitches help create distinct patterns that stand out in textured knitting.
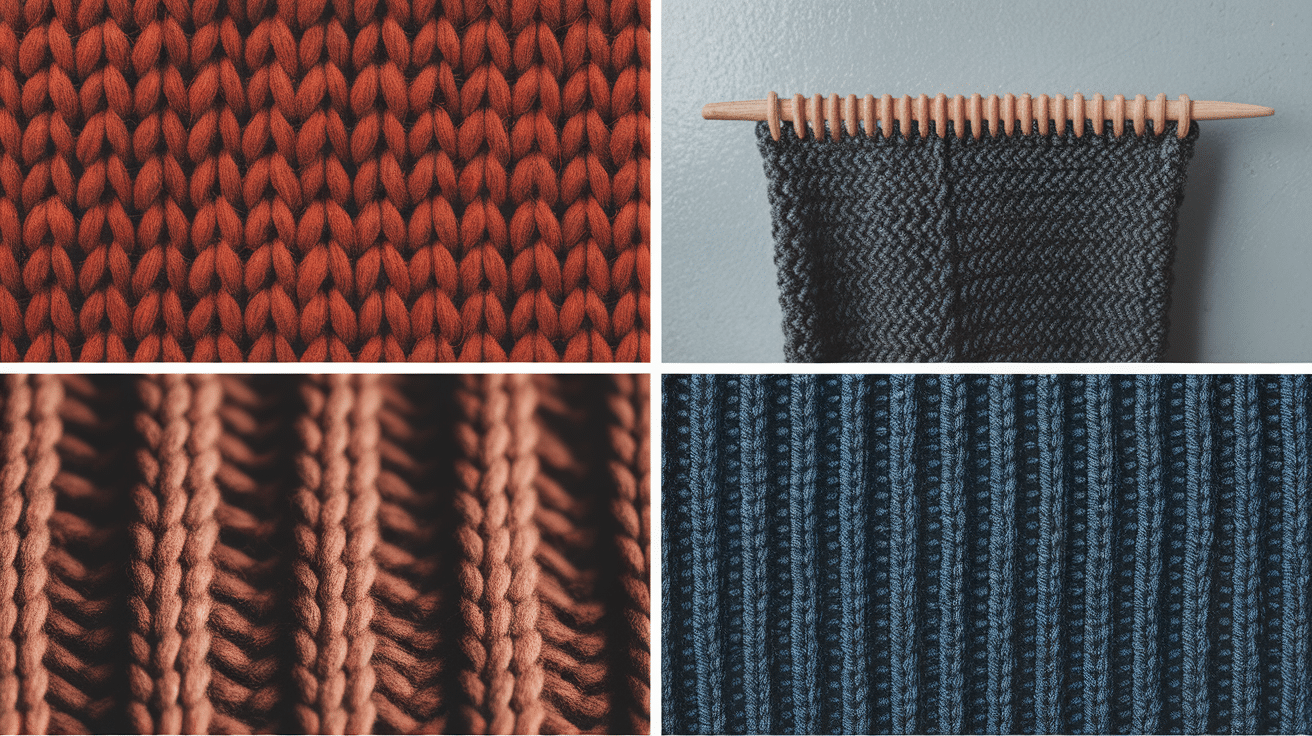
Mixing Knit and Purl Stitches for Unique Patterns
- Stockinette Stitch: Knit one row, purl one row for a smooth, classic look.
- Ribbing: Alternating knit and purl columns for stretchy edges.
- Seed Stitch: Alternating knit and purl stitches within the same row for a bumpy texture.
- Basketweave Stitch: Blocks of knit and purl stitches for a woven effect.
Both knit and purl stitches have their place in knitting, and learning when to use each one will help you create the perfect fabric for your project.
If you’re looking for a smooth texture, stretchy ribbing, or decorative details, combining knit and purl stitches can bring your knitting to life.
Common Stitch Patterns Using Knit and Purl Stitches
Different stitch patterns are created by mixing knit and purl stitches in different ways.
- Stockinette Stitch
- Garter Stitch
- Ribbing
- Seed Stitch
By learning different combinations of knit and purl stitches, you can create a variety of textures and patterns in your knitting projects.
Helpful Tips for Beginners
Learning to knit can feel overwhelming at first, but mastering the basics of knit and purl stitches makes everything easier. With a few simple tips, you’ll build confidence and improve your skills in no time.
- Practice knit and purl stitches separately: Master each stitch before combining them in patterns.
- Use thicker yarn and larger needles: It makes stitches easier to see and handle.
- Keep an even tension: Avoid pulling too tight or leaving stitches too loose.
- Start with simple patterns: Garter stitch and ribbing are great for beginners.
- Use stitch markers: Helps track pattern changes, especially in ribbing or seed stitch.
- Watch tutorials or join a knitting group: Seeing techniques in action can be helpful.
With practice and patience, knitting will become second nature. Focus on the basics, enjoy the process, and soon you’ll be creating beautiful projects with ease!
Conclusion
Knit and purl stitches are the foundation of all knitting. While they may seem different at first, they actually work together to create endless patterns and textures.
Mastering both allows you to make anything from simple scarves to complex sweaters.
By understanding the differences, recognizing stitches, and learning when to use each one, you’ll become a more confident knitter. With patience and practice, you’ll be able to mix knit and purl stitches to create beautiful designs.
So grab your yarn and needles, practice both stitches, and start creating something amazing!
Frequently Asked Questions
Do I Need to Learn Both Knitting and Purling?
Yes! Most patterns use both stitches to create different textures, patterns, and shapes. Mastering both gives you more creative options.
Is Knitting Easier than Purling?
For many beginners, knitting feels easier because it requires less yarn movement. Purling can take more practice to get comfortable.
Can I Mix Knit and Purl Stitches in One Row?
Yes! This is how patterns like ribbing, seed stitch, and basketweave are made. Mixing knits and purls creates unique textures.
Why Does My Knitting Have Random Holes?
This could be due to yarn overs (extra loops) or accidentally dropping a stitch. Count your stitches to ensure consistency.


