


I’ve always loved teddy bears. There’s something so special about a handmade one. If you’ve been thinking about making your own teddy bear, I’ve got a free pattern to share with you!
It’s simple and easy to follow, even if you’ve never made a bear before. You only need a few basic supplies and a little time.
I’ll guide you through every step so you’ll end up with a soft, cuddly bear that’s perfect for hugging or gifting.
It’s a fun project that requires no special skills, just a bit of patience. Making something with your own hands always feels rewarding, and I’m excited for you to try this out. Let’s get started and create your very own teddy bear today!
Why Make Your Own Teddy Bear?
Making your own teddy bear can be a great experience because it’s a fun project that allows you to create something special with your hands.
You can choose your fabrics and colors and even add little details that make the bear one of a kind. It’s also a wonderful gift idea for birthdays, holidays, or any occasion you want to show someone you care.
And there’s something magical about hugging a teddy bear that you made yourself!
Materials You’ll Need
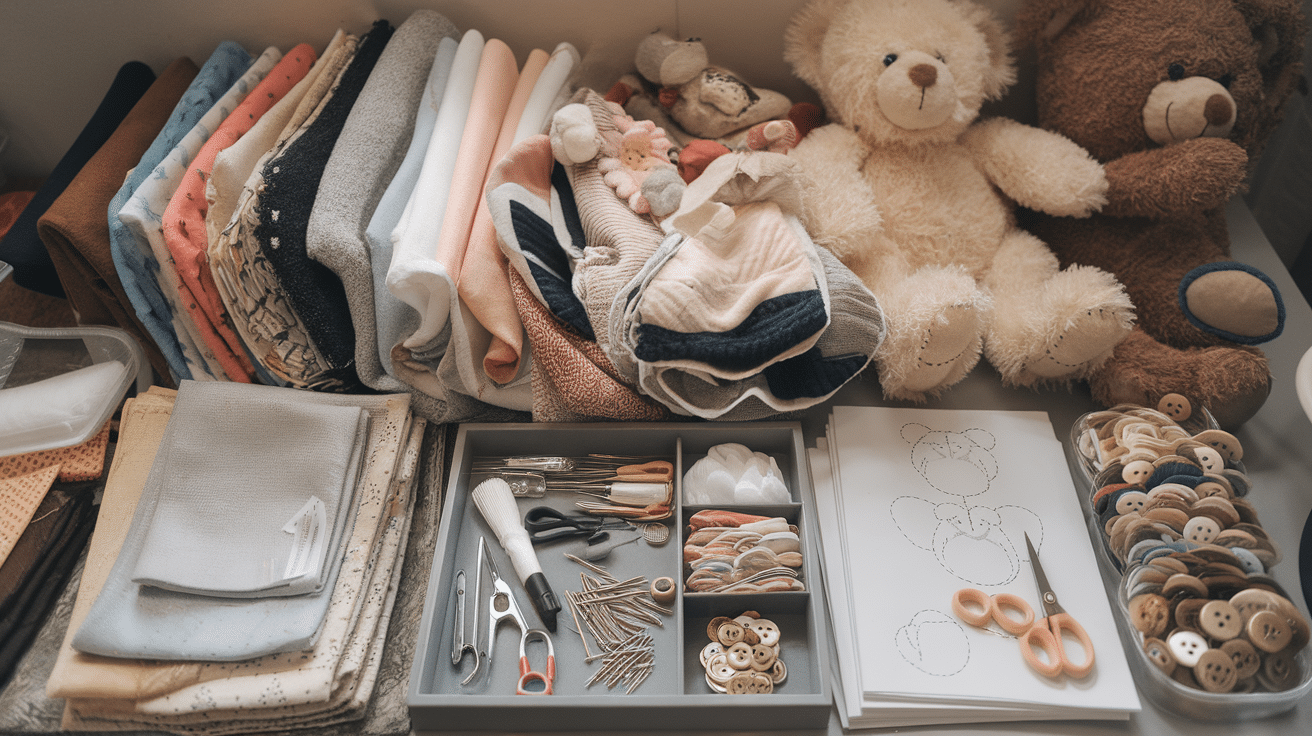
A list of materials you’ll need to make your own teddy bear:
- Fabric: You’ll need soft fabric for the body. Fleece, felt, or cotton are great options for beginners.
- Stuffing: Polyester fiberfill works best, but you can also use cotton or wool.
- Thread: Use a strong thread that matches the fabric color.
- Needles: A sewing needle for hand stitching.
- Pins: To hold the pieces of the bear together while you sew.
- Scissors: To cut the fabric and thread.
- Pattern pieces: These can be printed from online sources, or you can draw your own pattern. Make sure the pattern is easy to follow.
- Buttons or Embroidery Thread: For eyes and any other little details, like a nose or mouth.
Step-by-Step Guide to Make Your Own Teddy Bear
Follow these simple steps to create your very own cuddly teddy bear from scratch.
1. Cut Out the Pattern Pieces
The first thing you need to do is cut out the pattern pieces for your teddy bear. If you are using a free pattern that you found online, print out the pieces and cut them out carefully.
You should have pieces for the head, body, arms, and legs. If you’re drawing your own pattern, make sure each piece is a simple shape like circles and ovals.
Don’t worry about getting the shapes perfect—teddy bears don’t have to be exact, which is part of the fun!
Lay out the pattern pieces on your fabric, and use pins to hold them in place. Then, carefully cut around each piece.
2. Sew the Head and Body Together
Now that you’ve cut out all the pieces, it’s time to start sewing! Begin by sewing the two headpieces together. You’ll want to sew along the edges, leaving a little space at the bottom to stuff the head later.
Use a simple whip stitch or running stitch, and make sure the stitches are small and close together so the seams hold well.
Once the head is stitched together, do the same with the body. Make sure the body pieces are sewn neatly, leaving enough room at the top for attaching the head later.
3. Attach the Arms and Legs
Next, we’ll move on to the arms and legs. Take the arm pieces and sew them together in the same way you did for the head and body.
Do the same for the leg pieces. Remember, you can make your arms and legs as short or long as you like, depending on the style of bear you want.
Once you’ve sewn the arms and legs, it’s time to attach them to the body. Lay the body on its back, and pin the arms and legs in place where you want them to be.
Then, sew each piece securely to the body using a backstitch. Be careful to make sure they are even and balanced.
4. Stuffing the Bear
Now comes the fun part—stuffing! Start by adding small amounts of your stuffing into the head, body, arms, and legs.
Don’t overstuff, as you want the bear to be soft and cuddly, not too firm. Use your fingers to push the stuffing into the corners and curves.
You can also use a pencil or pen to help pack the stuffing into smaller areas like the hands and feet.
Sew up the openings once you’ve stuffed the head, body, arms, and legs. You can use a slip stitch or any other method that will keep the stuffing in place without making the seams visible.
5. Attach the Head to the Body
Now, it’s time to attach the head to the body. This part can be a little tricky, but don’t worry! Line up the neck area of the head with the top of the body.
Pin the pieces in place and sew them together securely. Depending on how you want the bear to look, you can make the neck a little tighter or looser.
Once the head is attached, make sure the stitches are tight so the head doesn’t wobble.
6. Add the Eyes, Nose, and Mouth
At this point, your teddy bear should look almost complete! It’s time to add the facial features. You can either sew on buttons for the eyes or use embroidery thread to stitch simple eyes.
The same goes for the nose and mouth. If you’re using embroidery thread, make sure to keep the stitches small and neat. This will give your bear a cute, friendly look.
If you’re using buttons, make sure to sew them on tightly to avoid them coming loose. Buttons should be securely stitched so they won’t fall off during play.
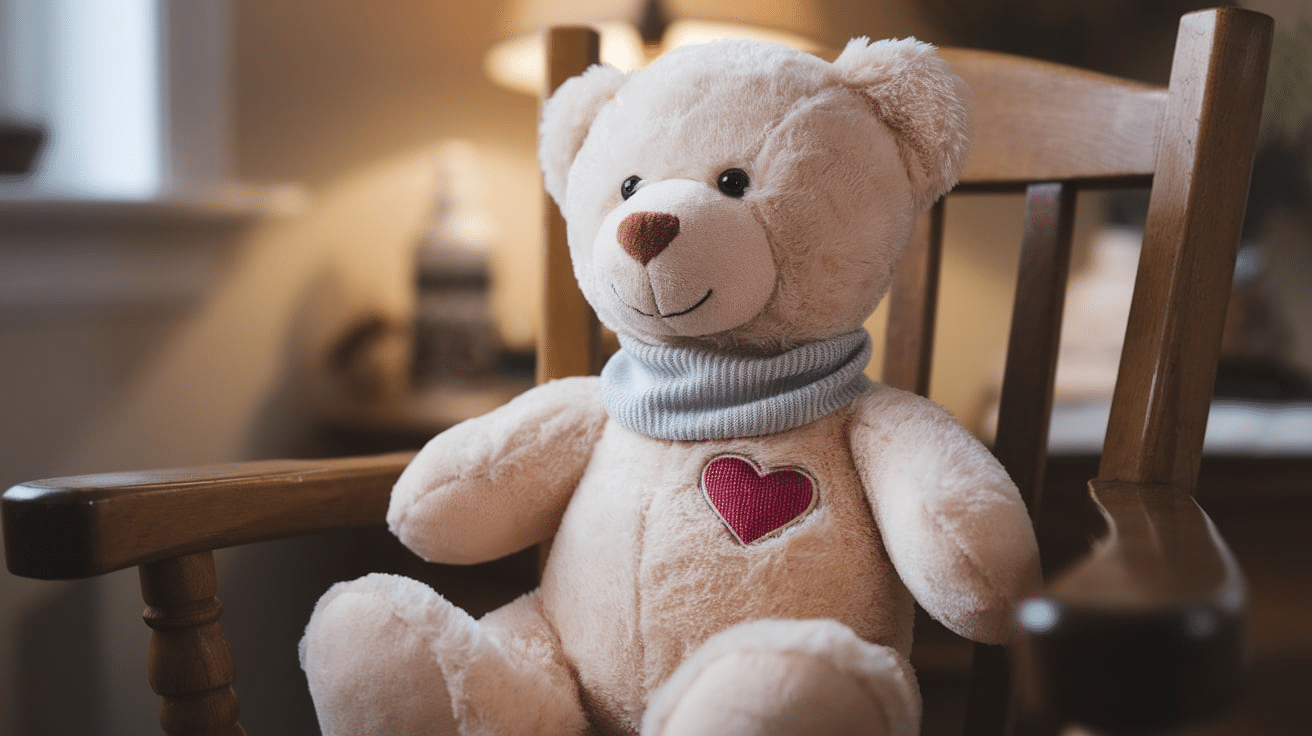
7. Finish Up the Details
Once your bear has a face, you can add some finishing touches. Consider giving your teddy bear a scarf, bow, or even a little clothing.
You can sew small details like a stitched heart on its chest or a patch on its foot. These small details make your bear feel more personal and special.
You can also add any little features you like, such as a tail or paws. Get creative and make your teddy bear truly unique!
8. Give Your Teddy Bear Some Love
Now that your teddy bear is complete, it’s time to give it some love! Take a moment to admire your work.
Your bear is now ready to be hugged, gifted, or displayed. If you’re making your teddy bear for a gift, consider putting it in a cute box or wrapping it up with a ribbon. You can even add a little tag with a message like “Handmade with love.”
For a detailed and visual, follow this YouTube Tutorial by @minkybinkyco:
Choosing the Best Fabric for Your Teddy Bear
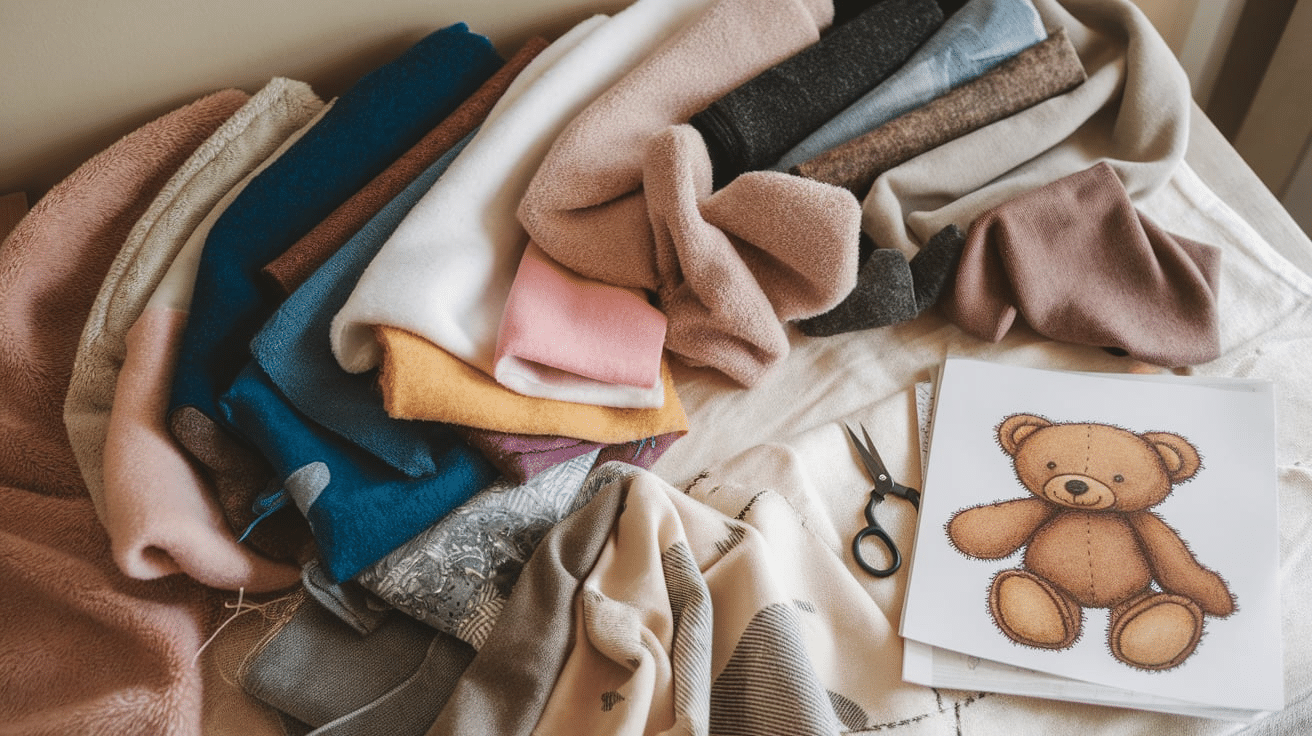
When it comes to making a teddy bear, selecting the right fabric is key. Your fabric will determine how soft, durable, and cuddly your bear will be.
- Fleece: Fleece is one of the softest fabrics you can use for a teddy bear. It’s warm, cozy, and feels great to hug.
- Cotton: Cotton is easy to work with, comes in many colors and patterns, and is a breathable fabric. It’s perfect for making bears with a more classic or vintage look.
- Felt: Felt is a good option if you want a sturdy bear with clean edges. It’s not as soft as fleece or cotton, but it’s still a nice material for making a teddy bear.
- Plush Fabric: Plush fabric is commonly used for store-bought bears. It’s soft and fuzzy, making it perfect for making a bear that feels super cuddly.
Remember, the fabric you choose should be soft enough for hugging and durable enough to hold up during play. Choose a fabric that feels comfortable to you, and that matches the look you want for your bear.
Creative Ways to Customize Your Teddy Bear
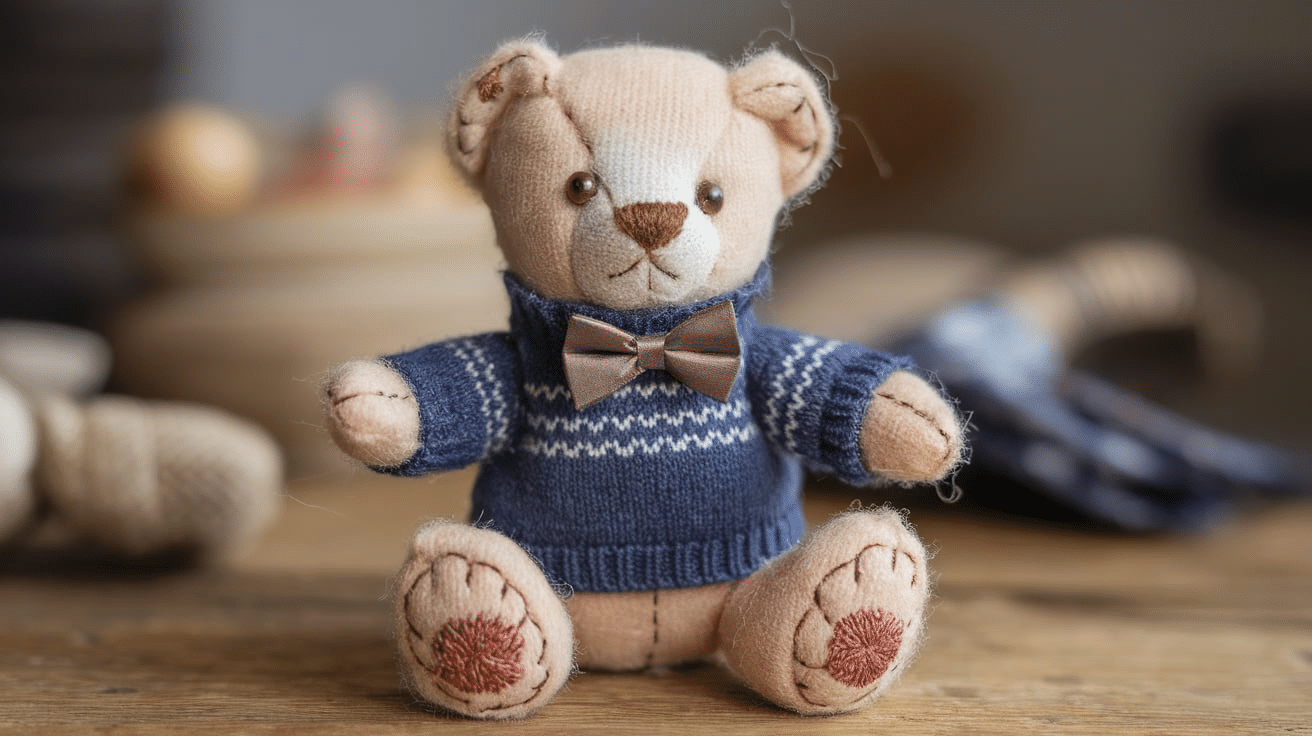
Making your teddy bear is just the beginning! You can make your bear even more special by adding your own creative touches. Some ideas to get you started:
- Clothing: Sew a cute outfit for your bear, such as a dress, jacket, or even a tiny sweater. You can also make accessories like hats or scarves.
- Embroidery: Add custom embroidery to your bear. You can stitch a name, a heart, or even a message to make your bear truly unique.
- Patches: Sew on fun patches to give your bear some personality. You could add stars, hearts, or even a little paw print.
- Custom Eyes and Nose: Instead of using buttons, you can sew your own eyes and nose with embroidery thread for a more personalized look.
With these ideas, you can make your teddy bear stand out and give it a personal touch that shows how much you care.
How to Care for Your Homemade Teddy Bear
Once you’ve made your teddy bear, you’ll want to take care of it to make sure it lasts a long time.
- Spot Clean: If your teddy bear gets dirty, try spot cleaning it with a damp cloth. This will help keep the fabric clean without damaging the stuffing or the bear itself.
- Hand Wash: If your bear is really dirty, you can gently hand wash it. Use mild soap and lukewarm water, and be sure to avoid wringing the fabric.
- Machine Wash: If you’ve used washable fabric and sturdy stitching, you can machine wash the bear on a gentle cycle. However, it’s always best to check the care instructions for the fabric you’ve used.
- Drying: After washing, air-dry your teddy bear by laying it flat on a towel. Avoid putting it in the dryer, as this could damage the fabric or stuffing.
By taking these simple steps, you’ll be able to keep your teddy bear clean and cuddly for years to come.
Tips for Making a Teddy Bear
- Choose the Right Fabric: Soft, plush fabrics are the best choice for teddy bears. Avoid fabrics that are too stiff or rough, as they may make your bear less cuddly.
- Use Small Stitches: Small stitches are stronger and will hold better over time. This is especially important for the head and body seams.
- Be Patient: Don’t rush the process. Take your time and enjoy the making process. Your bear will turn out better if you put in a little extra care.
- Make It Your Own: Feel free to add your own unique touch to the bear. You can change up the pattern, add accessories, or even change the colors to fit your style.
Troubleshooting Common Problems
- Uneven Stuffing: If one part of your bear feels overstuffed or underfilled, try adjusting the stuffing by adding more or removing some. You can always pull out the stitches and add more stuffing if necessary.
- Loose Seams: If your seams start to come apart, re-sew them with stronger stitches. Be sure to backstitch at the beginning and end of each seam for extra strength.
- Face Features Falling Off: If your buttons or embroidery thread start to come loose, make sure they’re sewn on tightly. You can also consider gluing the buttons or using a stronger thread.
Conclusion
Making your own teddy bear is a fun and creative project that anyone can enjoy. It doesn’t require special skills, just time and patience.
You can customize it with different fabrics, accessories, and details that make it truly your own. Once your bear is finished, you’ll have a soft, cuddly friend to keep or gift to someone special.
Taking the time to make something by hand always feels rewarding, and you’ll be proud of the teddy bear you created.
So, gather your materials, follow the steps, and enjoy the process. It’s a great way to tap into your creativity and end up with a cuddly bear you can cherish for years.
Frequently Asked Questions
What can I use for teddy bear eyes if I don’t have buttons?
You can use felt or fabric to create simple stitched eyes or even small beads or beads of thread for a different look.
Can I make a teddy bear without a pattern?
Yes, you can draw your own pattern or improvise by creating basic shapes, but using a pattern will make the process easier, especially for beginners.
How long does it take to make a teddy bear?
The time it takes to make a teddy bear depends on your experience and the complexity of the design. For beginners, it may take anywhere from 3 to 6 hours.
Can I make a teddy bear without sewing?
Yes, you can use fabric glue or fusible bonding tape instead of sewing if you prefer. This is a great option for those without sewing skills.


