


Weaving with yarn is a fun and creative way to make fabric. It has been around for thousands of years and is still popular today. If you want to make scarves, rugs, or wall hangings, yarn weaving lets you create beautiful and useful items.
Weaving is about crossing threads in a pattern. The vertical threads, called the warp, stay in place, while the horizontal threads, called the weft, move over and under them. This simple process can lead to so many designs and textures.
In this guide, I’ll cover the basics of yarn weaving, different techniques, and tips for choosing the right materials. Whether you’re a beginner or looking to improve your skills, this post will help you get started.
What is Yarn Weaving?
Yarn weaving is a way of making fabric by crossing threads over and under each other. It’s one of the oldest methods of creating textiles and is still used today for making clothes, blankets, rugs, and more.
In weaving, there are two main types of threads: the warp and the weft. The warp threads are stretched tightly on a frame or loom, staying in place. The weft threads are then woven through them, going over and under in a pattern. This creates a strong and flexible fabric.
Weaving can be simple or complex, depending on the design and type of yarn used. Some weaves create smooth, even fabric, while others add texture and patterns. Whether done by hand or machine, yarn weaving is a fun and creative way to turn threads into something useful and beautiful.
Different Types of Yarn Weaves
Weaving isn’t just about crossing threads—it’s also about the pattern you create. Different weave structures change how the fabric looks and feels. Some weaves are simple, while others create detailed designs and textures. The most common types of weaves used in yarn weaving are:
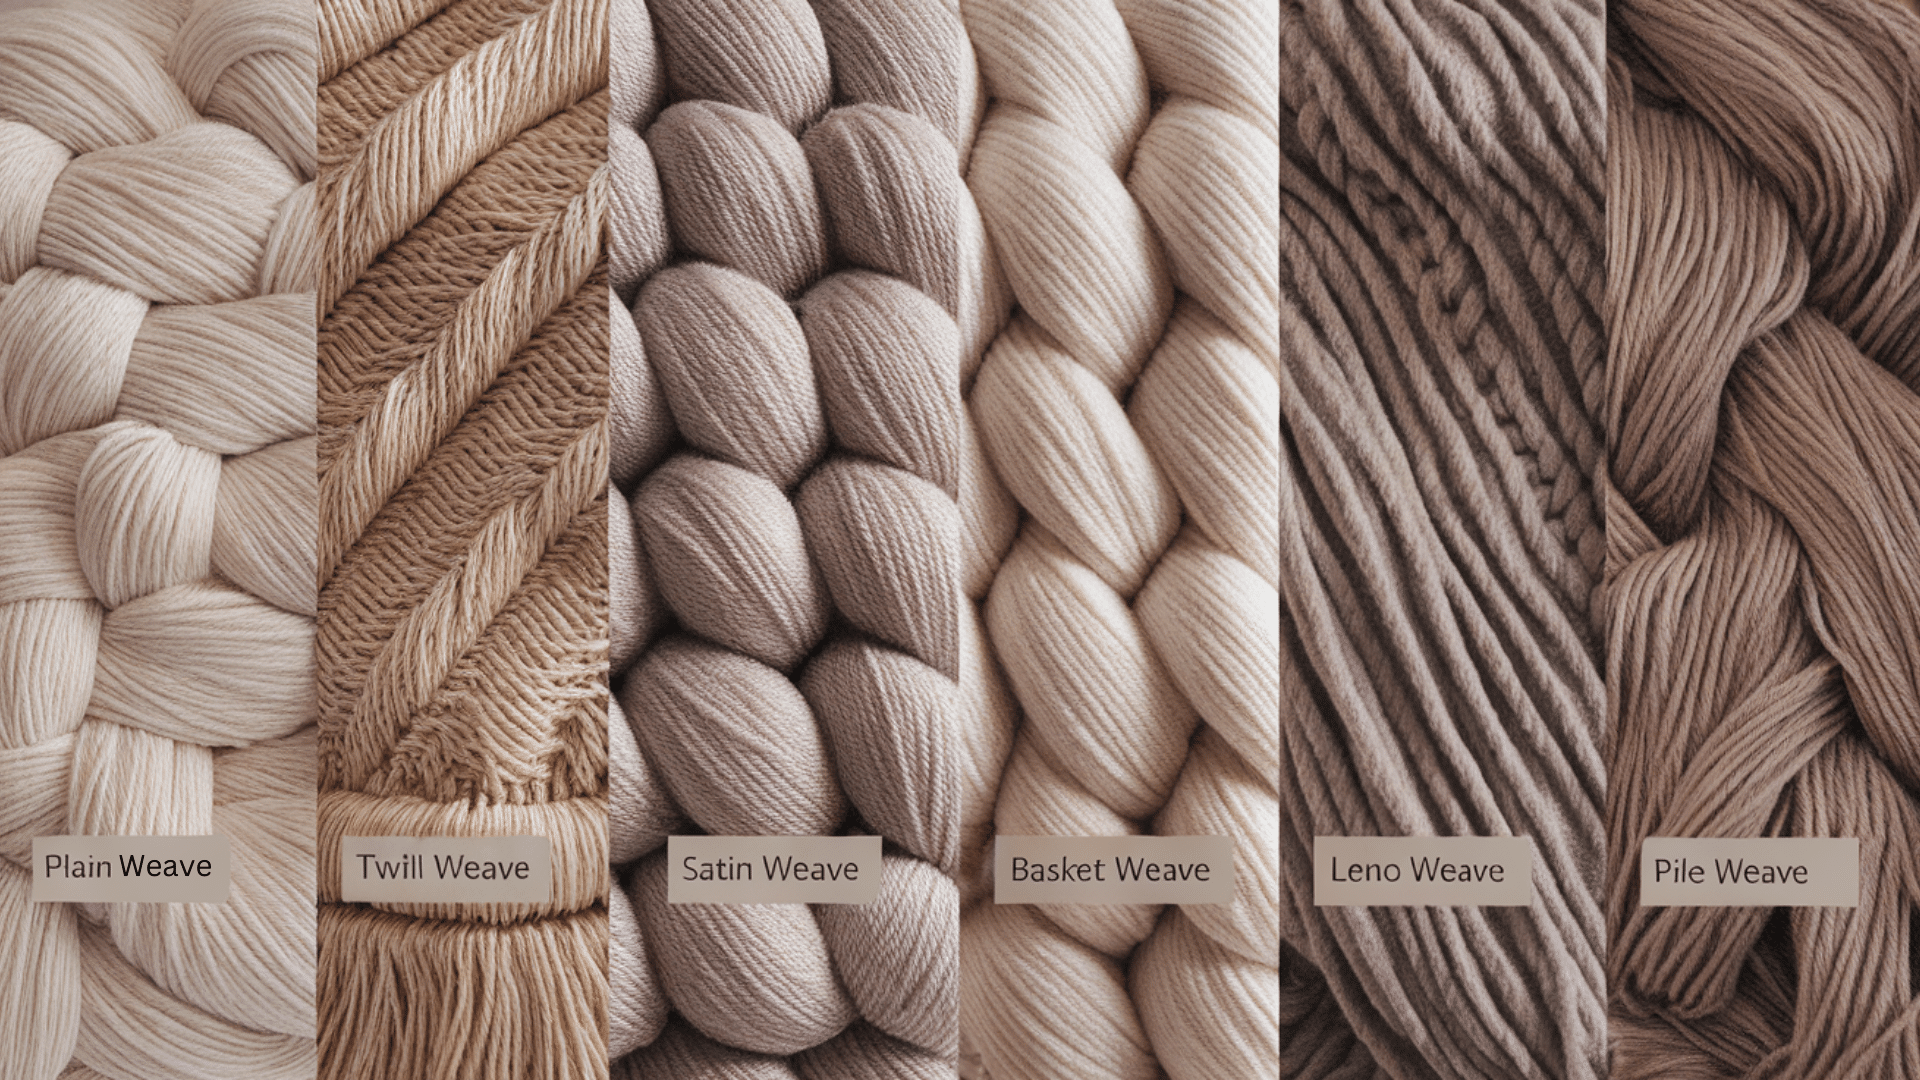
1. Plain Weave
- Plain weave is the simplest and most common type. The weft thread goes over one warp thread, then under the next, repeating across the row.
- This creates a strong, even fabric that works well for everything from clothing to home décor. It’s a great weave for beginners because it’s easy to learn and looks neat.
2. Twill Weave
- Twill weaving creates diagonal lines in the fabric by weaving the weft thread over two or more warp threads before going under. This structure makes the fabric stronger and more flexible.
- Twill is often used for jeans, jackets, and sturdy textiles because it can handle a lot of wear. The slanted design also gives it a stylish look.
3. Satin Weave
- Satin weave makes the fabric smooth and shiny by floating the weft thread over several warp threads before going under. This reduces the number of intersections, giving the fabric a soft, glossy finish.
- It’s commonly used for silk and luxury fabrics. While it looks fancy, satin weave can be delicate and may snag easily.
4. Basket Weave
- Basket weave is like plain weave but with two or more threads woven together instead of one. This makes the fabric thicker and gives it a textured checkerboard look.
- It’s often used for tote bags, upholstery, and rugs because it’s sturdy. The loose structure can sometimes make it less durable than other weaves.
5. Leno Weave
- Leno weave twists warp threads around each other while the weft passes through. This creates an open, airy fabric that doesn’t easily fray.
- It’s perfect for making lightweight curtains, mesh fabrics, and breathable textiles. Even though it looks delicate, leno weave is surprisingly strong.
6. Pile Weave
- Pile weave adds loops or extra threads to create a raised texture, like velvet or terry cloth. The extra threads can be cut for a soft feel (like in velvet) or left uncut for a bumpy texture (like in towels).
- This type of weave makes fabrics feel plush and luxurious. It’s great for adding warmth and softness to textiles.
Each weave structure has a different look and purpose. Plain weave is great for everyday fabrics, twill is strong and stylish, and satin gives a smooth finish. If you want something textured, basket, leno, and pile weaves are fun. The weave you choose will shape how your fabric feels and functions.
Step-by-Step Guide for Yarn Weaving
Weaving with yarn is a fun and relaxing craft that anyone can do. You don’t need a lot of fancy tools to get started—just some basic materials and a little patience. Below, I’ll go over what you need and walk you through the weaving process.
Materials Needed
Before you start weaving, gather these supplies:
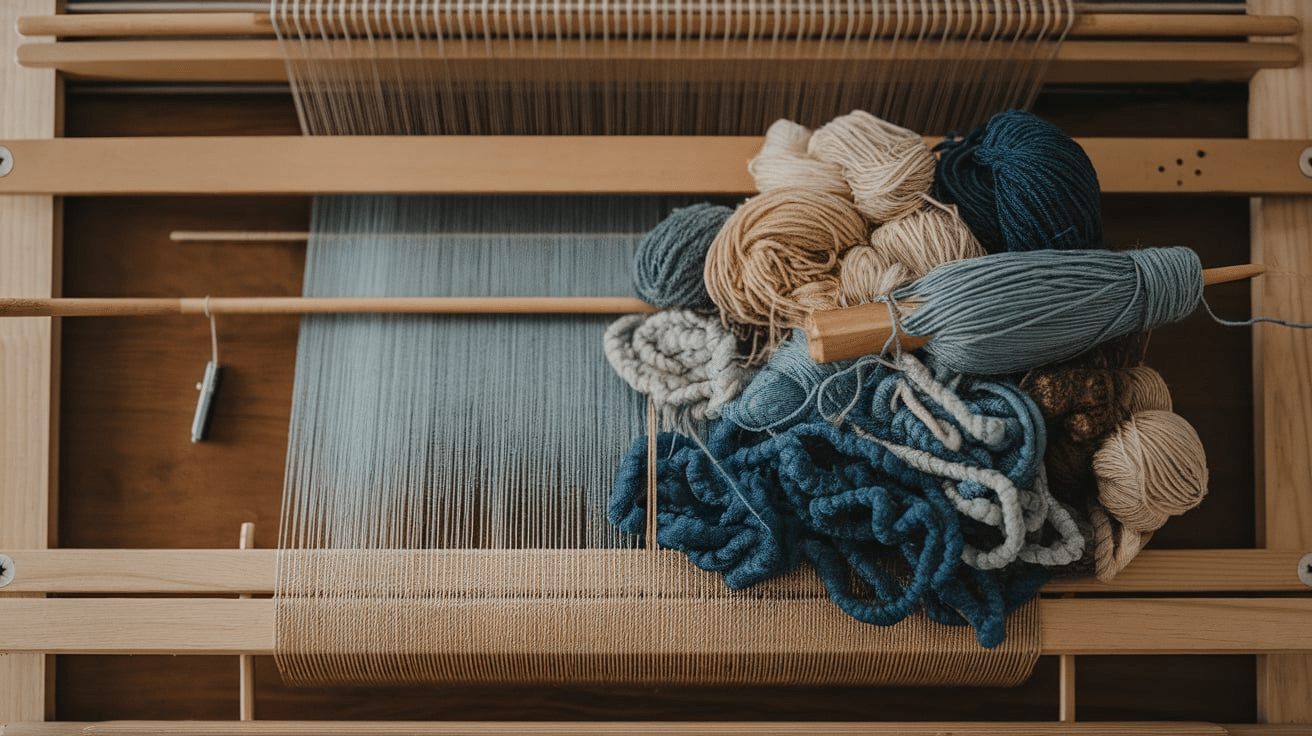
- Loom – A simple frame loom or a DIY cardboard loom will work.
- Yarn – Choose any yarn you like. Thicker yarns make weaving faster, while thinner ones create finer designs.
- Warp Thread – Strong thread that runs up and down on the loom. Cotton works well.
- Tapestry Needle or Shuttle – Helps guide the yarn through the warp threads.
- Comb or Fork – Used to press the yarn down and keep the weave tight.
- Scissors – For cutting yarn and trimming loose ends.
- Stick or Dowel (Optional) – For hanging your finished piece if making a wall hanging.
Step 1: Set Up the Warp Threads
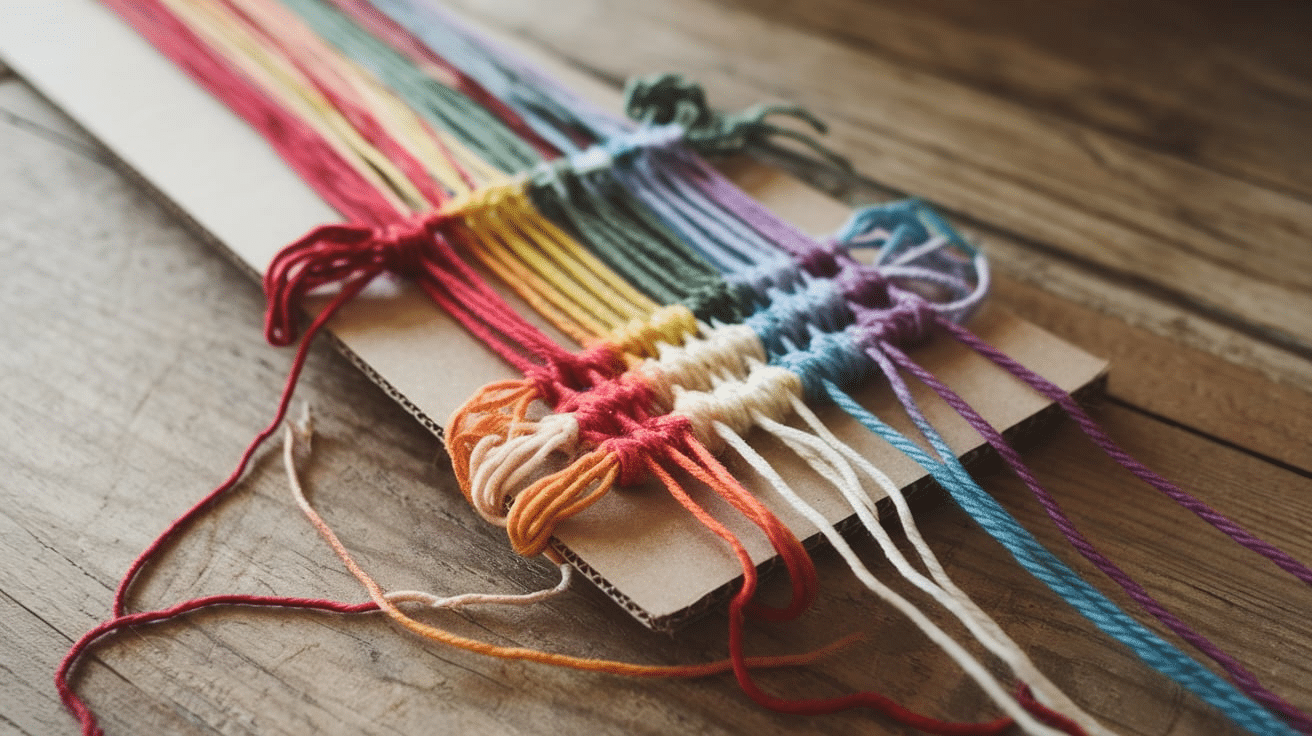
Start by stretching your warp thread onto the loom. Wrap the thread from top to bottom, keeping the tension even. These threads will stay in place while you weave the weft yarn through them. If using a cardboard loom, cut small notches at the top and bottom to hold the thread in place.
Step 2: Choose Your Weft Yarn
Pick the yarn you want to use for weaving. You can use one color or mix different colors to make patterns. If you want a textured look, use yarns with different thicknesses or materials. Experimenting with different fibers can also change the feel and durability of your woven fabric.
Step 3: Start Weaving
Thread your yarn onto a tapestry needle or shuttle and begin weaving it through the warp threads. Go over one thread, then under the next, repeating across the row. On the next row, do the opposite—go under where you went over before. This is called a plain weave and is the easiest pattern to start with.
Step 4: Push the Weft Down
After weaving a few rows, use a comb or fork to press the yarn down gently. This helps keep the weave even and tight. Repeat this step as you continue weaving to prevent gaps and maintain a consistent pattern throughout your project.
Step 5: Add Colors or Patterns (Optional)
If you want to change colors, cut the yarn and start with a new color. You can also try different weave patterns like twill or basketweave to create different textures. Just follow the same over-and-under technique in a different order. Blending colors gradually or using contrasting shades can add depth to your design.
Step 6: Finish the Weaving
Once you reach the end, cut the weft yarn and tuck the loose ends into the weave using a needle. Carefully remove the warp threads from the loom and tie knots at the ends to keep the weave secure. Trim any excess yarn and smooth out the fabric to give it a neat and finished look.
Weaving is a simple but creative process. You can make anything from wall art to blankets with just a loom, some yarn, and a little patience. Start with a basic weave, then experiment with colors and textures to make it your own.
Selecting the Right Yarn for Weaving
The type of yarn you use affects how your fabric looks, feels, and holds up over time. With so many options available, deciding which one is best for your project can be tricky. Here’s a simple guide to help you pick the right yarn for weaving.
1. Fiber Type: Natural vs. Synthetic
Yarns come in different materials, and each has its benefits.
- Cotton – Strong, smooth, and great for beginners. It’s good for table runners, towels, and lightweight fabrics.
- Wool – Warm and soft, perfect for blankets and scarves. It can also add texture to your weave.
- Linen – Durable and breathable, best for making crisp fabrics like placemats.
- Silk – Shiny and smooth, ideal for fancy, delicate fabrics.
- Acrylic & Other Synthetics – Affordable and easy to care for, but not as strong as natural fibers.
2. Yarn Weight and Thickness
The thickness of the yarn changes how the fabric looks and feels. If you’re a beginner, medium-weight yarns (like worsted-weight cotton or wool) are easier to work with.
- Thick yarns create soft, chunky weaves and work up quickly.
- Thin yarns make finer, more detailed fabrics but take longer to weave.
3. Texture and Finish
Some yarns are smooth, while others are rough or fluffy. The texture of the yarn will change how the final fabric feels. If you want a tight, structured weave, go for smoother yarns. For a more relaxed, decorative weave, try textured yarns.
- Smooth yarns (like cotton and silk) create clean, even weaves.
- Textured yarns (like boucle or hand-spun wool) add depth and a unique look.
4. Stretch and Strength
Some yarns stretch a lot, while others stay firm.
- Non-stretchy yarns like cotton and linen are easier to control and great for projects that need structure.
- Stretchy yarns like wool and some synthetics can be trickier but create soft, flexible fabrics.
The right yarn depends on what you want to make. Consider thickness, texture, and color when choosing your yarn. Once you find the right one, weaving will be much easier and more fun!
Creative Yarn Weaving Projects
Weaving isn’t just about making fabric—it’s a great way to create art and useful items. Whether you’re a beginner or more experienced, there are plenty of fun projects to try. Here are some creative ideas to get you started.
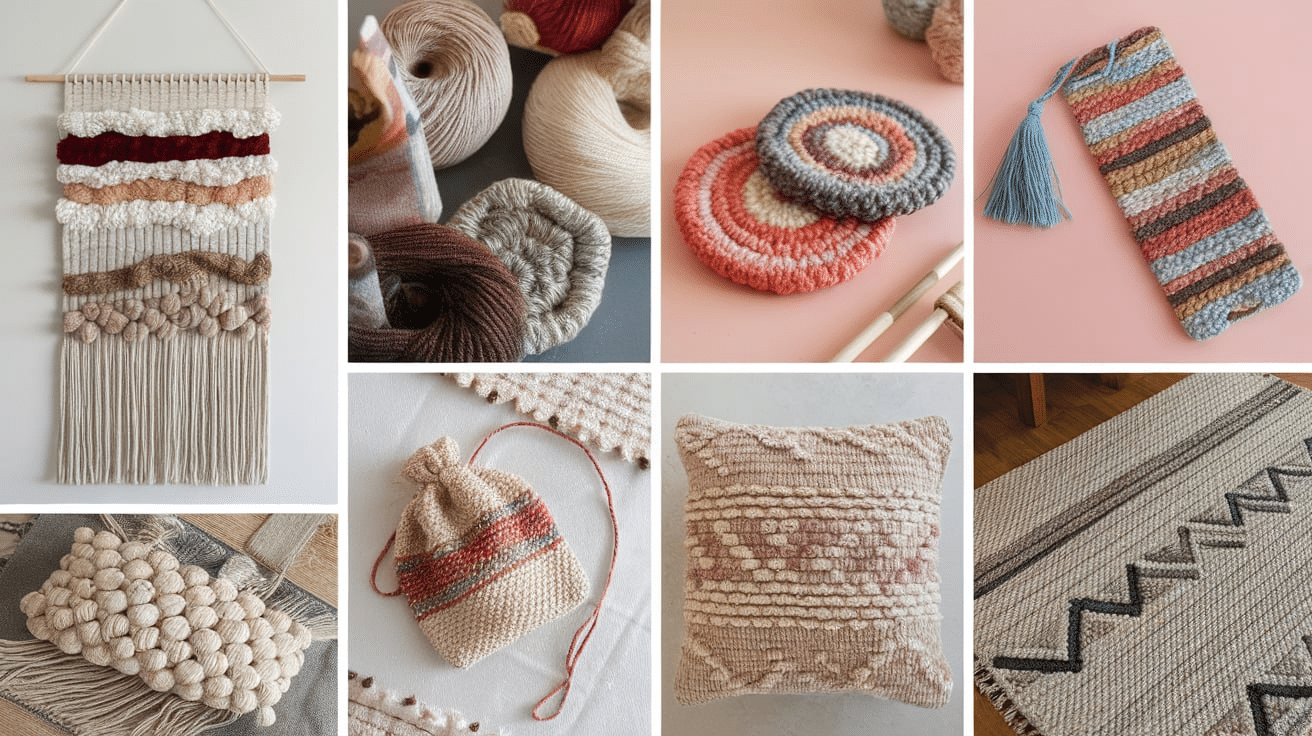
1. Woven Wall Hangings: You can use different colors, textures, and patterns to create unique designs. Add fringe or knots for extra style. Once finished, hang it on a wooden dowel or branch for a handmade decoration.
2. Coasters and Placemats: Small woven pieces like coasters and placemats are perfect for practicing different techniques. These projects are quick to make.
3. Woven Bookmarks: Use thin yarn or embroidery thread to create a lightweight design. You can add tassels or beads for extra detail. These make great personalized gifts for book lovers.
4. Handwoven Bags: Use strong yarn like wool or cotton to make a sturdy fabric. Once woven, sew the edges together and add a strap or zipper to complete your handmade accessory.
5. DIY Rugs or Floor Mats: Thick, durable yarn works best for this type of weaving. Try using recycled fabric strips for a colorful, eco-friendly rug. These make great additions to bedrooms or entryways.
6. Woven Pillow Covers: Make your own textured pillow cover by weaving a fabric panel and sewing it onto a cushion. You can use chunky yarn for a cozy feel or mix different weaving patterns for an eye-catching design.
7. Clothing Accessories: Woven belts, headbands, and wristbands are fun projects that let you experiment with colors and patterns. You can weave them on a small loom or braid yarn together for a stylish look.
Common Weaving Issues and How to Fix Them
Weaving is fun, but sometimes things don’t go as planned. Uneven edges, loose threads, or broken warps can make your project frustrating. Here are some common problems and how to fix them.
1. Uneven Edges (Selvages): If your edges are wavy or uneven, it’s usually because of pulling the weft too tight. Keep your weaving relaxed and ensure each row is placed evenly. Use a ruler or comb to press down the yarn.
2. Loose or Gappy Weaving: If your weave looks too loose, with big gaps, you may not be pressing the weft down firmly enough. Use a comb or fork to push the yarn into place gently after every few rows.
3. Warp Thread Breaking: Warp threads can break if they’re too tight or if you’re using a weak thread. Choose a strong cotton or linen warp thread. If a thread breaks, tie a small knot and continue weaving.
4. Weaving Getting Narrow: If your project starts wide and gets thinner, you might be pulling the weft too tightly at the edges. Try using a loose, even tension when weaving from side to side.
5. Weft Yarn Running Out Mid-Row: If your yarn runs out in the middle of a row, cut a new piece and tuck the ends into the weave. This helps blend the new yarn in smoothly. You can also leave a small tail and weave it back in later.
6. Mistakes in the Pattern: If you notice you’ve skipped a warp thread or made a mistake in the pattern, you can carefully unweave a few rows and redo them. It’s better to fix mistakes early rather than wait until the end.
7. Fabric Curling or Warping: If your woven fabric curls up or looks uneven, it might be due to different yarn thicknesses or too much tension. Try using a more balanced yarn. Blocking your fabric can also help smooth out bumps.
Weaving takes practice, and small mistakes are part of the learning process. The more you weave, the better you’ll get at keeping things even and fixing little errors along the way.
Conclusion
Weaving with yarn is a fun and rewarding craft that lets you create all kinds of unique and useful things. Whether you’re making wall hangings, coasters, or even rugs, each project helps you learn new skills and techniques.
At first, keeping your edges straight or fixing mistakes might feel tricky, but with practice, weaving becomes easier and more enjoyable.
The best part about weaving is that there are no strict rules—you can experiment with different yarns, colors, and patterns to make something that reflects your style and personality.
So grab some yarn, set up your loom, and start weaving! If you’re a beginner or looking to improve, the most important thing is to have fun and enjoy the creativity of making something by hand.
Frequently Asked Questions
What materials do I need to start weaving?
You’ll need a loom, warp thread, yarn, a tapestry needle or shuttle, a comb or fork for pressing, and scissors.
What is the difference between warp and weft?
Warp threads run vertically and stay in place, while weft threads go horizontally, weaving over and under the warp. Together, they create the fabric.
What is a simple weave pattern for beginners?
The plain weave is the easiest pattern. The weft thread goes over one warp thread, then under the next, repeating across the row. The next row does the opposite.
Can I mix different types of yarn in one project?
Yes! Mixing yarns of different materials, colors, and thicknesses adds variety and interest to your weave.
What’s the best way to learn weaving?
Start with a simple project, watch tutorials, or read beginner weaving guides. Practice is key—don’t be afraid to experiment and learn as you go!


