genericviagra

buy cheap cialis pill online lloyds pharmacy viagra cheapest without prescription farmacia online alprostadil

viagra no prescription required

cheap without prescription Cialis Super Active online meds where can i buy viagra cheap without prescription brand viagra online sildenafil online

canadian discount pharmacy

cheap without prescription Generic Levitra purchase tadalafil amoxicillin no prescription cheap without prescription pill online buy cheap generic viagra

yohimbe

Generic Viagra buy cheap cheap cialis impotence treatment cheapest without prescription buy viagra online stamina rx

buy prescriptions

buy cheap Viagra Super Active sildenafil citrate tablets soma pharmacy buy online cheap pharmacy cialis online

next day cialis

Zithromax cheap without prescription viagra sale online abortion pill online cheapest without prescription brooks pharmacy no prescription required

online pharma

buy cheap Viagra Soft viagra price comparison can i buy viagra online buy online order kamagra net pharmacy

viagra herbal

cheap without prescription Xenical discount viagra online lowest price viagra cheapest without prescription get viagra prescription online doctor

cialis generic

Levitra cheapest without prescription canadian rx canadian viagra online buy cheap canadian prescription drugs buy amoxil

Archive for the 'Sewing' Category

Farbenmix

Wednesday, April 30th, 2008

farbenmix.gif


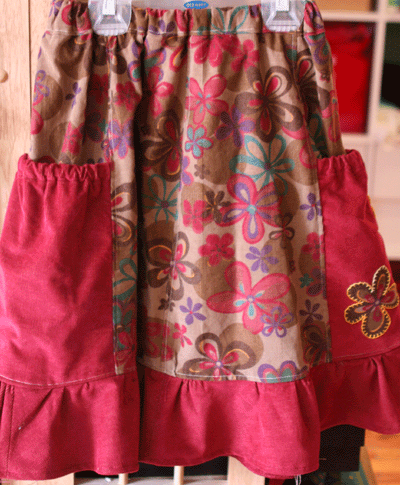
I finally found the time to make this skirt from this pattern:


emily.jpg

Farbenmix is a German company, thus the European sizing. Their patterns are pretty straightforward and leave you with lots of room to personalize the finished piece. You can access step-by-step, illustrated instructions in English for many of the models. They also feature examples of many variations for each pattern to inspire your inner designer. And, for all you craft fair participants and etsy shop owners, they allow you to sell your finished piece based on their pattern as long as you are selling individual items and not churning out mass produced clothing. This is a list of their retail partners including some American online shops.

P.S. No, this is not a paid endorsement, I just like their stuff. :)

Half-hour Kid’s Summer Quilt

Sunday, April 27th, 2008

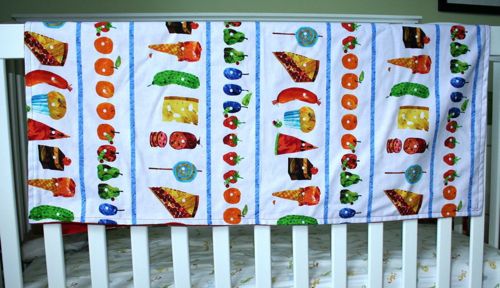
This is my first, simple attempt at “quilting”. Using only 1 yard each of 2 fabrics I made a lightweight summer toddler quilt.

img_2081.jpg

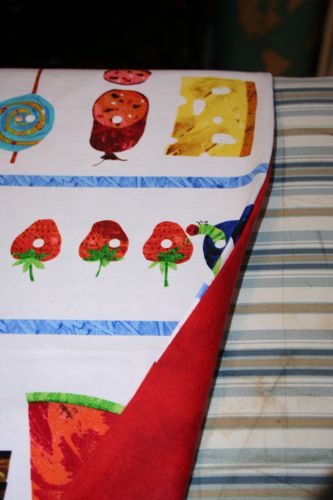
Now that I have done this once, I think I can seriously do it in half an hour (and you can too!) For the front I used 1 yard of nice cotton fabric- I love this series of prints from “The Hungry Caterpillar” books. The backing is 1 yard of lightweight cozy quilting fleece, a marbled red.

1) Line up fabrics wrong sides together and sew around 3 sides. I used a serger on all 3 sides but you could use a regular sewing machine too.

img_2061.jpg

2) Turn fabric so it is right-side out and press neatly around all 3 sewn sides. Fold 4th side under and sew across the edge, starting and stopping just short of each corner.

img_2064.jpg

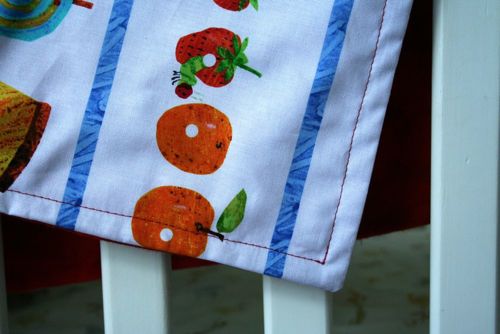
3) Lastly, starting with the 4th edge just sewn, sew on top of the fabric around right-side edge, turning just short of each corner. This will hold the 2 pieces together. I could have also sewn across the blue stripes for added accent since this fabric is patterned this way (but before sewing around right-side edge). You could also sew a pattern on top, or around the characters on the fabric.

img_2084.jpg

Very quick, easy and inexpensive! Great for summer traveling, picnics, for a crib or pack n’ play!

Scrap Sack

Monday, April 21st, 2008

I really should learn better how to conserve my fabric and cut things out better because I am always left with these skinny fabric strips leftover. Am I really going to use it if I keep it? Should I get rid of them? …This debate gets me at the end of every project because I hate wasting fabric! But this bag turned out pretty cute so I think I am going to rummage through that bag of scraps that yes, I did keep and see what I can salvage.

black-stripe-tote-1.gif

I love this fabric and went back to buy it numerous times until one day it was gone forever. I had a request for another bag out of it and only had 2 long, skinny strips left. I don’t like to sew a seam across the middle of a bag so I used extra wide grosgrain ribbon to hide where I sewed the 2 strips together. With fabrics wrong side, I lined up my 2 strips and inserted the ribbon in to sew between. I used this kind of ribbon for the handle too and like the layered look that the ribbon gave to the body of the bag. You could try this obviously with skinnier ribbon or with multiple rows if you have several strips you want to use up. I am excited to revisit some scraps I had doomed to the attic!

black-stripe-tote-2.gif

Magically this lined up almost perfectly, which I didn’t notice until I took the pictures!

Love my Serger/Hemming Jeans

Sunday, April 13th, 2008

img_2022.jpg

Tada! This is the beautiful serger that I got for Christmas! (Thanks family, I am finally using it!) It was intimidating to even get it out of the box but I am hoping that it will really make my sewing look more professional and many projects much quicker, so it’s plugged in now!

img_2017.jpg

One of the first uses I had for it was hemming a pair of jeans. Apparently alterations are a dying art and everyone that enters my house and sees my machine ends up coming back with pants to shorten. I hate turning denim over twice and breaking multiple needles trying to get over the side seams, so I let the serger cut the fabric and edge the bottom of the jeans. Then I just had to turn them under once and sew the hem on my regular sewing machine. It went really quickly so bring them on friends, I’m equipped now!

img_2019.jpg>

Little House in the Big City

Friday, April 4th, 2008

img_9072web.gif


Remember Little House in the Big Woods by Laura Ingalls Wilder? While I was making this afghan I was reminded of all the craft projects described in that book. I thought that this would be the sort of thing that Laura’s mother would put together for her girls as a Christmas present (except it wouldn’t be cashmere, and the sweaters wouldn’t have originated in China, and [fill in the blank]).

So, these are the steps I followed to put the blanket together:

Materials

  • 3 sweaters — The final product measured 42″ x 52 1/2″. You could felt the sweaters, but I wanted to maintain the light, airy feel of the original knit.
  • Bias tape or scrap fabric to make your own tape
  • 8 1/2″ x 8 1/2″ template to cut out the squares. (Guess why it’s that size :) )
  • Lots of thread (zigzagging takes way more thread than I had anticipated)

Step One

Cut out 30 squares. I wanted to show off some of the details of the sweaters. Consequently, I included side seams, shoulder seams, ribbing, and pockets in the squares.

mosaic2125613web.gif

Also, don’t forget that the “wrong” side may end up being the “right side.

Step Two

Lay out your design.

Step Three

Sew. Using a zigzag stitch at the widest setting, sew together strips of 6 squares each abutting the edges. You could also overlap the edges, whatever technique you prefer.

img_9043web.gif

Next, put the 5 strips together by first joining the “intersections” of the squares and then sewing down the length of the strip. You now have a 5 x 6 square blanket.

Step Four

Finish the edges. Originally, I intended to blanket stitch around the whole thing. Then I watched Amy Karol’s Bias Tape tutorial, read about this nifty tool on Alicia Paulson’s blog Posie gets Cozy and decided to make my own tape.

img_9060web.gif

This is a 1/2″ tape maker. They come in different sizes, but this is the only one they had at my corner store. You cut up your fabric to the requisite width, feed it through the tape maker and it comes out perfectly folded on the other side. You then fold the tape in half and iron it flat.

Next, you open up your store bought or home made tape (see Amy’s tutorial for the finer points of sewing on store bought tape) and align the edge of the tape to the edge of the blanket. Sew along the line created by the fold closest to the edge.

img_9051.gif

For instructions on how to create mitered corners, follow Alicia’s tutorial.

Once you’ve attached the binding to the edge, flip the binding over to the other side and top stitch alongside the folded edge.

img_9096web.gif

That’s it.

You can add an appliqué or two if you wish or just leave it as it is.

img_9085web.gif

I’ve set up a Flickr group where you can share your creations at www.flickr.com/groups/sweaterblankets/.


Tea Towel Apron II

Thursday, March 13th, 2008

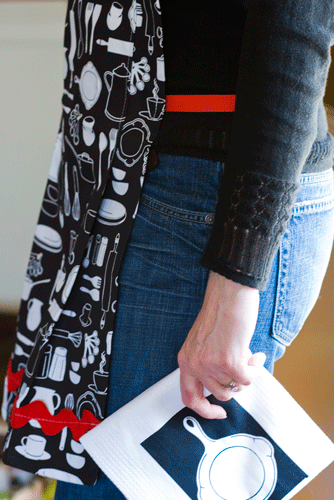
This really cute towel screamed Apron to me and it was so easy to make!

apron-1-cd.gif

This towel set came folded in thirds so I used the pleats to narrow this towel to better fit as an apron. I made a 2″ overlap from the pleat on the right and left and pinned the neck strap within the pleats. Then sewed across the top, securing the neck straps. Next I measured 15″ down from the top and sewed down the pleats. This left it to flair like a skirt a little at the bottom.

apron-side-cd.gif

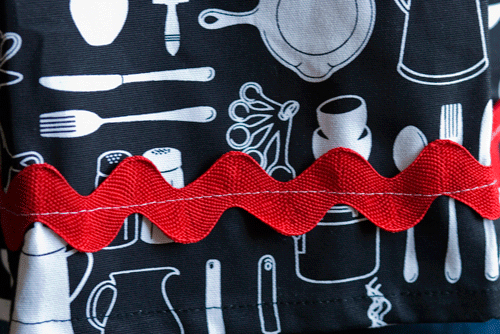
I tucked the ric rac ends under on the back side and sewed down the middle of the ric rac on the front. This would be such an easy way to make any color combination to match any kitchen.

apron-detail-cd.gif

I used grosgrain ribbon for the waist ties. I burned the ends slightly so that they wouldn’t fray and just sewed on the back side along the edge seam higher than where the sewn pleat ended. Super quick and easy!

This apron can be found at my shop in black and red.

More Crafty Thriftiness

Monday, February 25th, 2008

When I was in elementary school my mother would extend the life of my jeans with a piece of jacquard trim. As an eight-year old I hated it, but now in the age of craft and retro design what could be cooler than a personalized pair of pants.

img_8738small.jpg

So, when my daughter began to outgrow her much loved khakis I began my hunt for some trim. Luckily our local notions store had a stack of it. I decided on three different kinds and bought a yard of each. The trim should be at least two inches wide to get a noticeable extension of length. To ensure my daughter’s buy-in, she decided which trim would go with which pants and we were on our way.

img_8757small.jpg

To attach the trim, you measure the perimeter of the leg bottoms and add two inches to that number. In my case the perimeter measured 13 6/8″ plus 2″ equals 15 6/8″. Cut two pieces of trim to this length.

img_8765small.jpg

To clean up the cut edges, fold over a half inch at each end and zigzag stitch across the width of the trim.

img_8766small.jpg

Then attach the trim along the line of the bottom leg hem allowing for an inch of overlap at the inner leg seam.

img_8771small.jpg

Once you’ve come full circle, sew together the overlapping ends of the trim.

img_8775.JPG

Finish with a few stitches across the bottom of the trim overlap.

img_8752smaller.jpg

Should you have some leftover trim as we did, you can fashion a stylish and quick headband by attaching 1 inch wide braided elastic to each end of the trim.

Sham Pillow

Friday, February 15th, 2008

I can’t believe how expensive decorative pillows are to buy!! We recently moved and I want to change some of my old pillows with new colors so I headed to my favorite aisle for inspiration- the clearance aisle at TJMaxx.

sham-pillow-finished.gif

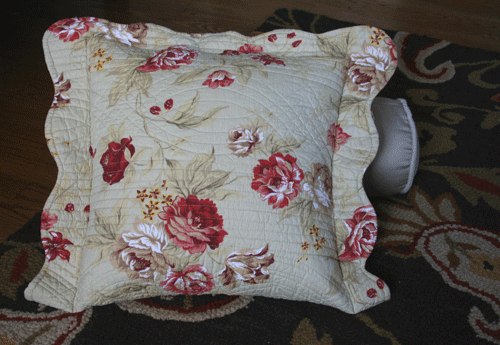
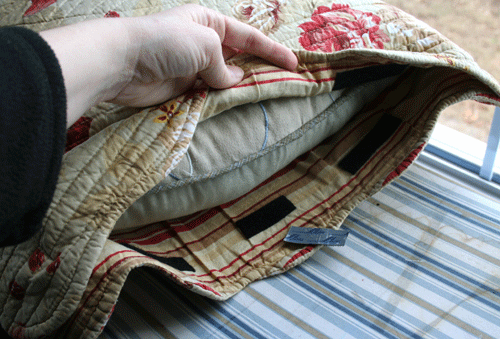
I found a single king-sized sham to make a cover for my old couch pillow. I like using shams because they are already lined, thick, and since they are quilted already have style to them. I also like to be able to take the pillow cover off and wash it since we snack alot on our couch. The sham was so long that I could fold it in half and perfectly surround my old pillow.

To make your own:
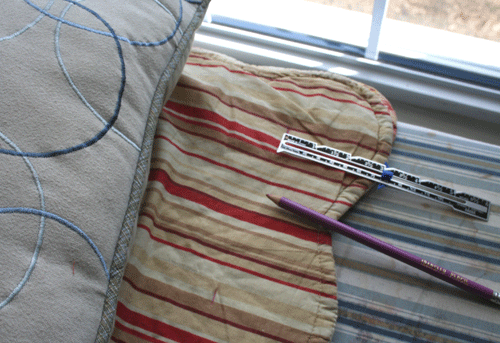
1. Fit pillow (or make one desired size) and measure how far in to make the seams. I made a mark all the way down with chalk. I liked the striped fabric the inside was lined with and the scalloped edges, so I decided to sew the seams on the right and left on the right side of the pillow sham, stopping a few inches from the top. This left a slight flap so I could see the reverse lining. (do not sew on the wrong sides as I marked to do here!)

sham-pillow-measure.gif

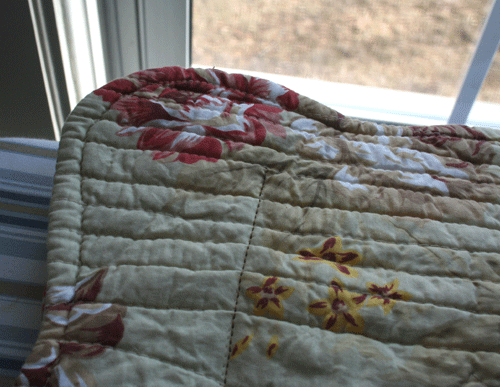
2. Sew down chalk line on top (right side) of sham, or on reverse side if you want to turn it inside out (like making a normal pillowcase).

sham-pillow-edge.gif

3. Measuring down on the inside along the top I used adhesive strips of velcro every few inches to attach at the top. Even though this doesn’t need to be opened every day I am going to now sew a line down the middle of the velcro because it hasn’t stuck as well as I’d hoped.

sham-pillow-stuffed.gif

I liked that this was $5 update and the recycling of my old pillow!

Bling, Blong, Merrily on High

Friday, December 14th, 2007

8160small.jpg

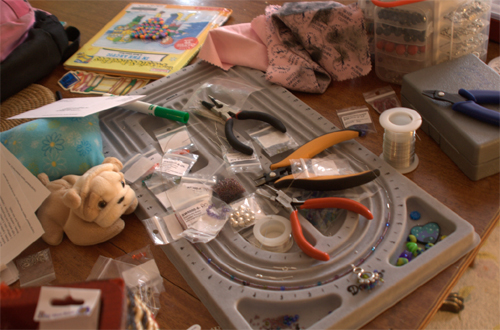
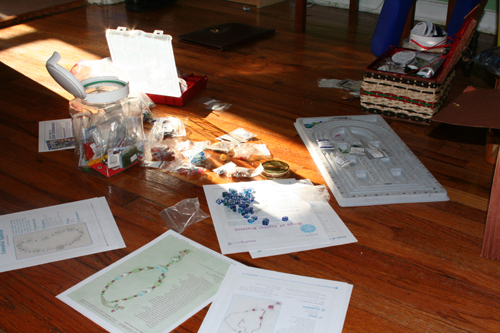
Reporting directly from Santa’s workshop: It’s a mess. Do you craft on the floor? I often do. It tends to be the last available spot for me to spread out since most of my table tops are covered with last month’s homework and advertisements. Also, when you’re beading the beads won’t roll off the table. (duh :) )

img_8158small.jpg

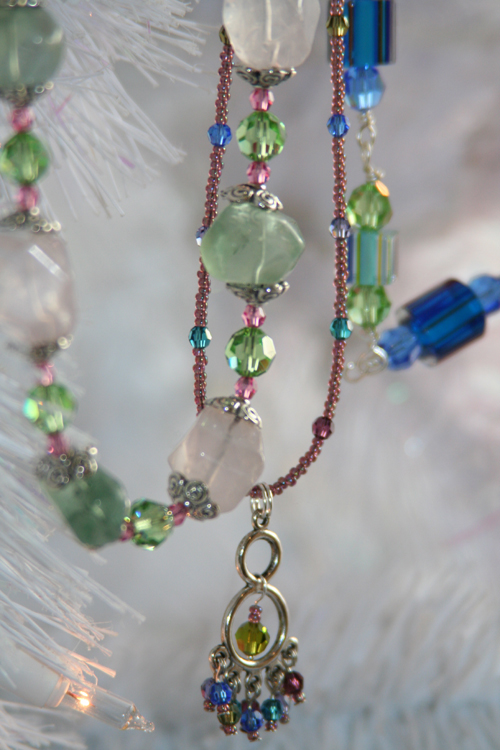
Given the current state of affairs at my household, my extreme handmade gifting pledge (I will only give handmade presents made by myself) will probably only extend to the female members of the family. The nice thing about making the kind of jewelry I’m capable of putting together is that it only takes a very finite amount of time. After one hour I feel like I was creative and actually finished something. For inspiration, check out Beading Daily. For how-to’s I like Rachel Nelson-Smith’s site. After following her tutorial on how to form a basic loop, I finally got it!

So who will get these pretties?

img_8177small.jpg

Towel Turned Apron

Friday, September 21st, 2007

fruity-apron-11.gif

Though I love the first apron I made, I found a much quicker formula. I simply converted a kitchen towel into a full apron. This is a quick 30 minute project and who can resist with such cute prints out there!

fruity-apron-set-2.gif

First, Run a needle and thread in and out evenly very close to the trim and draw it to the tightness of gathering you like. I loved this towel because it had the rust colored trim on the top and bottom already.

fruity-apron-4.gif<

Then pin your ribbons (20") in place and sew over the gathering, making sure it IS wrinkled under the needle and that the fabric doesn't flatten out. I also burn the edges of the ribbon with a lighter so that is does not unravel, very lightly so you don't change the color of the ribbon.

fruity-apron-3.gif

Last, I measured 2 ribbons 28" inches long and measured where at my waist I wanted to tie the apron. Again, I burned the ends of the ribbon and pinned them into place along the back right and left edges of the towel and sewed just over the ribbon, along the original towel seam.
Voila! So cute and automatically comes with a matching towel! This would be a great, quick, housewarming gift!
If this fruity set is perfect for your kitchen I have a couple of sets available
here!