Are you looking for ways to make your holidays more personal and less expensive? You’re in the right place!
In this article, I’ll share 21-holiday craft projects that will transform your home and gifts this season. From handmade ornaments to DIY snow globes, these ideas solve the “what should we do today?” problem that pops up during holiday breaks.
As a crafter with 15+ years of experience, I’ve tested each of these projects personally. Some take just 30 minutes, while others might fill a cozy afternoon.
The best part? You probably have many of these supplies already at home.
If you’re crafting with kids, looking for homemade gift ideas, or wanting to add a personal touch to your decor, these projects will help you create holiday magic without breaking the bank.
Creative Holiday Craft Ideas
Ready to get crafty? These 21 projects range from super simple to moderately challenging. I’ve organized them from quickest to more involved, so you can choose based on your available time and crafting skills. Most use materials you can find at home or pick up inexpensively.
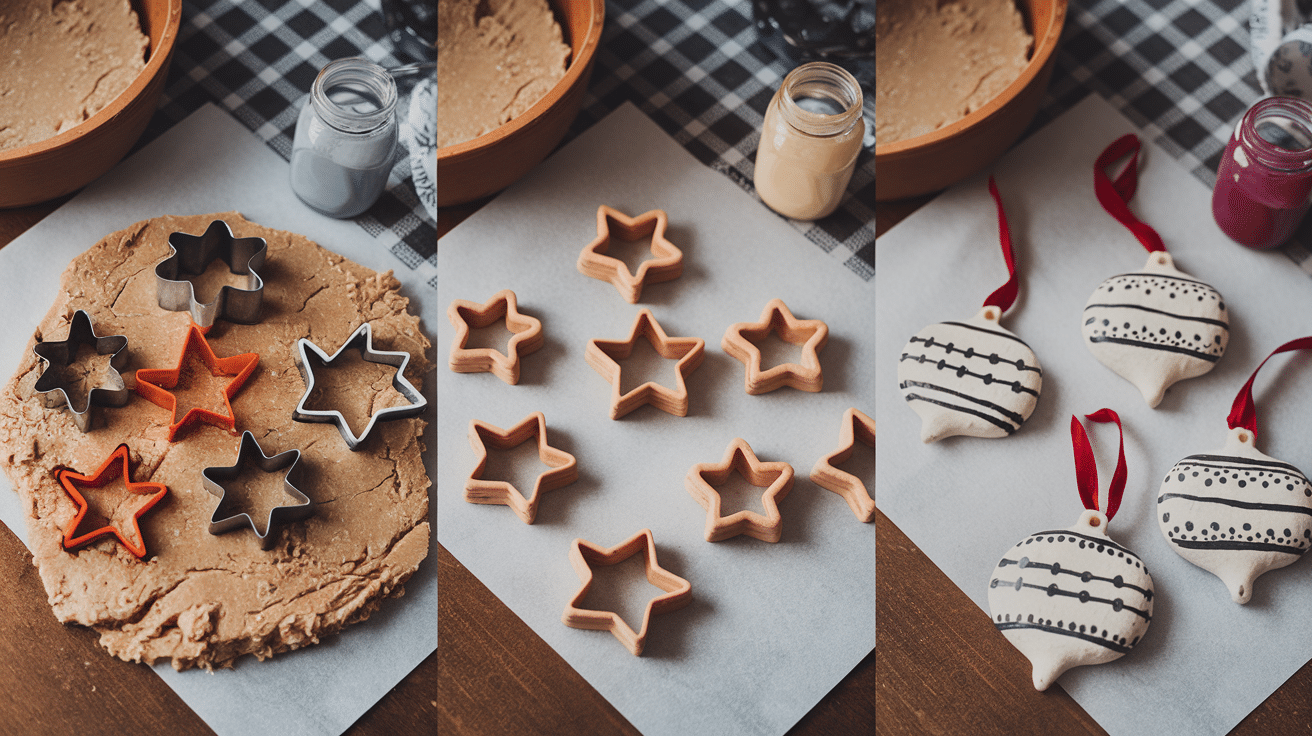
1. Handmade Ornaments
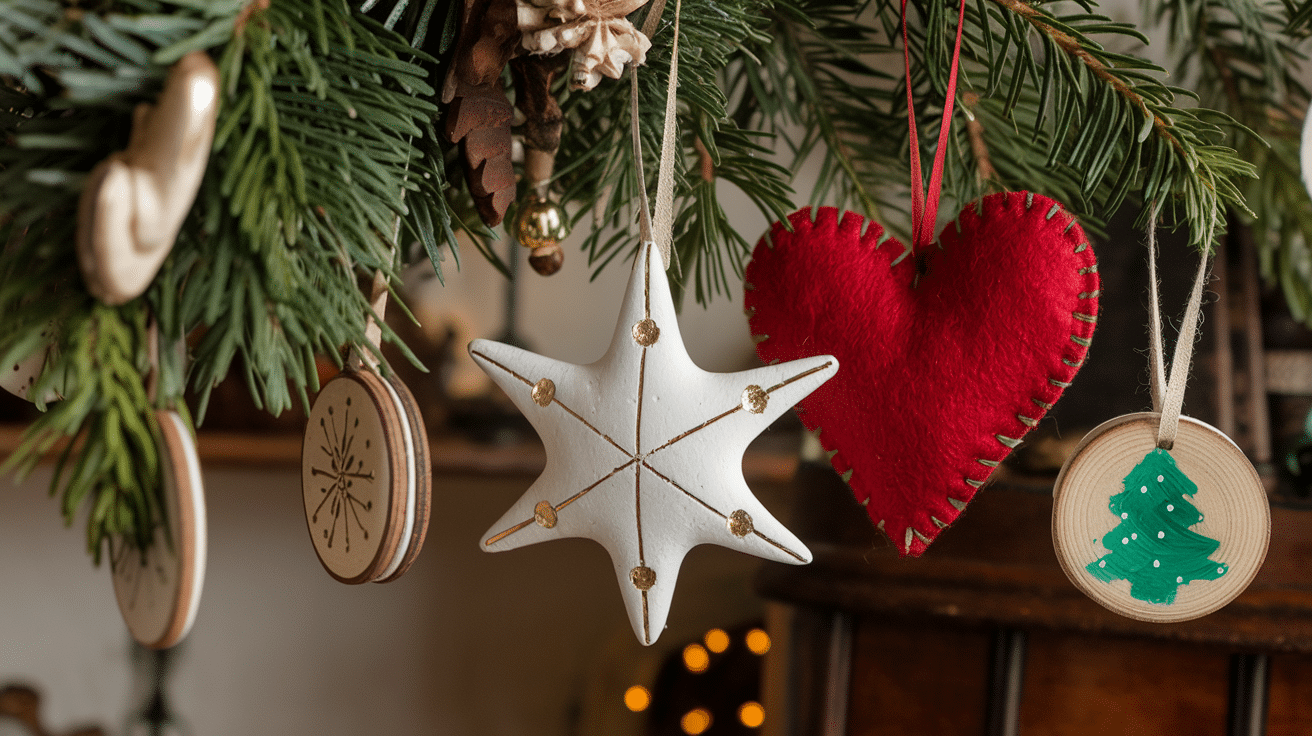
Roll out air-dry clay about 1/4 inch thick and use cookie cutters to create shapes. Make a small hole at the top for hanging before leaving to dry overnight. Once dry, paint with acrylic paints and seal with a clear varnish for longevity.
Color suggestions:
- Traditional red, green, and gold for a classic look
- White with silver accents for a winter wonderland theme
- Navy blue and copper for an elegant, modern feel
2. DIY Holiday Cards
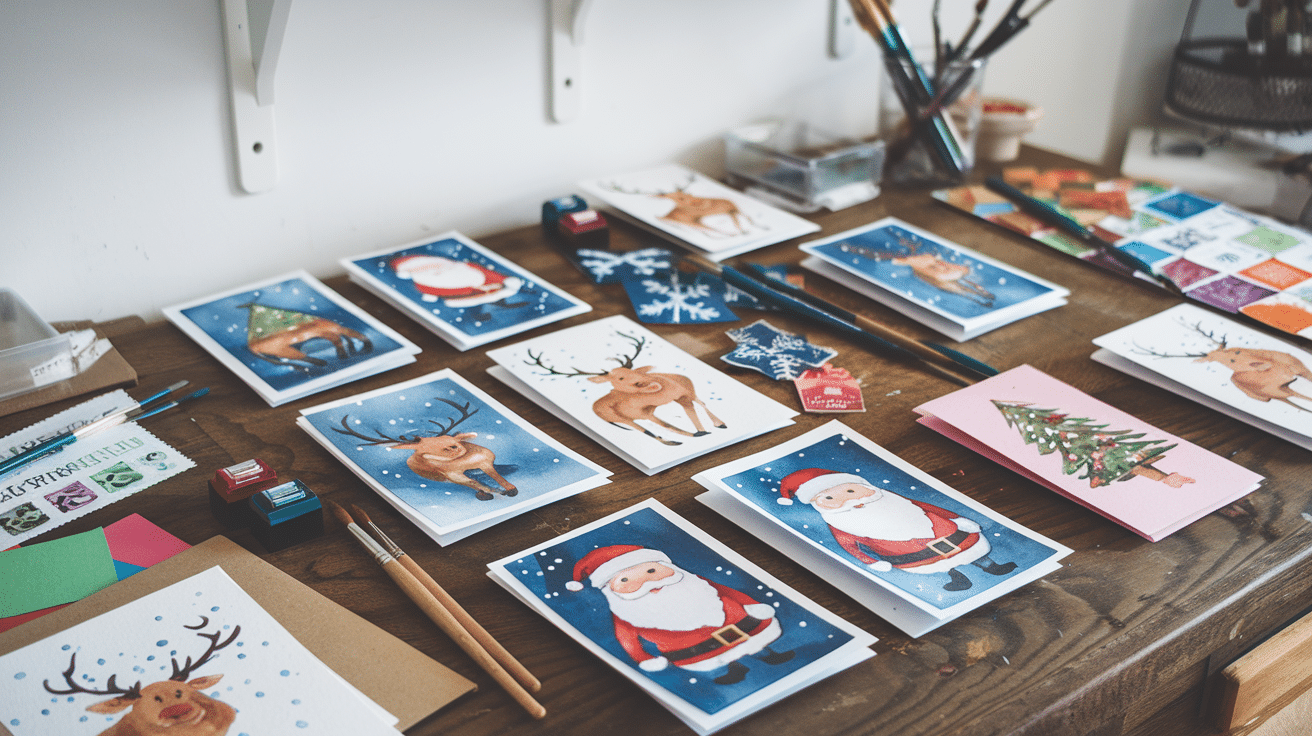
Fold cardstock in half to create card bases. Decorate the front using watercolors for backgrounds, rubber stamps for images, or cut paper collage techniques. Add a personal message inside and pair it with matching envelopes.
Color suggestions:
- Red and green for traditional holiday vibes
- Blue and silver for winter-themed cards
- Kraft paper with white and red for a rustic approach
3. Festive Wreaths
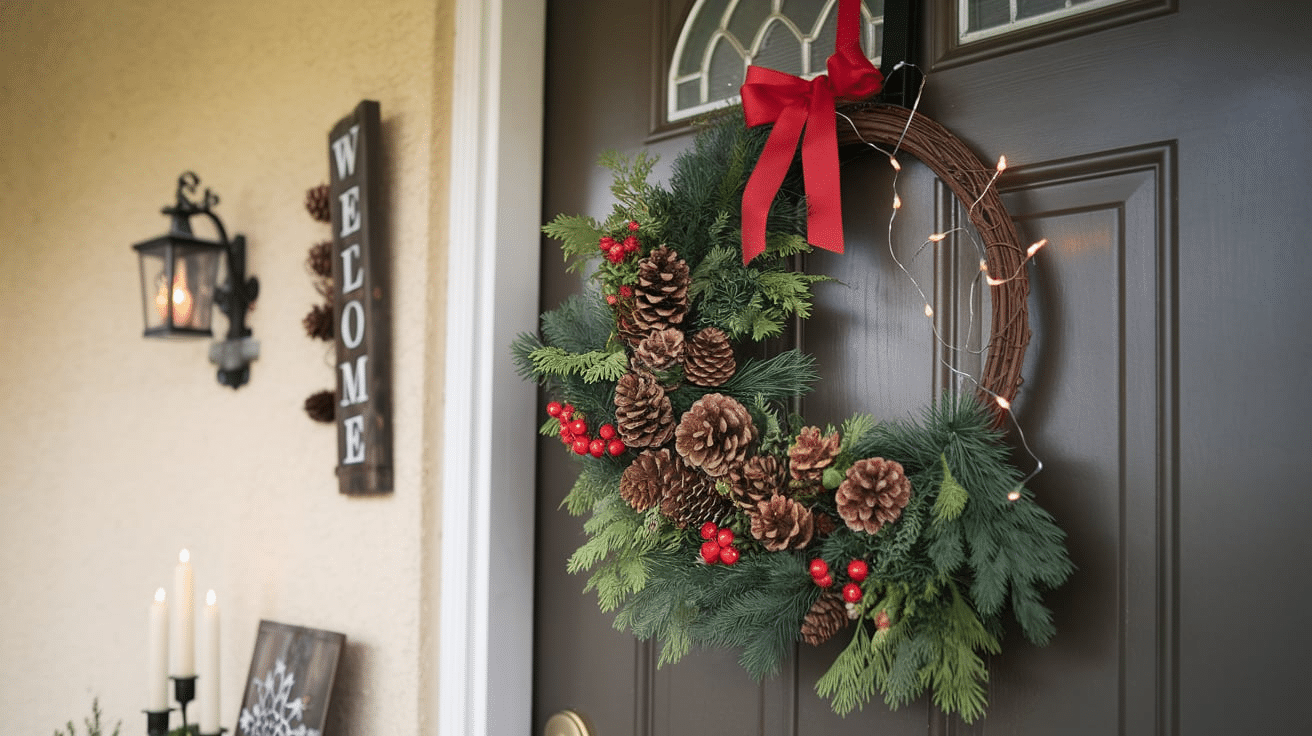
Start with a wire, foam, or twig wreath base. Attach your chosen materials using hot glue or by weaving them through the base. Add a ribbon loop at the top for hanging and finish with a decorative bow.
Color suggestions:
- Green base with red berries and pinecones for a natural look
- White base with silver and blue ornaments for winter elegance
- Rainbow colors for a playful, modern wreath
4. Salt Dough Keepsakes
Mix 2 cups flour, 1 cup salt, and 3/4 cup warm water to form a dough. Roll it out to 1/4 inch thickness and cut shapes with cookie cutters. Create a hole for hanging, then bake at 250°F for 2-3 hours until completely hard.
Color suggestions:
- White with gold accents for an elegant look
- Bright primary colors for kid-friendly ornaments
- Natural tan with clear gloss for a rustic appearance
5. Mason Jar Lanterns
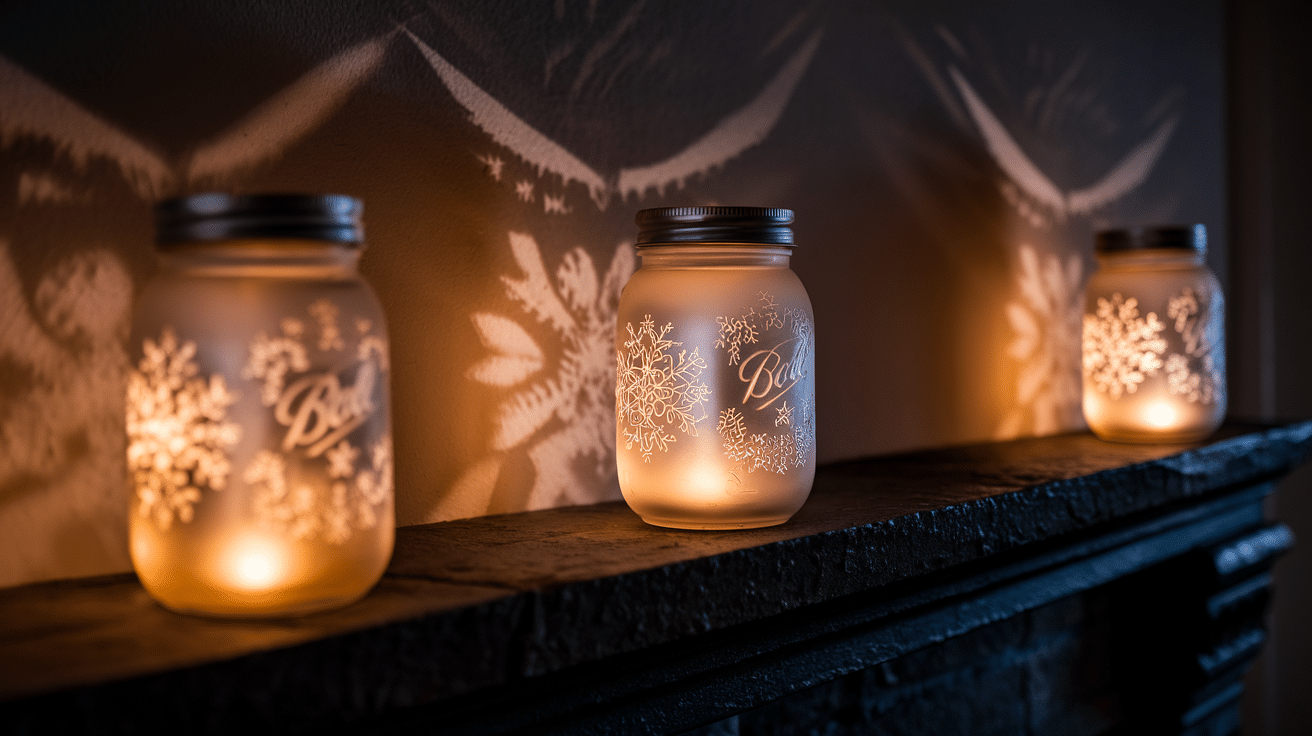
Clean mason jars thoroughly and dry them completely. Apply frosted glass spray paint or brush on glass paint in desired patterns. Once dry, place battery-operated string lights inside and secure the lid.
Color suggestions:
- Frosted white with silver details for a snowy effect
- Green and red for traditional holiday colors
- Blue with white snowflake patterns for a winter theme
6. Eco-Friendly Gift Wrap

Select your base material (kraft paper, fabric squares, or newspaper). Decorate paper with stamps, drawings, or cut-outs. For fabric, iron it flat before wrapping. Secure with natural twine, ribbon, or decorative tape.
Color suggestions:
- Brown kraft paper with red and green accents
- Black and white newspaper with colorful ribbon
- Fabric in holiday patterns with coordinating string
7. Paper Snowflakes & Stars
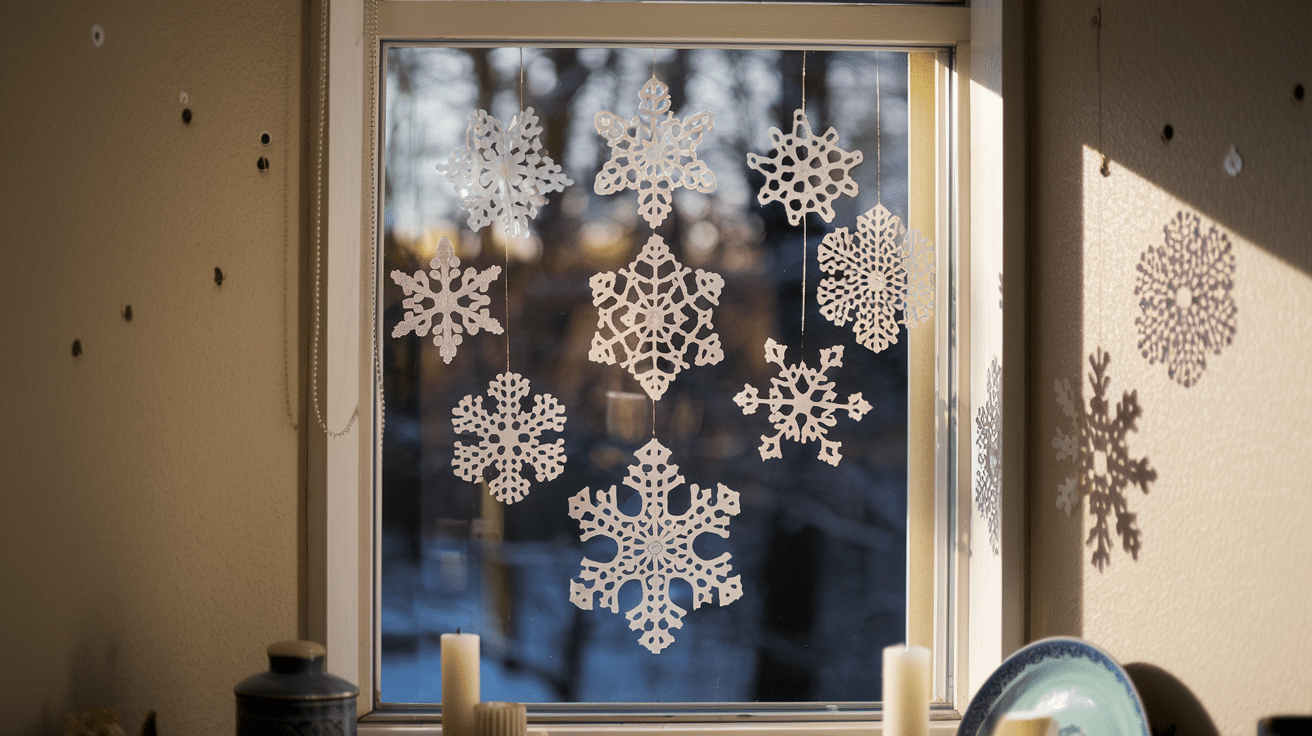
Fold a square piece of paper in half diagonally, then fold in half again. Fold the resulting triangle into thirds. Cut patterns along all edges, being careful not to cut all the way across any fold. Gently unfold to reveal your design.
Color suggestions:
- Classic white for traditional snowflakes
- Metallic paper for sparkly stars
- Pastel blues for a subtle winter decoration
8. DIY Advent Calendar
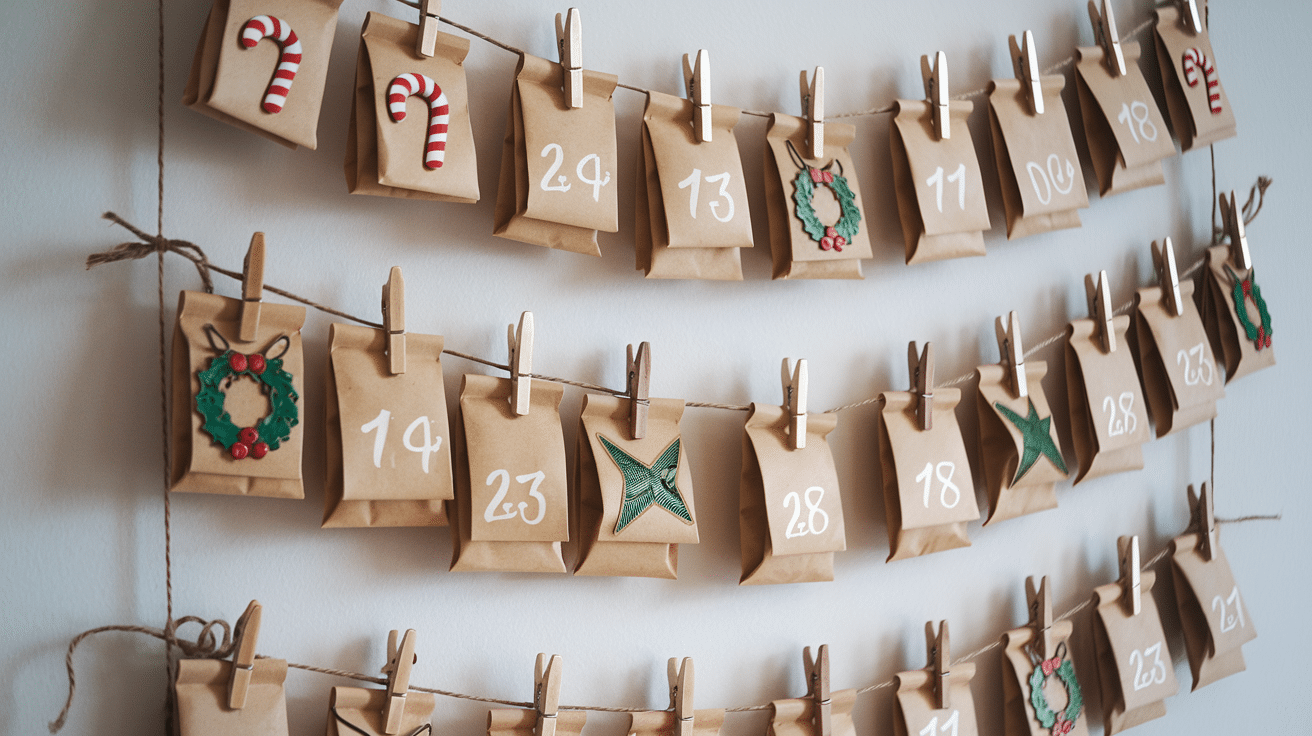
Choose a structure (board, string, or container). Create 24 small pockets, bags, or boxes and number them from 1 to 24. Fill each with a small treat, activity idea, or kind message before sealing.
Color suggestions:
- Red and green numbered containers for a traditional look
- Kraft paper with white numbers for rustic style
- Rainbow colors are arranged in order for a playful calendar
9. Homemade Scented Candles
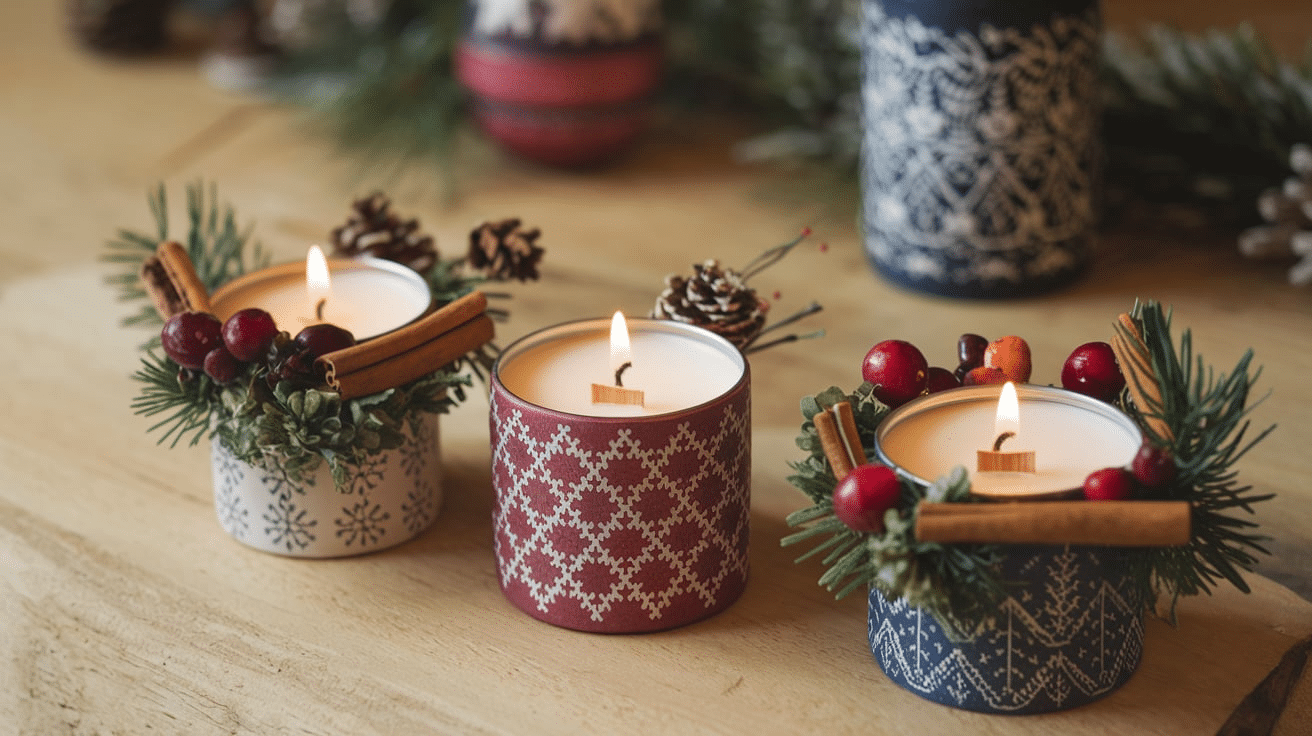
Melt candle wax in a double boiler. While melting, secure a wick to the bottom of your container with a dab of wax. Add fragrance oil and color if desired. Pour melted wax into the container and let set completely.
Color suggestions:
- Deep green or red for traditional holiday scents
- White or cream for clean, subtle candles
- Gold or silver for elegant gift candles
10. Gingerbread House Fun

Prepare walls and roof pieces using gingerbread dough or graham crackers. Assemble using thick royal icing as “glue.” Once the structure is stable, decorate it with candies, piped icing details, and sprinkles.
Color suggestions:
- White icing “snow” with multicolored candies
- Monochromatic white and silver for an elegant house
- Traditional brown gingerbread with red and green decorations
11. Personalized Holiday Stockings
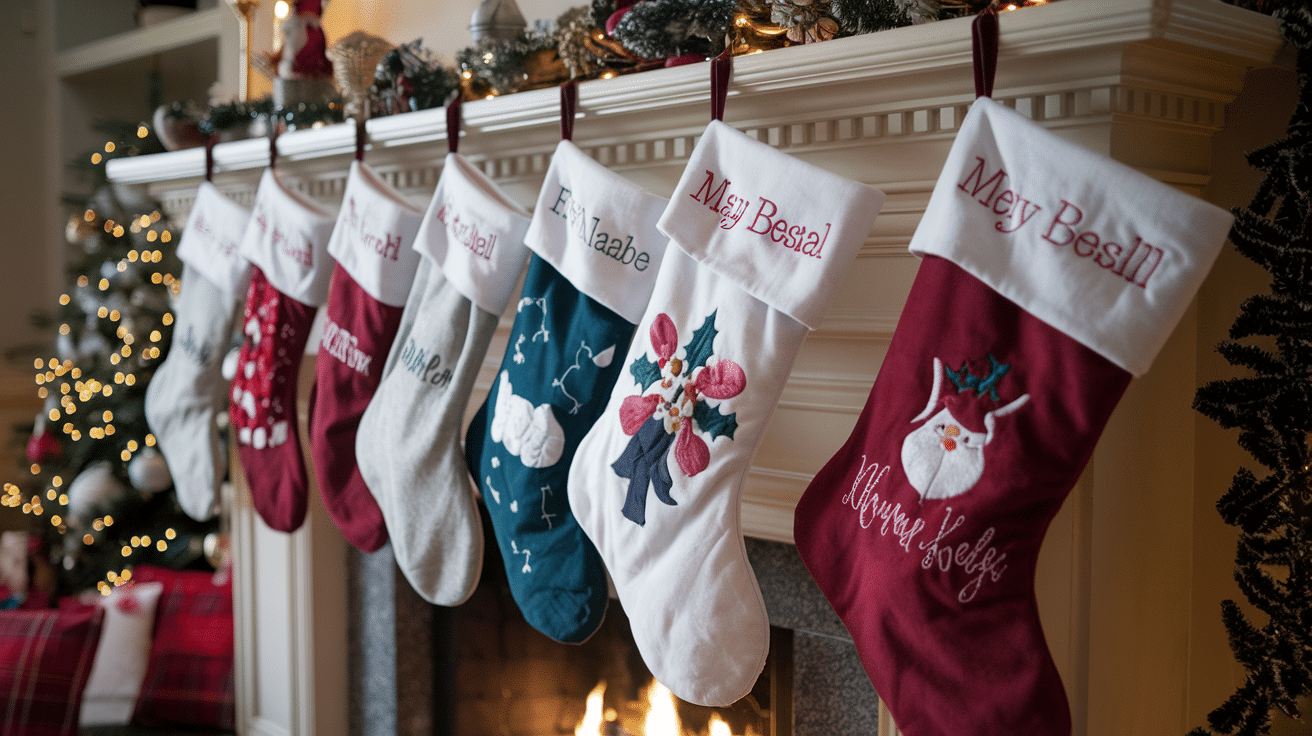
Purchase plain stockings or cut and sew your own from felt or fabric. Decorate using fabric paint, iron-on transfers, buttons, ribbon, or embroidery. Add names with fabric markers or embroidery floss.
Color suggestions:
- Red stockings with white trim for a classic look
- Green with plaid accents for rustic charm
- Navy blue with silver details for an elegant style
12. Handcrafted Gift Tags
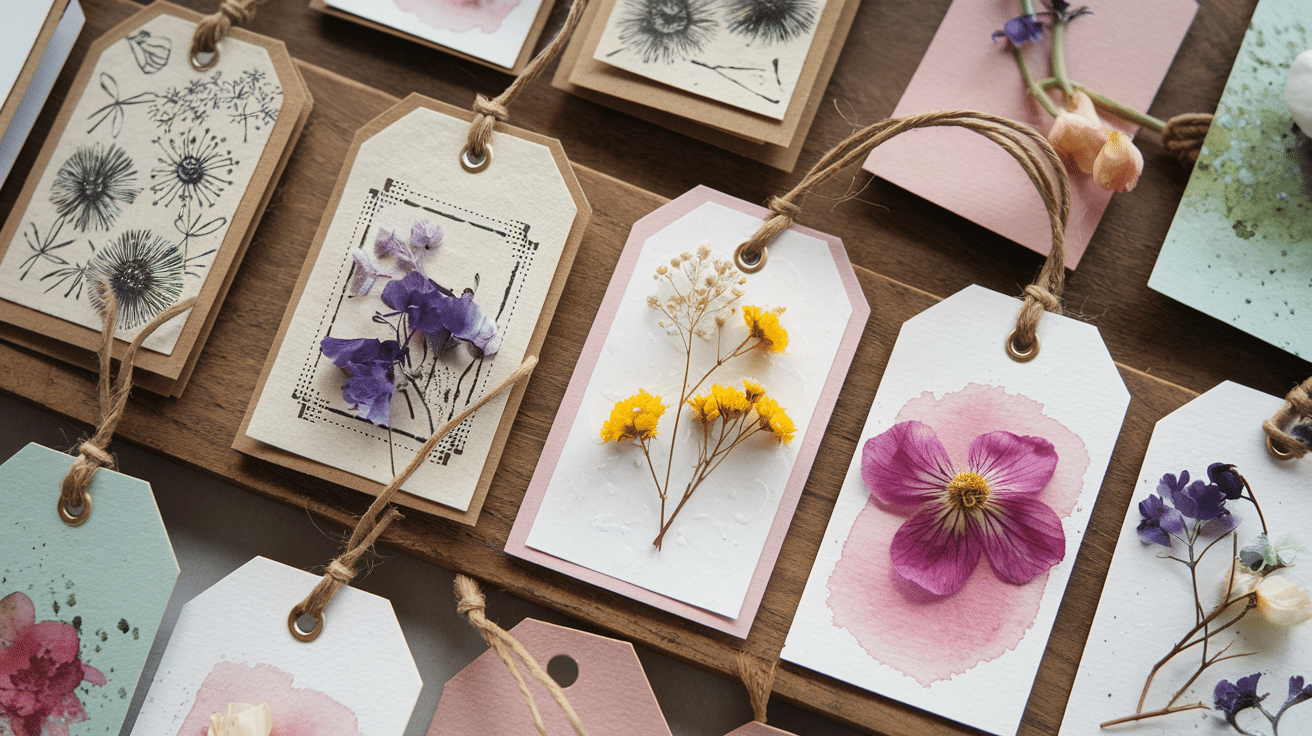
Cut cardstock or thick paper into tag shapes. Punch a hole at one end for the string. Decorate with stamps, drawings, pressed flowers, or small cut-outs—thread with baker’s twine or thin ribbon.
Color suggestions:
- Kraft paper with red and green accents
- White tags with metallic ink for elegance
- Recycled Christmas cards cut into tag shapes
13. Nature-Inspired Centerpieces
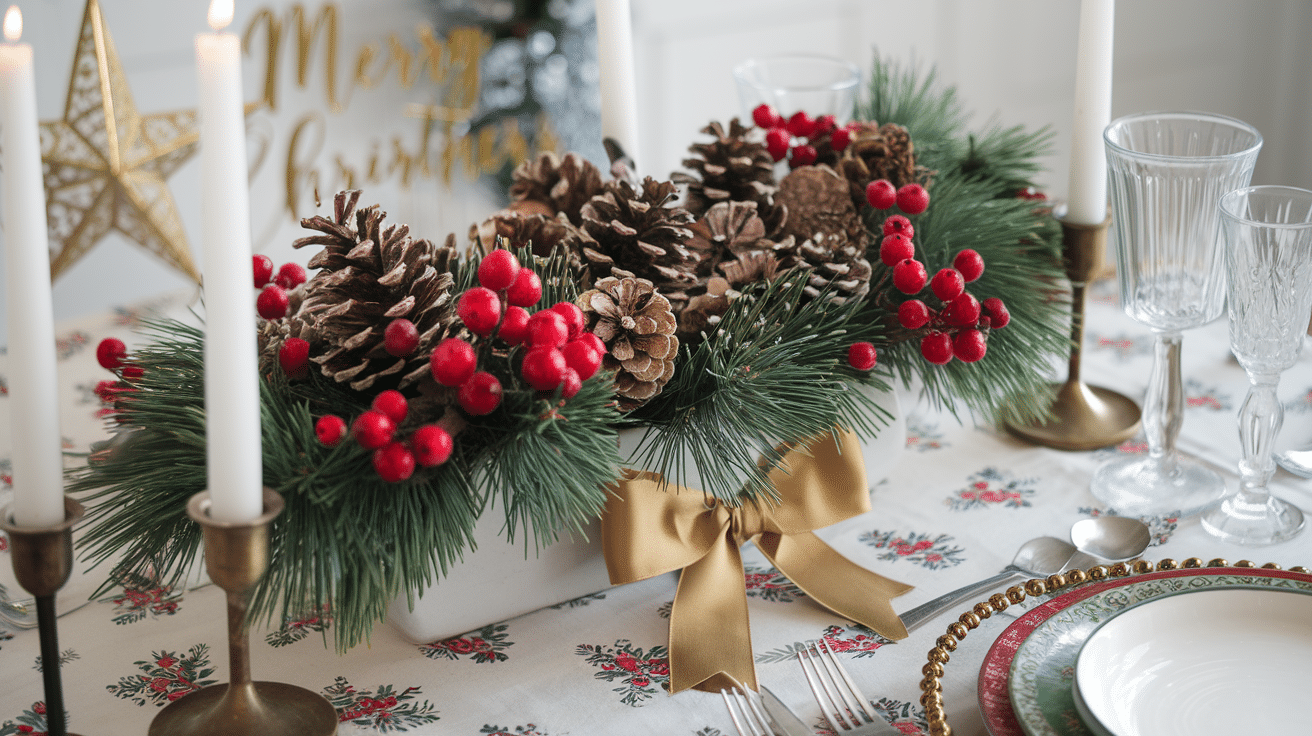
Select a low, wide container as your base. Arrange evergreen sprigs, pinecones, and other natural elements in a pleasing pattern. Add candles in glass holders for safety and incorporate seasonal fruits or berries.
Color suggestions:
- Green foliage with red berries for a traditional style
- White candles with silver and blue accents for winter theme
- Natural elements with gold touches for elegance
14. DIY Christmas Village
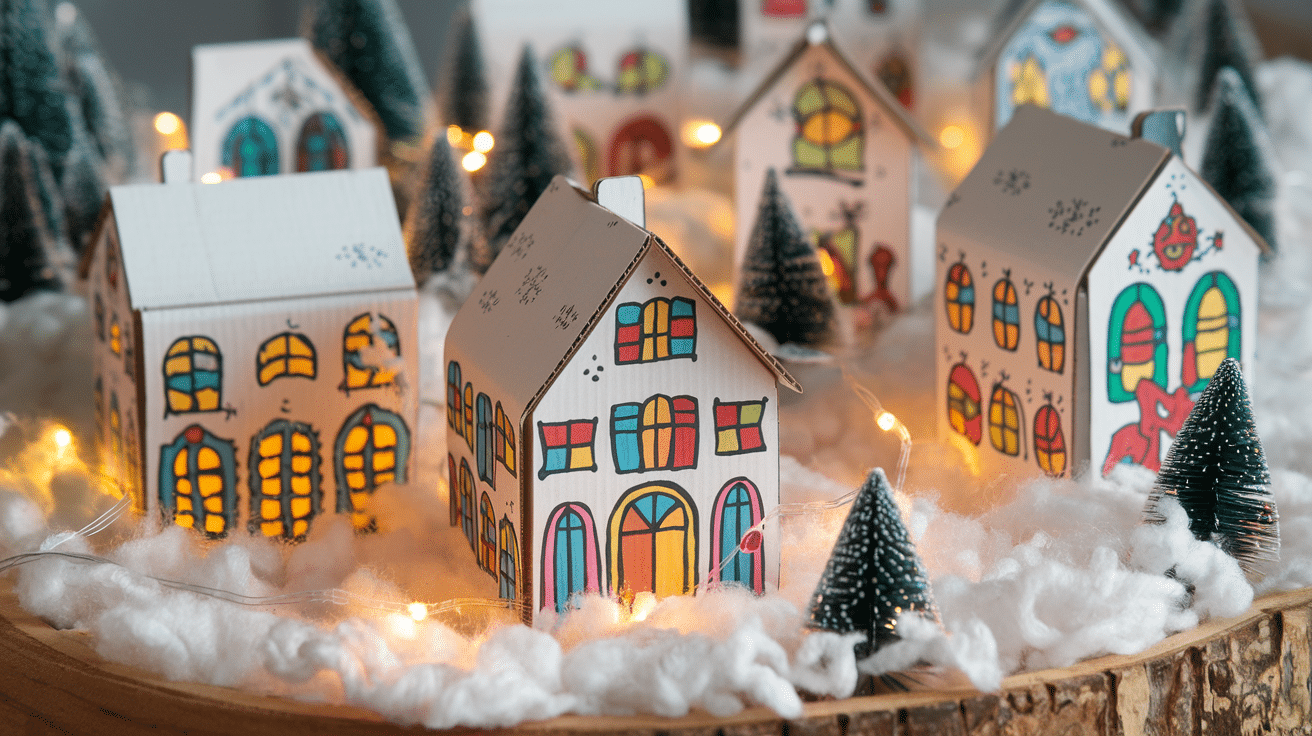
Cut house shapes from cardboard. Create doors and windows with cutouts or by drawing them. Paint houses white or pastel colors, adding details like roof tiles and window frames. Arrange them on cotton batting with mini trees.
Color suggestions:
- White houses with colorful doors and windows
- Pastel houses with white “snow” accents
- Gold and silver details for a magical nighttime village
15. Festive Fabric Banners
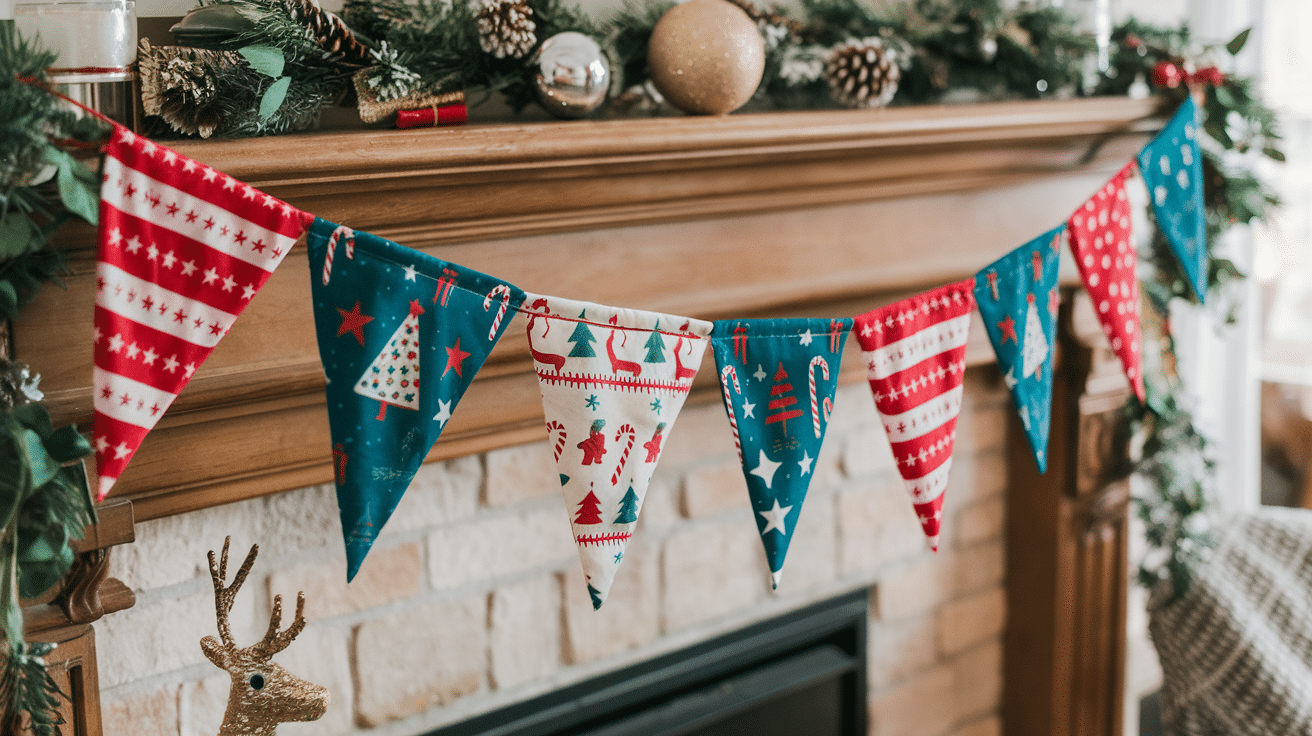
Cut fabric into triangles or other shapes. Arrange in the desired pattern along a length of ribbon or twine. Either sew or use fabric glue to attach each piece, leaving space between them for a nice drape.
Color suggestions:
- Red, green, and white patterns for a traditional look
- Blue and silver for a winter theme
- Mixed holiday patterns for an eclectic style
16. Recycled Holiday Crafts
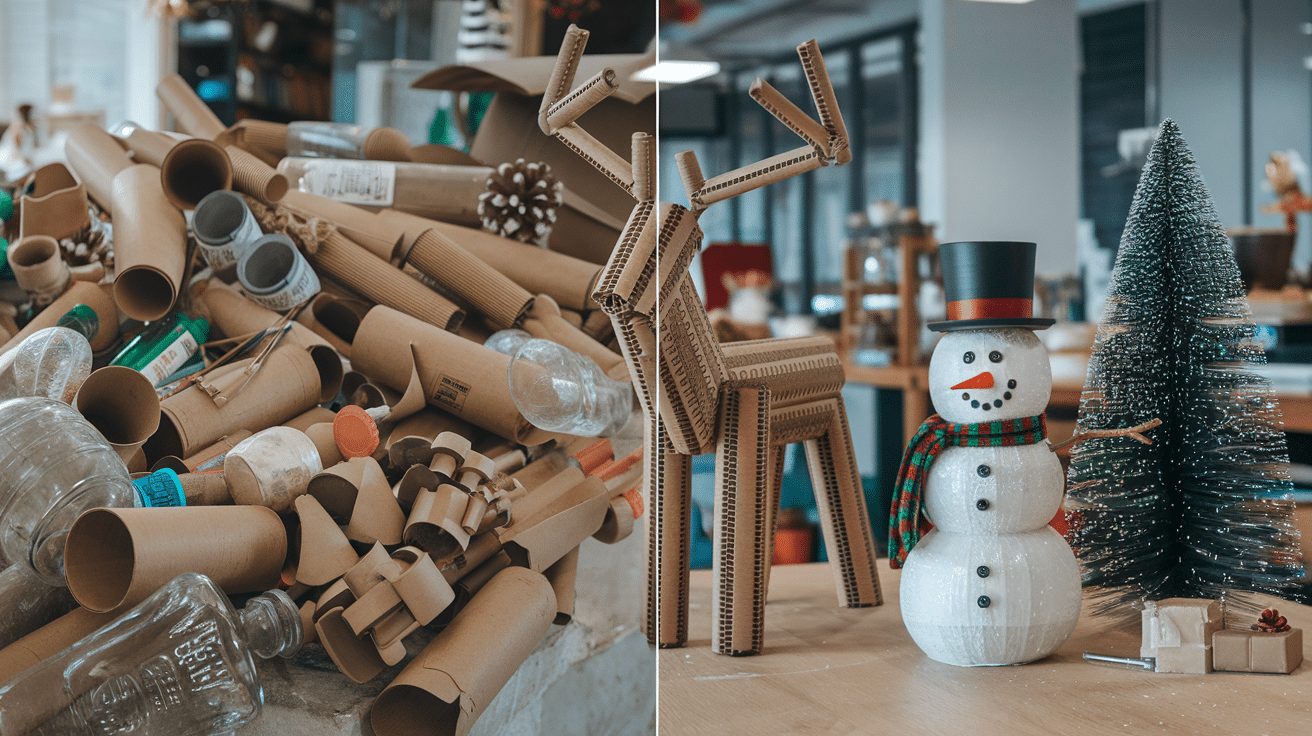
Collect clean, dry, recyclable materials like cardboard tubes, bottles, or packaging. Transform them using paint, paper, glue, and creativity. For ornaments, add hanging loops with string or wire.
Color suggestions:
- White paint base with bright accent colors
- Gold or silver for elegant upcycled decorations
- Natural materials with subtle green and red accents
17. Painted Holiday Mugs

Clean ceramic mugs with alcohol to remove any residue. Use oil-based paint pens to create designs. Allow to dry completely, then bake according to the paint manufacturer’s instructions to make designs permanent.
Color suggestions:
- Red and green for traditional holiday motifs
- Metallic gold or silver for elegant designs
- Blue and white for winter snowflake patterns
18. DIY Snow Globes
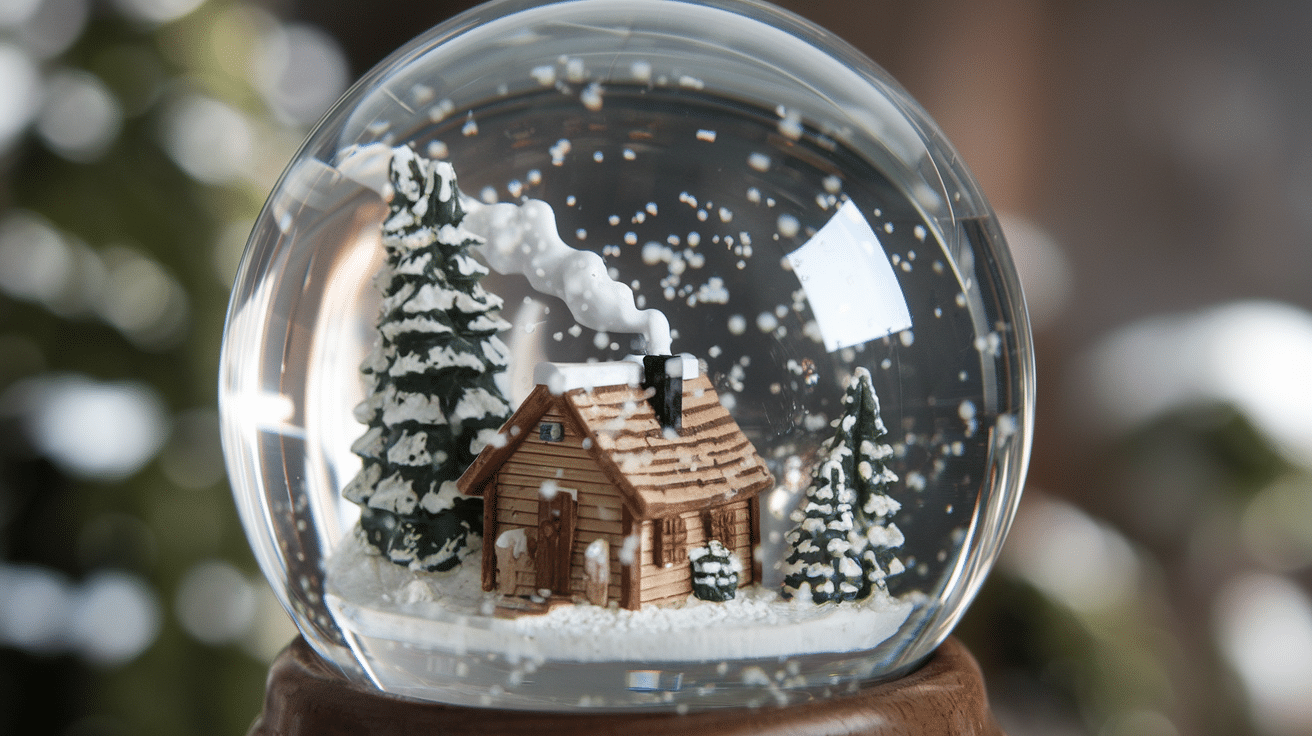
Secure a small waterproof figurine to the inside of a jar lid using waterproof glue. Fill the jar almost to the top with distilled water and a spoonful of glycerin. Add a pinch of glitter, screw on the lid tightly, and seal with clear glue.
Color suggestions:
- Silver and white glitter for a classic snow effect
- Blue-tinted water with silver glitter for a winter theme
- Gold glitter with miniature gold trees for elegance
19. Paper Bag Luminaries
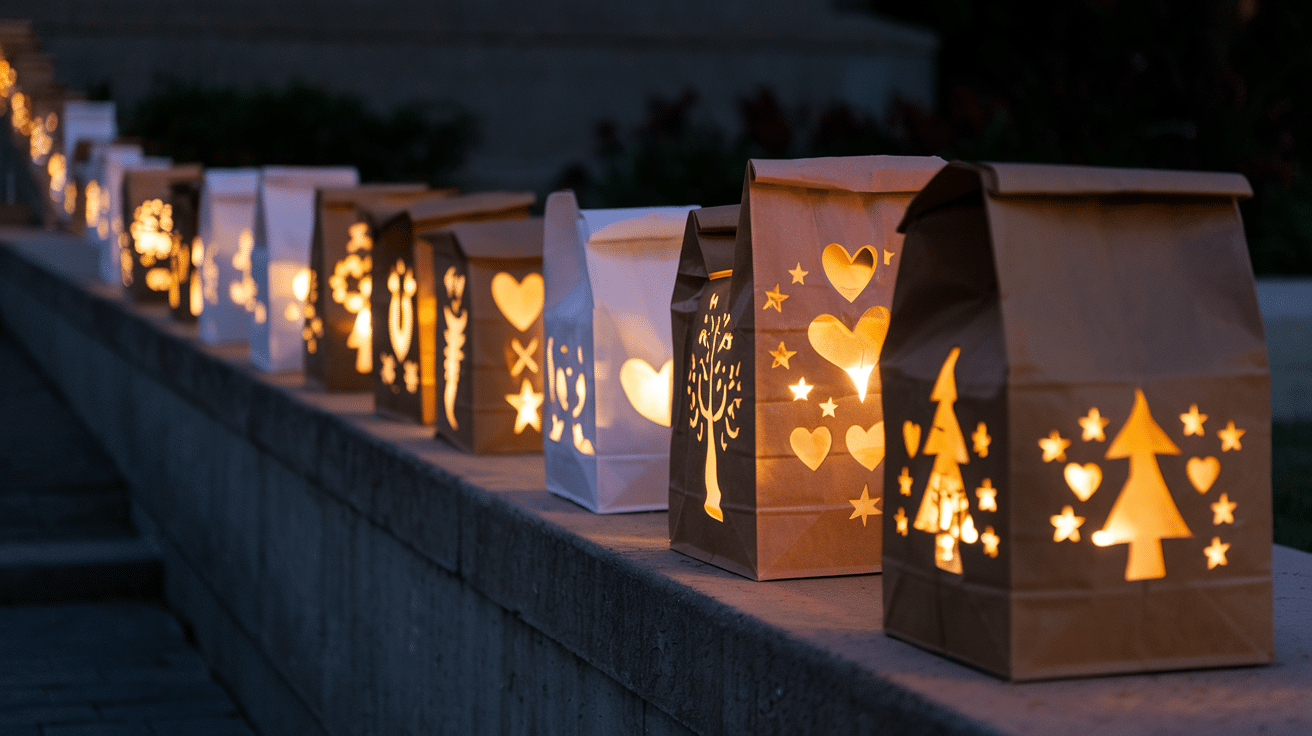
Fold lunch-sized paper bags in half. Draw or trace holiday designs on one side. Cut out designs with scissors or a craft knife. Open the bags, place sand in the bottom for weight, and add LED tea lights.
Color suggestions:
- White bags for traditional luminaries
- Red or green bags for colored light effect
- Brown kraft bags for a rustic, warm glow
20. Holiday Fridge Magnets
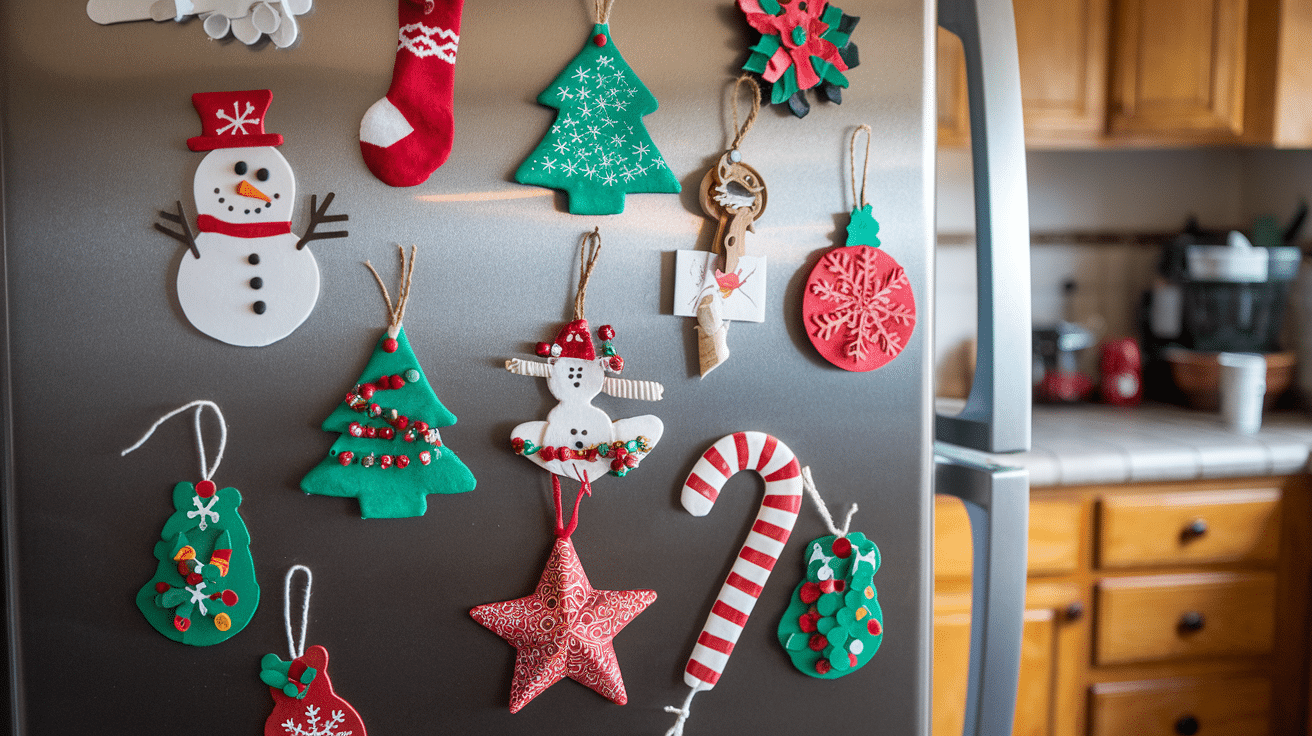
Roll out polymer clay or cut small wooden discs. Shape the clay into holiday symbols, bake according to package instructions, and then paint. Paint designs directly onto wood discs. Attach magnet backs with strong glue.
Color suggestions:
- Red, green, and white for traditional symbols
- Metallic paints for elegant ornament magnets
- Bright primary colors for playful designs
21. DIY New Year’s Party Hats

Cut cardstock into half-circles and roll into cone shapes. Secure with glue or staples and add elastic chin straps. Decorate with metallic paper, glitter, feathers, or small pompoms. Pair with simple noisemakers made from small containers filled with dried beans.
Color suggestions:
- Silver and gold for an elegant New Year’s celebration
- Black with rainbow accents for a festive midnight party
- White base with a bold number of the upcoming year
Tips for a Stress-Free Crafting Experience
Want to enjoy your holiday crafting without the headaches?
Here’s what works for me:
- Start early- Nothing ruins creativity like a tight deadline.
- Choose wisely- Pick 2-3 projects that truly excite you rather than trying to do everything.
- Gather supplies first- Nothing’s worse than stopping mid-project for a store run.
- Accept imperfection- Handmade means unique, not flawless.
- Involve others- Many hands make light work and better memories.
Conclusion
Holiday crafting isn’t just about making pretty decorations – it’s about creating moments that matter. These 21 projects give you ways to slow down during the busiest season and make something with your own hands.
You don’t need to be an artist or spend a fortune. Many of these crafts use items you already have at home or can find in nature. The imperfections in handmade items are what make them special.
Whether you’re looking to save money, create family traditions, or give gifts with more meaning, these projects deliver.
The best part? The memories you make while crafting often become more valuable than the finished products themselves.
So pick one or two ideas that speak to you, gather your supplies, and enjoy the process. Your holidays will be richer for the personal touches you add.
Frequently Asked Questions
What’s the Easiest Craft for Young Children?
Salt dough ornaments are perfect for kids. They can roll, cut, and paint with minimal help, and the results last for years.
How Can I Make My Crafts Look More Professional?
Use quality materials where they matter most, work in good lighting, and allow proper drying time between steps.
Which Crafts Make the Best Last-Minute Gifts?
Mason jar lanterns, scented candles, and painted mugs can all be completed in under two hours and look impressive.
How Do I Prevent Glitter from Getting Everywhere?
Work over a tray lined with wax paper, use glue that dries clear, and spray finished items with hairspray to seal loose glitter.
Can I Make These Crafts if I Don’t Have Specialized Tools?
Absolutely! Most of these projects require only basic supplies like scissors, glue, and paint—no special equipment is needed.