
Crocheting your own apron is a fun and rewarding project that lets you express your creativity while making something useful. Whether you’re looking for a practical apron for cooking, crafting, or gardening, or just want a cute, personalized accessory, crochet is the perfect way to make it happen.
Not only will you create a beautiful and one-of-a-kind piece, but you’ll also have a project that’s both functional and stylish. In this blog, we’ll read everything you need to know about crocheting an apron, from the basic materials to choosing a pattern that suits your style.
We’ll also walk you through easy steps to get started and share some tips for beginners. So grab your yarn and hooks, and let’s dive into making a crochet apron you’ll love to wear!
Why Crochet an Apron?
Crocheting an apron is a great way to add a personal touch to something you use every day. Whether you’re cooking, baking, or crafting, an apron helps protect your clothes from spills and stains while also providing a fun and creative way to showcase your style.
When you crochet an apron, you get to choose the colors, patterns, and even the design that best fit your personality and needs. Plus, it’s a project that’s both practical and rewarding to make. Another reason to crochet an apron is that it makes a fantastic gift! Handmade aprons are thoughtful and useful gifts for friends or family who love to cook or bake.
Overall, crocheting an apron is not only a fun way to practice your crochet skills, but it’s also a practical and customizable piece that you’ll use and enjoy for a long time.
Materials & Basic Stitches to Know for a Crochet Apron
Before you start crocheting your apron, you’ll need a few basic materials and should be familiar with a few key stitches.
Materials You’ll Need
- Yarn: Choose a durable, washable yarn like cotton or a cotton blend. These yarns are strong, soft, and perfect for everyday wear.
- Crochet Hook: Pick a hook size that matches your yarn. Usually, a 4mm or 5mm hook works well for aprons.
- Scissors: You’ll need these to cut your yarn when you’re finished.
- Tapestry Needle: To weave in any loose ends when you’re done crocheting.
- Buttons or Embellishments (Optional): You can add extra flair to your apron with cute buttons or other decorations.
Basic Stitches to Know
- Chain Stitch (ch): This is the foundation of most crochet projects. It’s a basic stitch to create your starting row.
- Single Crochet (sc): This stitch creates a tight fabric that’s great for the main part of your apron.
- Double Crochet (dc): This stitch is taller than single crochet, creating a more open fabric. It’s perfect for sections where you want a looser feel.
- Slip Stitch (sl st): This stitch is used to join pieces together or move within your project without adding height.
These materials and stitches will help you get started on your crochet apron. Once you’re comfortable with them, you’ll be ready to begin your apron project!
Step-by-Step Guide to Crocheting an Apron
Crocheting an apron is a fun and rewarding project that lets you add a personal touch to something you’ll use every day. Whether it’s for cooking, crafting, or just as a fun accessory, this step-by-step guide will walk you through the process of crocheting your very own apron.
Step 1: Start with the Bodice
Create a Foundation Chain: Begin by creating a foundation chain to fit the width of the bodice (the top part of your apron). For example, if you want a 10-inch wide bodice, you’ll need to chain enough stitches to reach that width. Make sure to keep your chain loose, so the fabric won’t be too tight.
Work in Rows: After your foundation chain is complete, work in rows back and forth to form the bodice. You can use single crochet (sc) for a tight fabric or double crochet (dc) for a looser, airier texture. Continue crocheting until the bodice reaches the desired length.
Shaping the Bodice: You may want to add some shaping to the bodice by decreasing or increasing stitches on the sides. For example, to create a more fitted look, you can decrease stitches towards the bottom.
Step 2: Add the Skirt
Start the Skirt with a New Row: Once the bodice is the right size, you’ll start crocheting the skirt. Begin by chaining 1 or 2 stitches at the end of your row, then turn your work.
Increase Stitches for a Flared Skirt: To make the skirt of your apron flare out, you can increase stitches on each row. For example, add 1 or 2 extra stitches on each side of the row. This will give your apron a more skirt-like shape, which is perfect for adding that cute, full look.
Continue Crocheting the Skirt: Keep adding rows, increasing your stitches as you go, until the skirt reaches the desired length. You can make it as long or as short as you like, depending on your style.
Step 3: Create the Straps
Crochet the Neck Strap: To make the neck strap, simply chain a few stitches (about 40-50, depending on how long you want it to be). You can use single crochet (sc) for a sturdy strap. Work in rows until the strap is long enough to comfortably tie around your neck.
Make the Waist Straps: Repeat the same process for the waist straps. These straps can be longer than the neck strap because you’ll need enough length to tie them around your waist. Chain enough stitches to get the desired length, then crochet in rows until the straps are long enough.
4. Attach the Straps: Once both straps are finished, attach them to the bodice of the apron. For the neck strap, sew or crochet the ends onto the top corners of the bodice. For the waist straps, attach them to the sides of the bodice at the bottom.
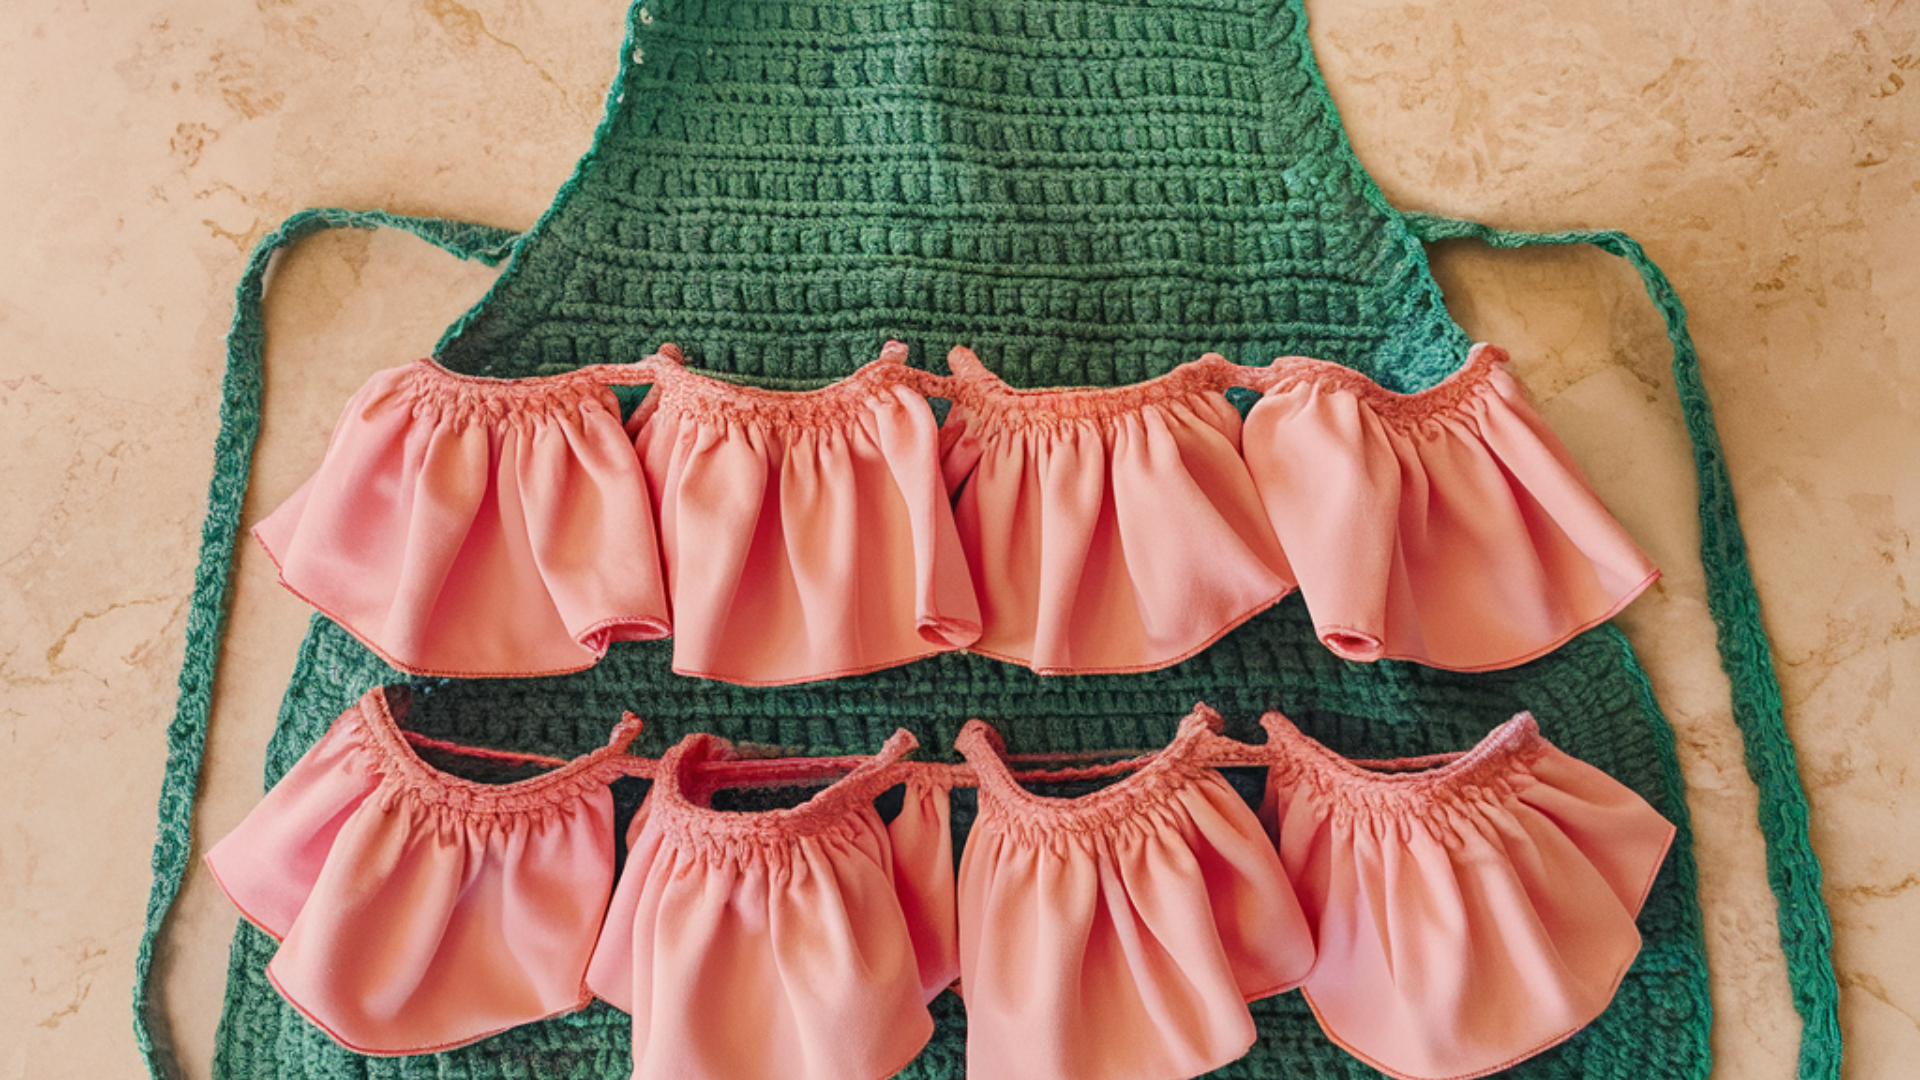
Step 4: Add Pockets (Optional)
Create the Pocket Pieces: If you’d like to add pockets to your apron, start by crocheting a small rectangle. Chain enough stitches to create a pocket that’s big enough to hold your hands or small tools.
Attach the Pockets: Once the pockets are the right size, sew or crochet them onto the apron. You can place them on the front of the skirt or the bodice, depending on where you want them. Make sure the pockets are securely attached so they can hold your items without tearing.
Step 5: Finishing Touches
Weave in the Ends: Once you’ve finished crocheting all parts of your apron, use a tapestry needle to weave in any loose ends of yarn. This will keep your apron looking neat and prevent any unraveling.
Block Your Apron: Blocking is a process that helps set the shape of your apron. Lay it flat on a clean, dry surface and pin it into place if needed. Let it dry completely, and this will help your apron hold its shape and give it a polished look.
Add Extra Decorations (Optional): You can personalize your apron further by adding cute embellishments like buttons, embroidery, or fabric trim. These little touches will make your apron unique and even more special!
Check out this amazing YouTube video by @WindingRoadCrochet to easily follow along with the steps!
Crocheting an apron is a simple and enjoyable project that allows you to create a functional and stylish item. By following this step-by-step guide, you can make an apron that fits your style perfectly.
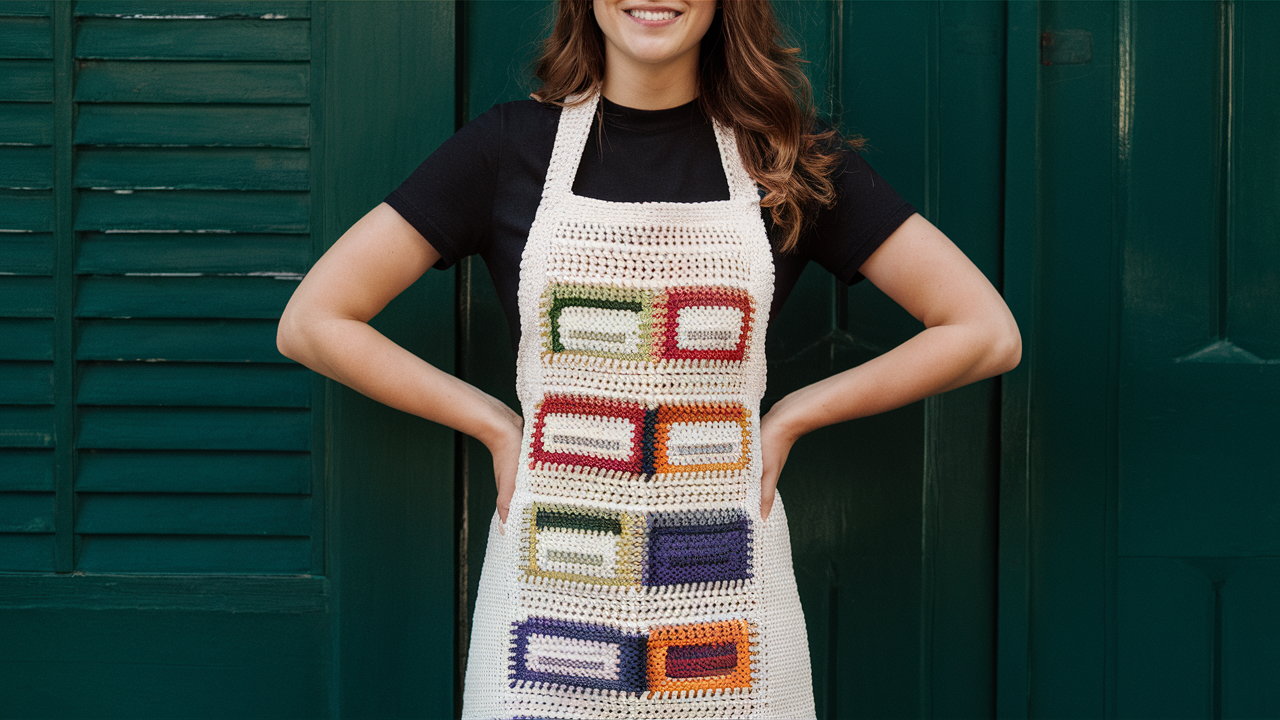
Free Crochet Apron Patterns to Try
If you’re ready to start crocheting your very own apron, there are plenty of free patterns out there that will help guide you every step of the way. Whether you’re looking for something simple, vintage-inspired, or fun, there’s a crochet apron pattern for every style.
1. Granny Square Apron
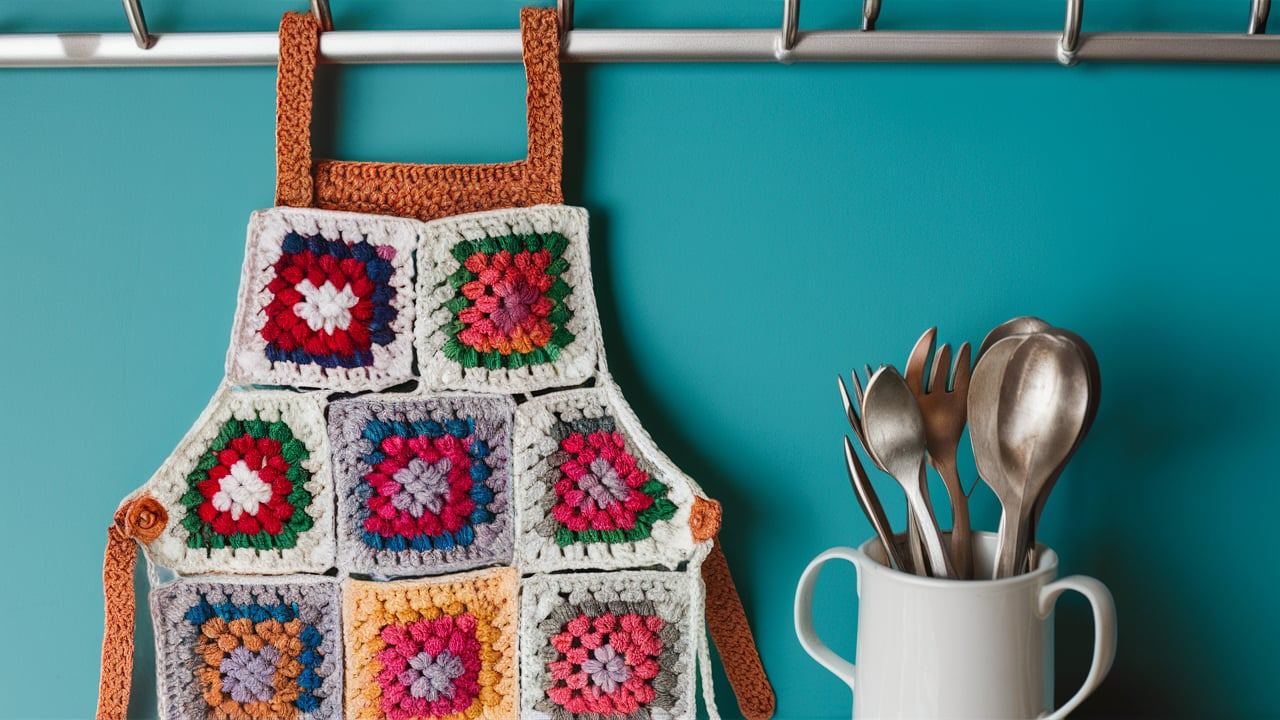
A Granny Square Apron is a great choice if you love working with classic crochet patterns. This apron uses granny squares, which are easy to make and add a fun, colorful touch to your apron. You can choose any colors you like, making this apron fully customizable to match your kitchen or personal style.
- What You Need: Cotton yarn in various colors, crochet hook (size H/8 or 5mm), and a pattern for the granny squares.
- Why It’s Great: Granny squares are beginner-friendly, and you can make them as big or small as you like. The apron can be as colorful and playful as you want.
- How to Make It: Start by crocheting several small granny squares, then sew them together to form the apron’s bodice and skirt. Add straps and pockets for extra detail.
2. Vintage-Inspired Apron
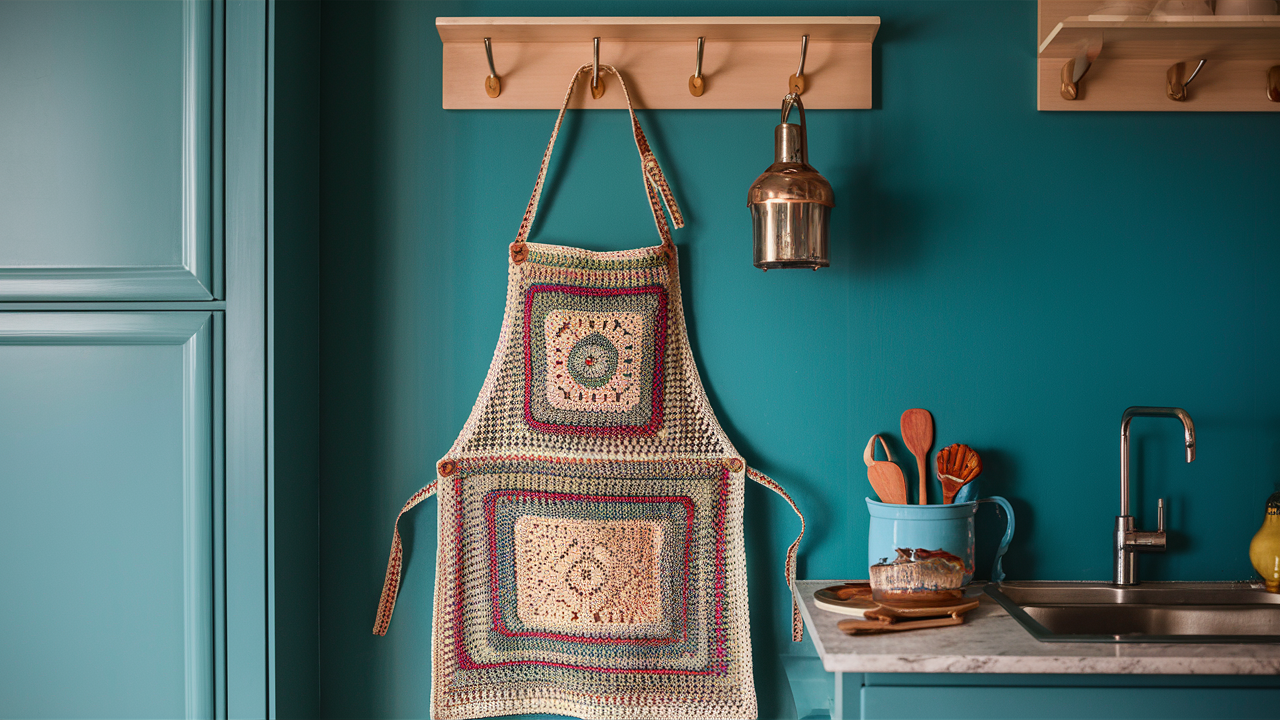
A vintage-inspired apron has a charming, retro look that’s perfect for anyone who loves classic styles. This pattern often features lacy details, frills, and feminine touches, making it a beautiful piece to wear while baking or cooking.
- What You Need: Lace-weight cotton yarn, crochet hook (size G/6 or 4mm), and a pattern with vintage-style elements.
- Why It’s Great: The delicate lace and frills give the apron a vintage, feminine vibe. It’s great for those who like more intricate designs and want something a bit more elegant.
- How to Make It: Start by crocheting a simple base for the bodice. Then, create the skirt with lacy patterns or frilly edges. Add neck and waist ties for a perfect fit. You can also add decorative touches like a ruffle or lace trim.
3. Mommy and Me Apron Set
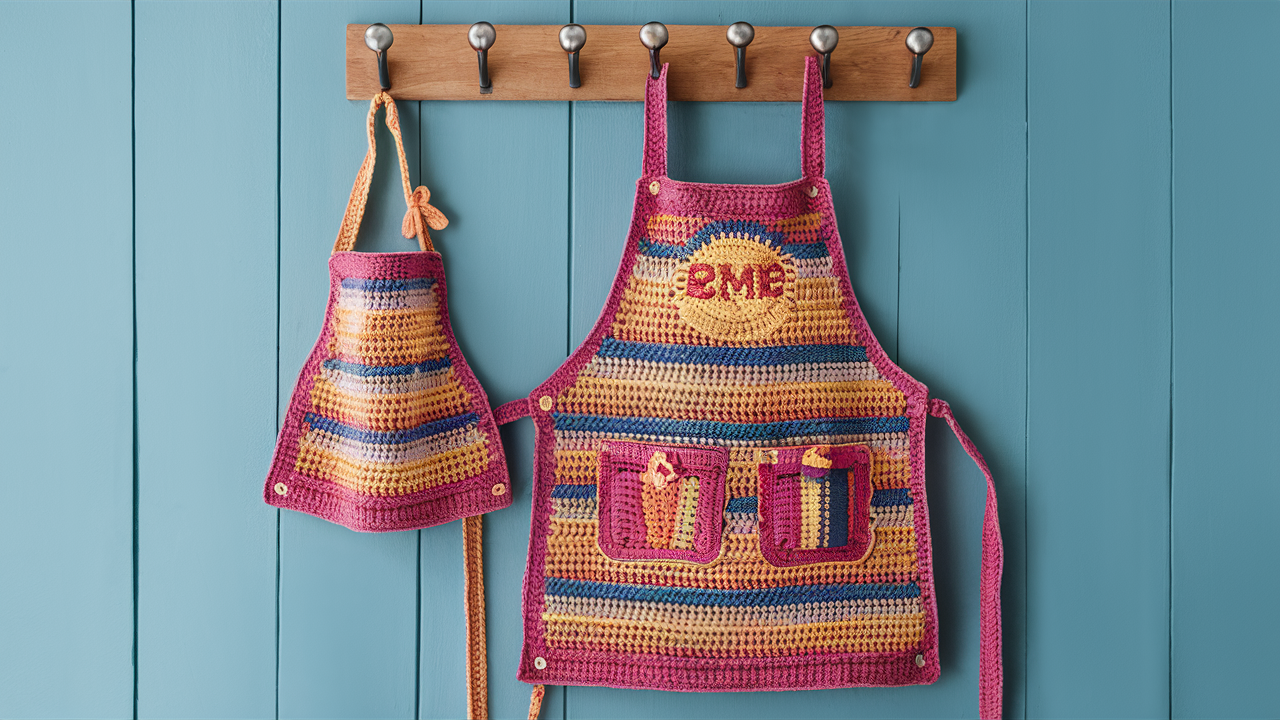
If you’ve got little ones who love to help in the kitchen or garden, a Mommy and Me Apron Set is a wonderful way to match with your child. This pattern creates matching aprons in adult and child sizes, so you can enjoy fun activities together while staying stylish.
- What You Need: Yarn in two different colors for contrast, crochet hook (size H/8 or 5mm), and a pattern for both adult and child aprons.
- Why It’s Great: This pattern is ideal for parents who want to share a fun crafting experience with their kids. You get to make matching aprons, which make for adorable photos and great memories.
- How to Make It: Follow the pattern for the adult apron first, then adjust it for the child’s size by making smaller straps and a shorter skirt. Both aprons will share the same basic design, but in a way that’s perfect for each size.
4. Farmhouse Apron
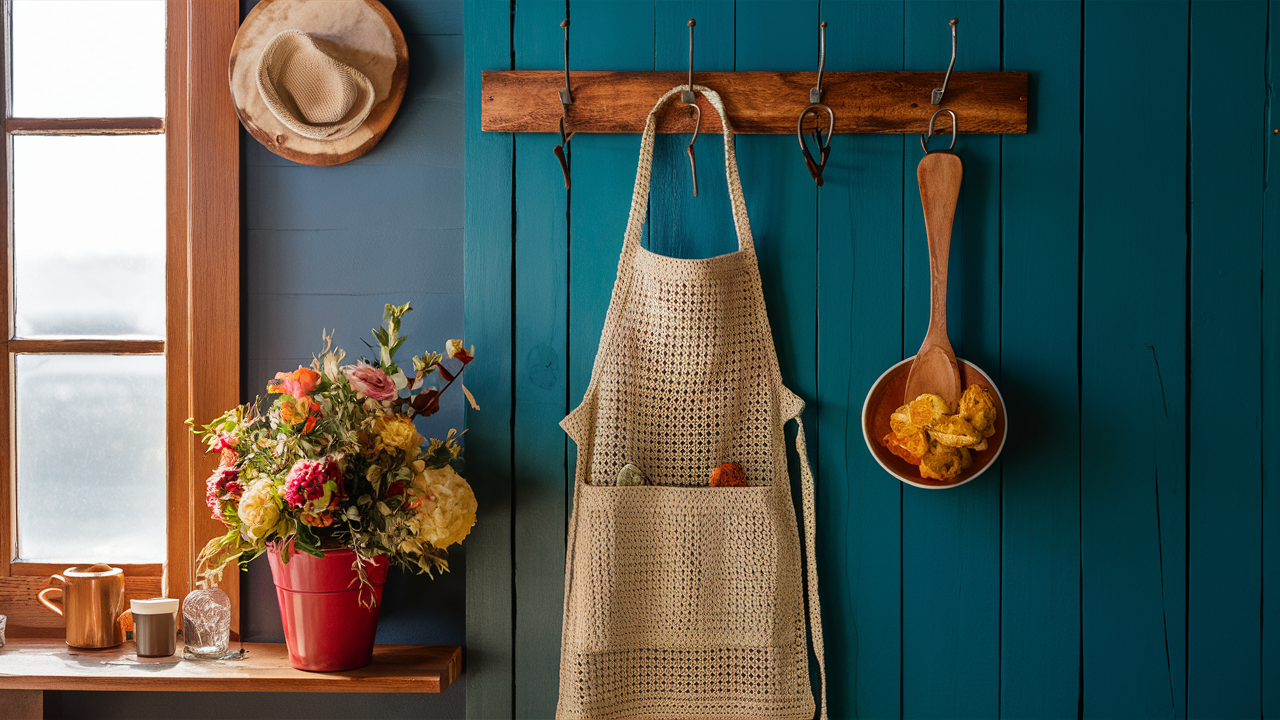
A farmhouse-style apron gives a rustic and cozy feel to any kitchen. This pattern is simple but stylish, perfect for anyone who loves the charm of country living. With its clean lines and classic look, this apron can be worn for all kinds of tasks, from cooking to crafting.
- What You Need: Rustic cotton yarn (natural or neutral colors like beige or gray), crochet hook (size H/8 or 5mm), and a pattern with simple stitch work.
- Why It’s Great: This apron has a simple, elegant design that’s perfect for everyday use. It’s practical but still looks stylish enough for a cozy farmhouse vibe.
- How to Make It: Start with a basic rectangle for the bodice, then crochet the skirt portion in rows. Add long straps for the neck and waist, and you’re done. It’s an easy, no-fuss pattern that looks great in any kitchen.
5. Egg-cellent Apron
If you love spending time in the garden or raising chickens, the Egg-cellent Apron is a perfect project for you. This pattern is designed with special pockets that are perfect for collecting eggs, making it both functional and cute.
- What You Need: Cotton yarn (choose natural or earthy tones), crochet hook (size H/8 or 5mm), and a pattern with large, deep pockets.
- Why It’s Great: The deep pockets are perfect for gathering eggs or carrying small tools. It’s practical, cute, and perfect for any backyard gardener.
- How to Make It: Start by crocheting the bodice and skirt as usual. Then, add extra-large pockets to the front of the apron for easy storage. You can also add a button or two to keep the pockets secure.
Crocheting an apron is a great way to make something both beautiful and practical. Each pattern offers something different, allowing you to express your personal style while creating a functional piece that you’ll enjoy using.
Tips for Beginners: Crocheting Aprons
If you’re new to crocheting, making an apron might feel a little tricky at first. But don’t worry! With a little patience and practice, you’ll be making beautiful, useful aprons in no time.
1. Start with Simple Patterns: If you’re just beginning, choose a simple pattern to start with. Look for aprons that use basic stitches like single crochet (sc) or double crochet (dc). These stitches are easy to learn and perfect for beginners.
2. Practice Your Stitches: Create a small swatch with just a few rows to get comfortable with holding the yarn and making stitches. Once you’re confident, you can start your apron.
3. Check Your Tension: Crochet is all about tension—the way you hold the yarn and make your stitches. Try to keep your stitches even. If they’re too tight, your work will be stiff; if they’re too loose, the fabric might stretch out.
4. Use Stitch Markers: Stitch markers are really helpful for beginners. They can mark the beginning of a row, or show where you need to increase or decrease stitches. This helps you stay on track and makes it easier to follow your pattern.
5. Use the Right Yarn and Hook: For beginners, it’s best to use medium-weight yarn (like worsted weight) and a corresponding hook size. This yarn is easy to work with and not too thick or thin.
Crocheting an apron as a beginner might seem like a big task, but with these simple tips, you’ll feel more confident and ready to get started. Take your time, practice, and don’t be afraid to ask for help if you need it.
Conclusion
In conclusion, crocheting your own apron is a fun and rewarding project that allows you to create something practical and personal. Whether you’re a beginner or an experienced crocheter, there’s a pattern out there for you, from simple designs to more intricate vintage or farmhouse styles.
By choosing the right yarn, learning the basic stitches, and following the steps in this guide, you’ll be able to make a beautiful apron that suits your style and needs. Don’t forget to practice and take your time—crocheting is all about enjoying the process!
And if you’re new to crochet, remember that it’s okay to make mistakes. With patience and a little creativity, you’ll soon be wearing your own handmade apron or gifting one to someone special. So grab your crochet hook and yarn, and get started on your apron today!
For more detailed information on the types of materials you can use for your crochet projects, be sure to check out our guide on crochet materials.