If you’ve ever thought about sewing something simple and useful, making a cloak is a good place to start.
It doesn’t take a lot of experience or expensive tools, and it’s one of those projects that can be both fun and practical.
If you’re getting ready for Halloween, helping your kid with a school project, or want something warm to throw on, there’s no need to buy a fancy pattern.
You can find a cloak pattern free online that works just as well as something you’d pay for.
In this blog, I’ll discuss a few things to consider before choosing your pattern and share 11 free cloak patterns I think are worth trying.
If you have some basic supplies, a little time, and a bit of curiosity, this is a great project to start.
Why Make Your Own Cloak?
Sewing your own cloak has a few clear benefits. First, it’s usually much cheaper than buying one.
You don’t need to purchase a pattern if you use one of the free ones available, and in many cases, you can use fabric you already have.
Second, it gives you more control. You get to choose the fabric, color, style, and the length or cut you prefer.
That kind of flexibility is beneficial, especially when creating something for someone else or trying to match a specific outfit or costume.
You also don’t need to be an expert sewer. Most of these patterns are easy enough for beginners, especially the ones that don’t require lining or extra steps.
I started with a no-sew fleece cloak a few years ago and was surprised by how simple it was.
Since then, I’ve tried longer cloaks with hoods and even made one for a family member. It’s a relaxing project, and if you’re like me and enjoy slow, creative tasks, you might really enjoy it.
Cloak Patterns You Can Find for Free
Want to make a cloak but not sure where to start? Good news, there are many free, easy-to-follow patterns out there, and you don’t need fancy skills or supplies to begin.
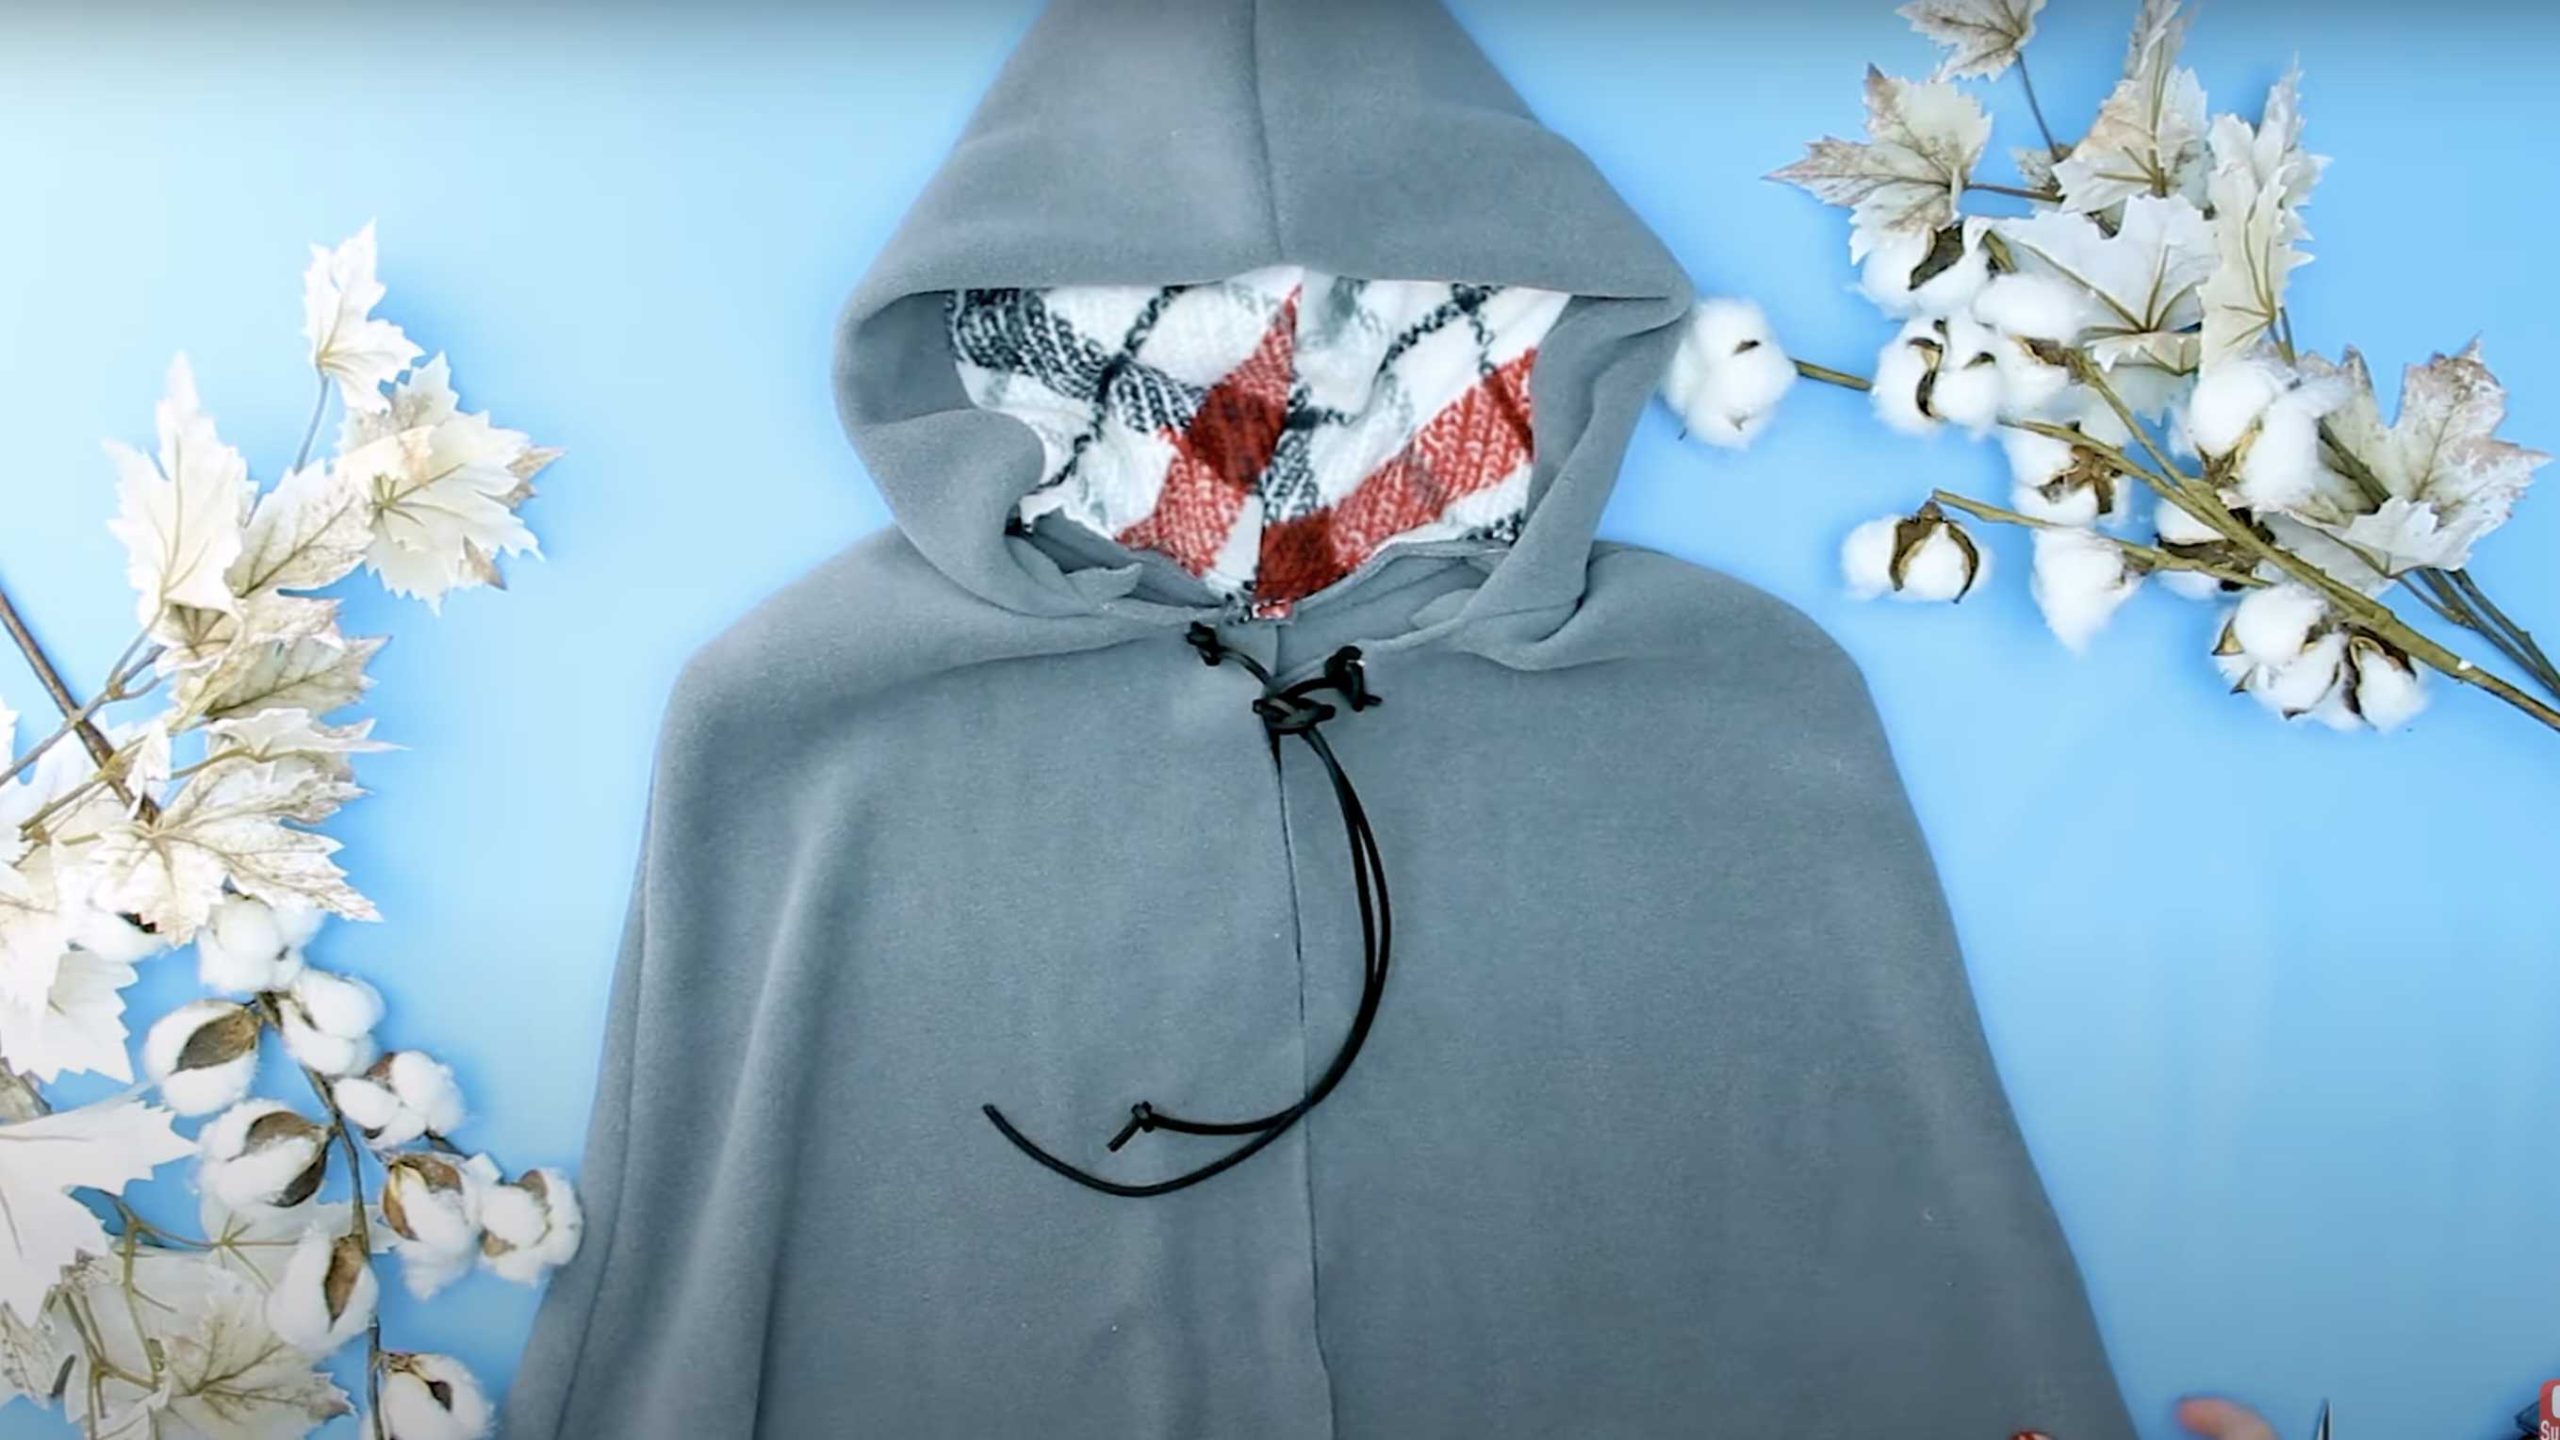
1. Classic Hooded Cloak
This is probably the style that comes to mind first when people hear the word “cloak,” and that’s because it’s a timeless design that works in a lot of different situations.
It usually has a relaxed, roomy fit and a large hood that drapes over the head comfortably, making it a great choice for cooler weather or as part of a costume for a play or Halloween.
The cloak often reaches all the way to the floor or just above the ankles, giving it a dramatic look without being too hard to sew, even for beginners.
2. Short Shoulder Capelet
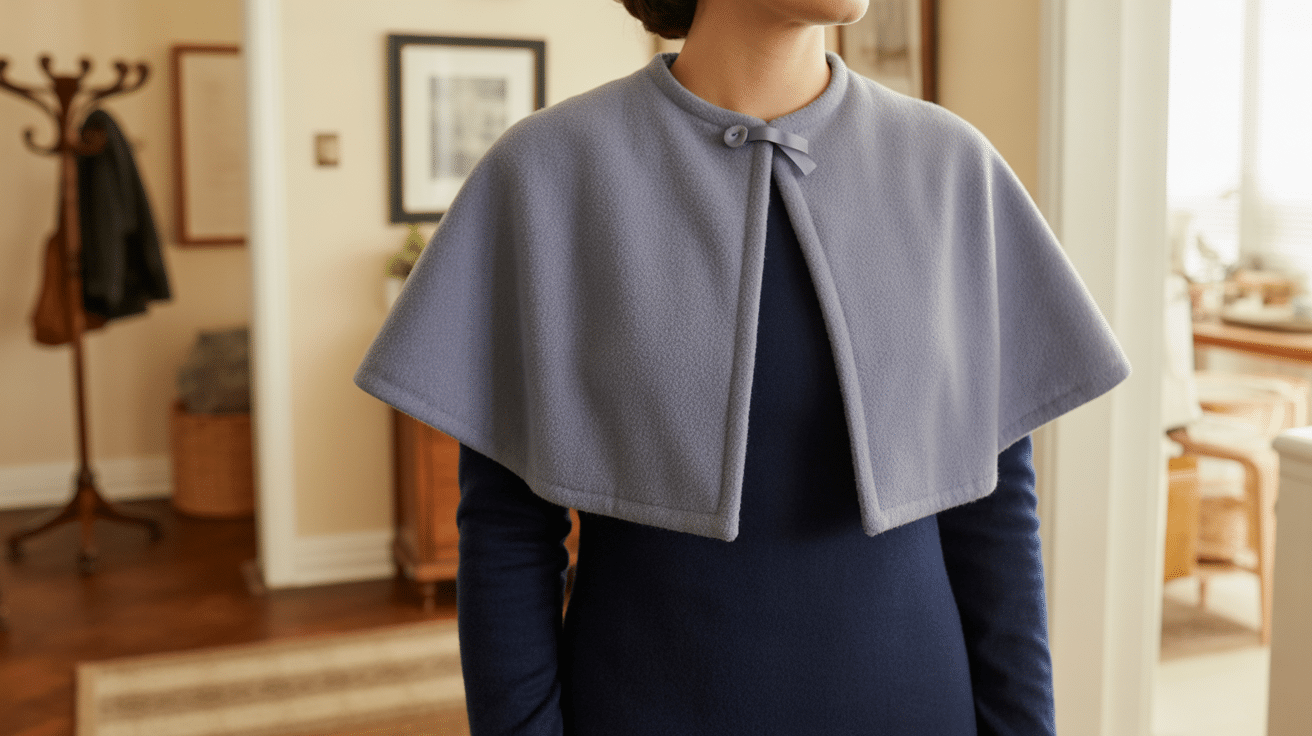
If you’re looking for something easier to move around in and that uses less fabric, a shoulder capelet might be exactly what you need.
It sits across the shoulders and upper arms, kind of like a small blanket or wrap, but with a more structured shape.
It’s a smart option if you want to add a little extra warmth or complete a costume without making a full-length cloak. I like this one because it’s quick to finish and still looks nice when layered over a shirt or dress.
3. No-Sew Fleece Cloak
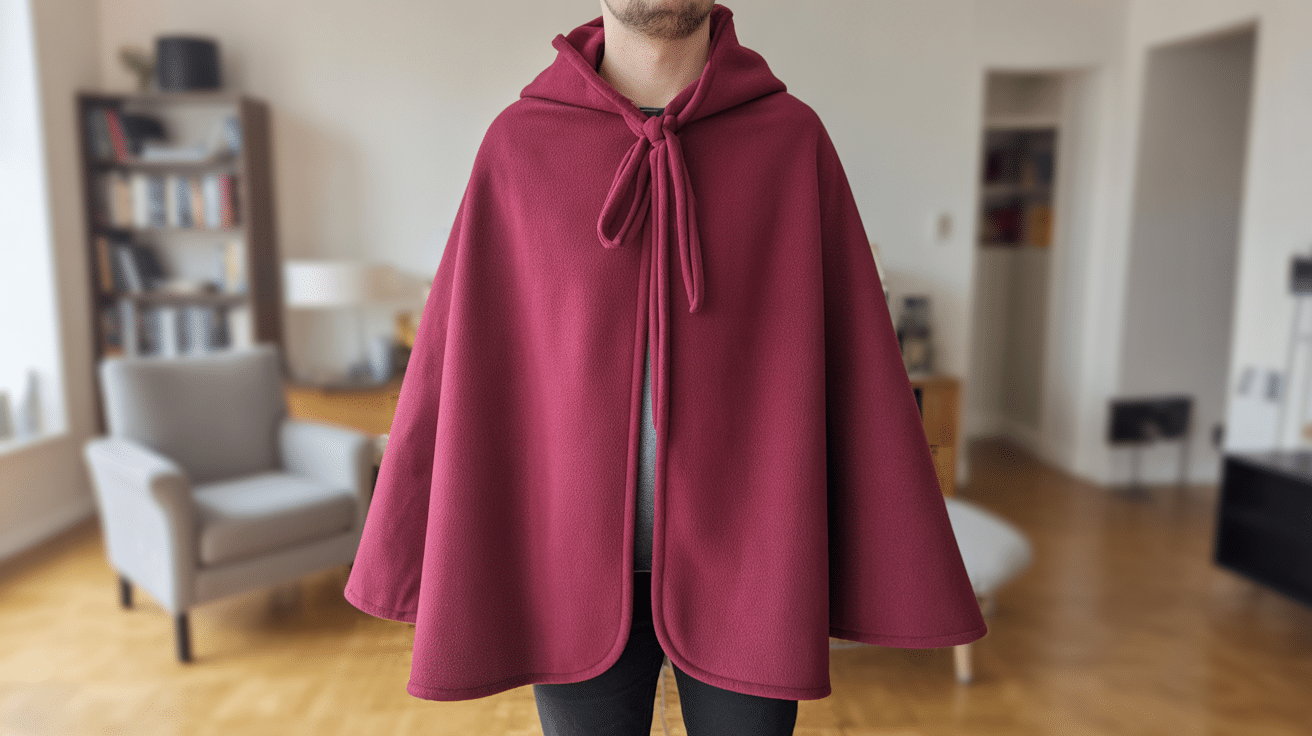
This pattern is a good choice for someone who doesn’t have a sewing machine or wants something they can make quickly without dealing with stitches, seams, or a bunch of steps.
All you need is some fleece fabric, a pair of sharp scissors, and a way to tie or fasten the cloak around your neck.
Because fleece doesn’t fray, you don’t have to hem the edges, which makes this one of the easiest and fastest options, perfect for last-minute costumes or simple dress-up play at home.
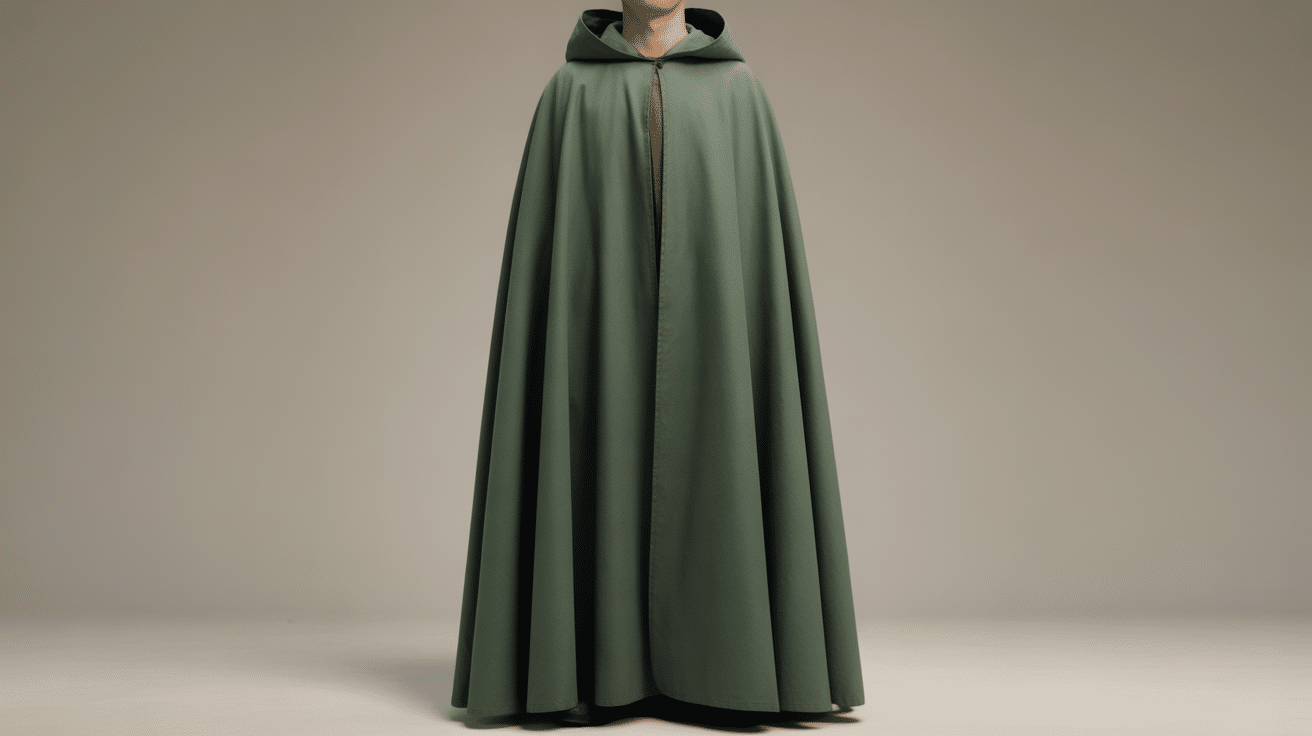
4. Elven-Style Cloak
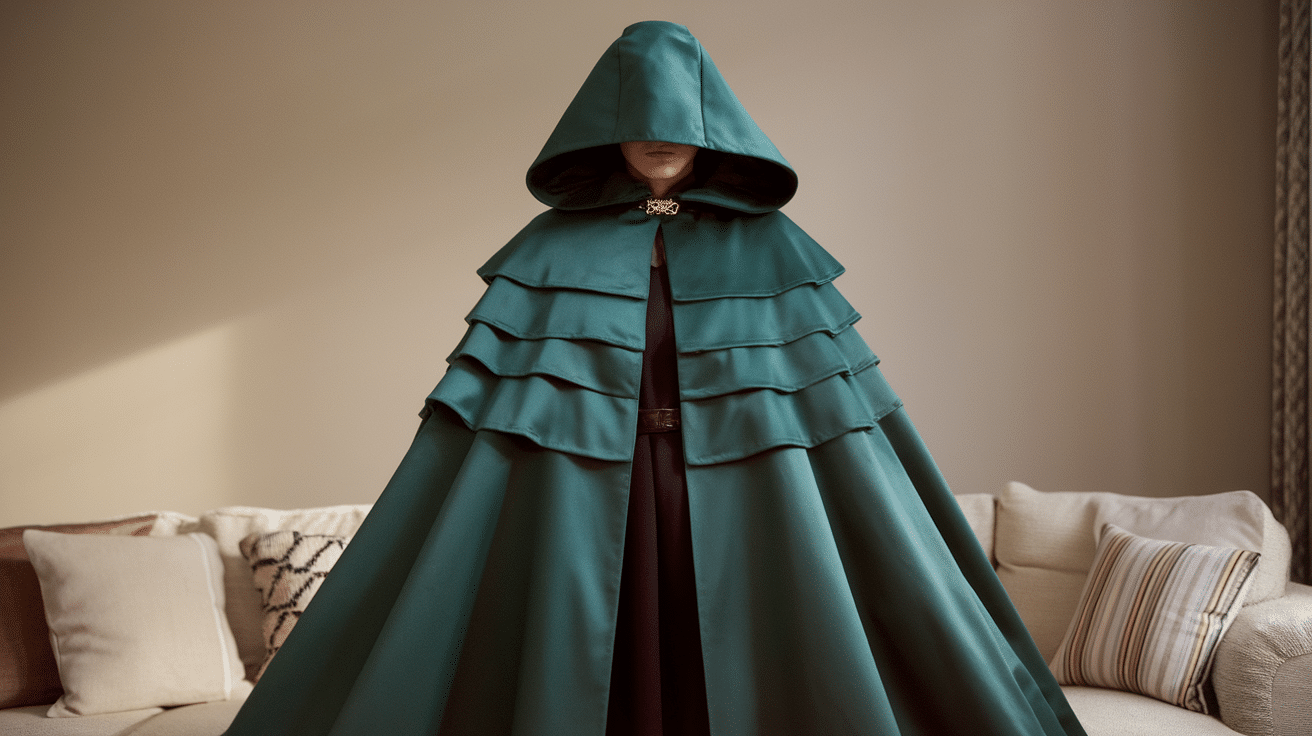
For fans of fantasy books, movies, or games, an elven-style cloak is a fun and stylish project to try.
These cloaks are usually shaped to fit a bit more closely around the shoulders and often feature a pointed hood or extra length in the back that flows while you walk.
Even though the design looks a bit more detailed, most free elven cloak patterns are still pretty simple to follow, and the final result looks really nice, especially with earthy or deep-colored fabrics like forest green or navy blue.
5. Medieval Circle Cloak
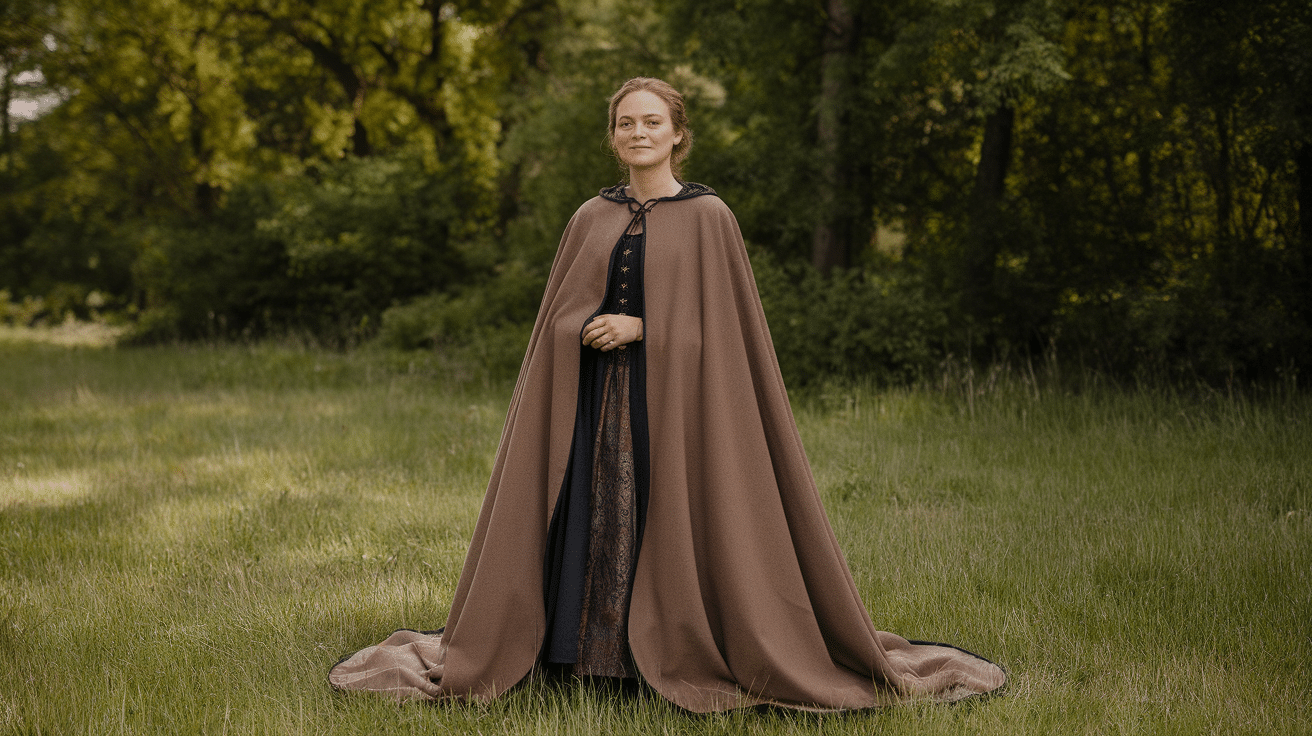
This kind of cloak is cut in a large circular shape, which means it falls in soft folds and has a lot of movement when worn.
It’s often used in historical or fantasy costumes and, depending on the fabric, can look very traditional or even royal.
Because of the amount of fabric involved, it can take a bit more time to cut and sew, but the flowy feel and fuller coverage make it a great choice if you want something dramatic yet comfortable and warm.
6. Kid’s Cloak Pattern

If you’re making a cloak for a child, many free patterns are sized down and easier to manage.
These smaller cloaks take less fabric and less time to sew, and they’re perfect for costumes, school events, or just playing pretend at home.
You can have fun with it by using bright fabrics, simple patterns, or even letting the child pick out the materials and colors to help.
It’s a fun and simple project to do with kids, especially on a weekend or during a school break.
7. Reversible Cloak
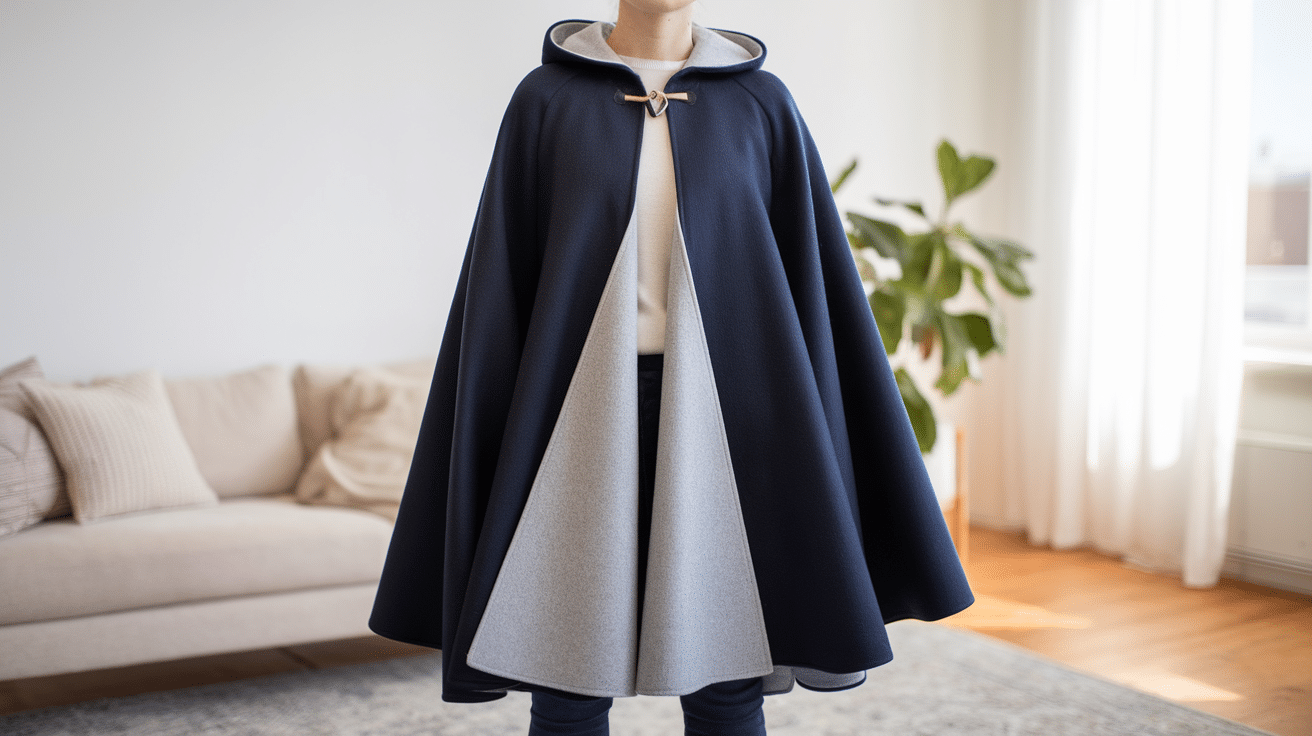
A reversible cloak is a smart idea if you want two looks in one, and it works by sewing together two layers of fabric back-to-back so that either side can face out.
This pattern takes a little more time and fabric, but it gives you a neat and polished result, especially if you use two colors or prints that go well together.
Some people like to use a fun print on one side and a solid color on the other, so they can flip it depending on their mood or what they’re wearing.
8. Sherlock-Style Cloak with Collar
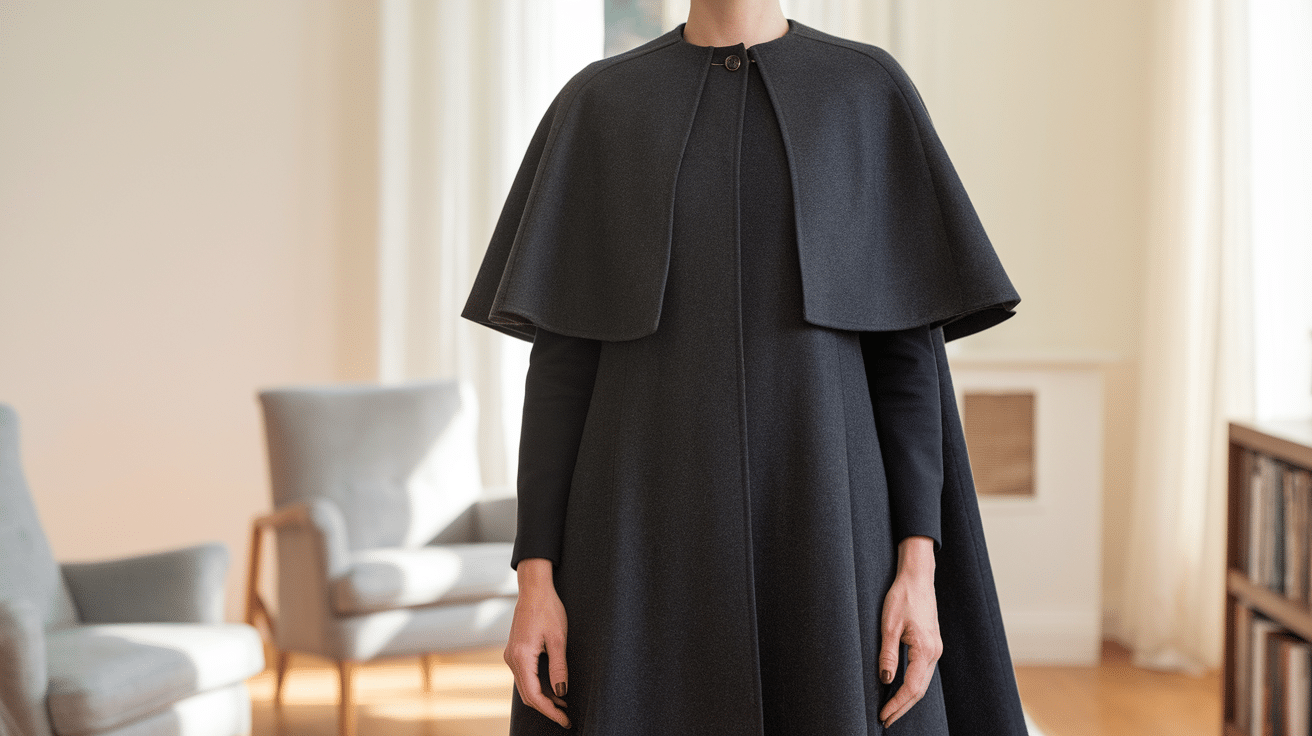
This style is inspired by older detective and Victorian looks. It usually has a short or mid-length design with a small collar instead of a hood.
Sometimes, it even has a shoulder overlay for added style. It’s a little more structured than a casual cloak and can be worn like a lightweight jacket or as part of a historical costume.
It’s a good pick if you like cloaks but prefer something that feels a little more tailored and less flowy.
9. Rain Cloak with Waterproof Fabric
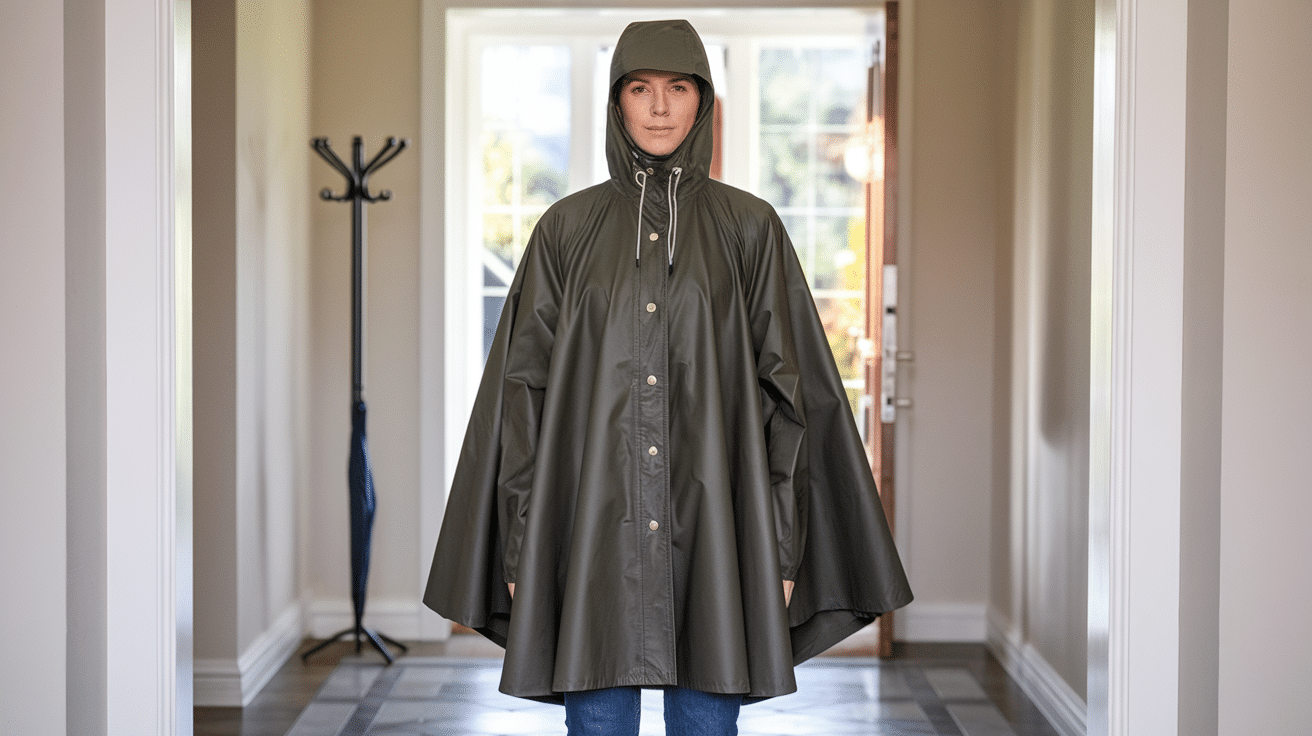
This is a practical option if you want a cloak you can wear outdoors when it’s wet or windy.
By using a waterproof or water-resistant material like nylon or polyester, you can sew a simple cloak that keeps you dry without needing a standard raincoat.
These patterns usually keep things simple with a loose fit and an open front, sometimes closed with a tie or snap. It’s also a good cloak to keep in a bag or car for unexpected showers.
10. Fantasy Robe Cloak
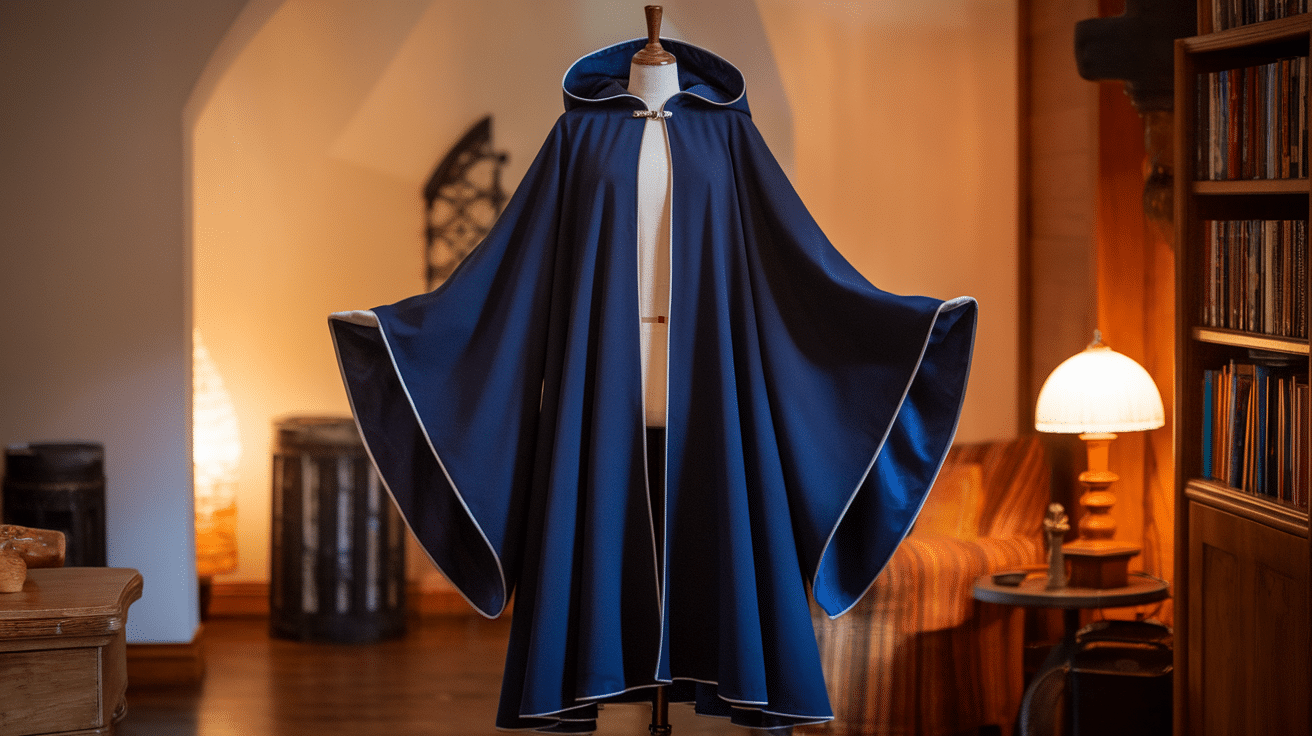
This version is shaped more like a full robe than a regular cloak, which means it usually has long sleeves and often goes all the way down to the floor.
It’s a great choice for full costume looks, whether you’re going to a themed party, a cosplay event, or putting together a wizard outfit for Halloween.
Most of the free patterns come with clear instructions, and you can easily adjust them to make them shorter, add pockets, or trim.
11. Faux Fur Capelet
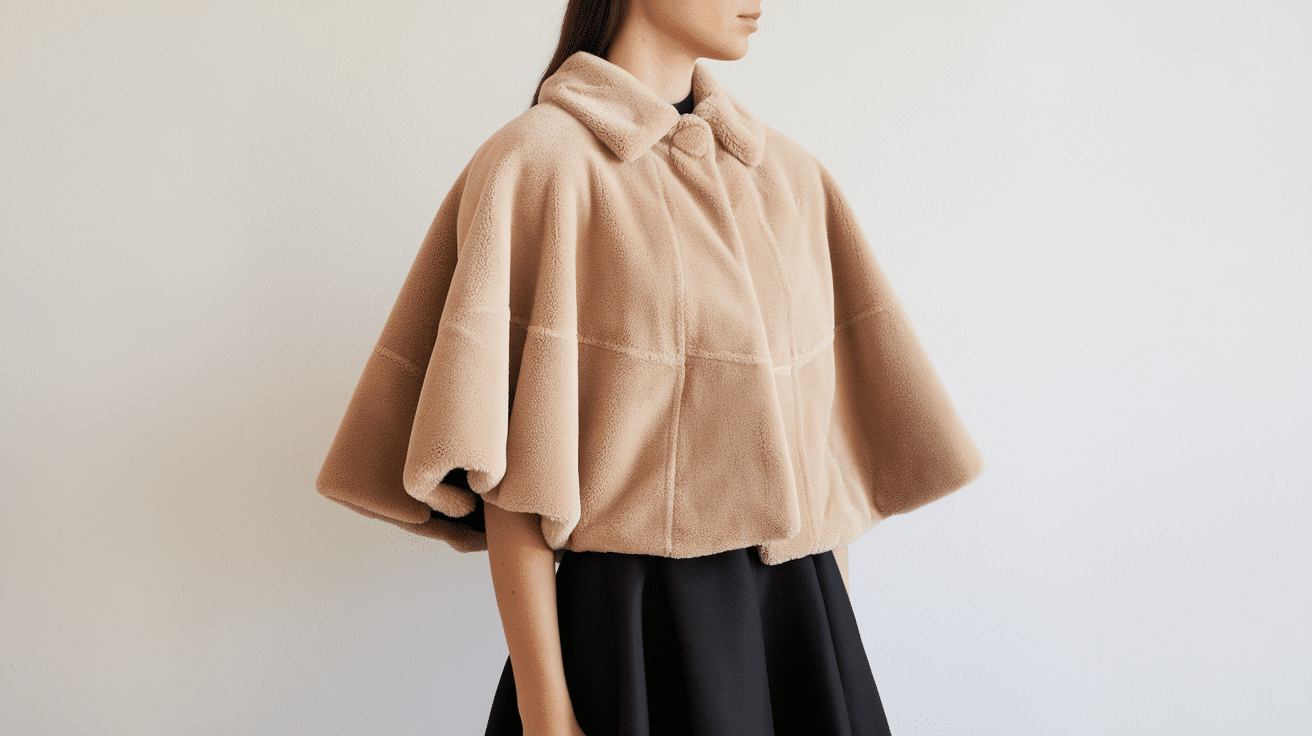
A faux fur capelet is perfect for a cozy, winter-inspired look that still feels stylish and fun to wear.
It’s shorter than a full cloak and usually wraps around the shoulders, kind of like a shawl but with more structure.
You can use real or faux fur. It’s a great way to use leftover materials or turn something simple into something a little fancier without much extra work.
Step-by-Step Guide to Make a Long Hooded Cloak
Follow these steps to cut, sew, and finish your long hooded cloak. Each section includes simple instructions to guide you from raw fabric to a finished costume piece.
Materials You Need
Before you start sewing, make sure you have all the necessary fabric, tools, and pattern pieces. This project is beginner-friendly and uses fleece or jersey knit for comfort and drama.
- 3¾ yards of fleece or jersey knit fabric for the cloak exterior (must be 60″ wide)
- ¾ yard of fleece or jersey knit for the hood lining
- 1 yard of leather cord, ribbon, button, or clasp for closure
- Basic sewing tools: scissors, pins, matching thread, sewing machine
Step 1: Cut Out the Cloak Pieces
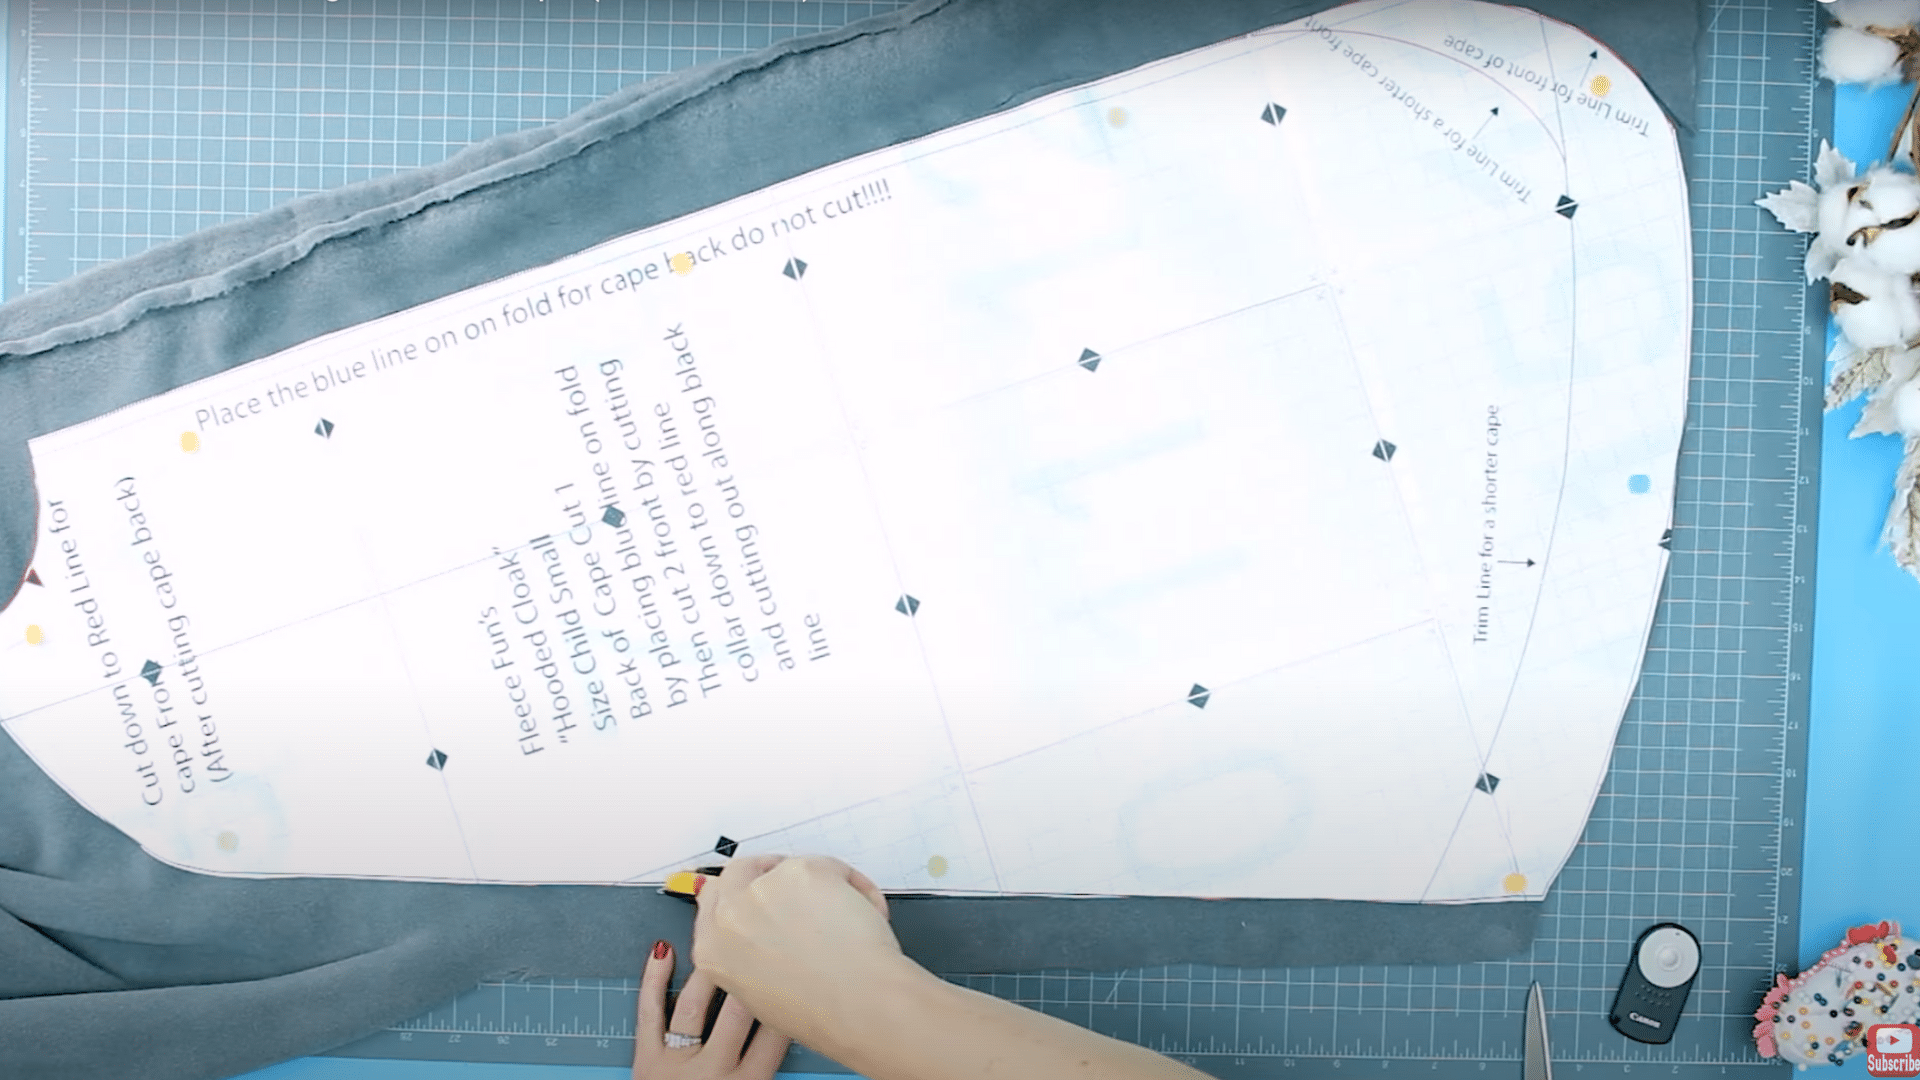
Begin by cutting the back piece. Place the pattern on the fabric fold, aligning the blue line with the fold. You’ll notice a small lip of paper hanging off; that’s normal.
Next, trim the same pattern piece along the red lines to create the front pieces, which are slightly shorter to prevent tripping.
Lay this modified piece on doubled fabric to cut two symmetrical front panels. If your fabric isn’t patterned, you can flip the pattern to save material.
Step 2: Cut Out the Hood Pieces
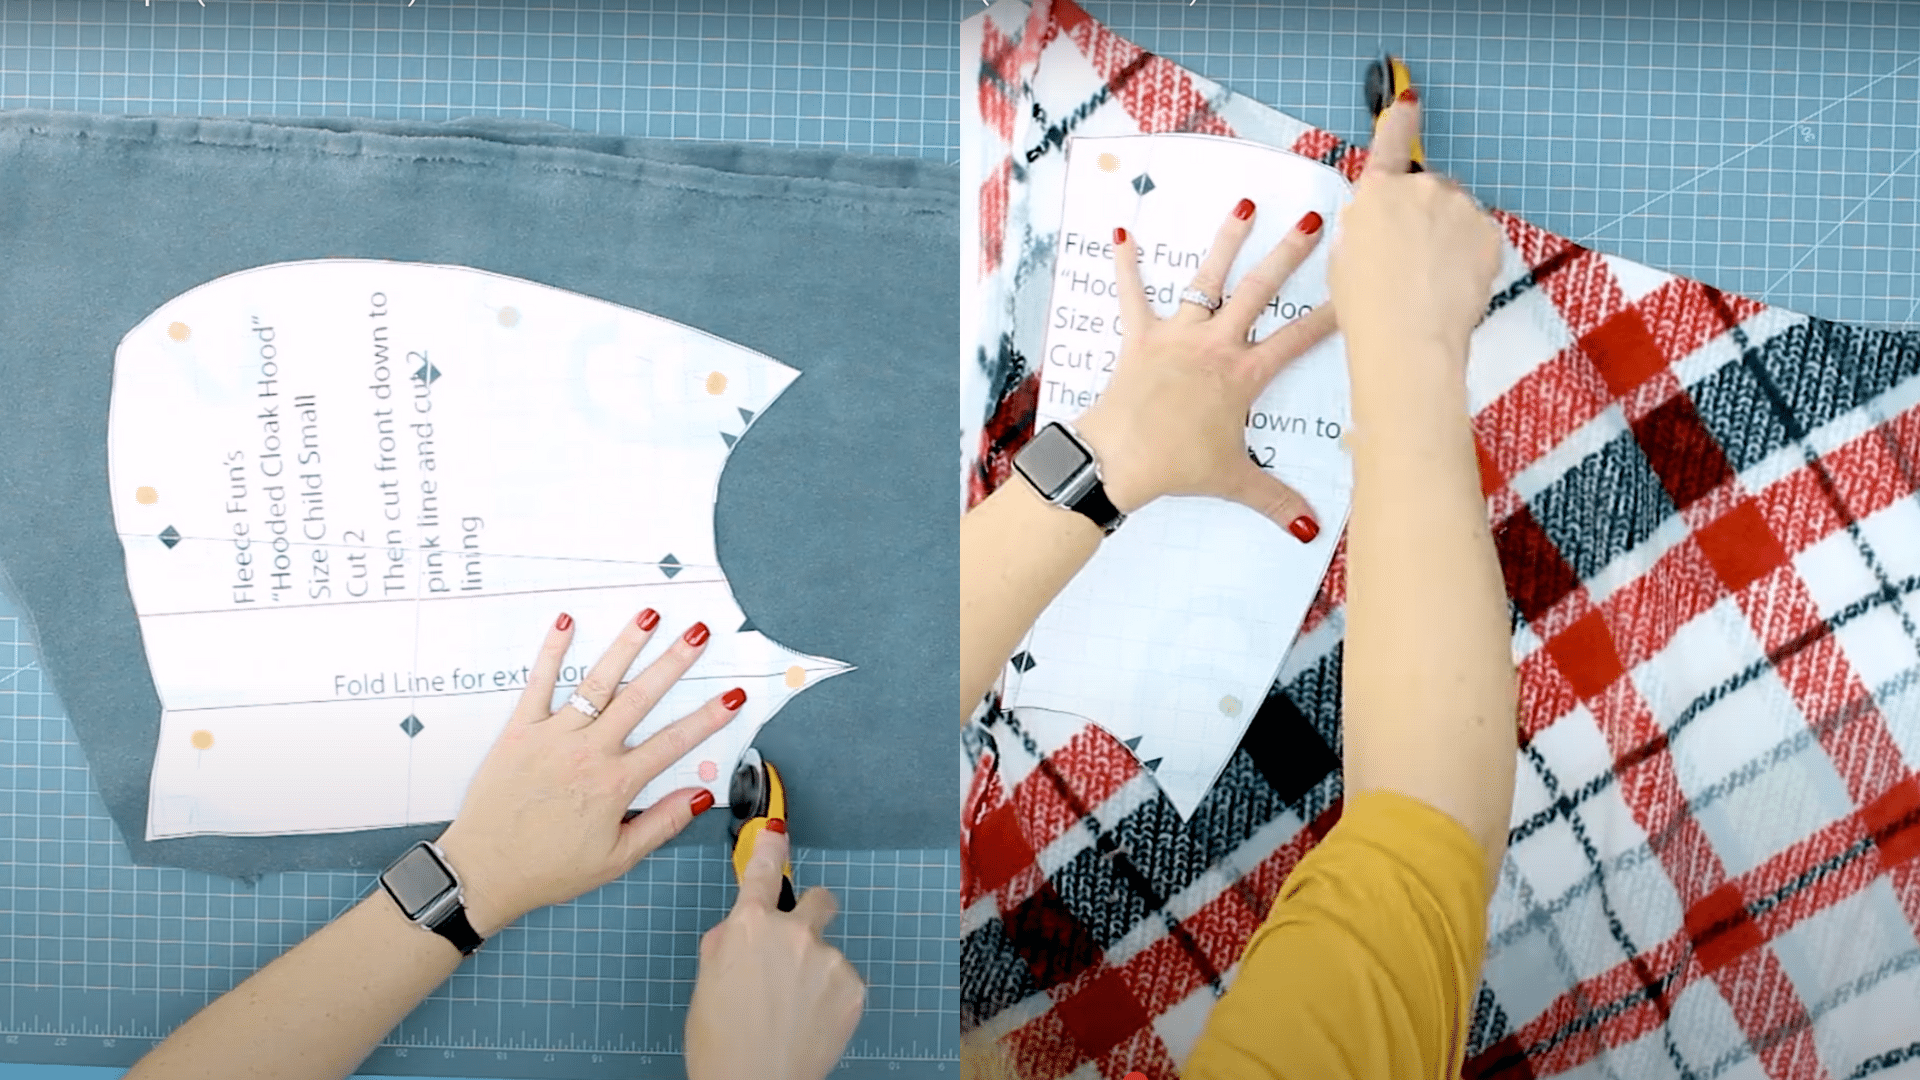
Use the same pattern-cutting logic for the hood. First, cut two exterior hood pieces from doubled fabric.
Then trim the pattern along the red or pink guideline and cut two hood lining pieces from another doubled section. Set all your hood pieces aside for now.
Step 3: Sew the Cape Body
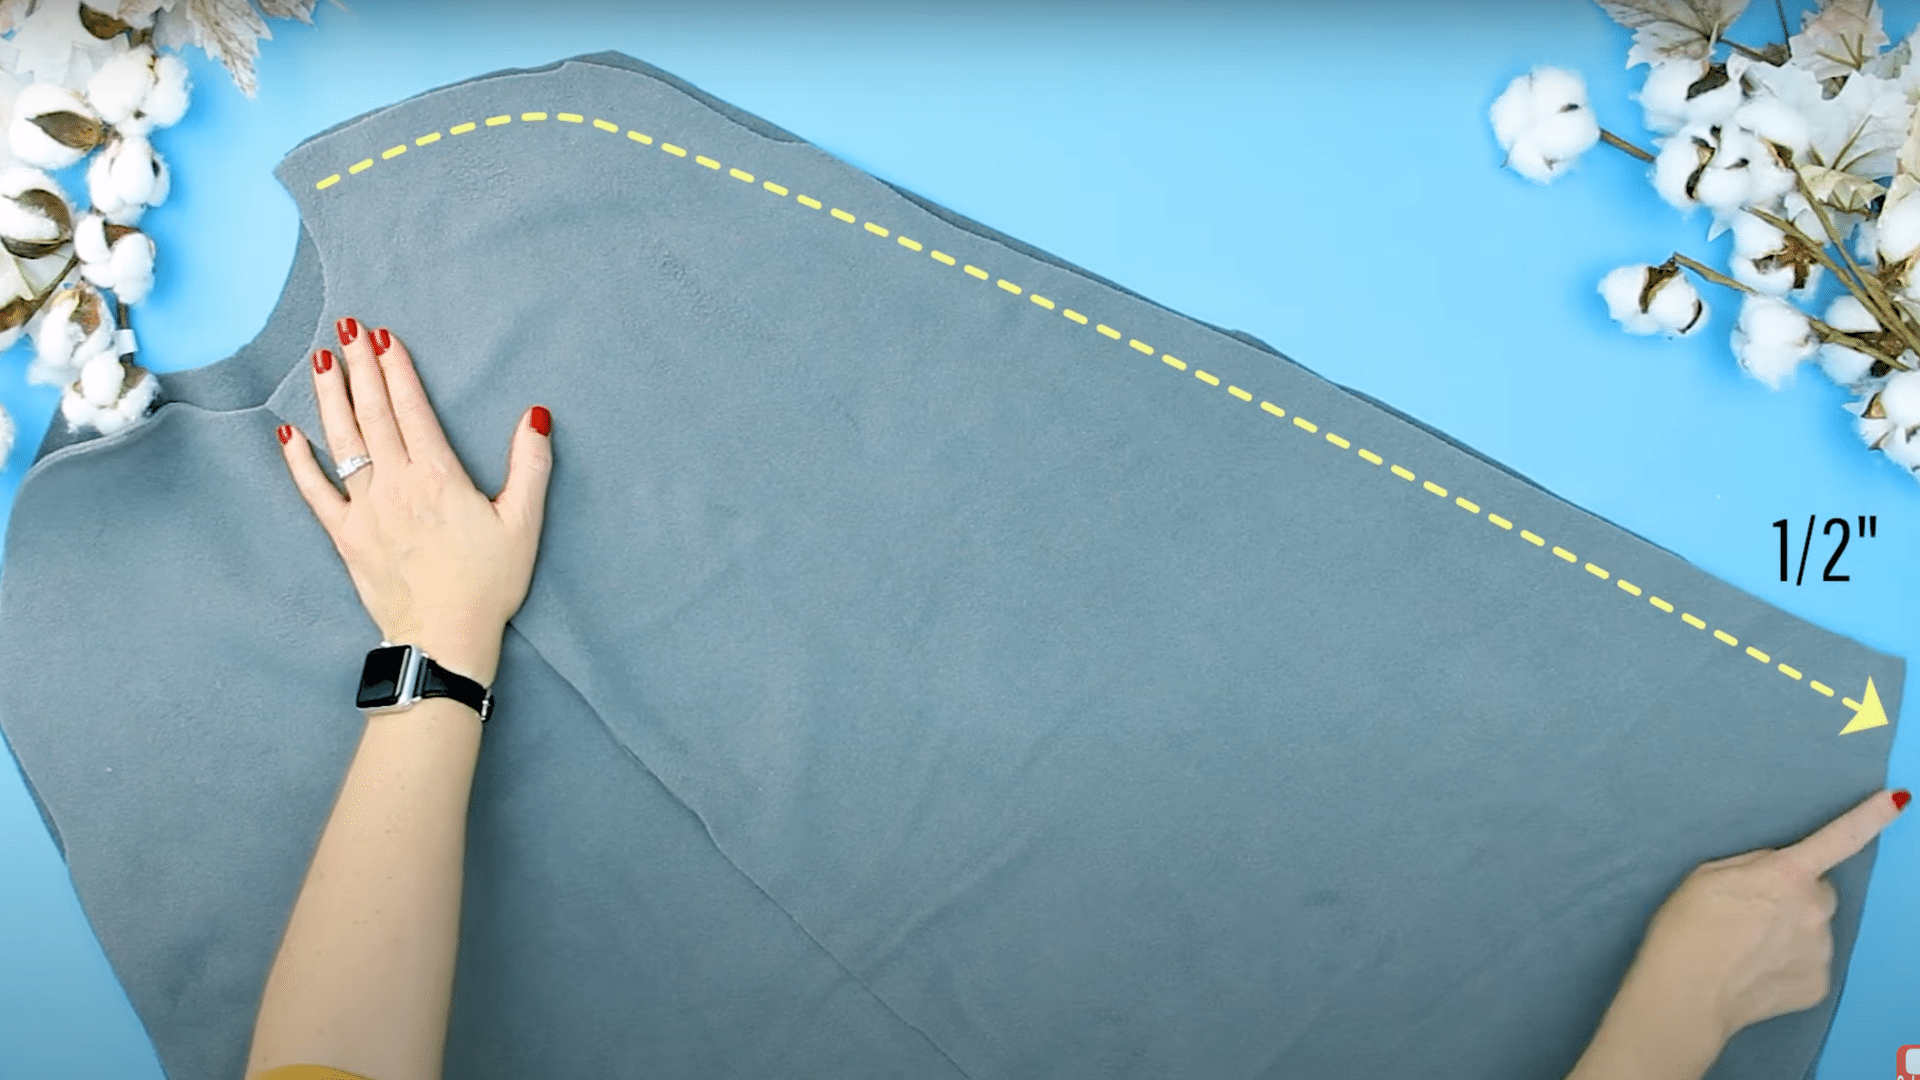
Lay the back cloak piece flat, right side facing up. Then, place the two front pieces right-side down on top, aligning the shoulders.
Sew each front panel to the back panel along the shoulder seams using a ½-inch seam allowance, from collar to hem. Set aside the completed body once sewn.
Step 4: Sew the Hood
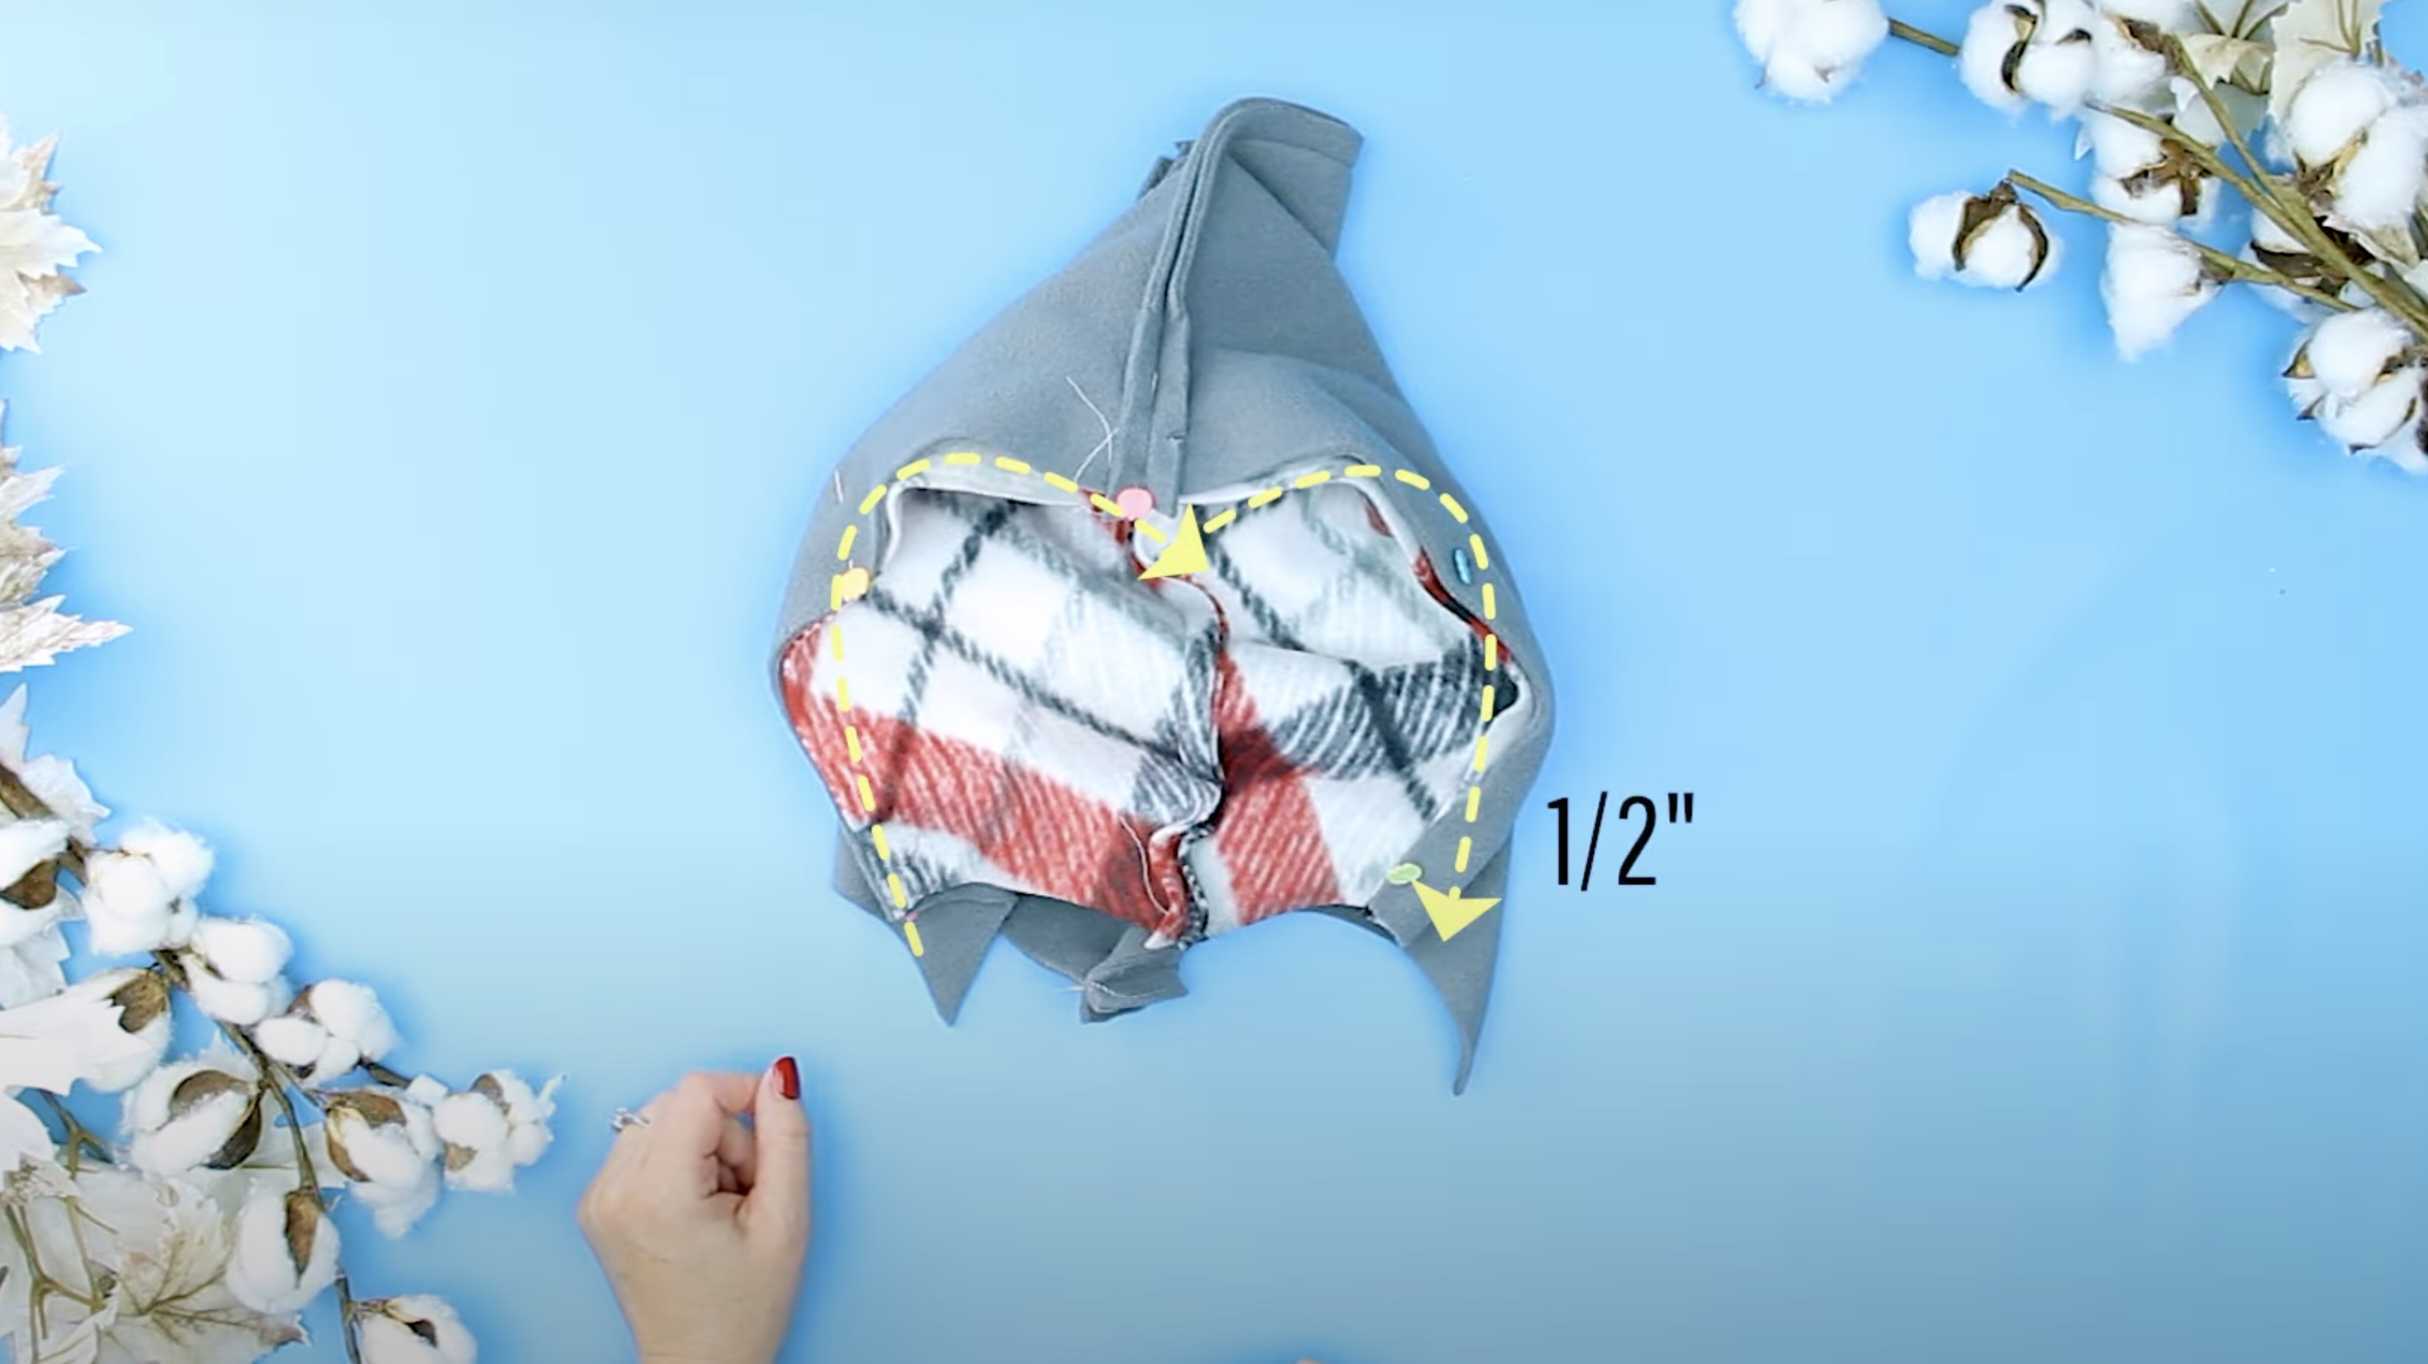
Sew the two exterior hood pieces together along the curved edge, right sides facing, using a ½-inch seam allowance. Repeat for the hood lining pieces. Clip the curves to help them lie flatter.
Turn the lining right side out, then place it inside the exterior hood, aligning the front edges so the right sides touch.
Sew only the front edges together; don’t worry if the lining doesn’t reach the back of the hood. Turn the hood right side out again, tuck the lining back in, and pin it in place.
Optionally, top-stitch (“stitch in the ditch”) to help it stay neat and secure.
Step 5: Attach the Hood to the Cape
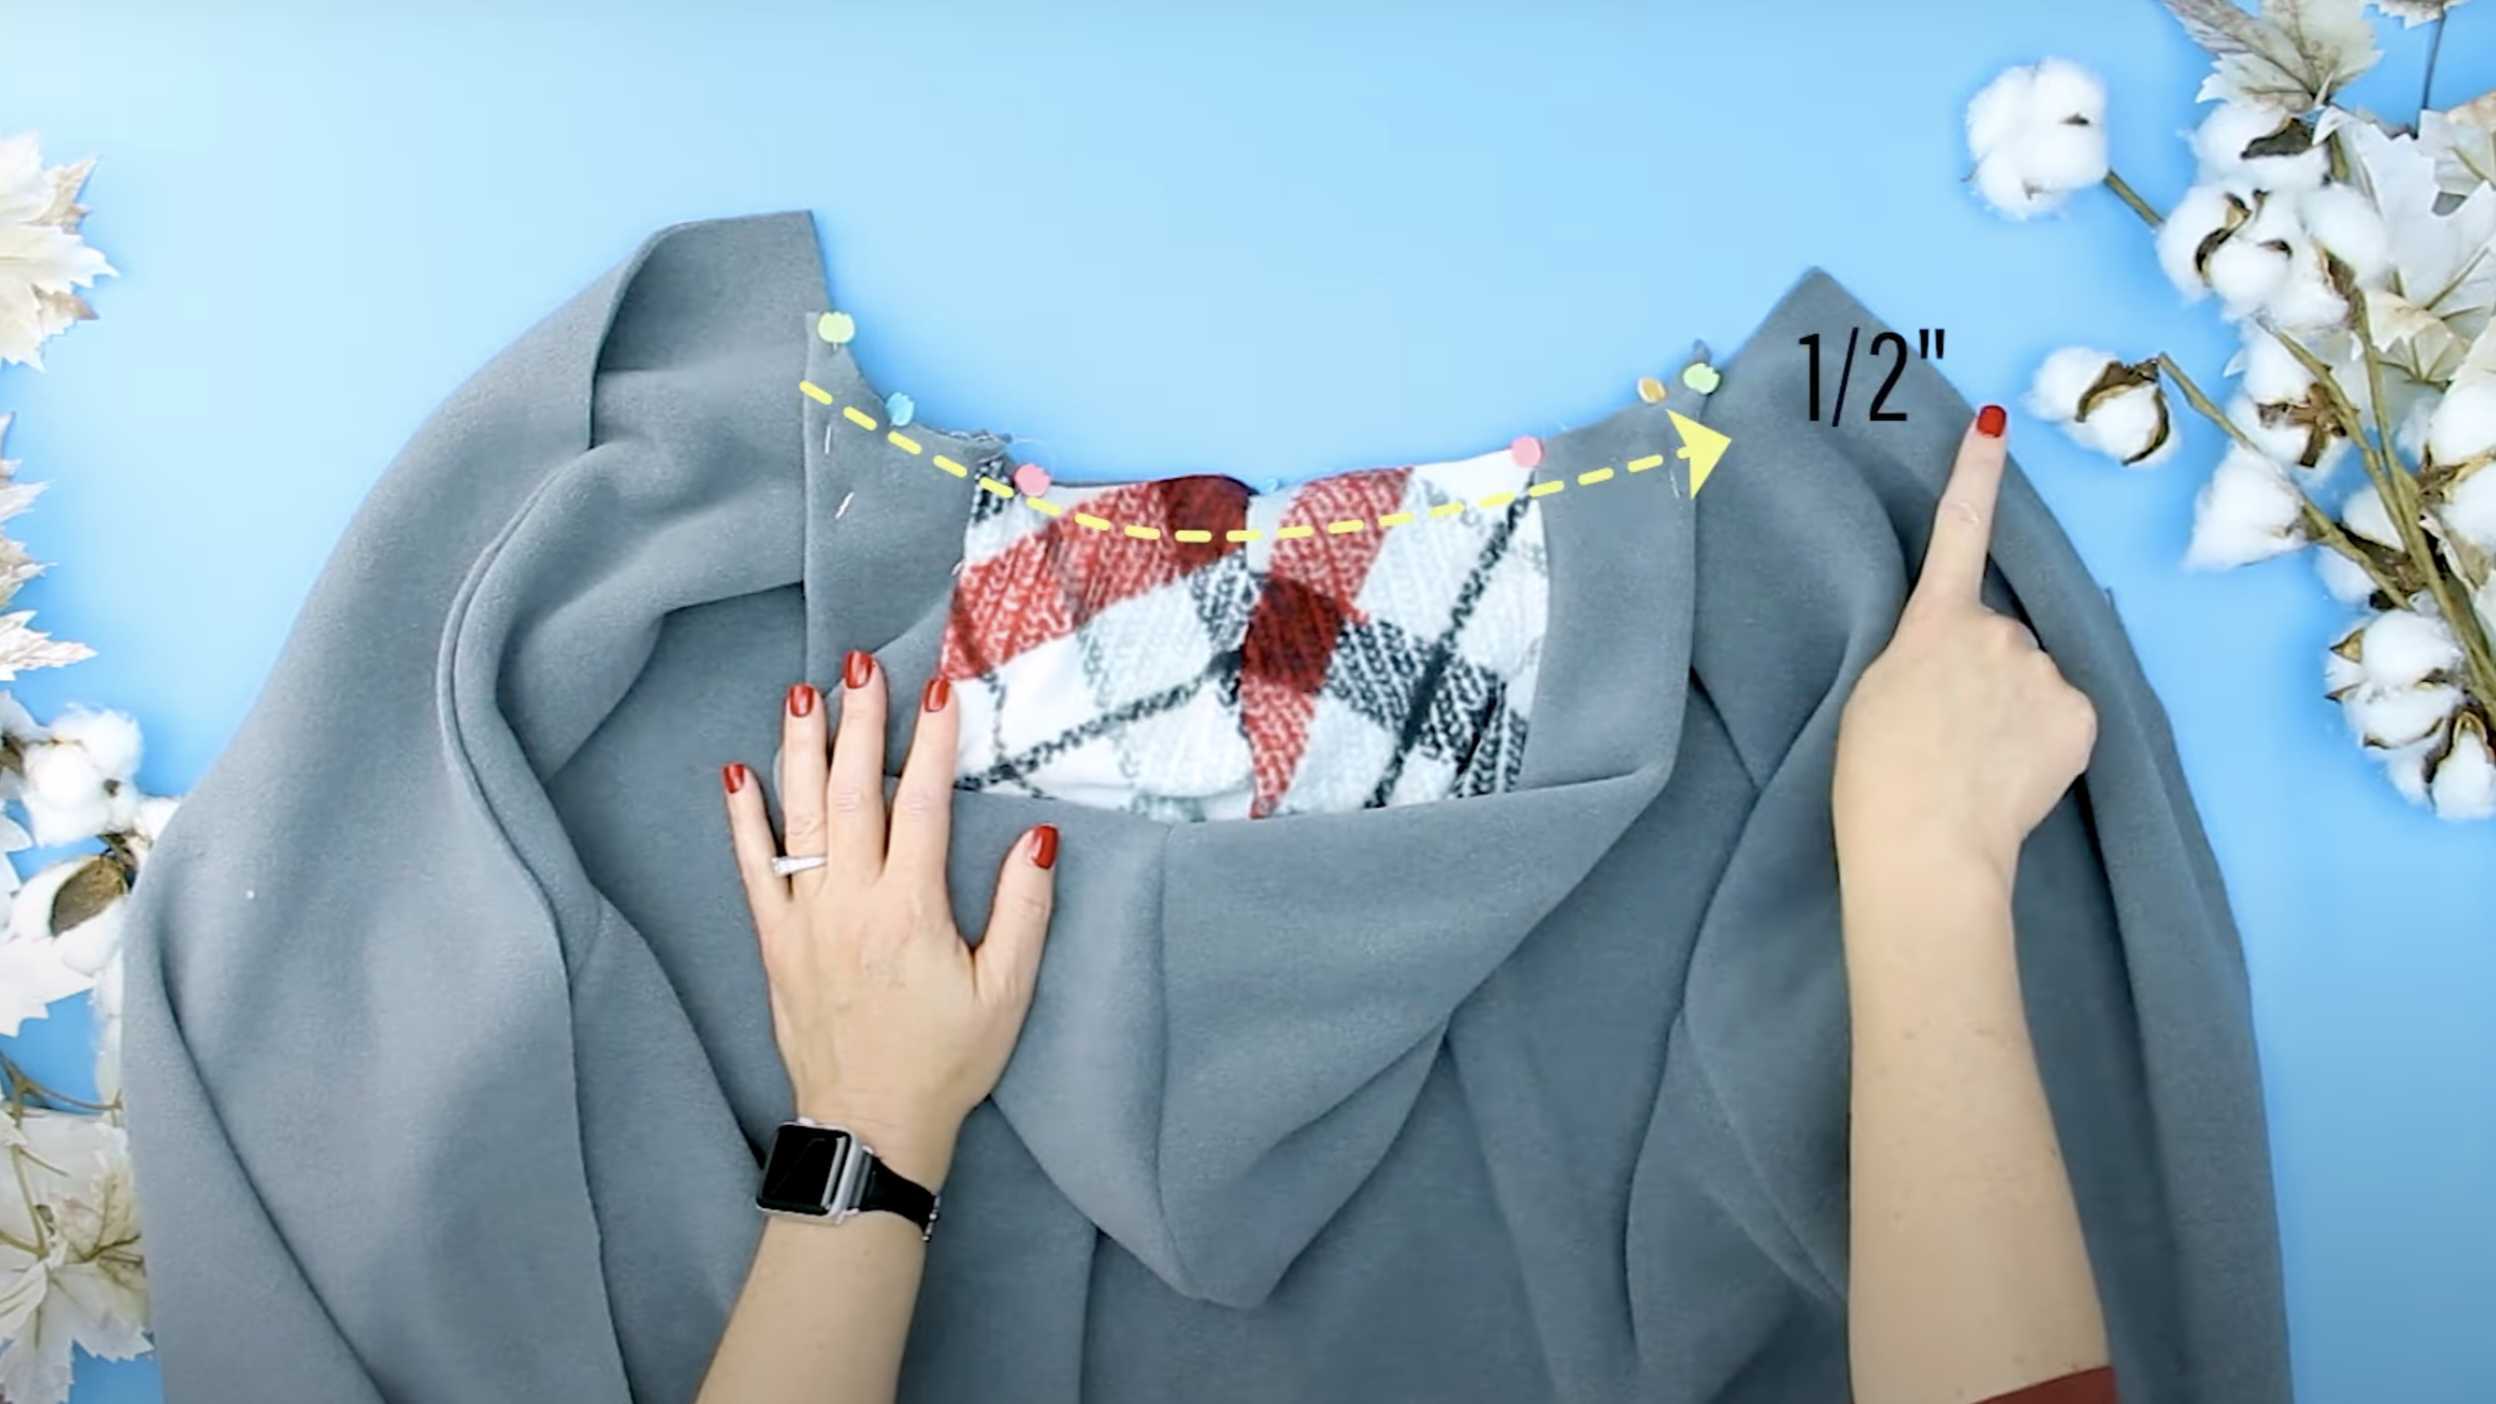
Lay the cape body out flat with the right side up. Center the hood along the neckline, right sides facing, and pin it in place. Sew the hood to the cloak using a ½-inch seam allowance.
Because you’re sewing through multiple layers, lengthen your stitch and go slowly. You’ll notice the cloak front will extend slightly past the hood; this is correct.
Press the seam and top-stitch ¼ inch below it to help it lie flat.
Step 6: Finish the Edges and Add Closures
You can leave the raw fleece edges as-is, or turn them under ½ inch and sew them down with a straight or zigzag stitch for a neater finish.
Suppose you want something more polished. Fold under a full inch and stitch. It’s totally up to you.
Add your closure by sewing leather ties, ribbon, a button, or a clasp to each front side of the cloak’s opening. This adds both style and function.
You can also follow along with a detailed video tutorial on how to sew a hooded cloak by @FleeceFun on YouTube.
Things to Consider Before Choosing a Cloak Pattern
Before picking a cloak pattern from the internet, a few helpful things to think about are:
- Fabric choice matters: Wool or fleece works well for cold weather since they’re warm and thick. Velvet or cotton is lighter and more flexible, good for indoor or costume use. If you plan to wear it outside, pick fabric that holds up in wind or light rain.
- Decide if you want a hood: A large, roomy hood adds a dramatic touch, but a simple collar might feel more comfortable or practical. Hoods use more fabric and take a few extra steps to sew.
- Pick your length: Long cloaks look dramatic but can be harder to move around in and take more fabric. Shorter cloaks (waist or hip length) are easier to make and more useful for daily wear.
- Lined or unlined: A lined cloak feels smooth inside and looks more finished, but takes more time to sew. If you’re new to sewing, an unlined version might be a better choice to start with.
- Choose your closure: Some cloaks close with buttons, some with ties, or simple clasps. Go with whatever feels easiest or most comfortable for you.
Conclusion
Sewing your cloak doesn’t have to be complicated or expensive. With a good free cloak pattern and some basic supplies, it’s a project you can enjoy whether you’re making it for fun, for a costume, or to have something warm to wear.
There’s something nice about creating something with your own hands, especially when it turns out useful and personal.
You don’t need to aim for perfection; take your time and enjoy the process.
With so many pattern styles to pick from, there’s bound to be one that feels just right for you. Even if you’ve never sewn before, starting with something like a simple cloak is a great way to learn.
So if this sounds like something you’d enjoy, choose a pattern from the list, gather your fabric, and start sewing. You might end up with a new favorite piece, and maybe even make a few more.