
I love making cute and simple crochet projects, and this flower hat is one of my favorites. It’s fun, easy, and works up fast. You don’t need a lot of yarn or fancy tools; just basic crochet skills and some free time.
This hat is great for kids, but the size can be adjusted for anyone. I made one for my niece, and she wears it all the time.
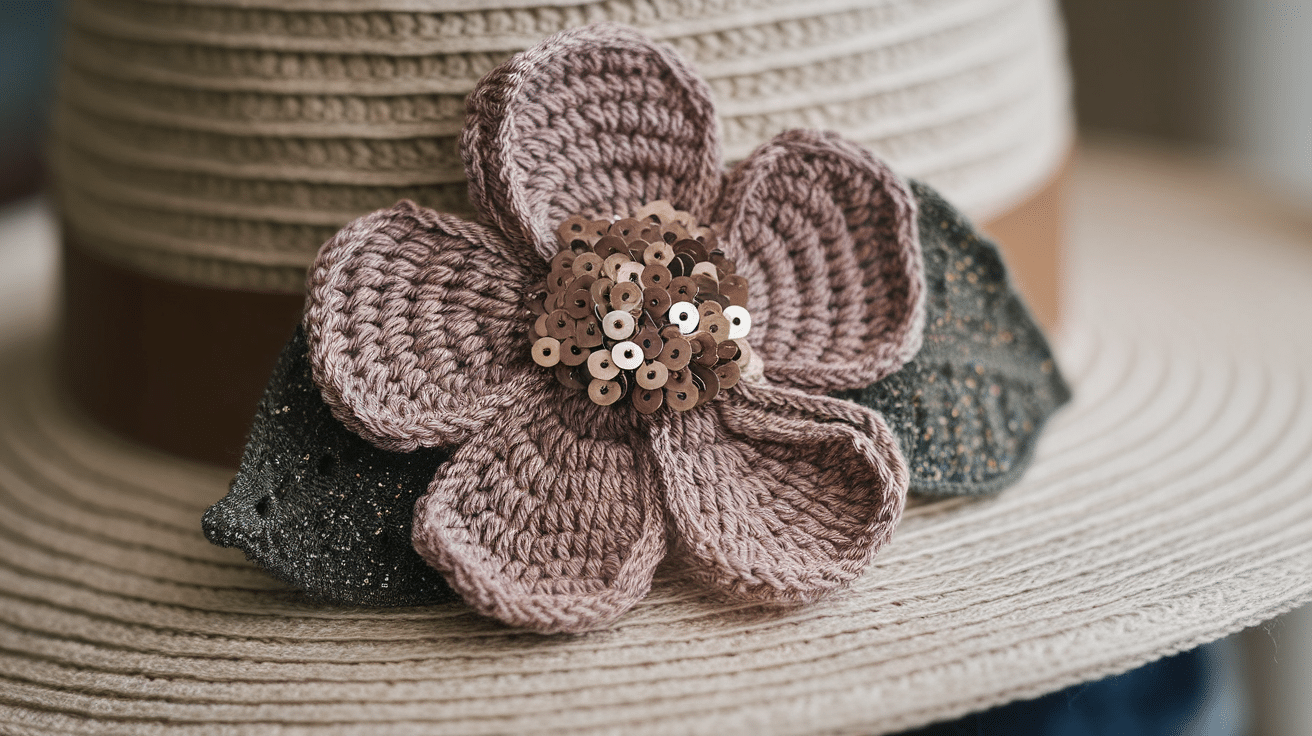
The flower adds a sweet touch and makes it extra special. You can even mix and match colors to make it your own.
I’ll walk you through every step so you don’t feel lost. If you’ve made a hat before, this will seem very easy. If not, don’t worry, I’ll keep it simple. Let’s get started on this free and easy crochet flower hat pattern together!
Why Make a Crochet Flower Hat?
Crochet flower hats are cute, easy to make, and always bring a smile. They turn a simple hat into something fun and special.
I love making them because they feel cheerful, even on cloudy days. You can match colors to outfits or create one as a sweet gift.
This is a great project to practice your crochet skills. The hat uses basic stitches, and the flower adds a fun way to learn shaping. It doesn’t take long, so it’s perfect for busy days or last-minute gifts.
Flower hats look great on everyone, babies, kids, teens, and adults. Change the size, colors, or flower type to make each one your own.
What You’ll Need to Make a Crochet Flower Hat
Getting your supplies ready before starting can help everything go smoother. This project doesn’t need a lot, which makes it great for beginners or anyone on a budget. You probably have some of these items already.
Yarn
Choose a medium-weight yarn (worsted weight, size 4). This type is easy to work with and holds shape well.
- Cotton yarn is soft, breathable, and holds its form. Good for spring or summer hats.
- Acrylic yarn is affordable, stretchy, and machine washable. Great for kids and everyday use.
- Blended yarns give you the best of both worlds. Soft like cotton, strong like acrylic.
Pick two colors, one for the hat and one for the flower. For a baby version, you can mix bold colors or use soft pastels.
Crochet Hook
Use a 5mm (H-8) hook unless your yarn suggests something different. If your stitches feel too tight or too loose, try a different size. The key is comfort and ease.
Extra Tools
- Yarn needle for sewing the flower on and weaving in ends
- Scissors for cutting yarn
- A measuring tape to check the size
- Stitch markers if you have trouble finding the start of each round
Optional: Add a cute button or small bead in the center of your flower for decoration.
Basic Stitches You Should Know Before Starting
Don’t worry if you’re still learning. This pattern only uses simple stitches.
- Chain (ch): The base of most crochet work
- Slip Stitch (sl st): Used to join rounds or finish pieces
- Single Crochet (sc): One of the easiest stitches
- Half Double Crochet (hdc): Taller than sc but shorter than dc
- Double Crochet (dc): A popular and common stitch
- Magic Ring (optional): A neat way to start in the round
I’ll explain where and how to use each one below.
How to Choose the Right Hat Size
This flower hat can be made in many sizes. Use the guide below to adjust the pattern.
| Size | Hat Diameter | Hat Height |
|---|---|---|
| Baby (0–6M) | 4.5 inches | 5 inches |
| Baby (6–12M) | 5 inches | 5.5 inches |
| Toddler | 5.5 inches | 6 inches |
| Child | 6 inches | 6.5 inches |
| Teen/Adult | 6.5–7 inches | 7–8 inches |
You can check your size as you go. If the crown becomes too wide, stop increasing and proceed to the sides.
Step-by-Step Guide to Crochet Flower Hat
Let’s walk through the full process step by step. You’ll start with the main hat base, then add a brim if you want, and finally make and attach the flower.
Everything is broken down clearly, so you won’t feel lost along the way.
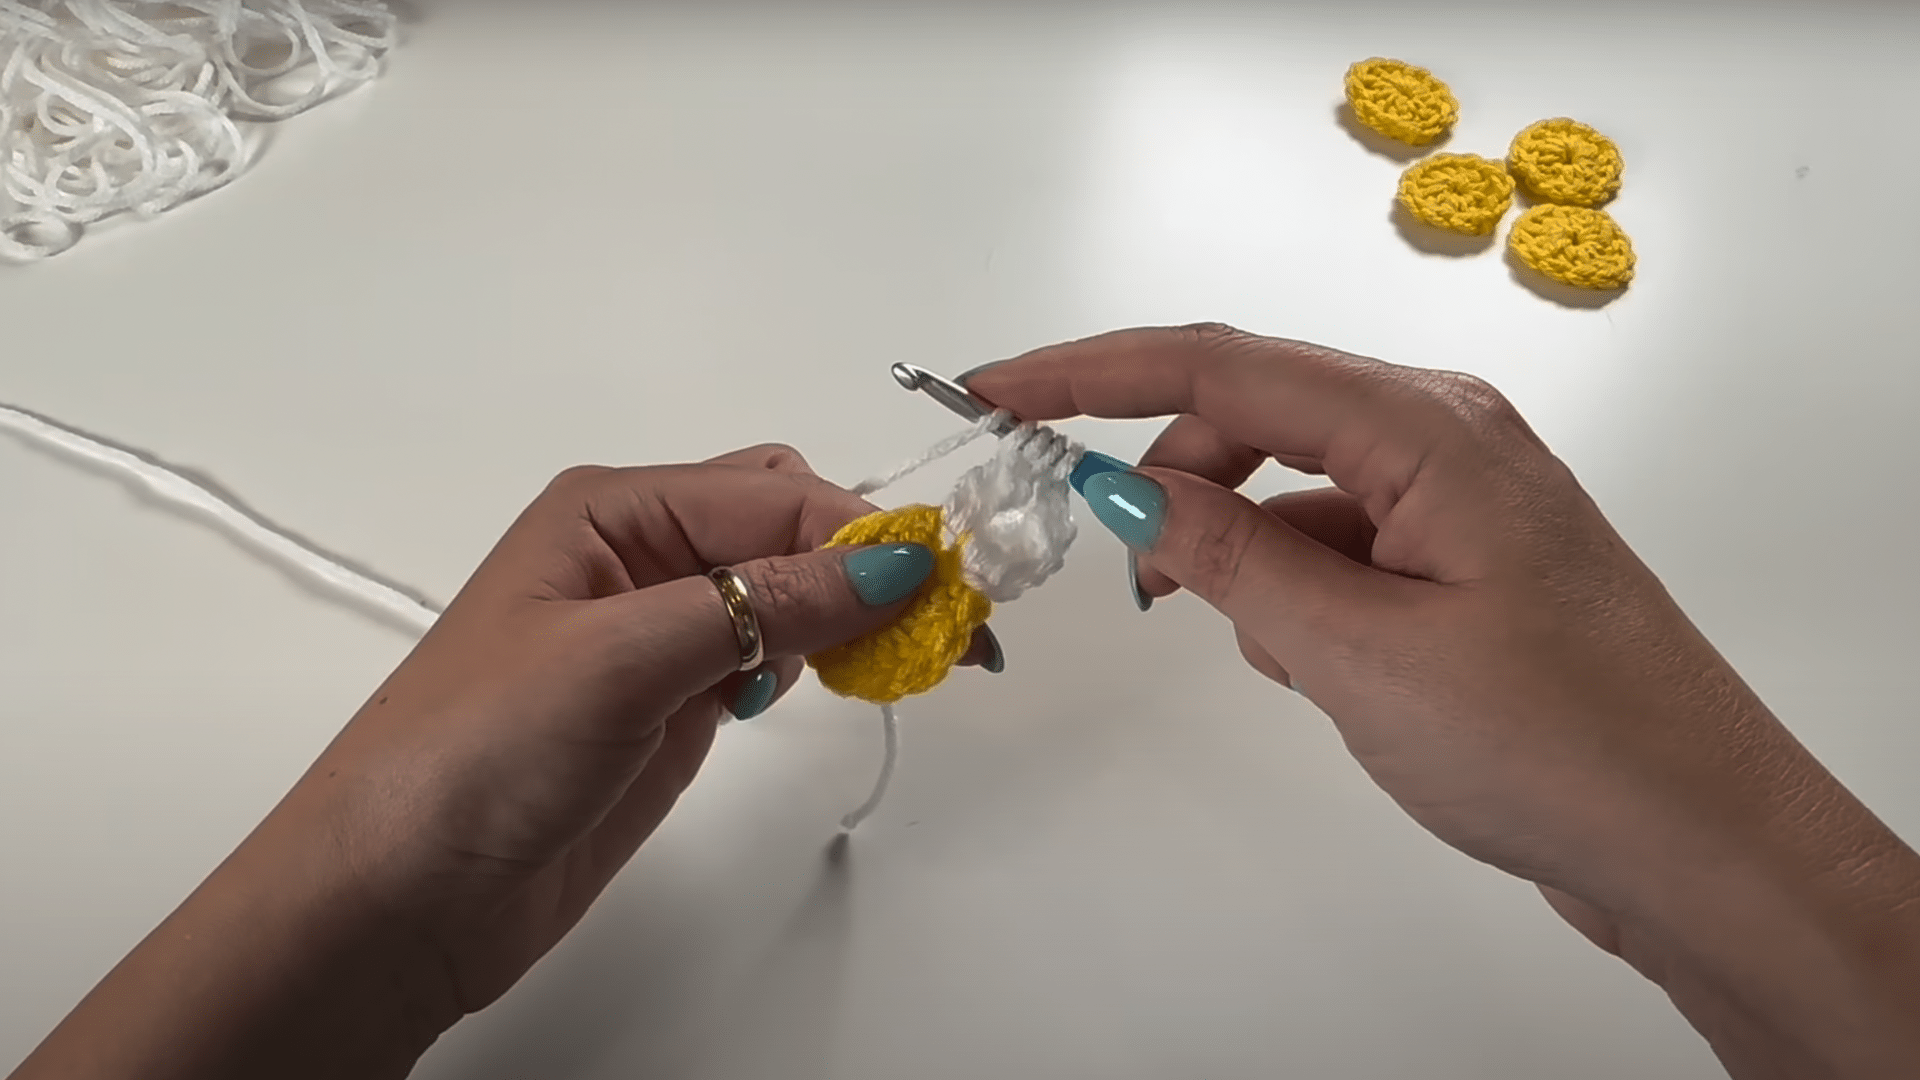
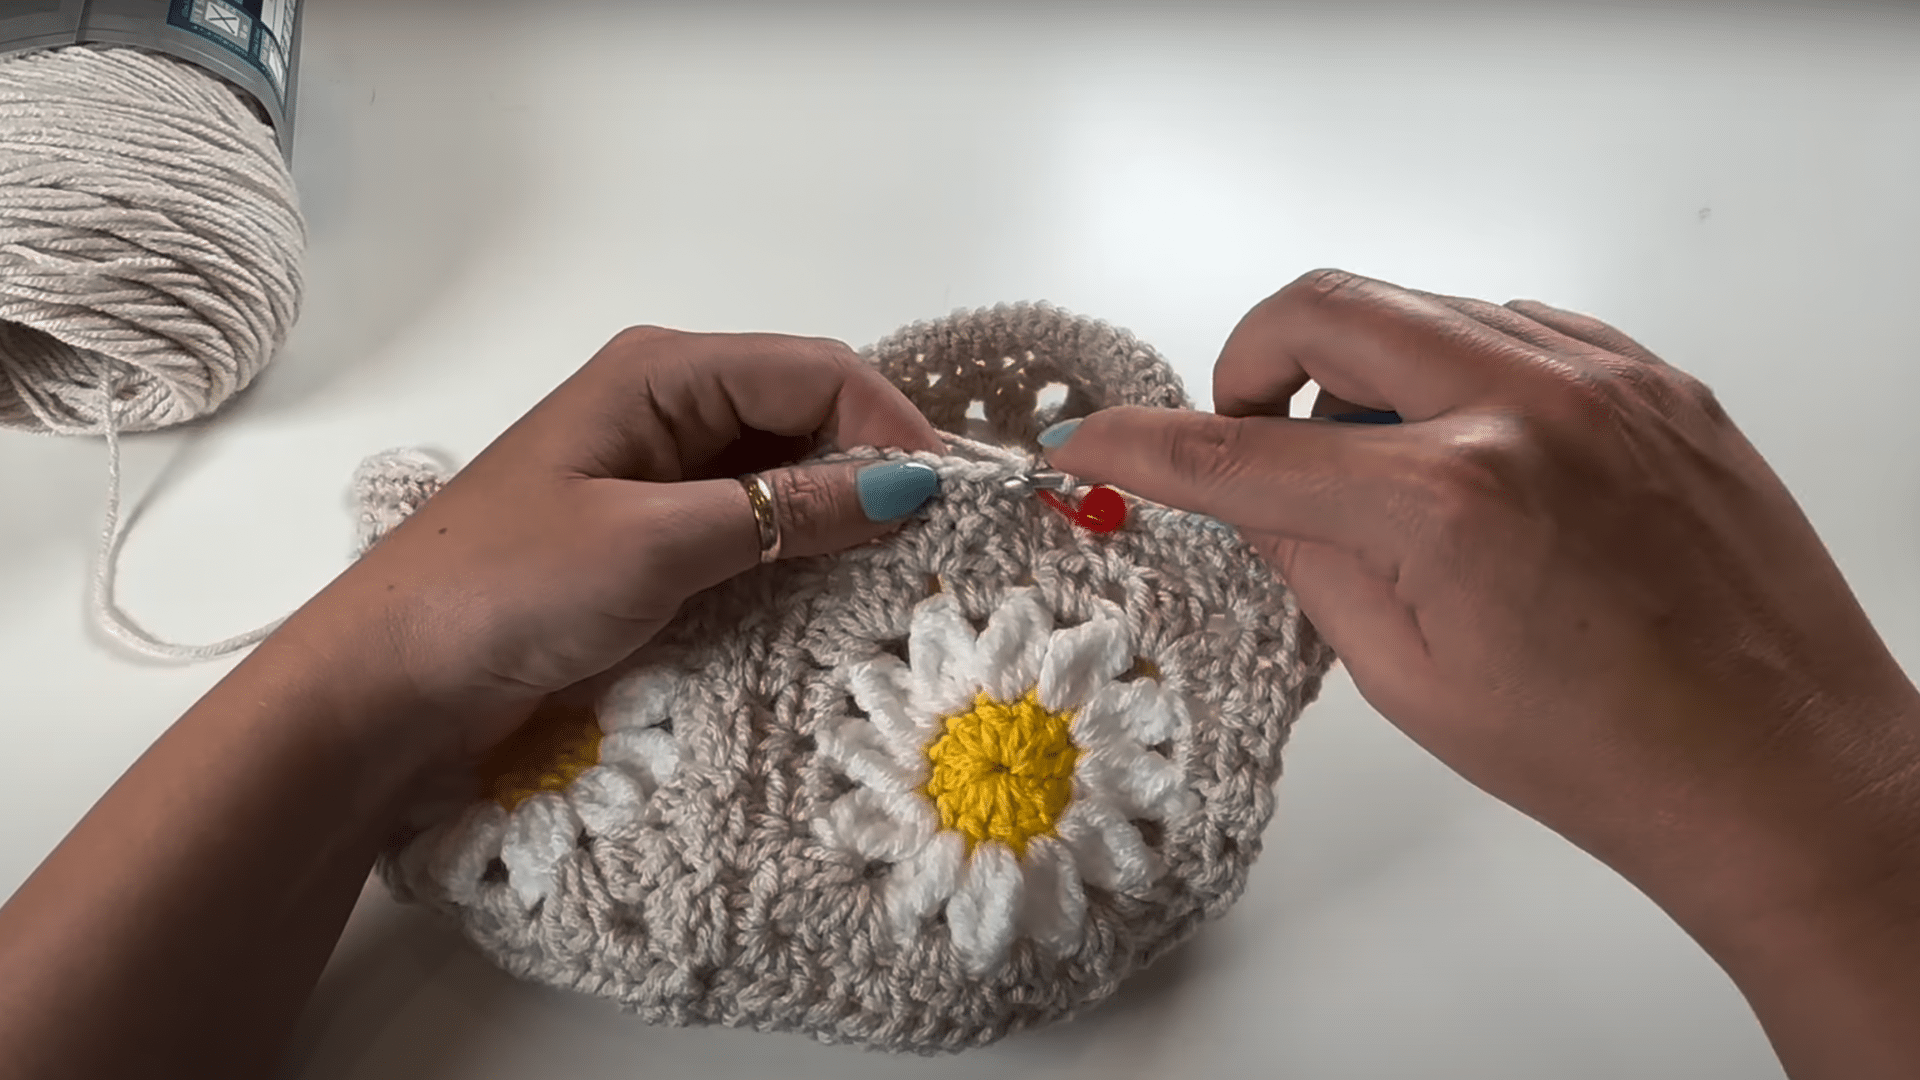
Step 1: Make Flower Centers
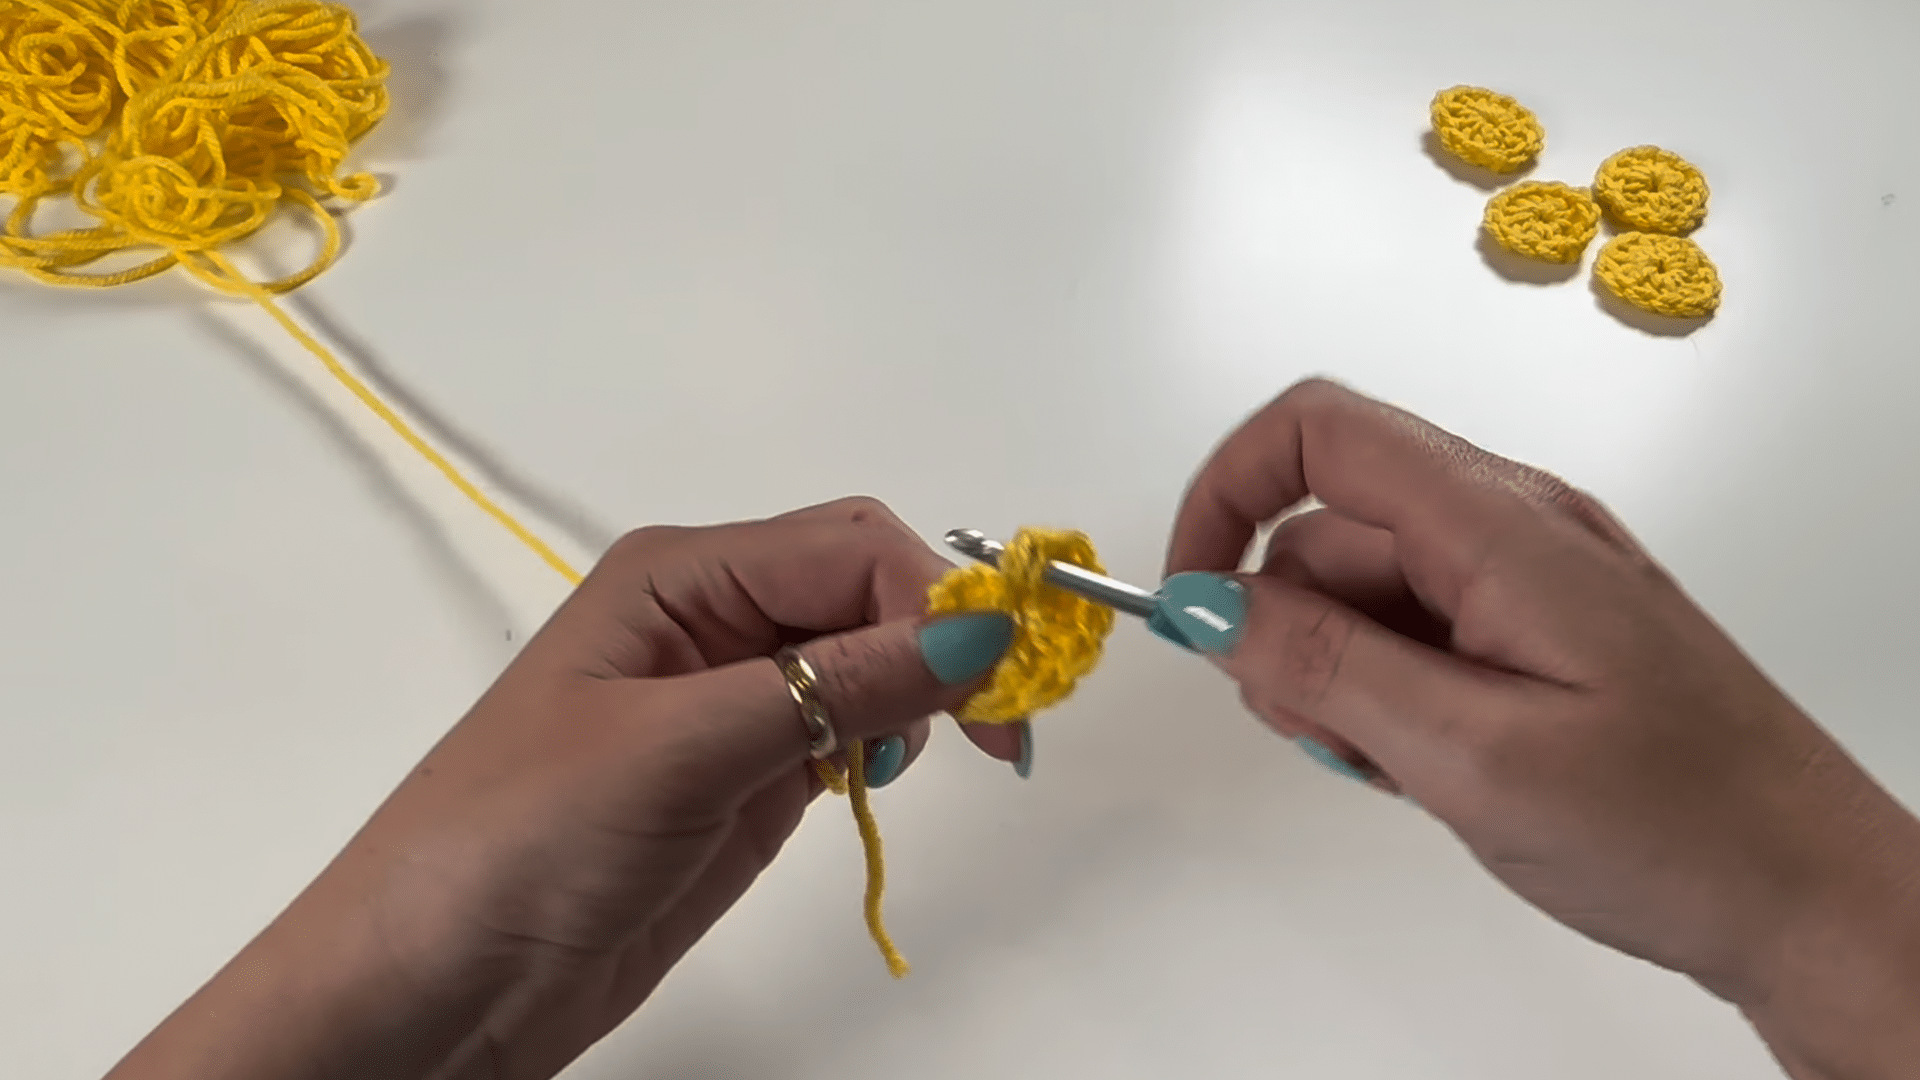
Create a slip knot, chain three, and join into a ring. Work twelve double crochets into the ring, then slip stitch to close. Fasten off and weave in ends. Repeat this process to make five identical yellow flower centers.
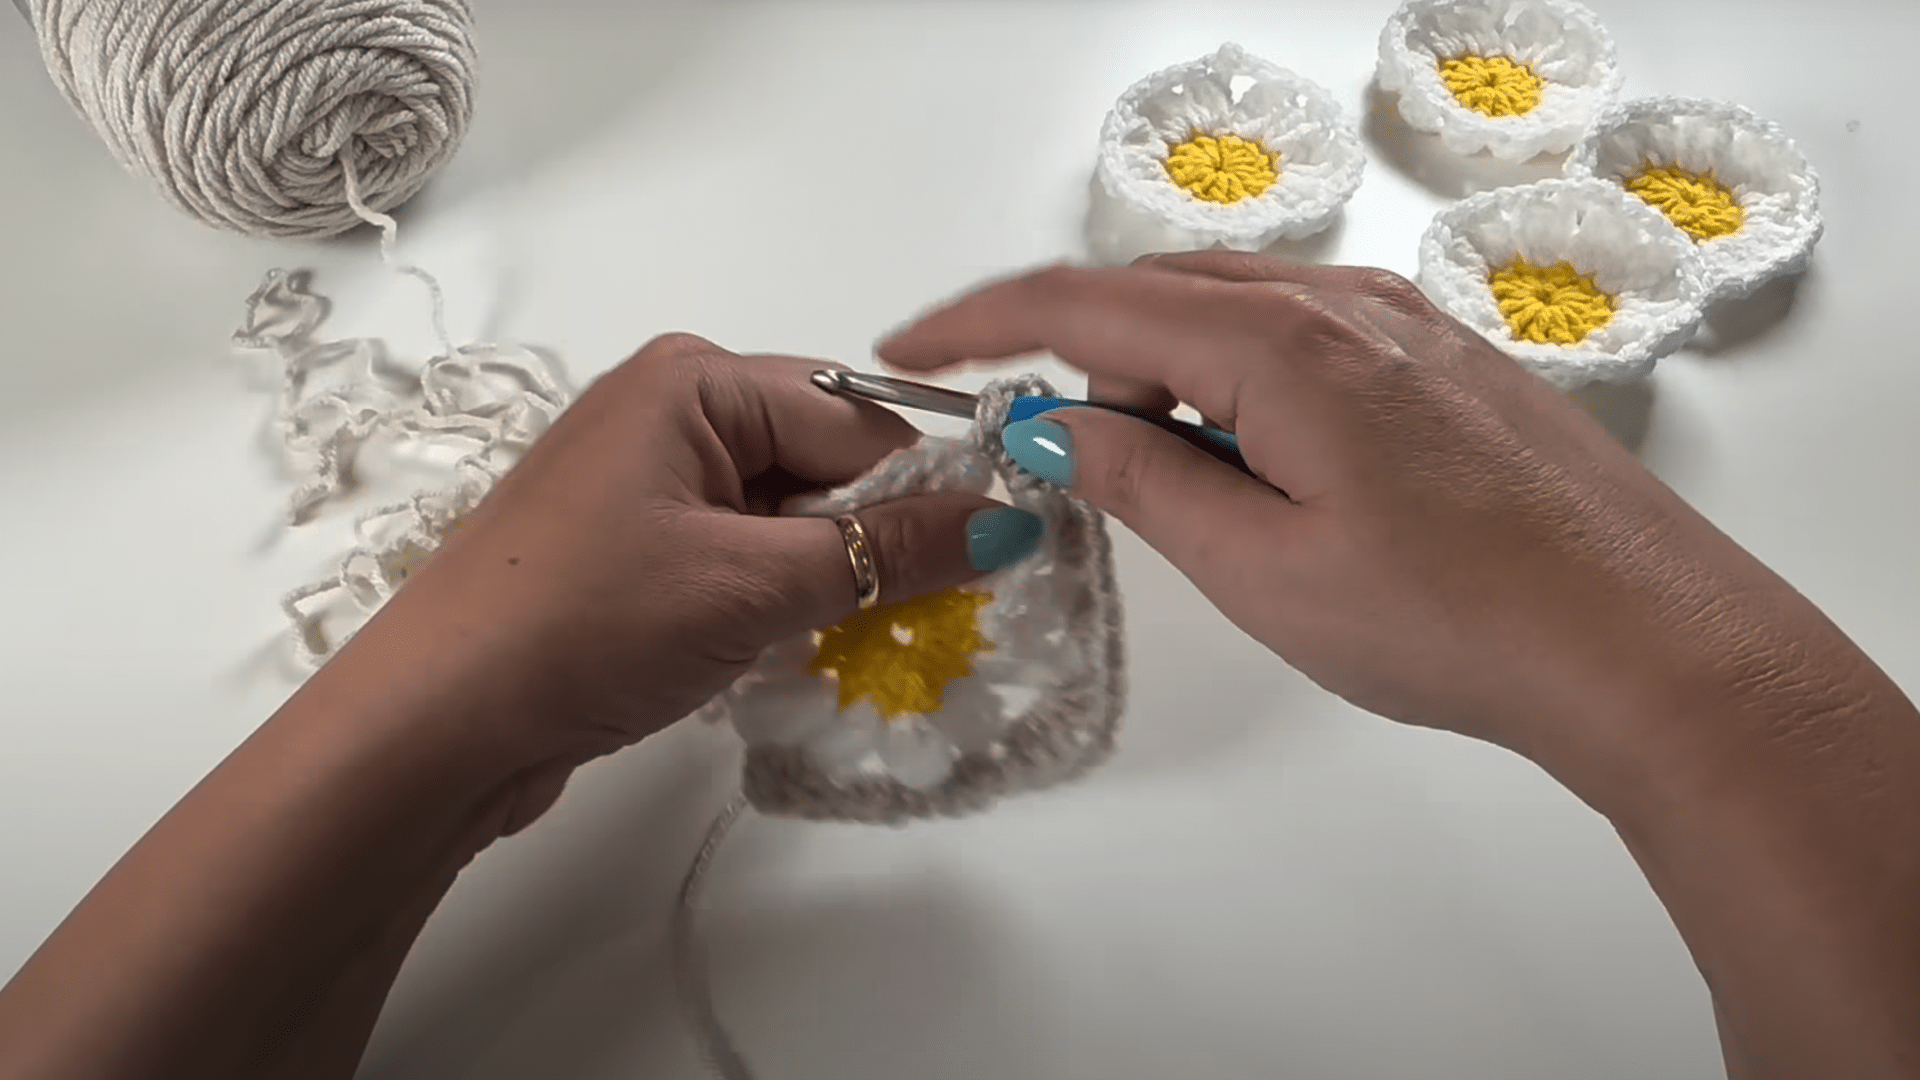
Step 2: Crochet White Petals
Join white yarn to any stitch. Work a single crochet, chain two, then a cluster of three treble crochets together. Chain two between each petal. Repeat around for twelve petals. Slip stitch to join, fasten off, and weave in ends.
Step 3: Form Granny Squares
Join the linen yarn in a chain space. Make corners with three double crochets, chain two, three double crochets. Work sides with three half double crochets. Repeat around, join with a slip stitch, and fasten off. Make five total flower squares.
Step 4: Join the Squares
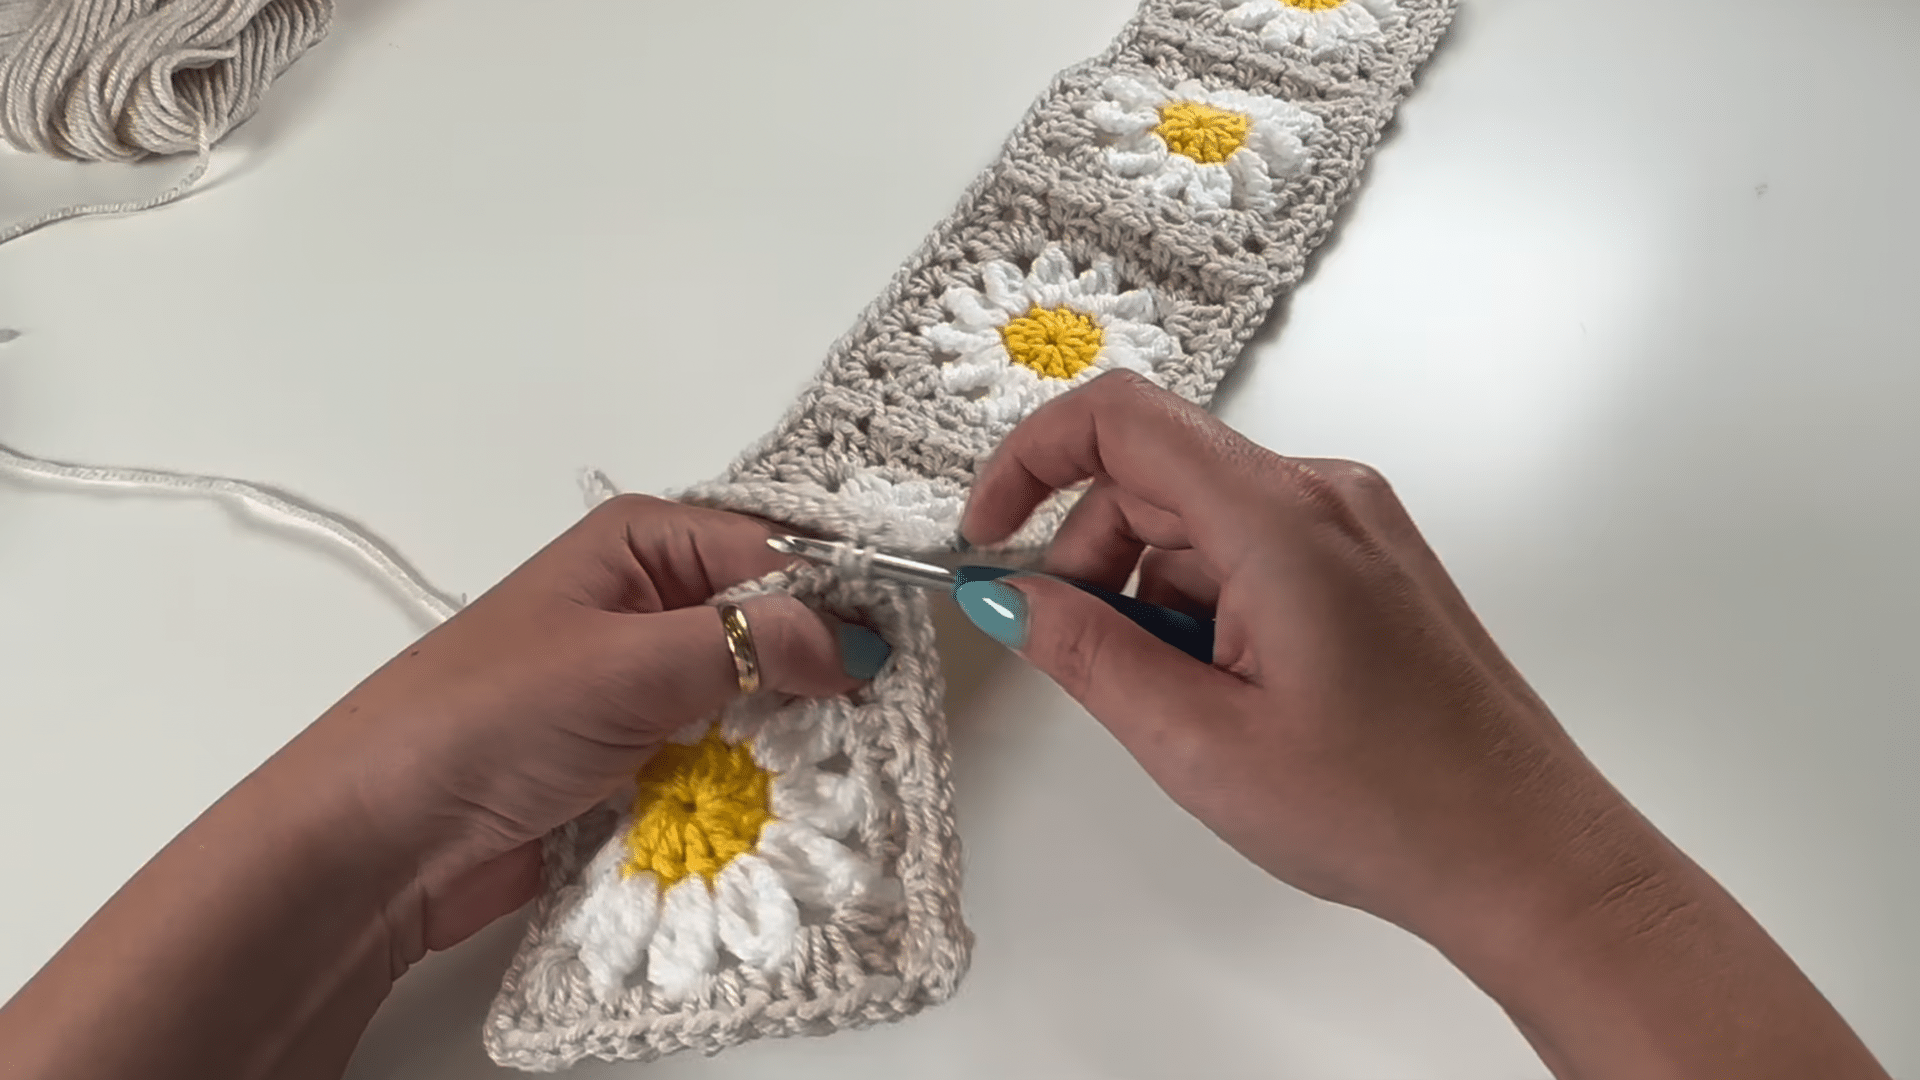
Begin the final round of a square and use slip stitches to attach it to another finished square. Continue joining side-to-side until you’ve made a full loop of five squares. Join the last square to the first to complete the ring.
Step 5: Crochet the Hat Top

Start with a ring, work ten half-double crochets. Increase each round: first two per stitch, then alternate one and two, up to six singles between increases. Stop when you have 80 stitches. Slip stitch to join and fasten off.
Step 6: Attach Top to Sides
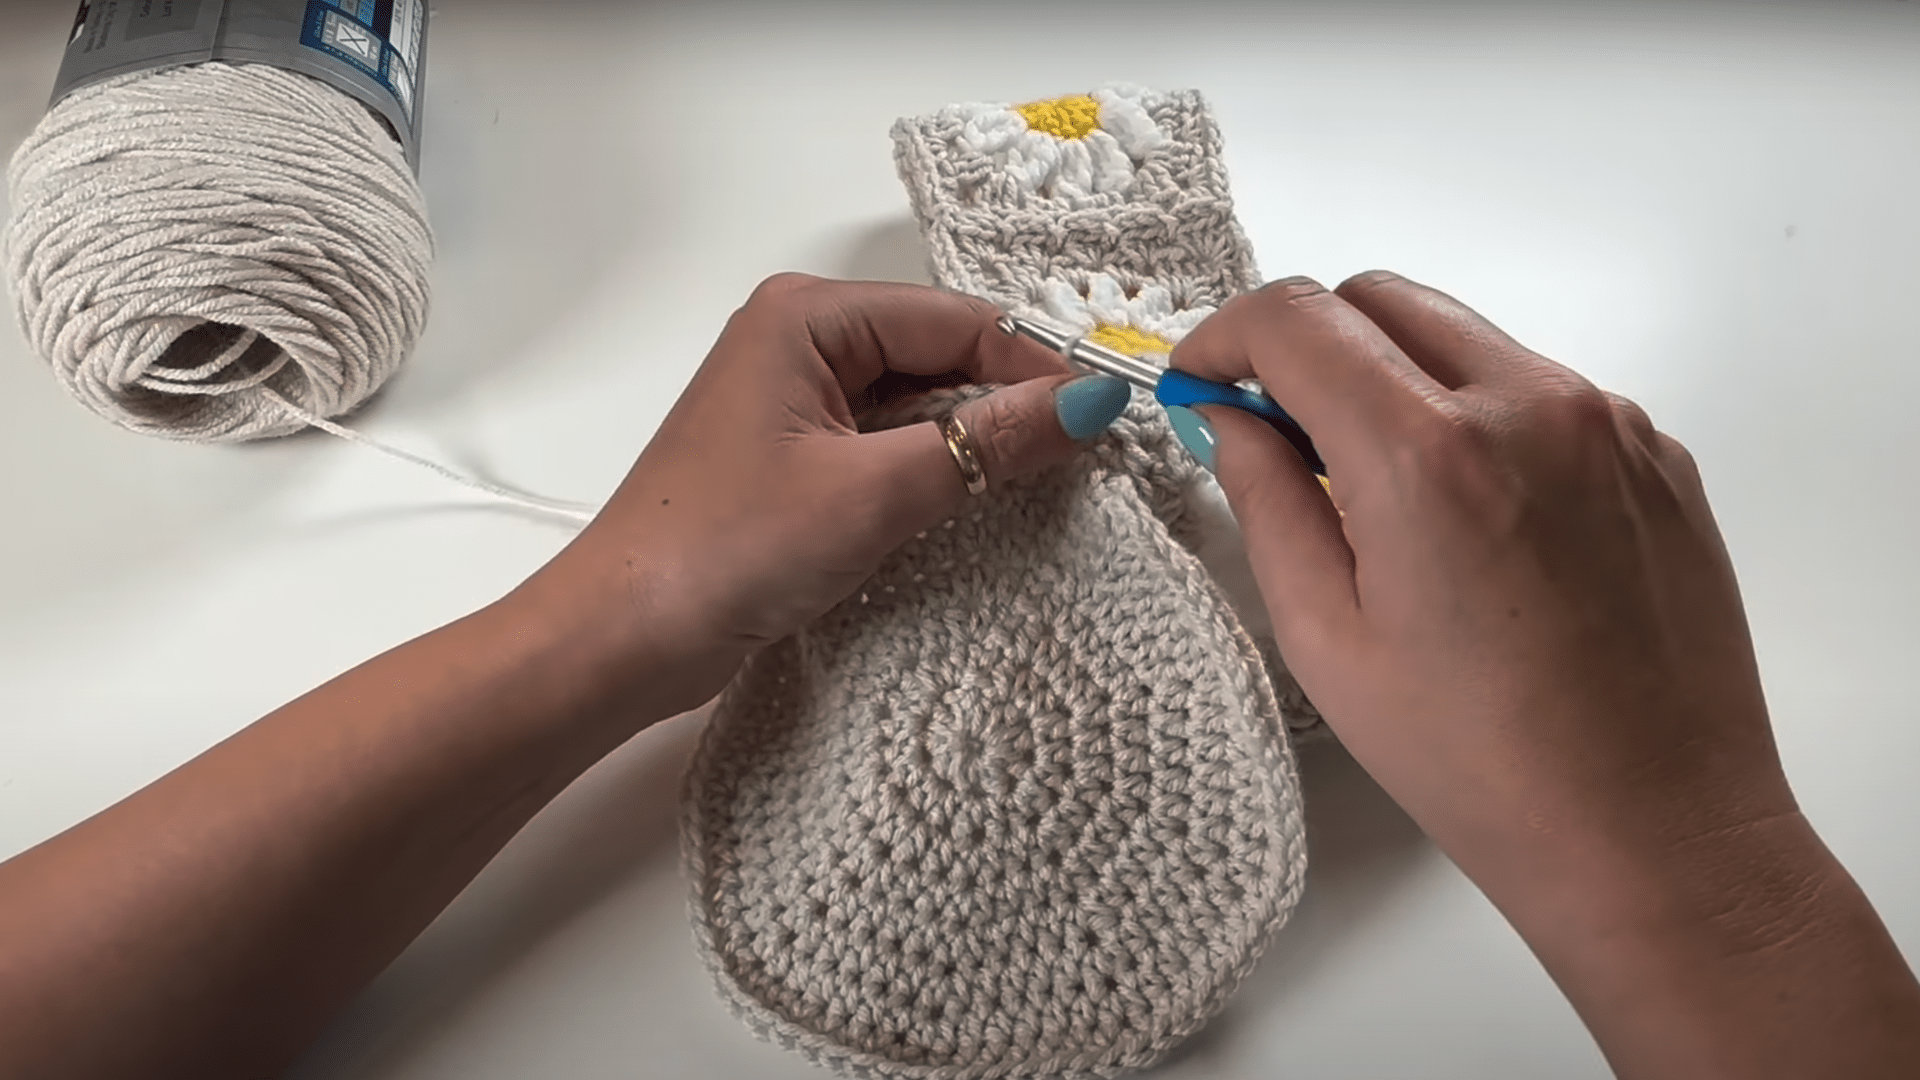
Single crochet into a stitch on the top, pull up a loop, insert into the matching side stitch, and slip stitch. Repeat this method all around to join the top and sides. Tighten joins neatly and finish with a slip stitch.
Step 7: Make the Brim
Turn the hat upside down. Single crochet evenly around for the first round. Increase with each new round, adding an extra stitch between increases each time. Finish with a round of reverse single crochet. Fasten off and weave in all ends.
For a more detailed and visual guide, watch this YouTube Tutorial.
How to Resize the Pattern
Making your flower hat fit just right is easy. You only need to adjust a few parts: the crown (top), the body (middle), and the brim (bottom). This is how to do it:
Crown (Top of the Hat)
To make a larger hat, continue adding rounds until the flat circle reaches the desired size. For a smaller hat, stop earlier. Use a ruler to check the diameter.
- Baby: 4.5–5 inches
- Child: 6 inches
- Adult: 6.5–7 inches
Body (Middle of the Hat)
This is the height of the hat. Crochet more rounds to make it taller, fewer to make it shorter.
- Baby: 5 inches
- Child: 6.5 inches
- Adult: 7–8 inches
Brim (Bottom Edge)
Add a few rows for a thicker brim. Use tighter stitches for a snug fit or taller ones for a loose edge. You can also fold the brim for extra warmth.
How to Customize Your Flower Hat
Making a flower hat lets you choose every detail. Keep it simple or have fun with colors, shapes, and extras. Once you learn the basic pattern, it’s easy to add your own twist and make each hat feel unique.
1. Try Fun Color Combos
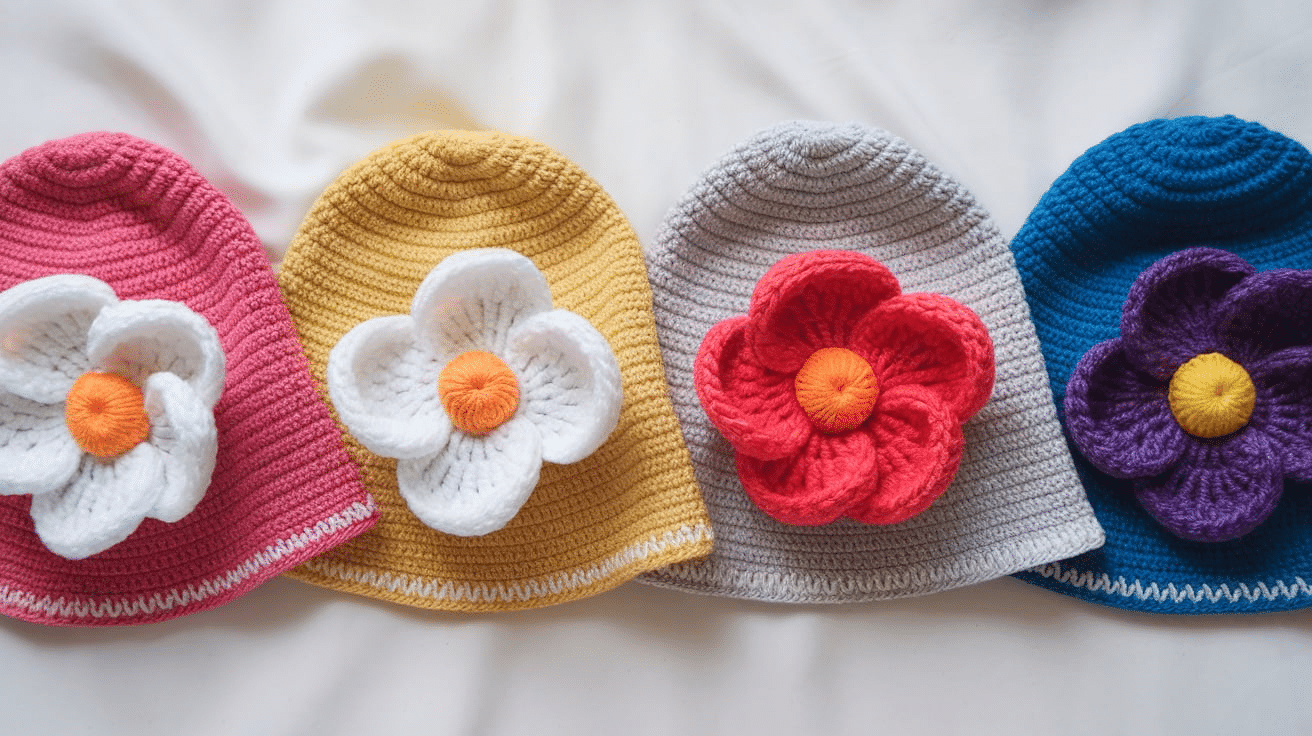
Color is one of the easiest ways to change the look of your hat. You can use soft colors for a baby hat, bright colors for kids, or calm shades for adults.
Some people like to use two or more colors in the hat body, while others stick to one color for the hat and a different one for the flower.
You can even use yarn that changes color automatically; this is called variegated yarn, and it makes every hat look a little different without extra work.
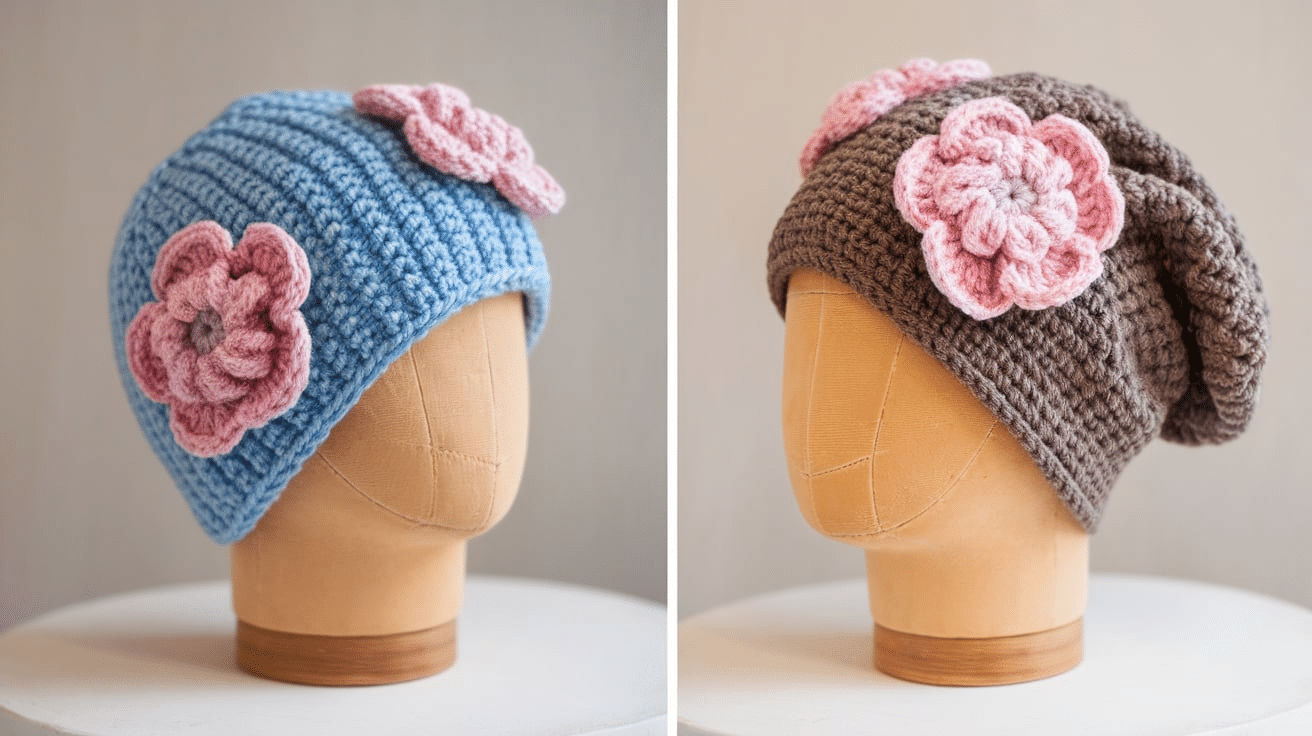
2. Add More Flowers
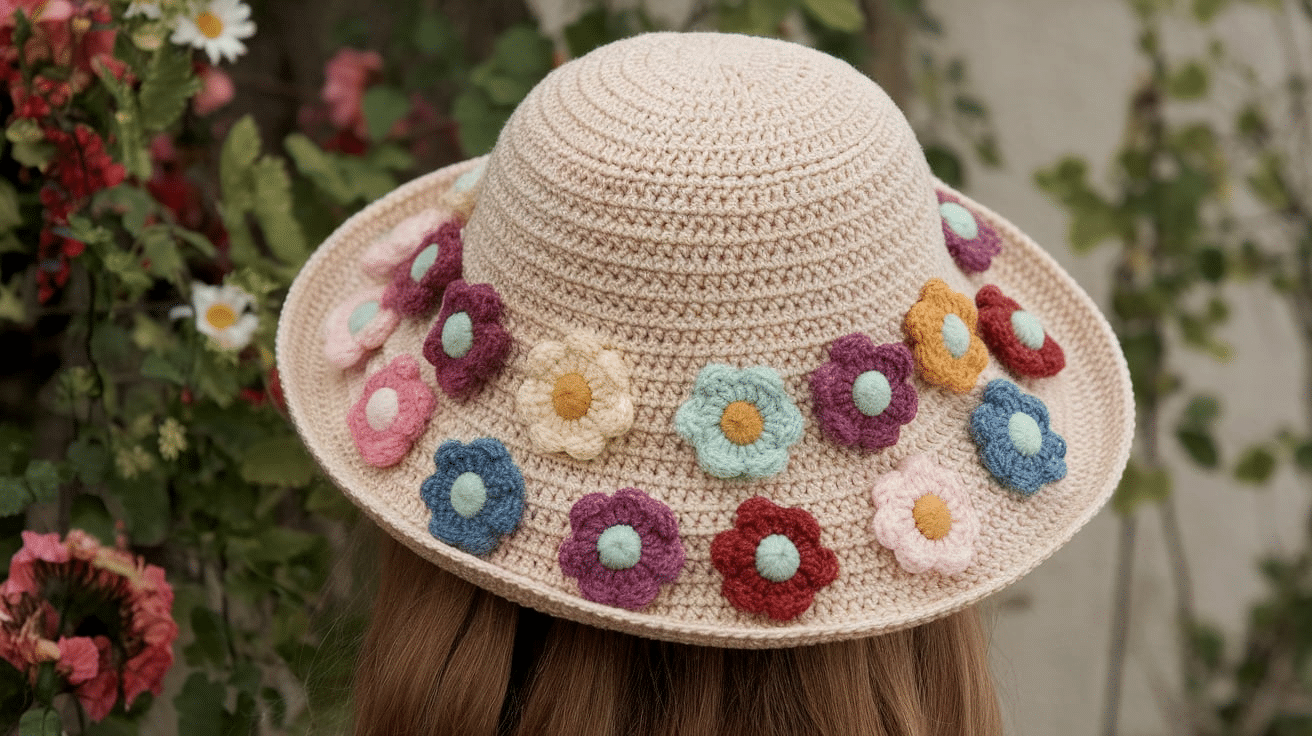
If one flower looks cute, adding more can make your hat even better. You can place two or three flowers next to each other on one side, or sew small flowers all around the brim.
Mixing different flower sizes also adds a fun touch. Some people like to use matching flowers, while others mix colors and shapes.
This is a great way to use up leftover yarn scraps and give your hat a playful, full look.
3. Change the Flower Style
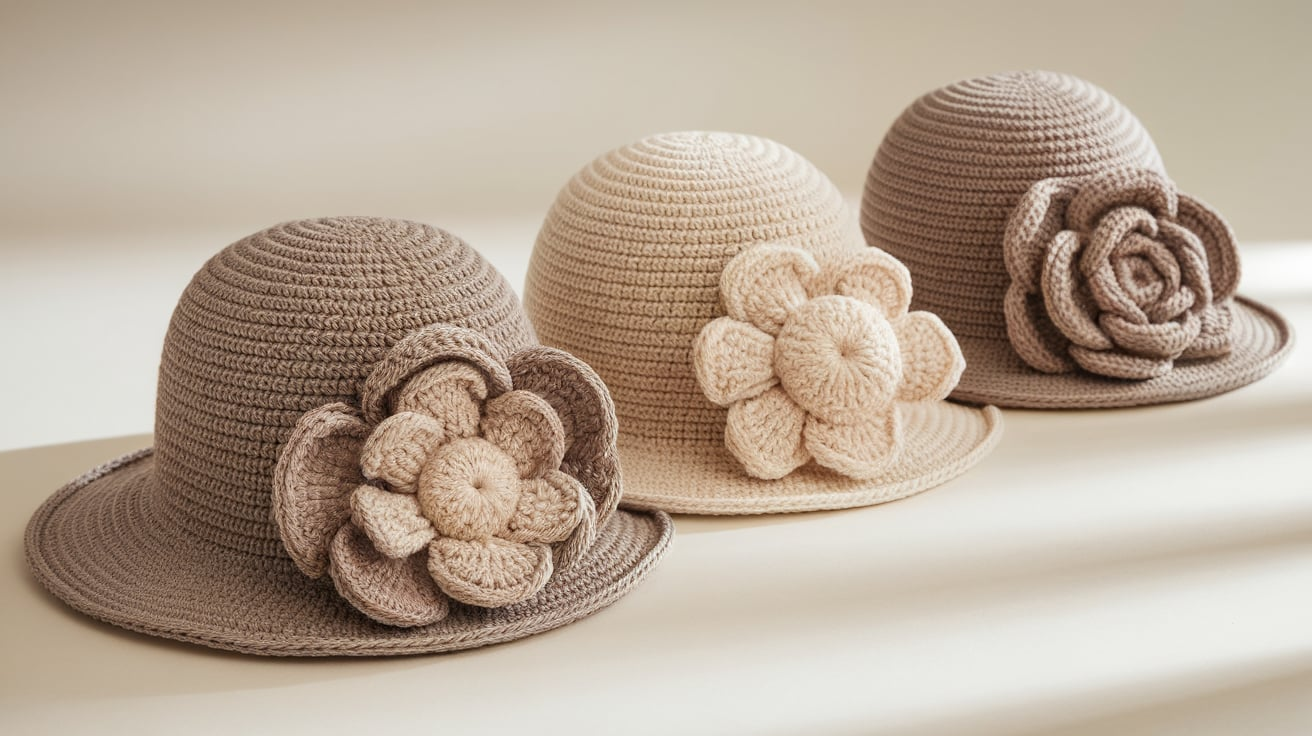
There are many ways to crochet a flower, so you don’t have to stick to just one kind. You can make a layered flower by stacking smaller petals on top of larger ones.
You can also try flowers with pointed or curly petals for a different shape.
If you want something with more texture, use puff or bobble stitches in the petals. You can even crochet a long strip of petals and roll it into a rose. Don’t be afraid to try something new; every flower adds personality.
4. Add Sparkle or Texture
Using a different yarn can completely change the feel of your hat. To make the flower stand out, you can pick a yarn with glitter or shine. Soft and fuzzy yarns, like velvet or boucle, add warmth and texture.
If you want to add something extra, try sewing a few small beads or sequins into the center of your flower. These small touches make your hat look fancy, even if the pattern stays simple.
5. Stitch a Fun Edge
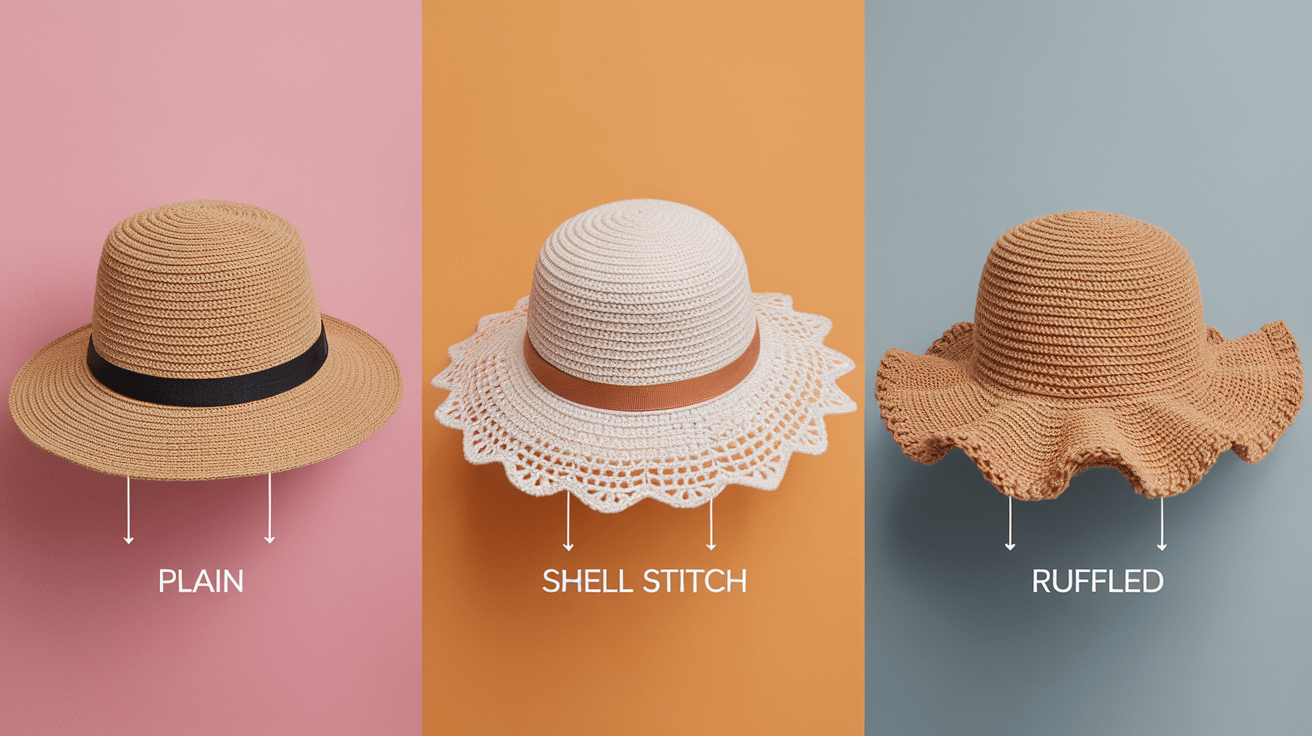
You don’t have to end your hat with a plain brim. Try a special stitch like the shell stitch to give your brim a wavy edge.
The crab stitch, also called reverse single crochet, makes a neat twist around the edge.
A picot edge adds little loops that look like tiny bumps. If you want something softer and fuller, you can increase stitches around the brim to make it ruffled. These edge styles are easy to do and make the hat look extra polished.
6. Add Cute Extras
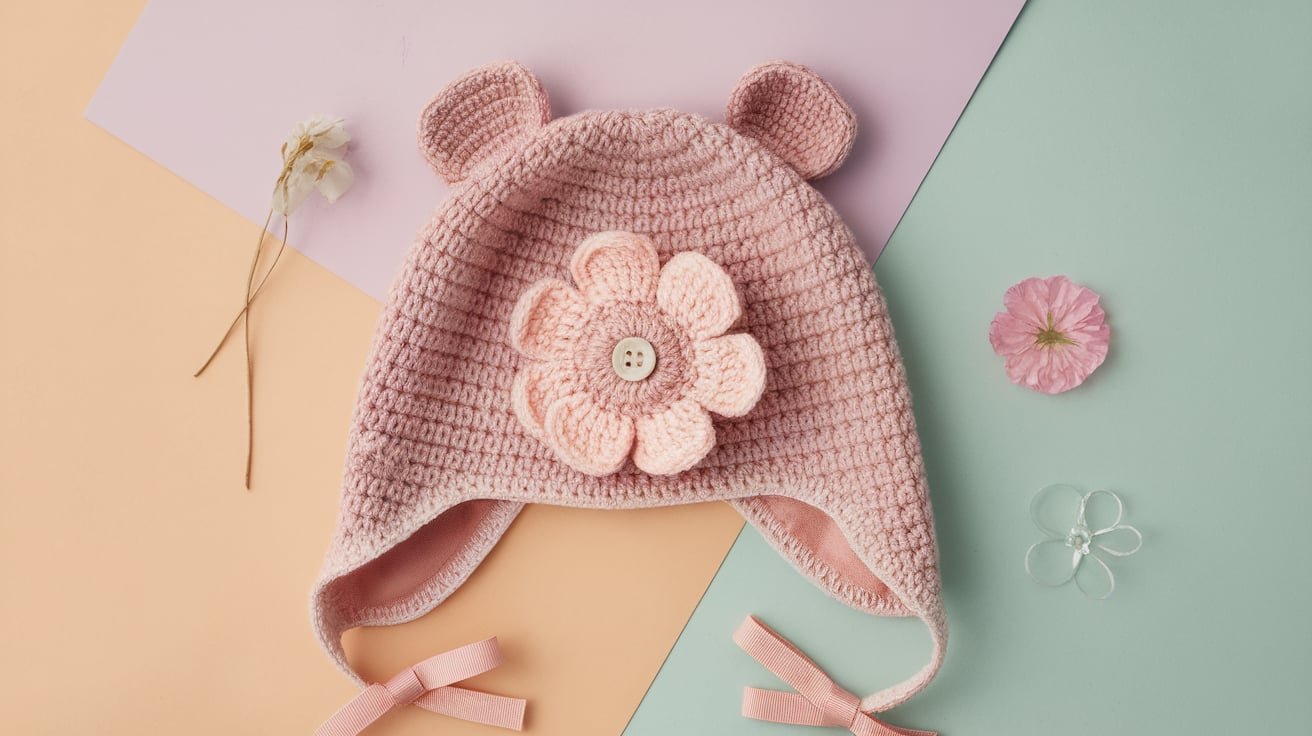
Once your hat is finished, you can decorate it with small details. Sew on a button in the center of the flower, or add a bow made from yarn or ribbon.
If you’re making a hat for a child, you can add bear ears or bunny ears by sewing small crocheted shapes on top.
You could also stitch the wearer’s name or initials on the side. These little additions don’t take much time but make the hat feel one-of-a-kind.
7. Play with Fit and Style
You can change the shape of the hat to match the style you want. If you like a slouchy look, add more rounds before starting the brim. For a snug beanie, stop early and make the brim tighter.
You can also make a wide, flat top if you want a beret style. To keep ears warm in winter, try adding earflaps and ties to the sides. Small changes in shape can turn the same pattern into many different hat styles.
Tips for Beginners
If you’re new to crochet, this flower hat is a great project to start with. It’s simple, uses basic stitches, and doesn’t take too long. Some helpful tips to make the process smoother and more fun.
- Take your time: Go slowly, especially if you’re still learning the stitches. It’s okay to undo and try again. That’s how you get better.
- Use a stitch marker: Mark the beginning of each round. This keeps your place and helps you count your stitches more easily.
- Count your stitches: Always check the number of stitches at the end of each round. This helps your hat stay the right shape.
- Check your tension: Don’t pull the yarn too tight or leave it too loose. Keep your hands relaxed and aim for even stitches.
- Practice first: If a stitch feels tricky, like the magic ring or petal shape, practice it on a scrap piece of yarn before doing it in the pattern.
- Watch tutorials if needed: If you get stuck, a video can help you see exactly how a stitch works. There’s no shame in needing a visual guide!
Conclusion
Crocheting a flower hat is a fun and easy project that anyone can try. You don’t need to be an expert. With just a hook, some yarn, and a little time, you can make something both cute and useful.
This hat works well for all ages. It’s also a great gift for birthdays, baby showers, or holidays. You can change the size, switch colors, or add extras to make it your own.
The best part is how relaxing it feels to work with your hands. Crocheting helps you slow down and enjoy the process.
If you make a mistake, it’s easy to fix. You learn as you go. And each hat you finish builds your skills.
I hope this pattern gives you the confidence to keep going. Try new styles, mix in your favorite colors, and keep it fun. No two hats need to look the same. Every one you make will be special in its own way.