


The tradition of hanging Christmas stockings has been cherished for generations. It’s a meaningful part of the season, full of warmth, family memories, and anticipation.
Creating your own stockings can make the experience even more rewarding.
Handcrafted pieces let you choose colors, materials, and designs that reflect your holiday style. They also add a heartfelt touch that store-bought ones often can’t match.
In this article, I’ll guide you to free resources for Christmas stocking patterns to help you begin.
Ready to start? Let’s begin creating something special for this holiday season.
Why Choose Handmade Stockings?
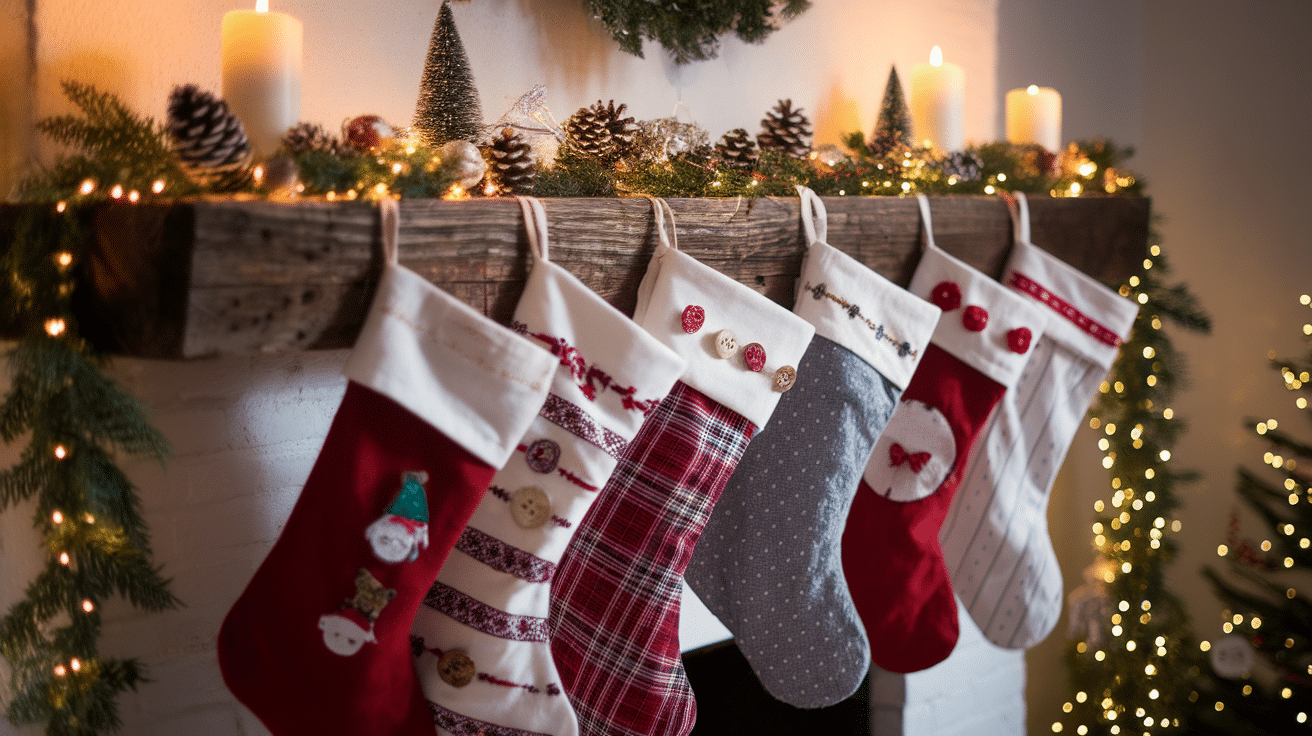
When you make your own Christmas stockings, you add a personal touch that no store-bought ones can offer.
It’s yours – crafted by your hands, with your favorite colors and designs. It’s a reflection of your style and personality.
With DIY stockings, the possibilities are endless. You can:
- Choose fabrics that match your holiday theme
- Add custom embroidery or appliqué
- Personalize each one with names or special messages
The best part? It’s not as expensive as you might think. Buying stockings from stores can add up, especially if you want something unique. But with just a few supplies, you can create something special for a fraction of the cost.
So, why settle for ordinary when you can have something truly one-of-a-kind? Making your stockings is a great way to add that extra touch of holiday magic.
Top Free Christmas Stocking Patterns
There are so many ways to make your own Christmas stockings. Below are some of my favorites, each with its own design and style.
1. Classic Quilted Stocking
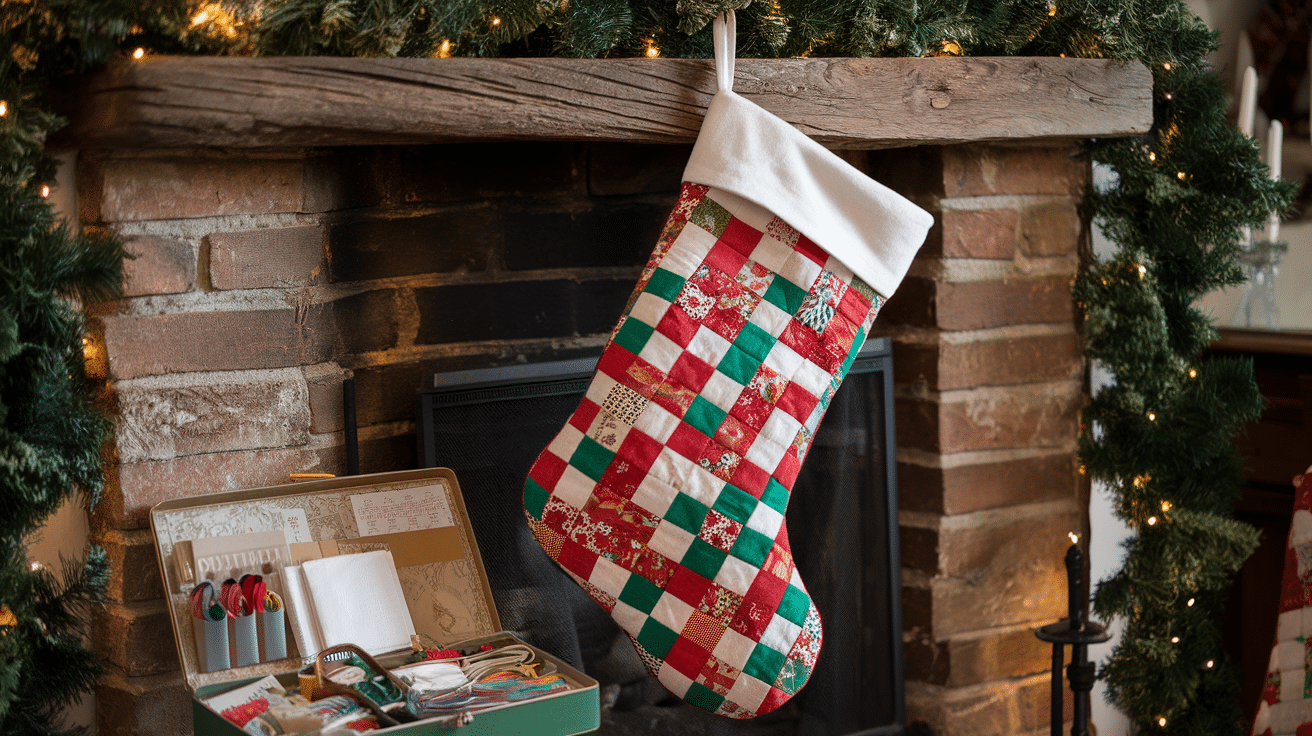
This one is timeless, and I almost always end up making a new one every year for my collection.
The quilted design gives it a cozy, homemade feel. It’s perfect for creating a warm, traditional vibe. You can mix and match fabrics for a fun, personalized look.
This design also offers a great opportunity to try out different sewing techniques. Whether you’re a beginner or advanced, the quilted stocking can be tailored to your skill level.
2. No-Sew Felt Stocking
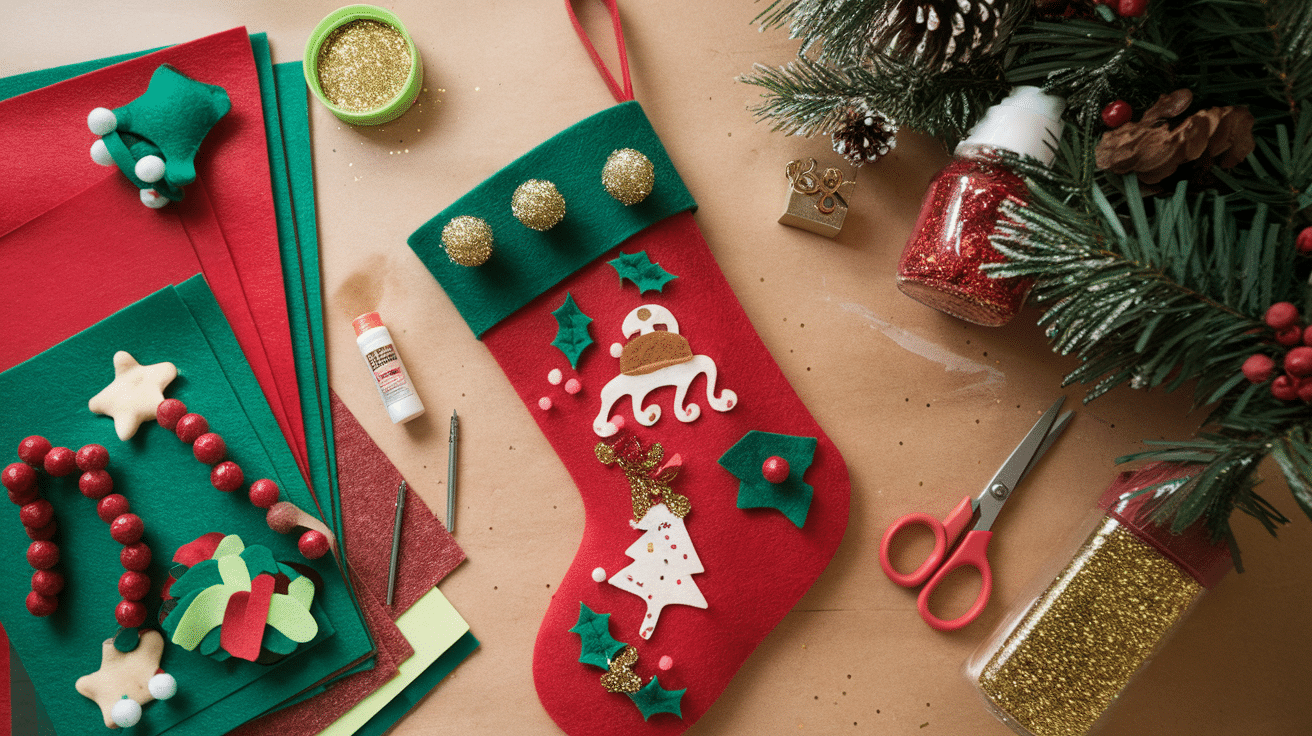
Don’t sew? No problem. This is an easy, beginner-friendly option. You can put it together quickly with just glue and felt. It’s a great project for kids or a last-minute stocking idea.
Felt is also an affordable material, making this an inexpensive option. You can customize the shape and size, and even add fun decorations like pom-poms or glitter.
3. Crochet Christmas Stocking
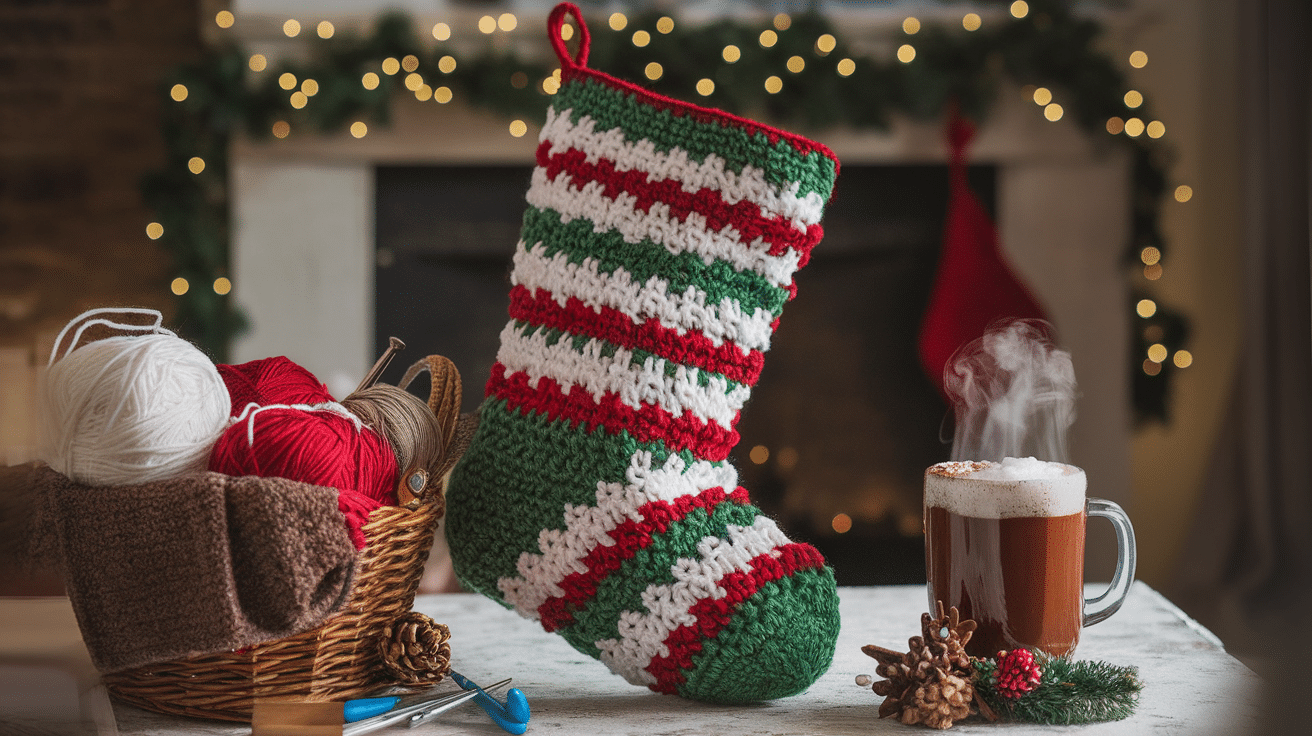
If you love to crochet, this one’s for you. Crocheting is great for adding detailed designs and texture to your stockings. You can experiment with different stitch patterns to make your stocking truly unique.
Crocheting allows you to create intricate designs that stand out. From colorful stripes to detailed patterns, these stockings can reflect your style.
4. Embroidered Stocking Pattern
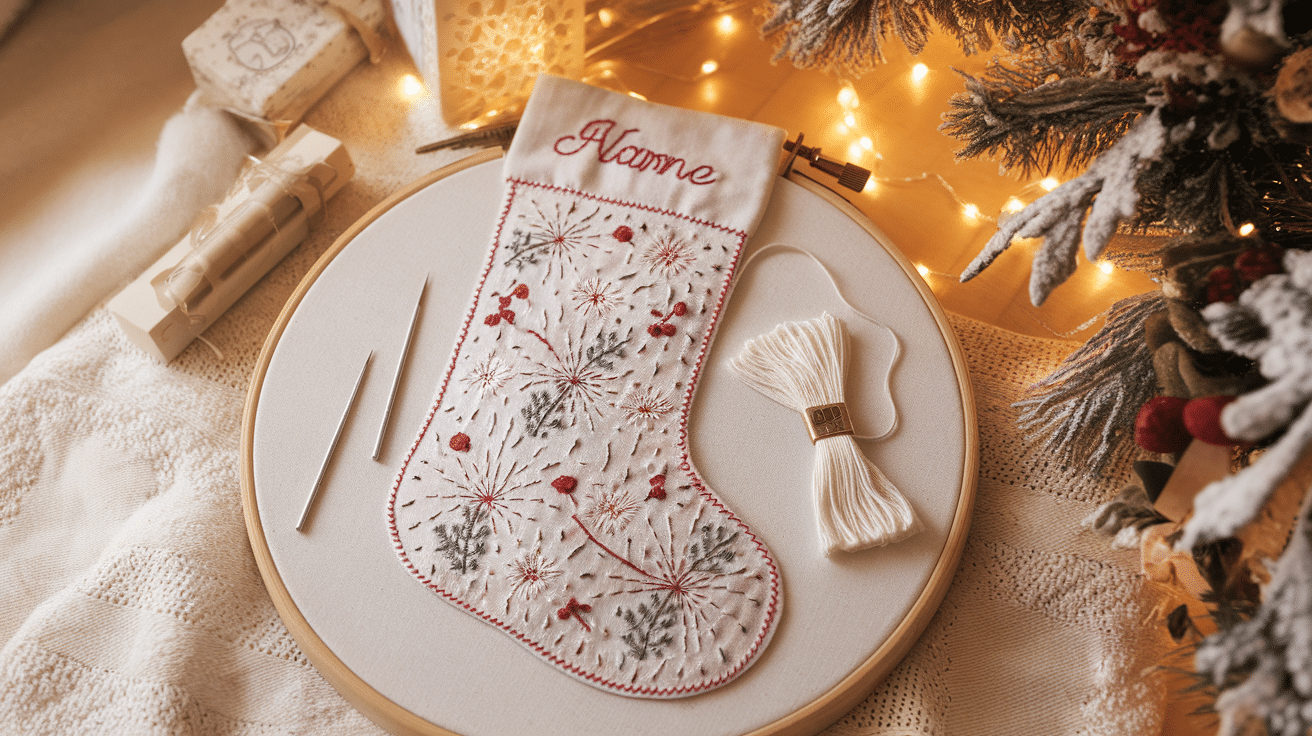
Want to add a personal touch? Try embroidery. You can stitch names, designs, or patterns to make your stocking truly unique. It’s a wonderful way to create a memorable keepsake.
You can choose to go simple with small designs or generate larger, more elaborate patterns. The possibilities are endless when it comes to adding custom details.
5. Upcycled Sweater Stocking
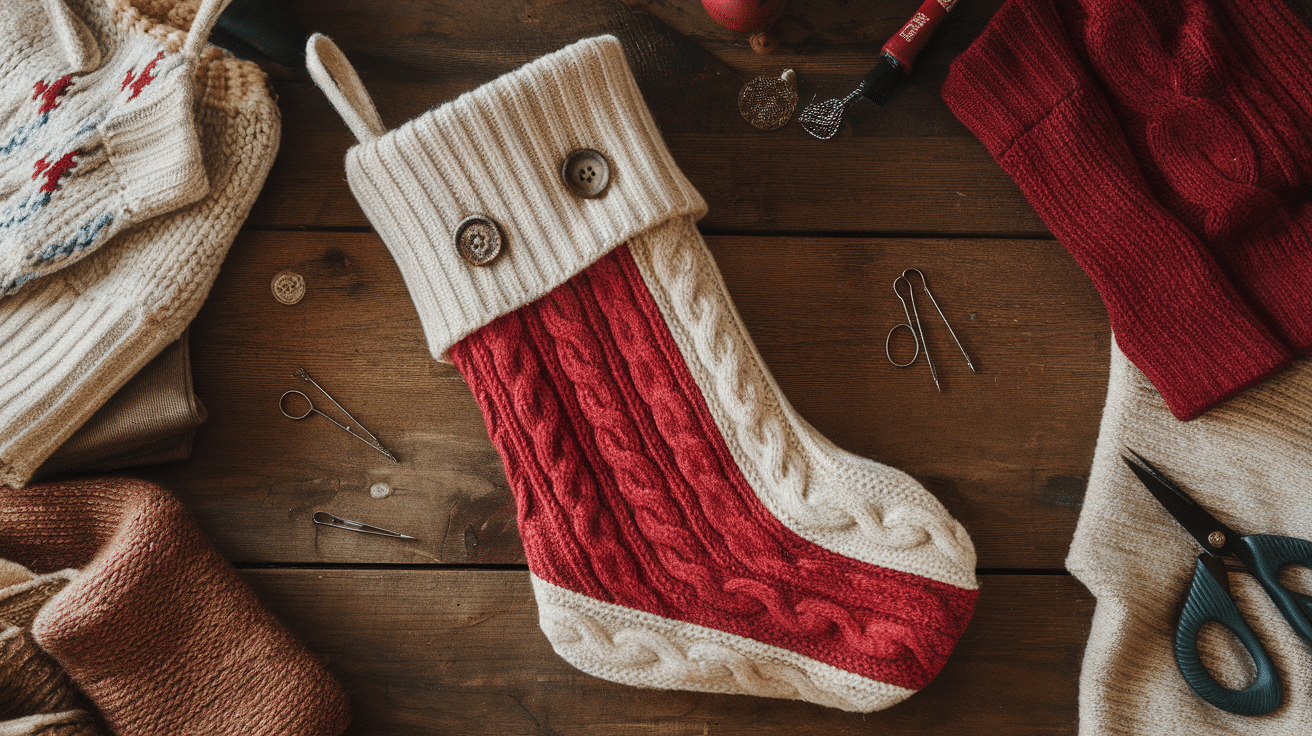
Going for an eco-friendly option? Use an old sweater! It’s a creative way to repurpose materials and make a stylish, one-of-a-kind stocking. This project is perfect for giving old clothes new life.
You can even use the sweater’s buttons or zippers as decoration for an added touch. This method is sustainable and will give your stocking a unique, vintage look.
These free patterns will help you get started on your crafting journey. Each one gives you a chance to express your creativity and create something special.
Whichever pattern you choose, you’ll be adding a personal touch to your holiday celebrations.
Step-by-Step Guide to Crafting Your Stocking
This simple step-by-step guide will help you craft one from scratch using basic tools and materials.
Materials You’ll Need
Fabric Options
You can use a variety of fabrics for your stockings. Some popular choices are:
- Cotton: Soft and easy to work with. It’s a versatile fabric for all skill levels.
- Felt: Great for no-sew projects. It’s durable and holds its shape well.
- Fleece: Warm and cozy, perfect for winter stockings. This fabric adds a snug, comfy feel.
- Upcycled Materials: Old sweaters or fabric scraps work great, too. It’s a creative and eco-friendly choice.
Tools and Embellishments
- Scissors
- Sewing machine or needle and thread
- Pins
- Patterns
- Buttons
- Ribbons
- Embroidery floss
- Sequins
Once you have everything ready, you can start creating your stocking and make it truly your own.
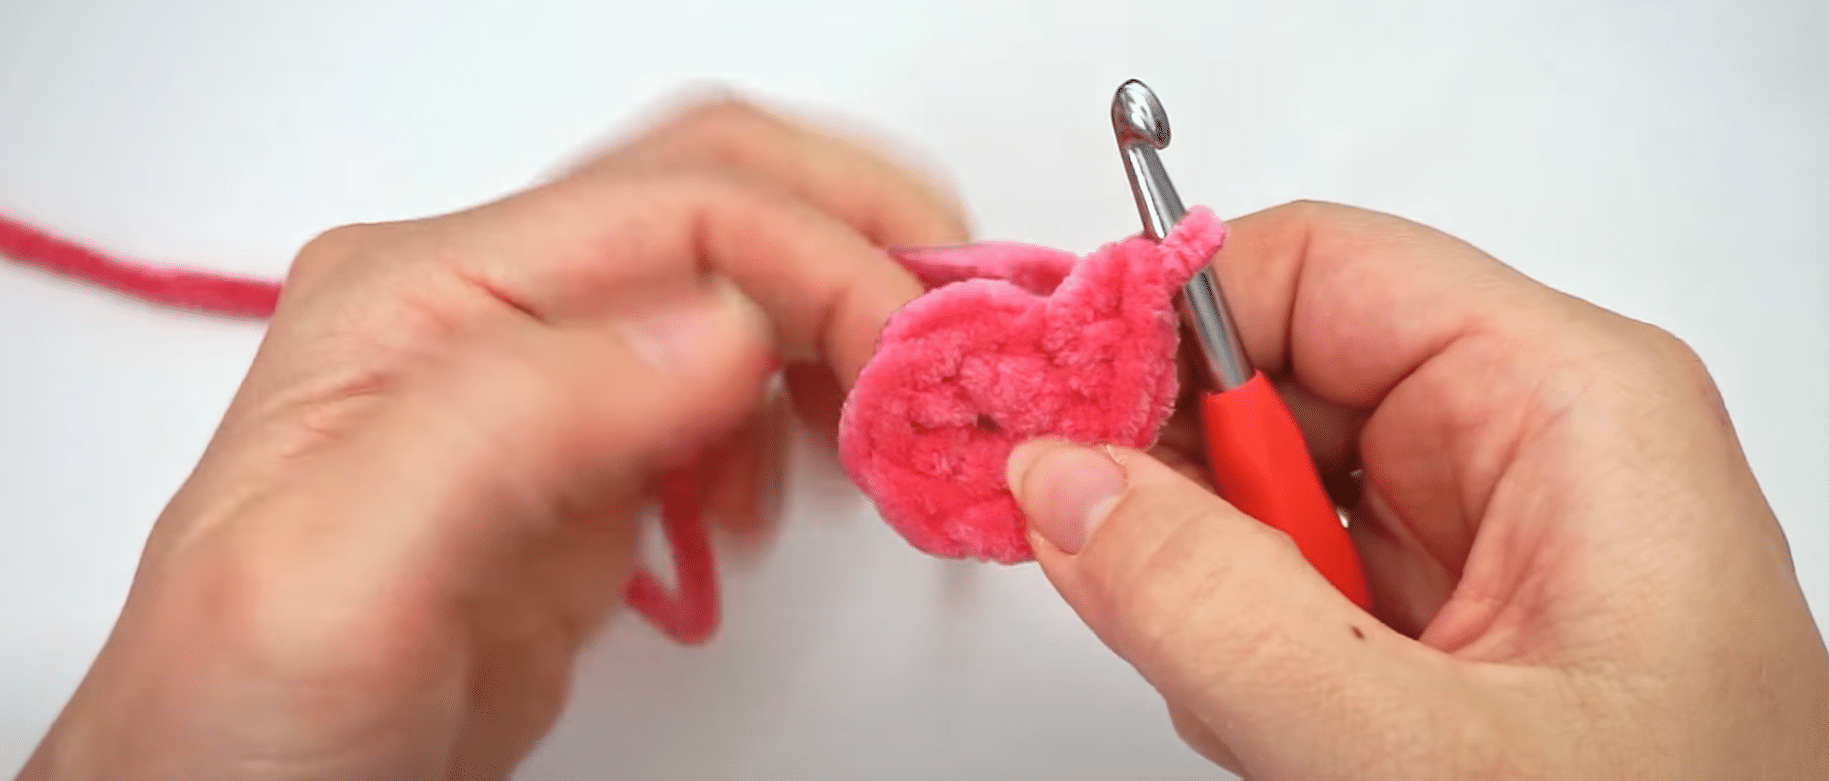
Step 1: Start with a Slip Knot
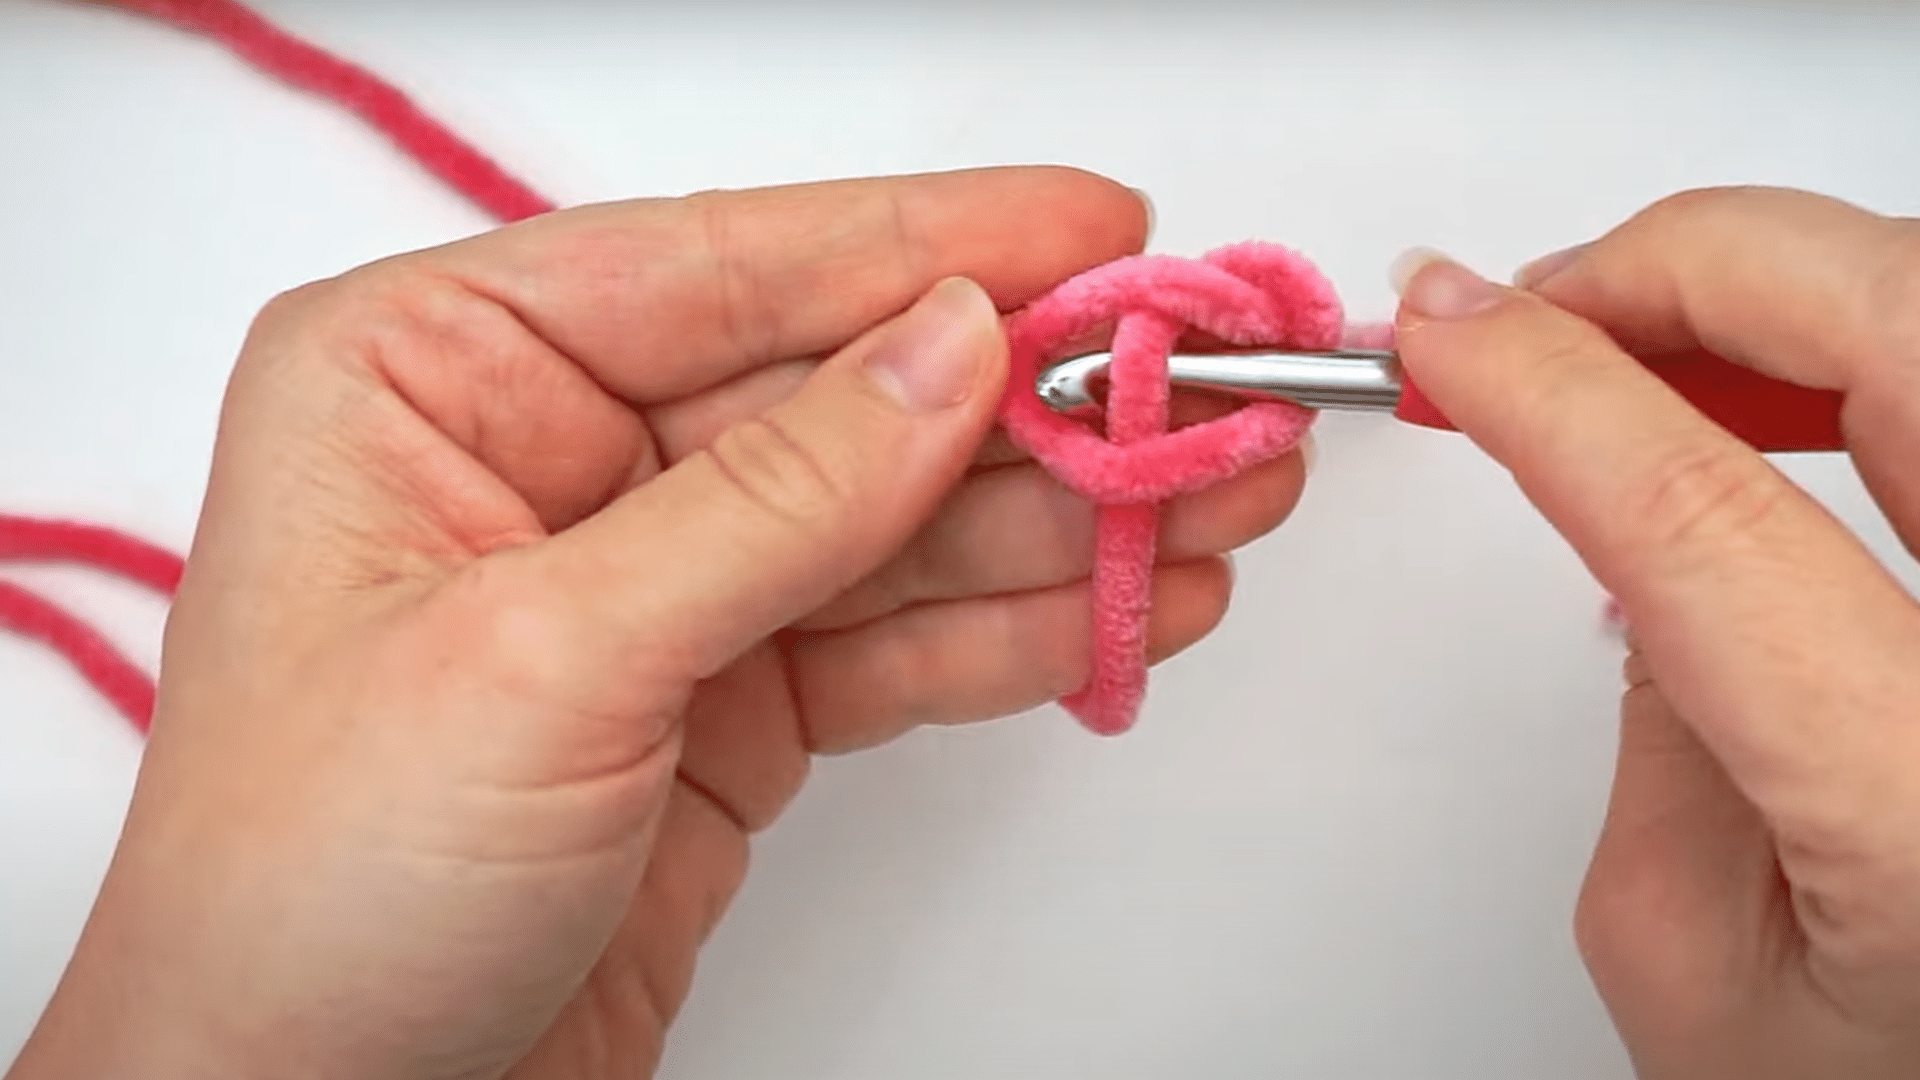
Begin by making a slip knot with your yarn. Form a loop and place the long end behind the loop.
Next, grab the yarn from the middle with your hook and pull it through. This creates the foundation for your crochet work.
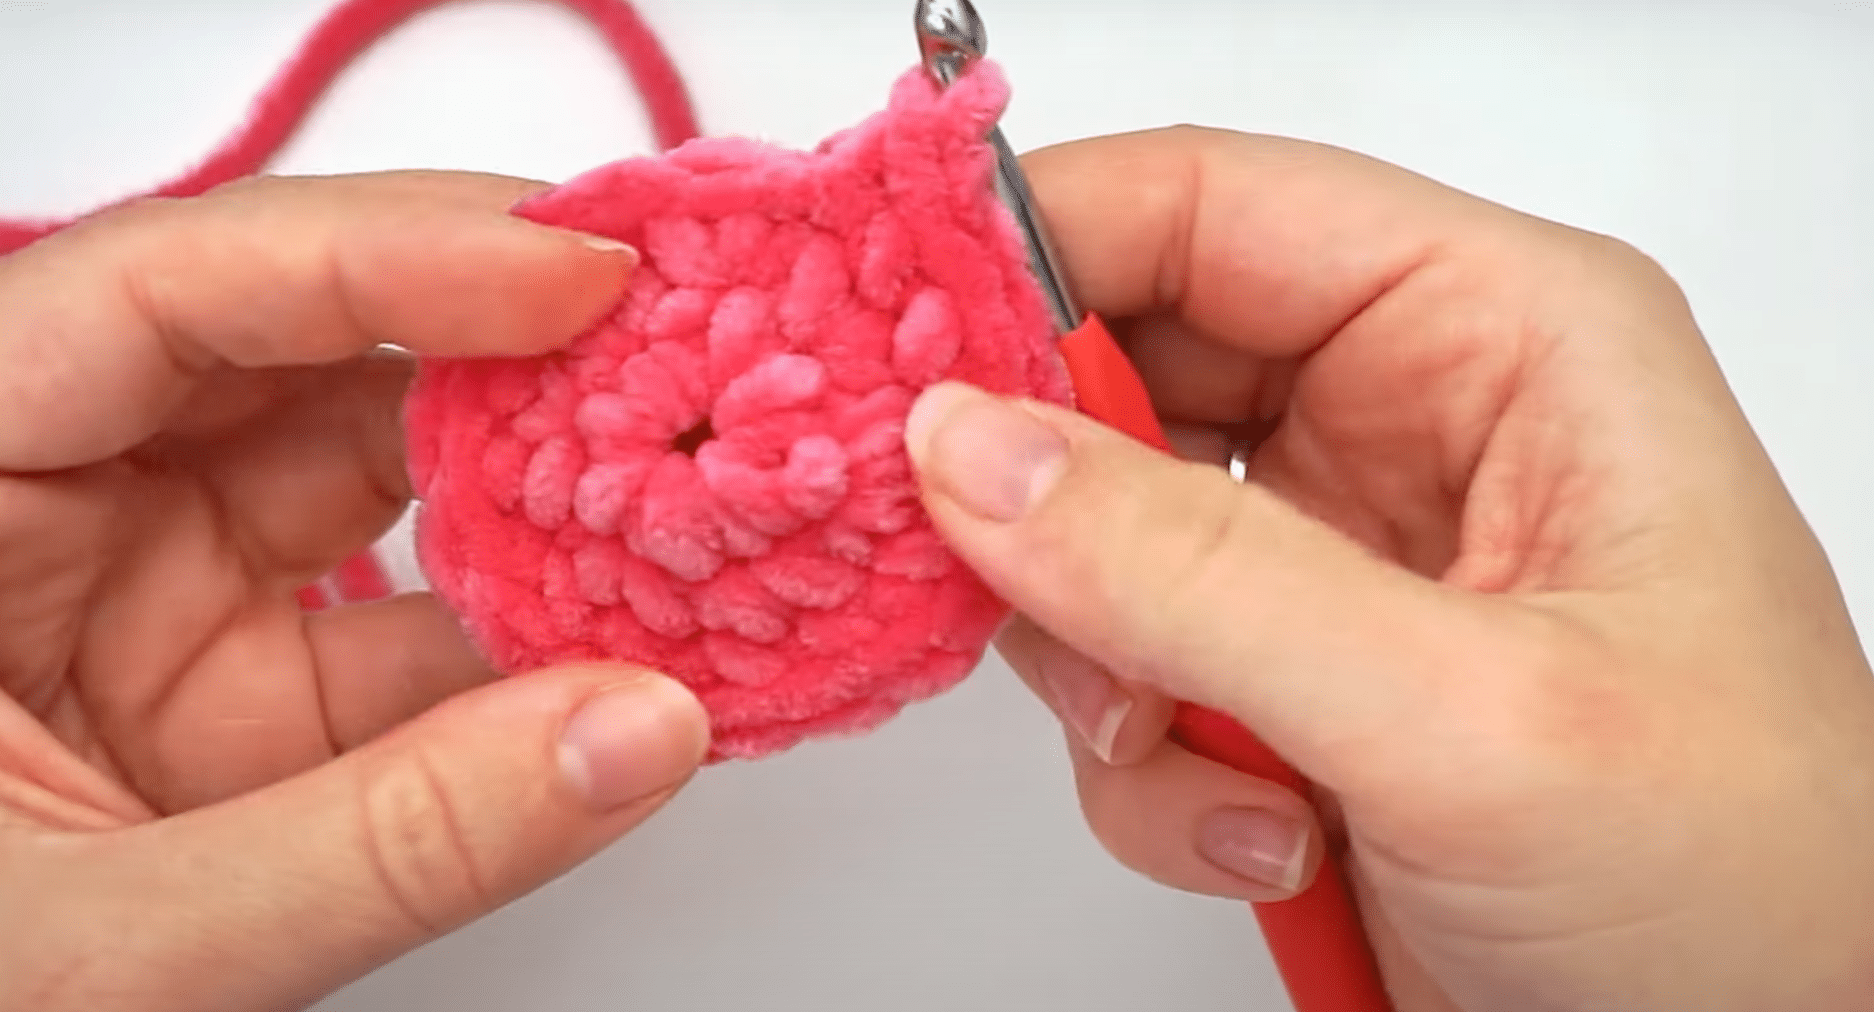
Step 2: Chain and Single Crochet
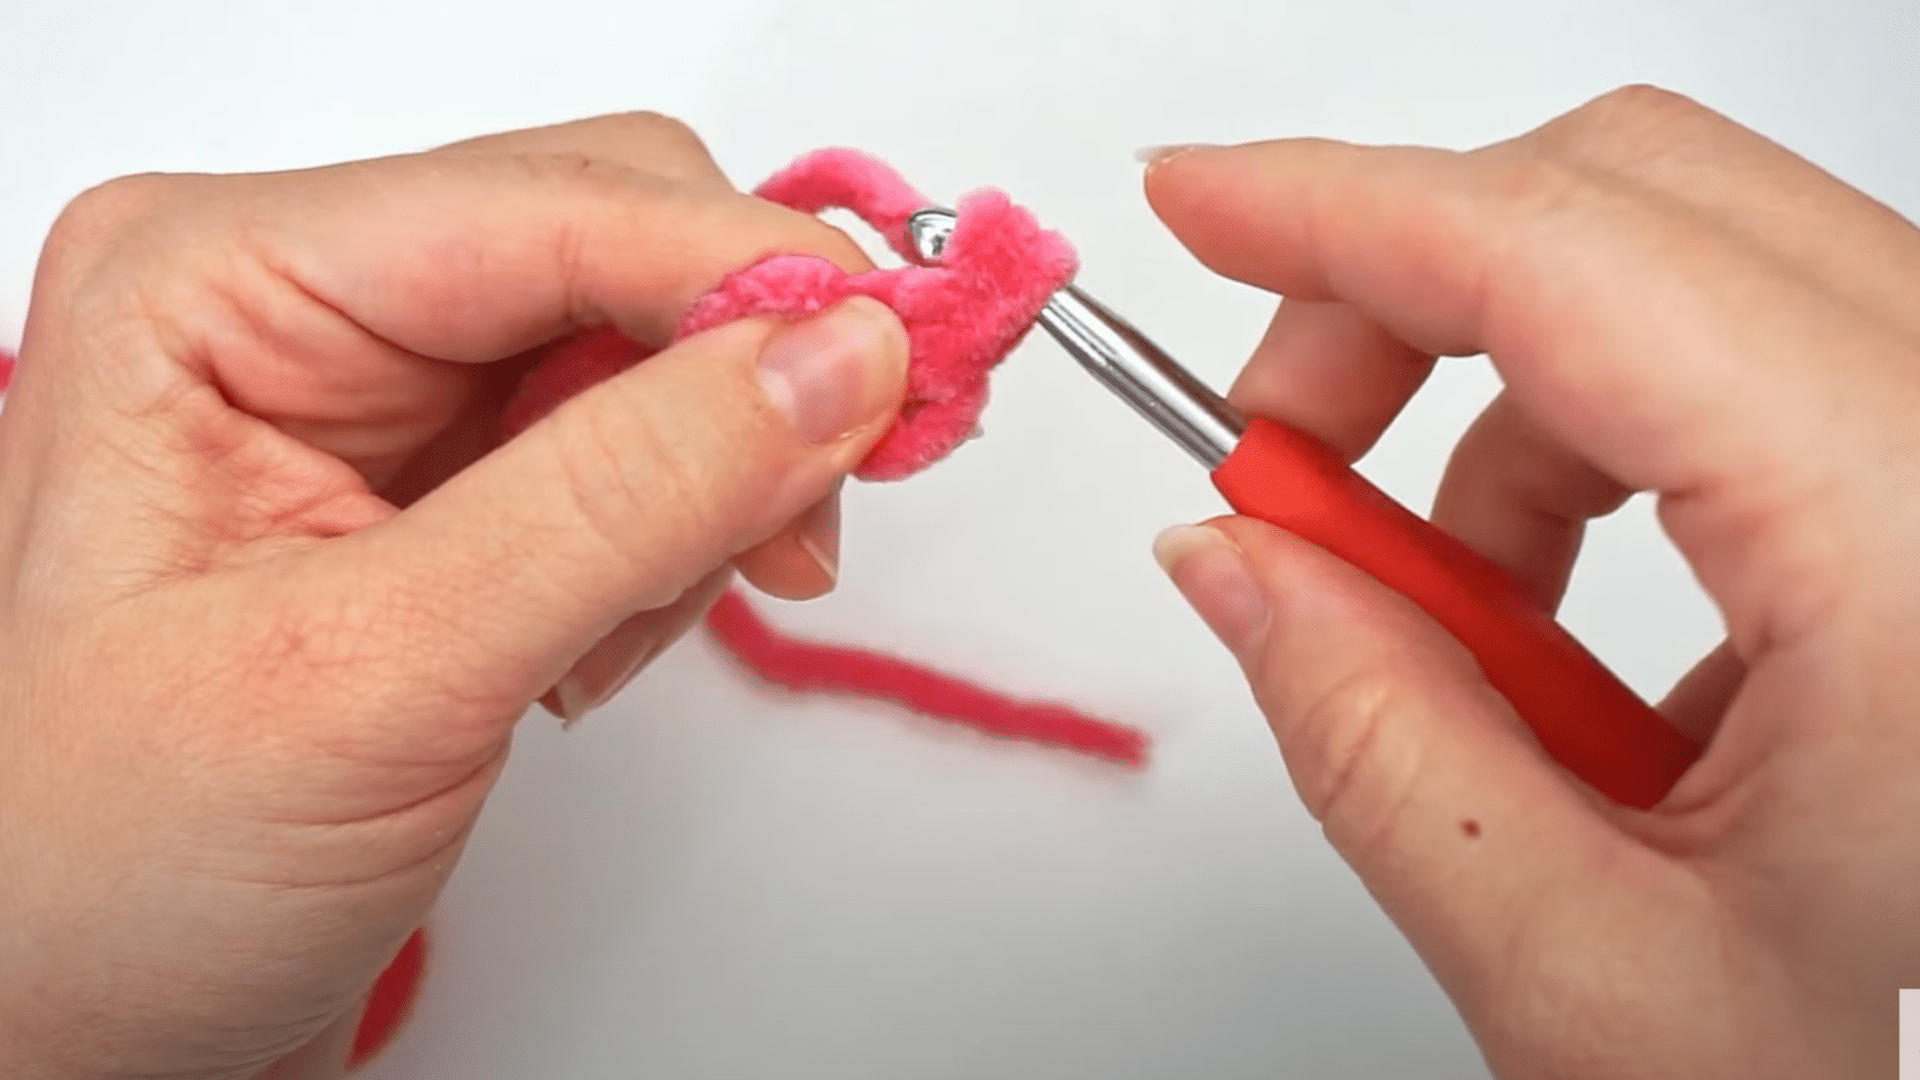
After the slip knot, chain 2 stitches. In the first chain, make 6 single crochets. Insertyour hook into the first chain, yarn over, and pull through.
Then, yarn over again and pull through both loops on your hook to complete the single crochet stitch. Continue this process until you have 6 single crochets in this first round.
Step 3: Increase to 12 Stitches
Now that you have your 6 single crochets, it’s time to work in spirals without turning the work. For the next round, you will increase the stitch count by placing 2 single crochets in each stitch.
Continue this pattern of increasing in every stitch around the circle until you have a total of 12 stitches.
Step 4: Increase to 18 Stitches
For the next round, you will increase your stitch count further. Start by placing 2 single crochets in the first stitch (this is your increase).
Then, in the next stitch, crochet 1 single crochet. Continue alternating between placing 2 single crochets in one stitch and 1 single crochet in the next stitch. By the end of this round, you should have 18 stitches.
Step 5: Work in Spirals for the Foot
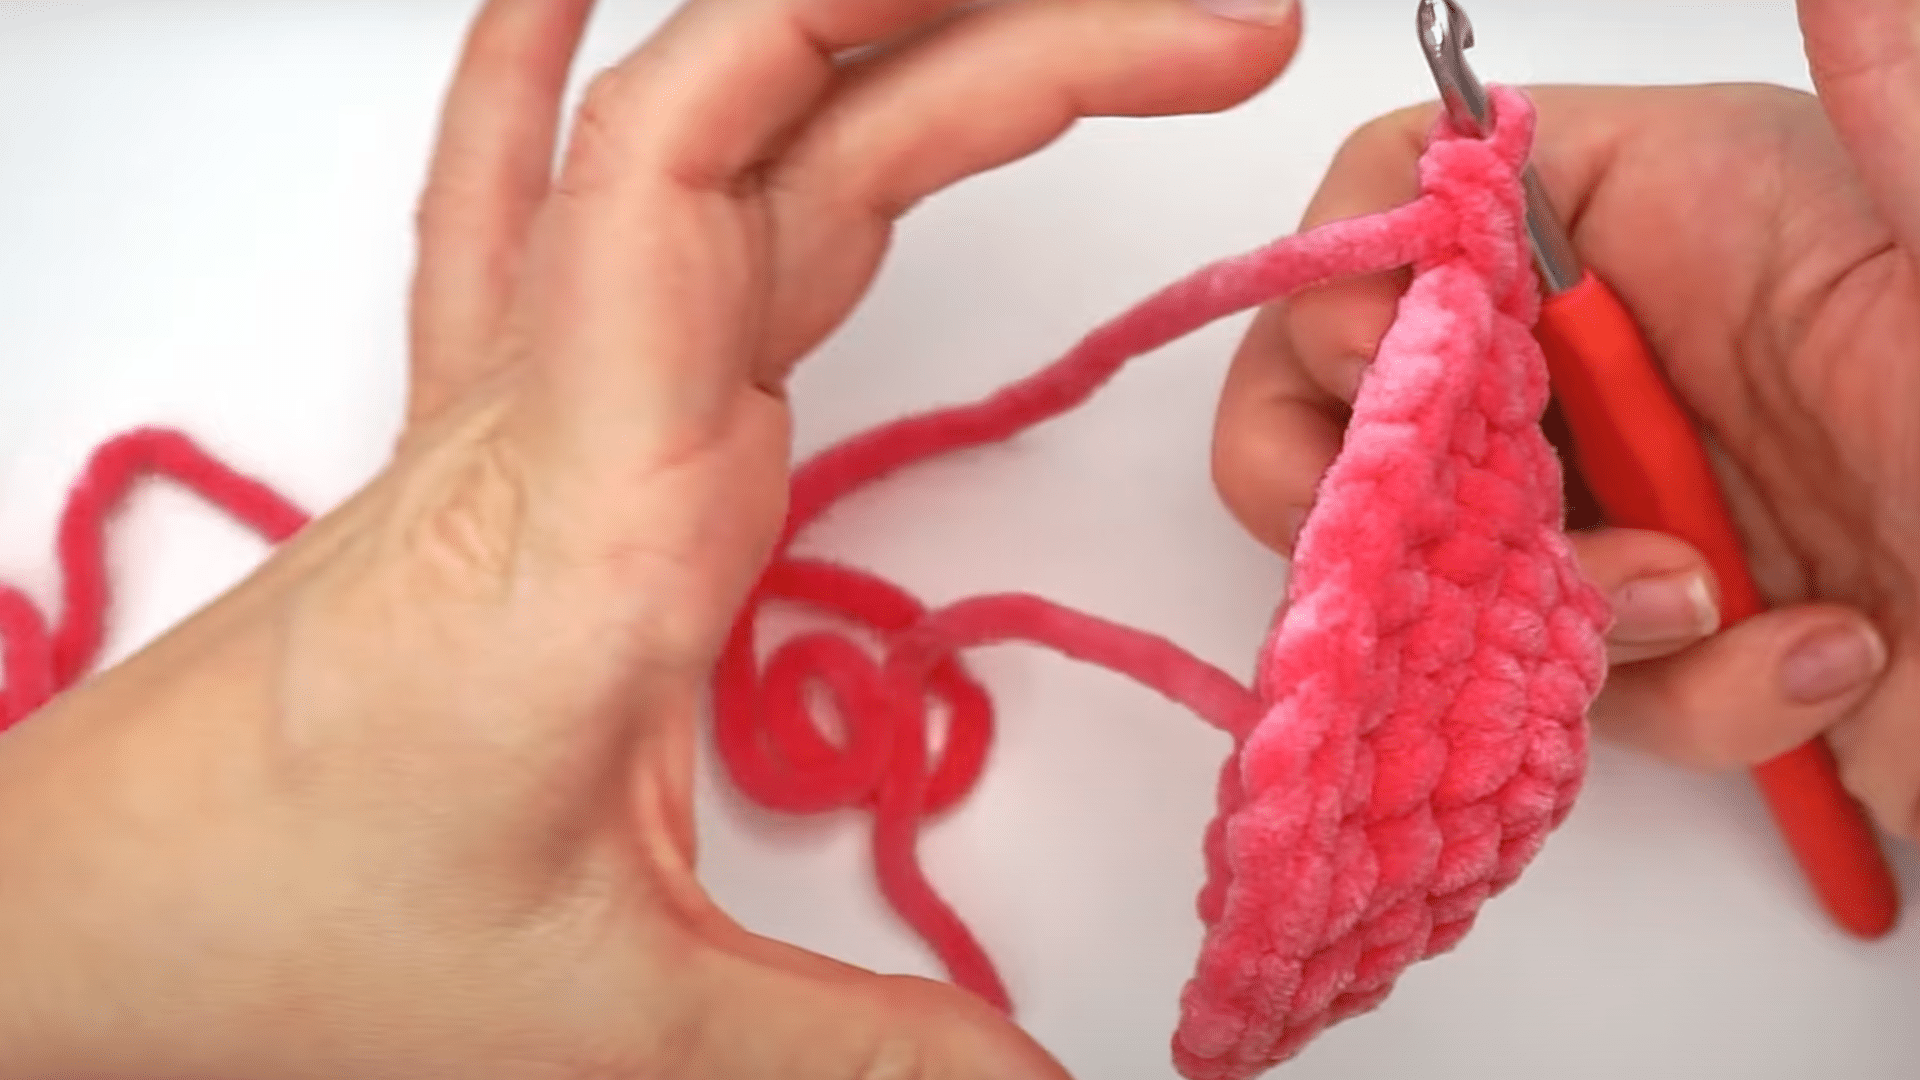
Once you reach 30 stitches, you will continue crocheting in spirals, without any further increases. Simply crochet 1 single crochet in each stitch all the way around.
Continue this for 15 rounds, which will form the base of your stocking. The foot section will remain the same size while you work up along the foot in spirals.
Step 6: Turn the Work and Work the Heel
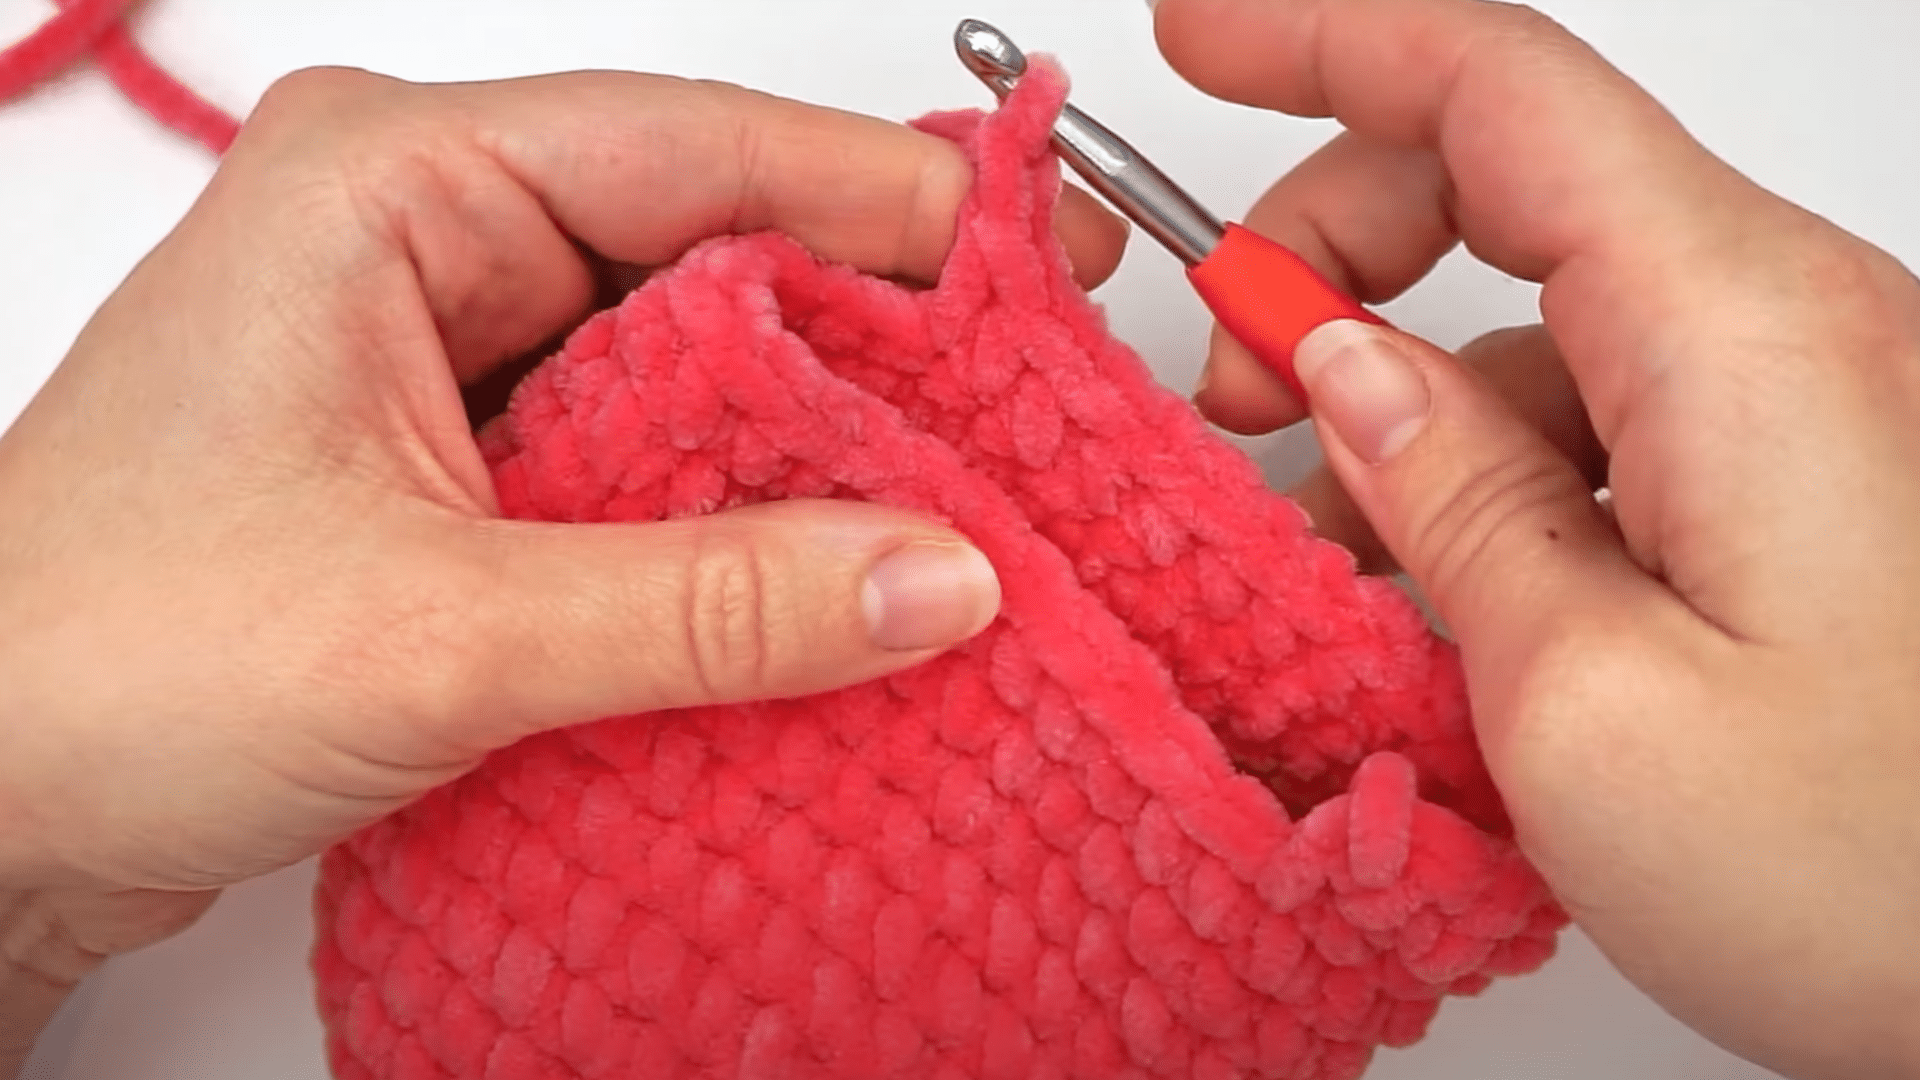
After completing 15 rounds for the foot, chain 1 and turn the work. Skip the turning chain and start crocheting into the second stitch.
Crochet 15 single crochets across. Repeat this process by chaining 1 and turning at the end of each row. Continue crocheting back and forth for a total of 12 rows.
Step 7: Close the Heel
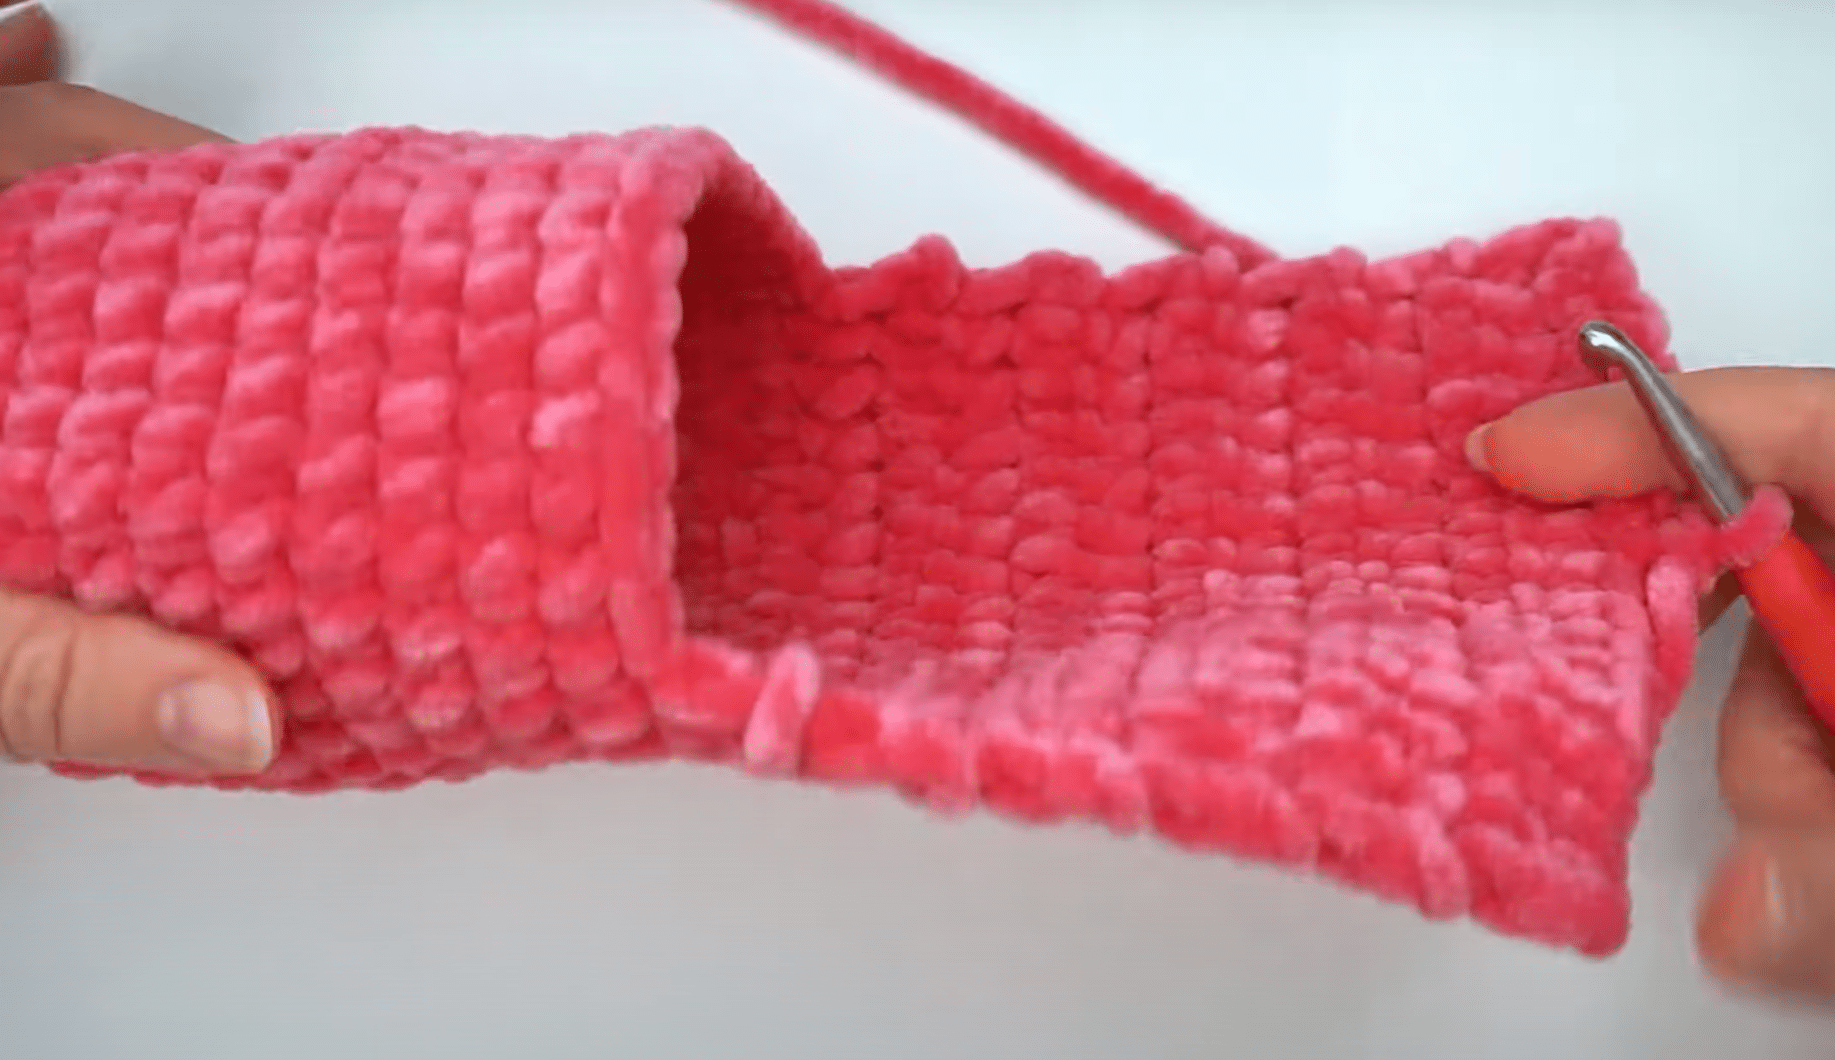
Once you finish the 12 rows for the heel, start the 13th row by single crocheting only 7 stitches. Now you need to close the heel of the stocking.
Turn the work so that the heel is on the inside and use slip stitches to sew the bottom of the slipper.
Insert your hook through both layers and complete a slip stitch all the way down. Continue doing this until the heel is securely closed.
Step 8: Add the Top Cuff (White Yarn)
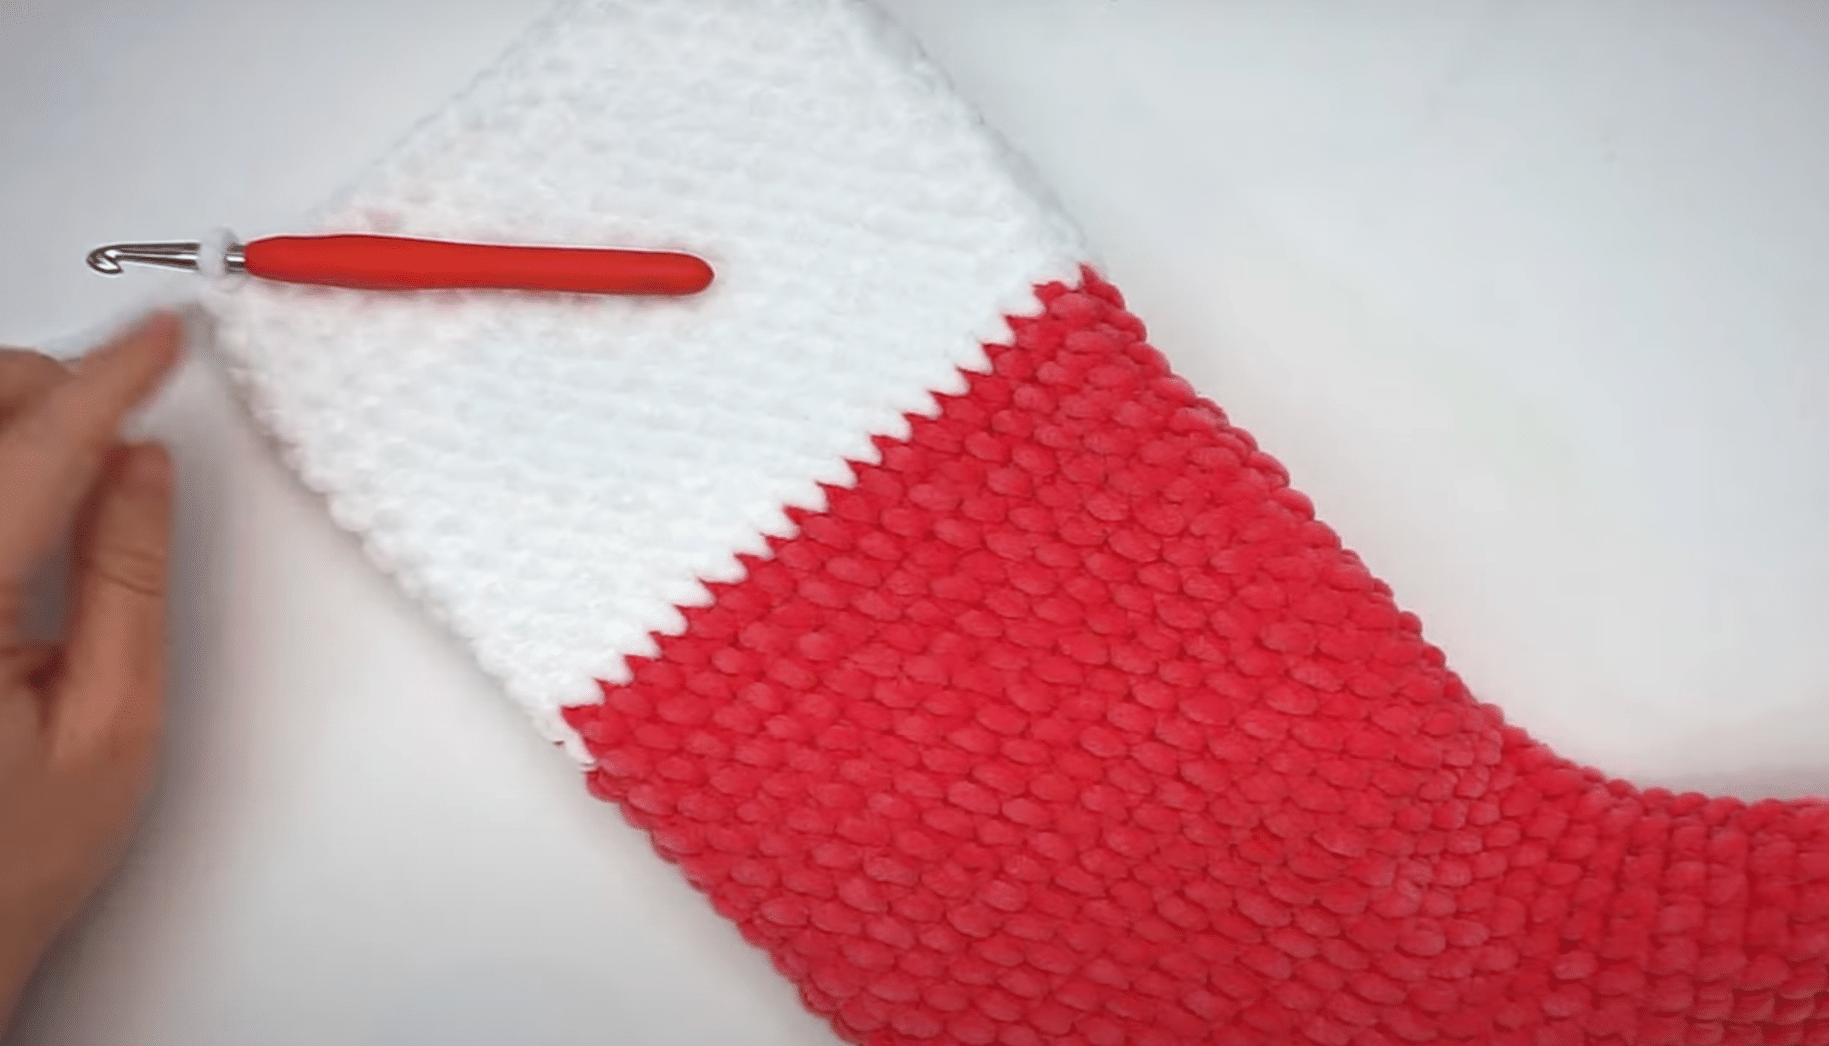
Now, switch to the white yarn to begin the top cuff of the stocking. Attach the white yarn by inserting the hook into the next stitch, then pulling the yarn through.
Continue single crocheting in spirals around the top of the stocking for 13 rows. Once you’ve completed 13 rows, finish off the white section with 3 slip stitches to close it.
Step 9: Finish the Stocking
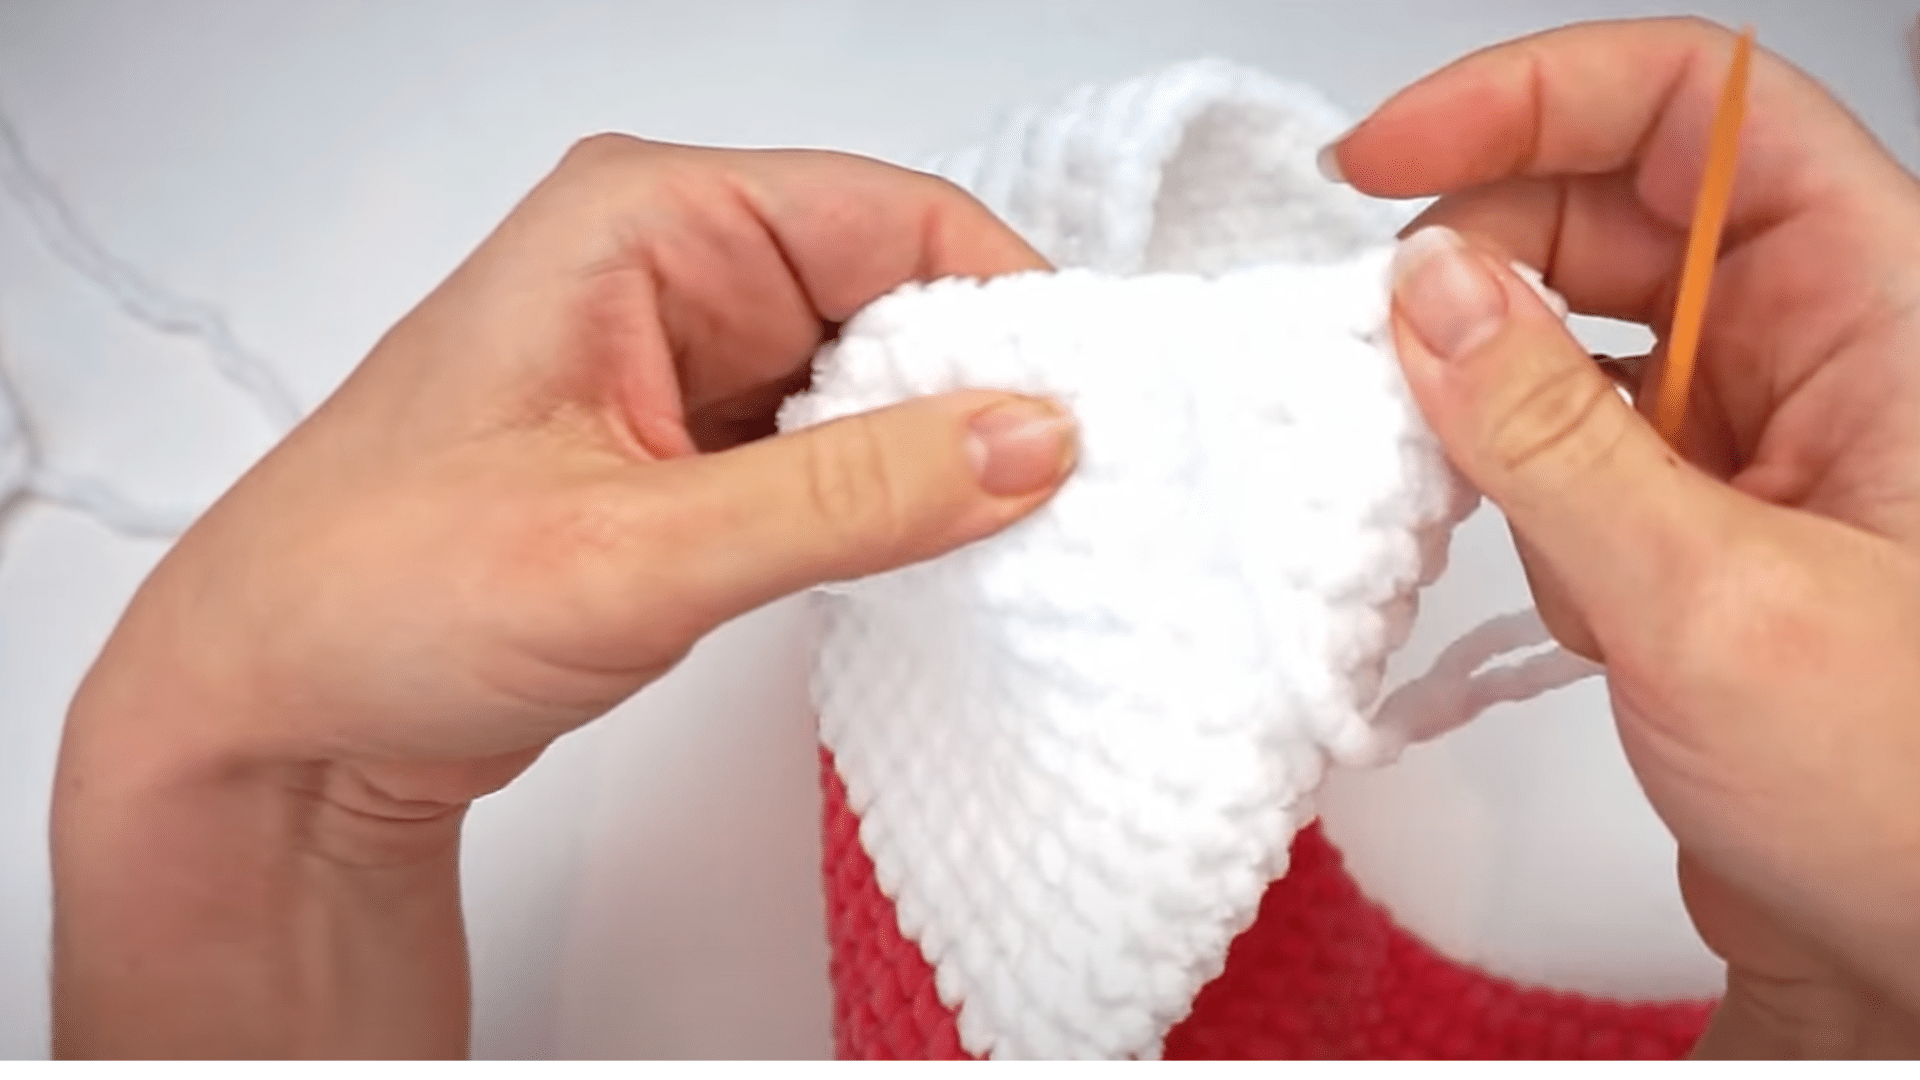
When you’ve finished the cuff, cut the yarn and pull the hook through to secure it. Weave in any loose ends, and since the cuff will fold down, make sure the ends are woven in on the outside to hide them.
This will ensure that they don’t show when the cuff is folded down. Your stocking is now almost complete!
Step 10: Final Touches
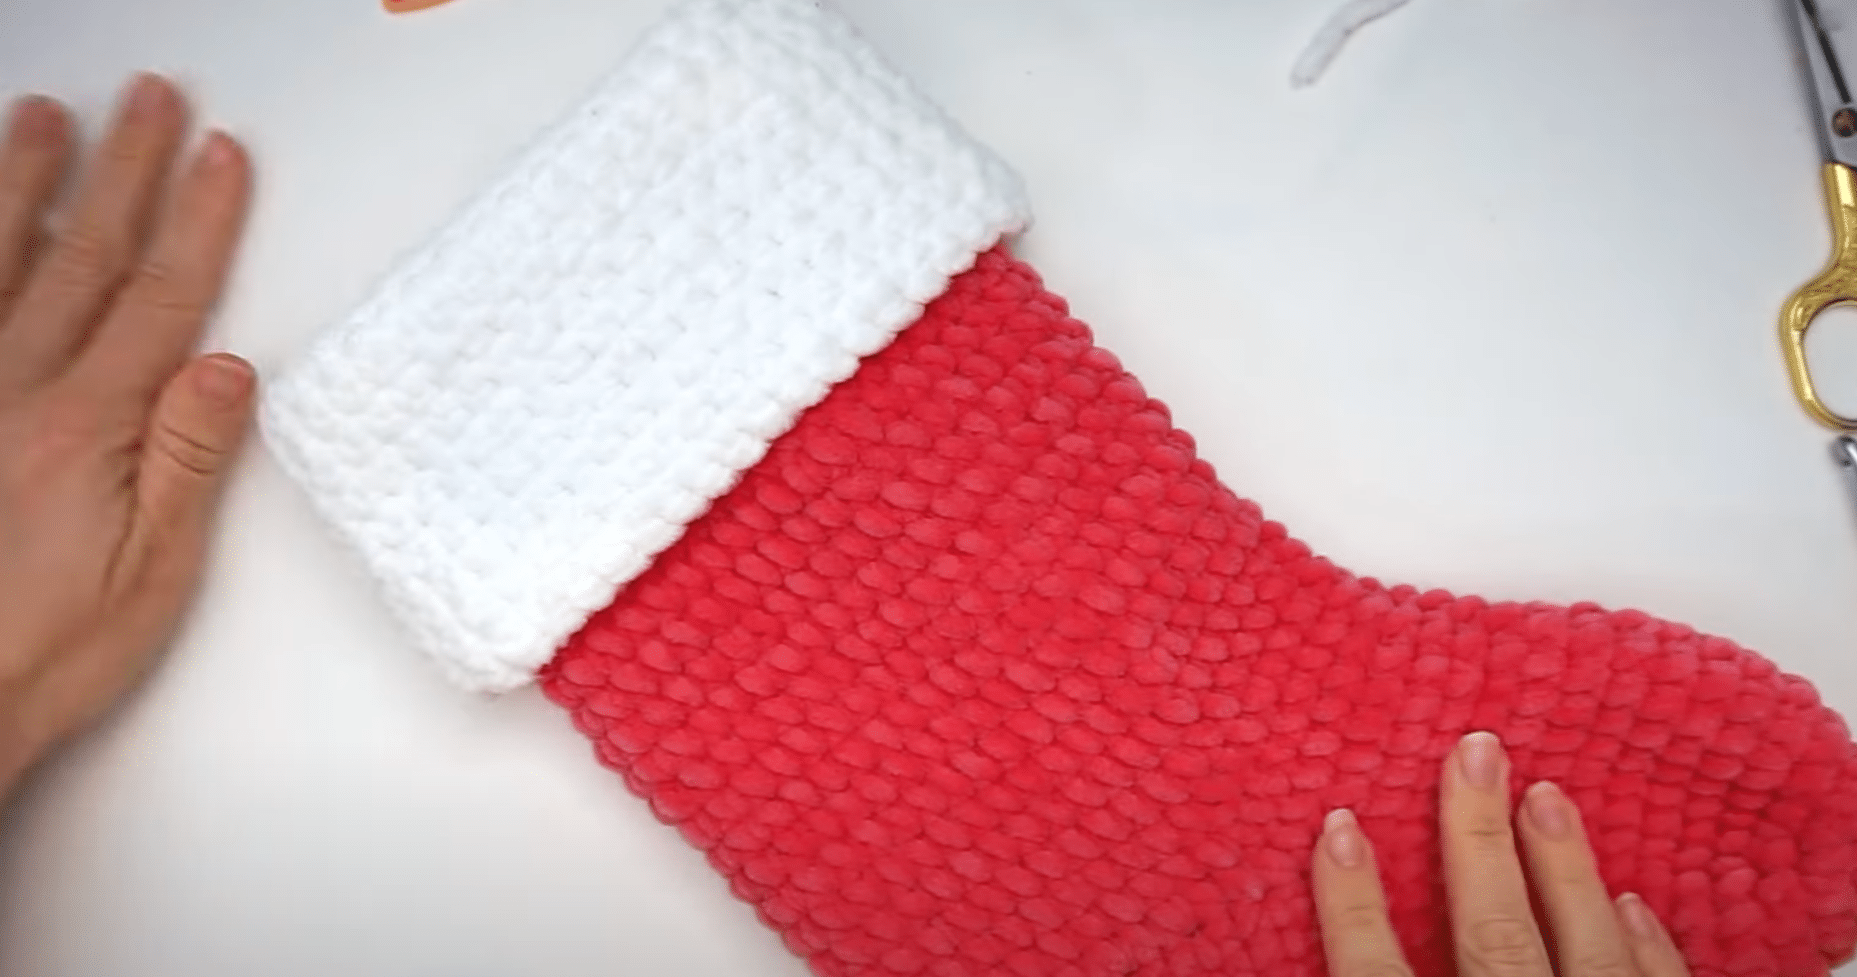
Finally, fold the white cuff down to the desired length, and your stocking willtake shape. The color change at the top may look a little messy, but it will be hidden once the cuff is folded down.
Now, your crochet stocking is ready to hang up and enjoy! This simple stocking is a great gift or decoration for the holidays.
These steps are simple, but they’ll give you a beautiful handmade stocking. Enjoy the process and make it as unique as you are!
Personalization Ideas for Your Stocking
Personalizing your Christmas stocking makes it extra special.
- Add Names or Initials:A great way to personalize your stocking is by adding names or initials. You can do this with embroidery or fabric paint. You could even use glitter or metallic thread for a little extra sparkle.
- Incorporate Family Heirlooms or Meaningful Fabrics:You can make your stockings even more special by using family heirlooms or fabric that holds meaning. Maybe you have an old scarf or shirt that reminds you of a loved one.
- Create Themed Stockings:Why not make stockings that match a theme? For example, you could go for a rustic, modern, or whimsical look. You can choose fabrics and embellishments that fit the theme.
Personalizing your stocking can turn it into a meaningful holiday tradition. Let your creativity shine!
Tips for Crafting Success
Crafting your own Christmas stocking is fun, but there are a few tips to help make the process smoother and the result even better.
- Pre-wash Fabrics: Before you start cutting, make sure to pre-wash your fabric. This helps prevent any shrinkage after your stocking is made. It’s always better to be safe than sorry!
- Use Contrasting Threads for Decorative Stitching: If you want to add extra details, try using contrasting thread for stitching. It adds a pop of color and makes the stocking more interesting.
- Practice on Scrap Fabric: Before you start working on your final piece, practice on some scrap fabric. This helps you get comfortable with the sewing machine or hand stitching, and it’s a great way to avoid mistakes on your actual stocking.
These small tips can help make your project easier and more enjoyable. You’ll be crafting with confidence in no time!
Conclusion
There’s something deeply satisfying about crafting a personalized stocking that reflects your style and adds a personal touch to your holiday decor. I hope this guide has inspired you to start your stocking project.
The best part? You can keep experimenting with different patterns, fabrics, and embellishments to create truly one-of-a-kind stockings.
Feel free to explore more patterns and tutorials right here on my website.
There’s always a new project to try and more ideas to make your holidays even brighter.
Frequently Asked Questions
How Do I Know What Size to Make My Christmas Stocking?
You can adjust the pattern size or choose one based on your desired look, whether it’s a small gift stocking or a large decorative piece.
How Can I Add More Color to My Stocking?
To make your stocking stand out with bright colors, use contrasting fabrics or add embellishments like ribbons, buttons, or embroidery.


