


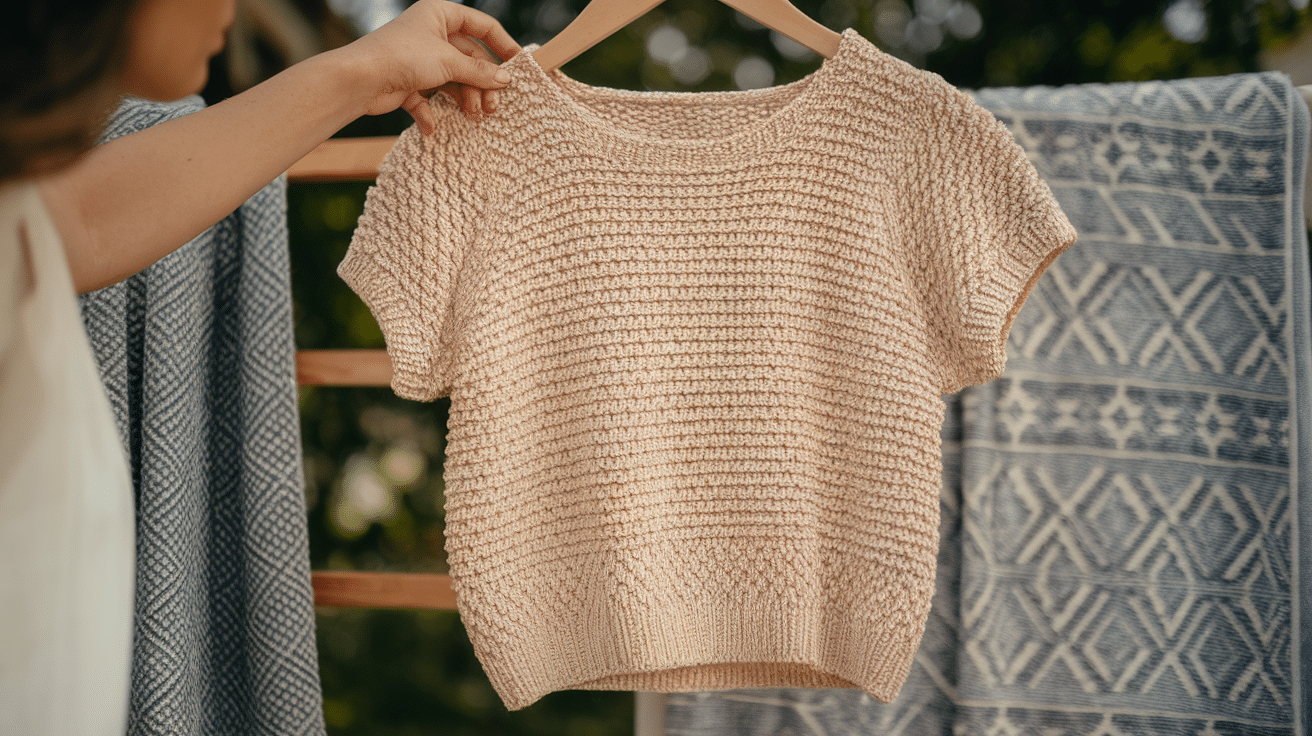
Ever wanted a breezy summer top that fits perfectly? You’ve come to the right place! In this article, I’ll walk you through every step of making your own beautiful knitted top from scratch.
I struggled for years to find the perfect summer knits. Store-bought tops never fit right and lacked personality, so I created this guide.
This article will teach you:
- How to choose the right materials
- Step-by-step knitting instructions
- Tips for customizing your summer top
- How to fix common mistakes
As a knitting teacher with 8 years of experience, I’ve helped hundreds of crafters create tops they love. I promise you can do this, even if you’re a beginner.
No more wasting money on ill-fitting store options. By the weekend, you’ll have a gorgeous, handmade summer top that fits your style perfectly. Let’s get started!
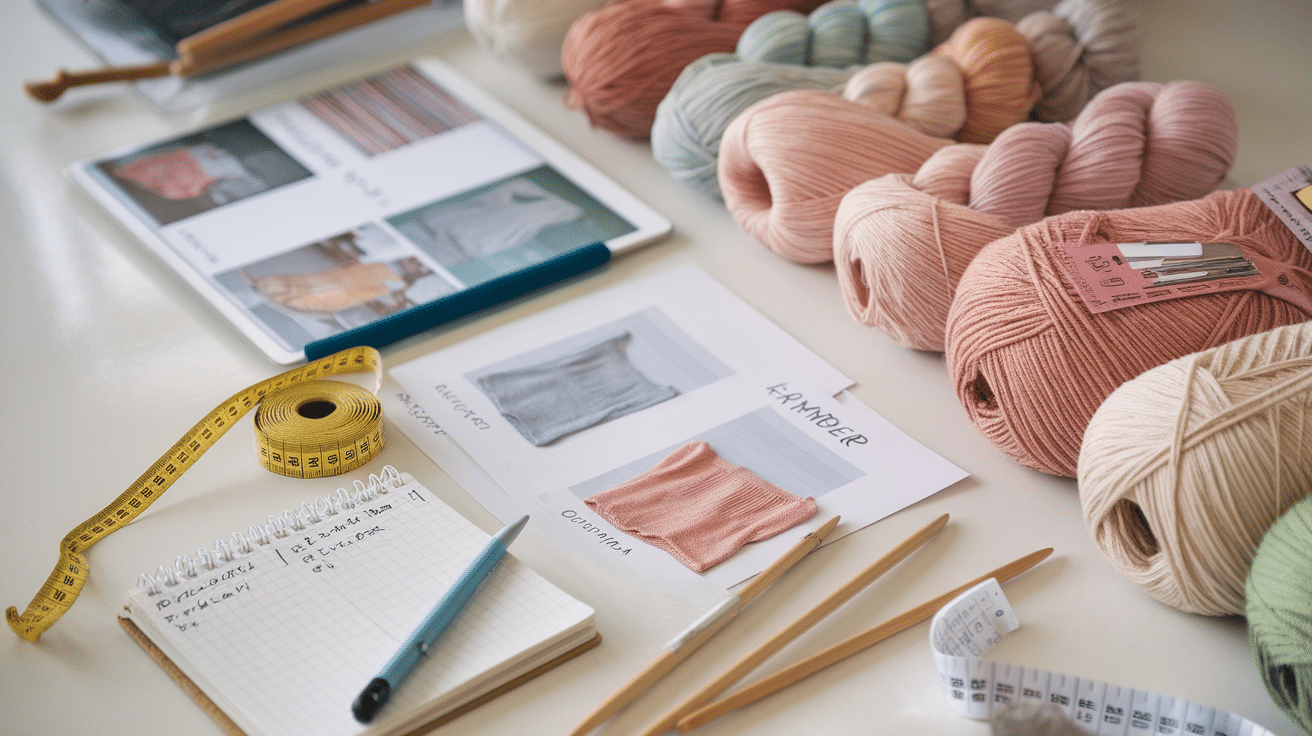
Choosing the Right Yarn and Needles
The yarn you pick will make or break your summer top.
Here’s what I’ve learned:
- Lighter yarns like cotton, linen, or bamboo are perfect for summer
- Breathable fibers keep you cool in hot weather
- Natural fibers absorb moisture better than synthetics
- Drape is crucial for a flattering summer garment
For my favorite summer top, I used a cotton-bamboo blend in soft aqua. It’s cool, breathable, and has just enough drape.
Match the needles to your yarn weight. For my lightweight yarn, I used size US 6 (4mm) circular needles. Circular needles help support the weight of your project as it grows!
Step-by-Step Knitting Guide
Knitting a summer top may seem tricky at first, but breaking it down into simple steps makes it easy to follow. This will take you through each stage, from selecting the right materials to adding the final touches. Whether you’re a beginner or an experienced knitter, you’ll find helpful tips along the way.
Picking a Pattern and Measuring Yourself
Before you start knitting, it’s important to choose a pattern that matches your skill level and style. A simple tank top or cropped tee is great for beginners, while lace or textured designs add flair for experienced knitters. Taking accurate body measurements ensures a comfortable and flattering fit.
You’ve got several summer top styles to pick from:
- Tank top – simple, versatile, perfect for beginners
- T-shirt style – short sleeves, more coverage
- Crop top – shorter length, trendy look
- Boatneck – elegant neckline, flattering on everyone
Whichever you choose, measuring is key.
Grab a tape measure and write down:
- Bust circumference
- Shoulder width
- Desired length from shoulder to bottom edge
- Armhole depth
Remember: For summer tops, a slightly looser fit is more comfortable in hot weather!
Casting On and Starting the Project
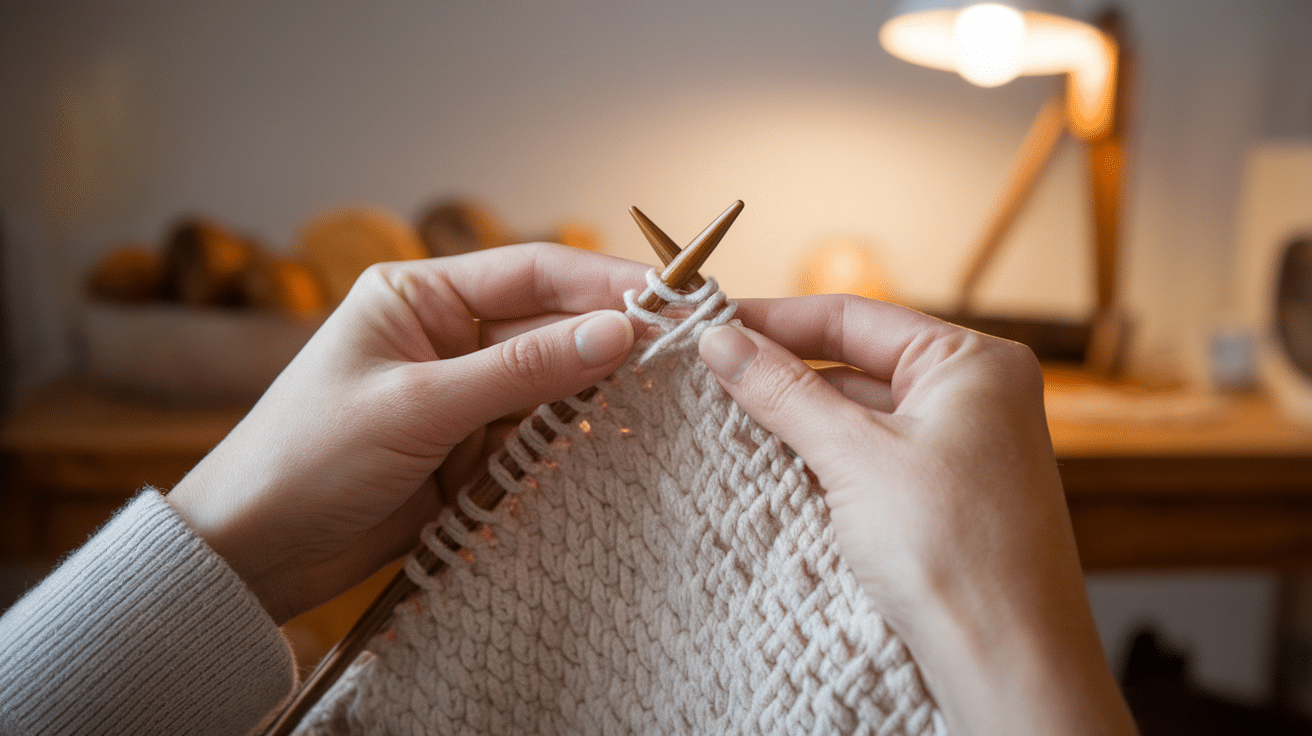
Before you start knitting, it’s important to choose the right cast-on method for a stretchy and comfortable fit. A smooth, even foundation will make the rest of your project easier and help maintain the shape of your summer top.
Time to begin!
Here’s how I start my top-down summer tank:
- Cast on enough stitches for the neck opening (typically 80-100 stitches for an adult)
- Join in the round, being careful not to twist
- Work 1-2 inches of ribbing (K1, P1) for a clean neckline
- Increase row for raglan shaping: Place markers at four points and increase before and after each marker
- Continue increasing every other round until you have enough stitches for the chest
Continue this pattern until the yoke reaches your underarms. The top will grow from the neck down!
Don’t rush this part. Put on some good music and enjoy the rhythm of the knitting. This is the perfect project for binge-watching your favorite show.
Shaping the Top (Neckline, Armholes, and Fit)
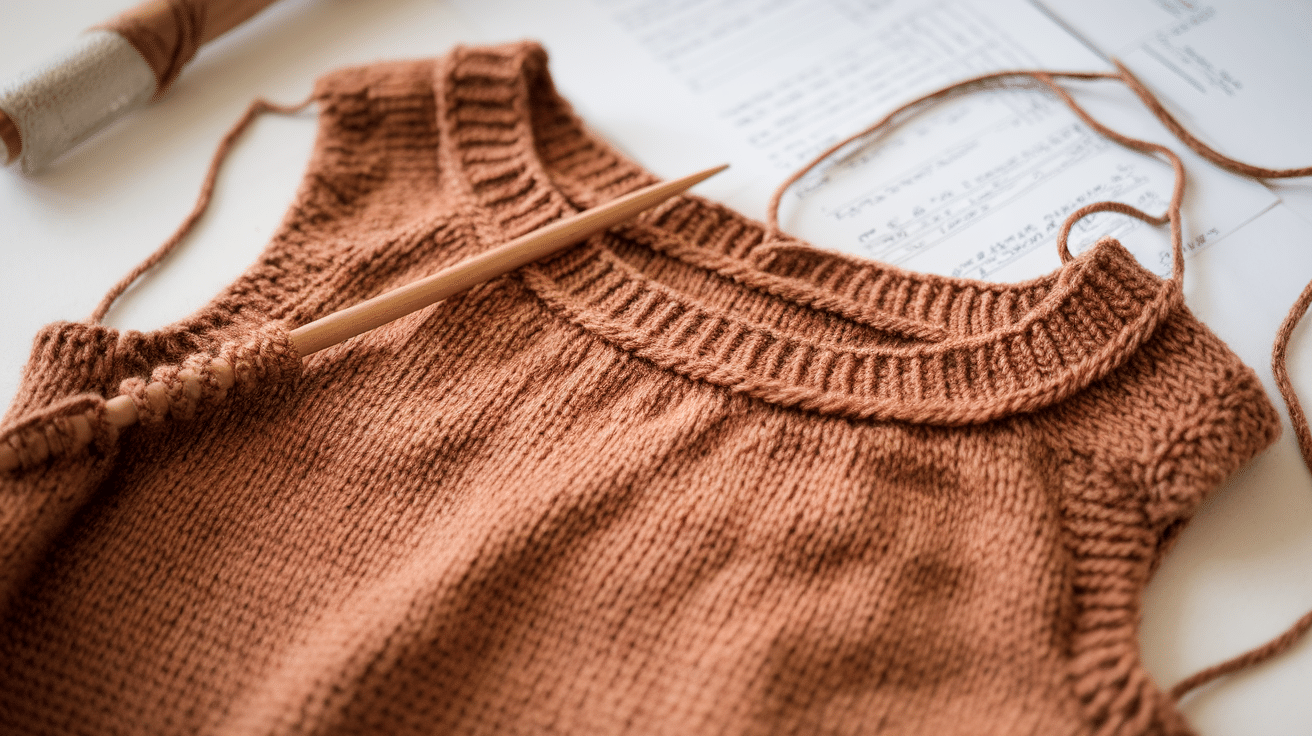
The neckline defines your summer top’s style.
Here’s my foolproof approach:
When your piece reaches chest level, it’s time to separate for armholes.
- Work to the first marker (front)
- Place the next set of stitches on waste yarn (first sleeve)
- Cast on 2-4 stitches for underarm
- Work to the next marker (back)
- Repeat for the second sleeve
Now you’re working just the body in the round. Continue until you reach your desired length.
For the best summer fit, try on your top frequently. Summer tops should be light and breezy, not too tight!
Adding Decorative Details for a Unique Look
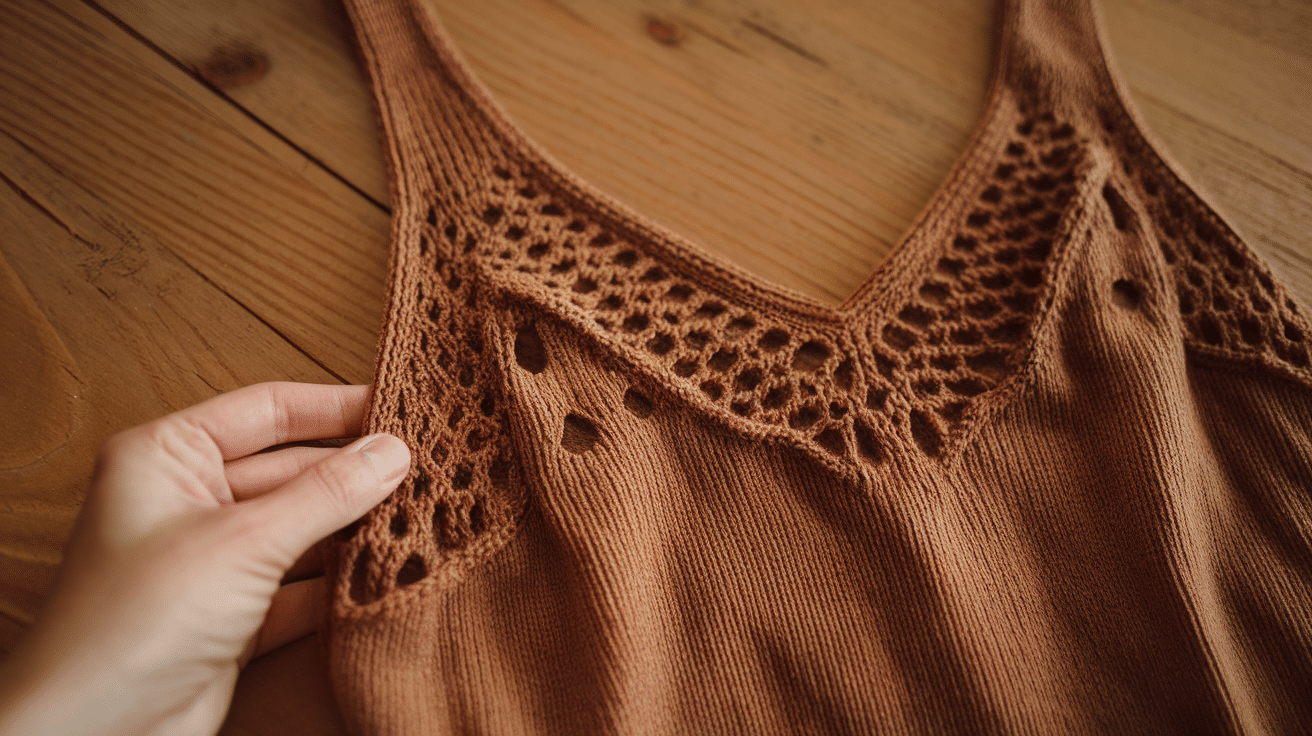
This is where your top becomes truly yours!
Some ideas I’ve tried:
- Lace panels along the sides
- Eyelet details at the bottom hem
- Simple color-blocking
- Textured stitch patterns that don’t add bulk
My favorite addition? A simple eyelet pattern across the yoke. It adds just enough interest without being over-the-top.
For summer tops, you have several sleeve choices:
- Sleeveless (finish armholes with ribbing)
- Cap sleeves (just a few rounds)
- Short sleeves (pick up stitches and work 2-3 inches)
For the most versatile summer top, I recommend cap sleeves that hit just at the shoulder.
Finishing Touches and Blocking
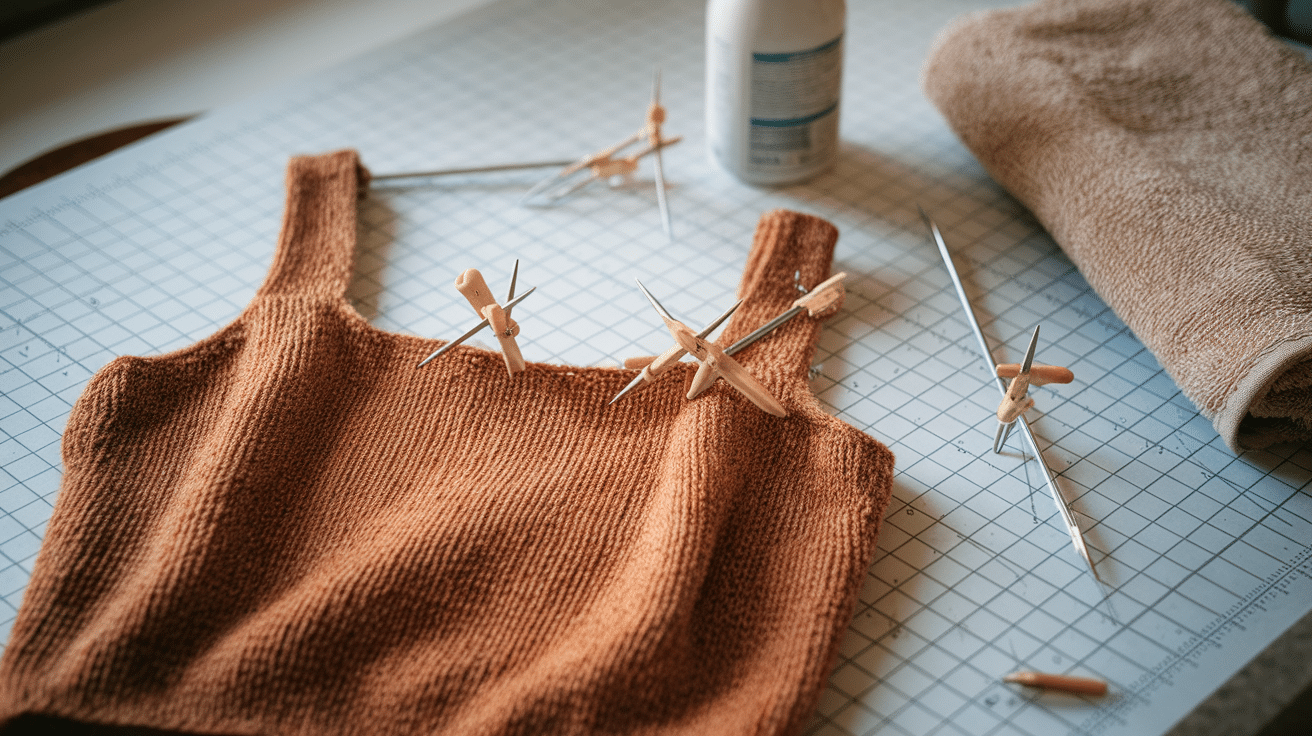
After all the knitting is done, the final steps can make a big difference in how your summer top looks and fits. Proper finishing ensures clean edges while blocking helps shape the fabric for a smooth and polished result.
You’re almost there!
To finish your summer top:
- Bind off loosely at the bottom edge
- Pick up stitches for sleeves (if applicable)
- Add any finishing details to the neckline and edges
- Weave in all ends
- Block your top to shape
Blocking is non-negotiable! It’s especially important for plant fibers like cotton and linen. I lay mine flat to dry, gently shaping the neckline and armholes.
Common Mistakes and How to Fix Them
Knitting a summer top can be a fun project, but small mistakes can affect the final look and fit. Whether it’s uneven tension, incorrect sizing, or dropped stitches, these issues can be fixed without starting over.
Don’t panic if you make these common errors:
- Uneven Increases: Results in asymmetrical shaping. Fix by blocking thoroughly or adding decorative edging.
- Too-tight Bind-Off: Makes edges dig in uncomfortably. Fix by redoing with a stretchier bind-off method.
- Too-narrow Armholes: Restricts movement and comfort. Fix by adding a small gusset or reknitting with more stitches.
- Dropped Stitch: Fix with a crochet hook to ladder it back up before it runs too far.
- Inconsistent Tension: Creates uneven fabric. Fix by blocking well and being more mindful of your tension on future projects.
Remember: Mistakes add character! Some of my favorite projects have little “design features” that nobody else notices.
Styling and Care Tips
A knitted summer top is versatile and can be styled for different occasions. Whether you pair it with jeans for a casual day out or layer it over a dress for a beachy vibe, there are plenty of ways to wear it. Proper care is also key to keeping your handmade piece looking fresh all season long.
Your new summer top can be styled in so many ways:
- Over shorts for casual beach days
- With a skirt for dinner out
- Under a light cardigan for cooler evenings
- With statement jewelry for a dressy look
To keep your top looking great:
- Follow the care instructions for your specific yarn
- Lay flat to dry rather than hanging to prevent stretching
- Reblock as needed to refresh the shape
- Store folded to maintain its shape
Conclusion
Creating your summer top transforms ordinary yarn into something both beautiful and functional. It’s a project that combines simplicity with endless possibilities for personalization.
I remember the first top I made—it was full of small errors but perfect for hot summer days. Now, it’s my go-to pattern when the temperature rises.
The best part isn’t just saving money or getting a perfect fit. It’s the feeling of accomplishment when you wear something you created from scratch.
Ready to start your summer knitting journey? The pattern is simpler than you think, and the result will be your new favorite warm-weather piece!
Frequently Asked Questions
Can I Convert This Pattern to Be Worked Flat Instead of In the Round?
Yes! Simply add 1-2 seam stitches to each side and work back and forth, remembering to purl on wrong-side rows.
What if I Want a Looser, More Flowy Summer Top?
Choose a pattern size 1-2 inches larger than your measurements, and use a yarn with excellent drapes, such as linen or bamboo.
Will This Top Work for Plus Sizes?
Absolutely! The top-down construction makes it easy to customize for any body size. Just adjust your cast-on and increase numbers accordingly.
How Do I Prevent My Cotton Yarn from Stretching Out After Washing?
Mix your cotton with a bit of elastic fiber, or choose a cotton blend with bamboo or modal for better recovery.
Can I Make This Top Sleeveless if The Pattern Calls for Sleeves?
Yes! Simply finish the armhole edges with a few rounds of ribbing or a picot edge for a clean, sleeveless look.


