


A circle cape is a flowing, cloak-like garment made from a large circle of fabric with a hole in the center for the neck. It’s simple to make but looks impressive when worn, making it a favorite beginner sewing project.
With no sleeves or complex shaping required, it’s an easy way to practice cutting, hemming, and basic sewing skills.
What makes the circle cape so appealing is its versatility. You can use it for costumes like wizards, fairies, or superheroes, or sew one in cozy fleece or flannel to wear as a warm outer layer.
For a more fashionable look, try using velvet or satin.
If you’re crafting for fun, fashion, or function, this pattern is quick, beginner-friendly, and full of creative possibilities. You’ll love how simple it is-and how great it looks!
What is a Circle Cape?
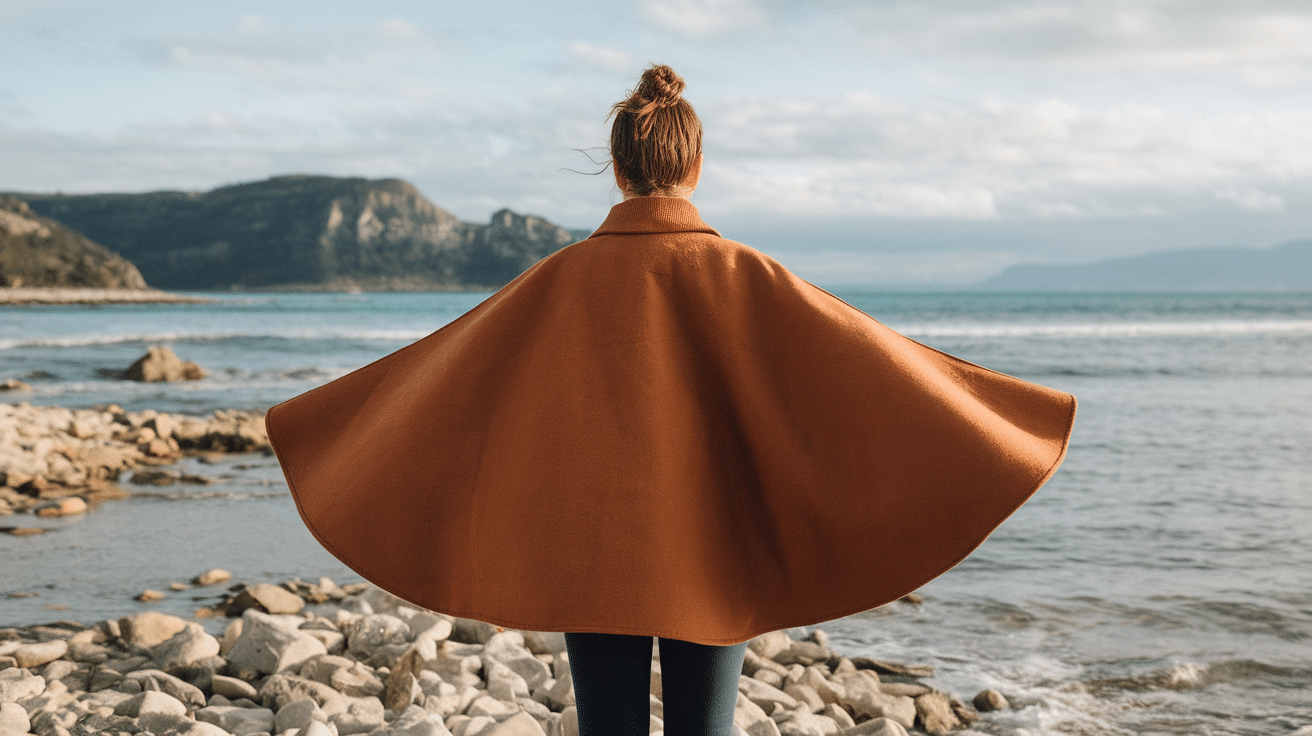
A circle cape is a cloak-like garment made from a full circle of fabric with a small hole cut in the center for the neck.
Unlike coats or jackets, it doesn’t have sleeves or separate panels-just one large, flowing piece that wraps around the shoulders and hangs evenly all the way around.
Because of its circular shape, a circle cape drapes beautifully, creating soft folds and movement as you walk.
It’s both functional and stylish, offering warmth without the structure or complexity of a traditional garment. Circle caps are popular for many reasons.
They’re great for cosplay, costume parties, and fairs, but also work for chilly evenings.
If you’re dressing up or just layering for warmth, a circle cape adds comfort and a touch of drama with very little effort.
How to Make a Circle Cape?
Making a circle cape is simple and beginner-friendly. With just a few tools and some fabric, you can create a stylish, flowing cape in less than a day. Follow these steps to measure, cut, and sew your cape with ease.
Materials You’ll Need
Before you start cutting and sewing, gather these basic supplies to make sure your circle cape comes together smoothly and looks just how you want.
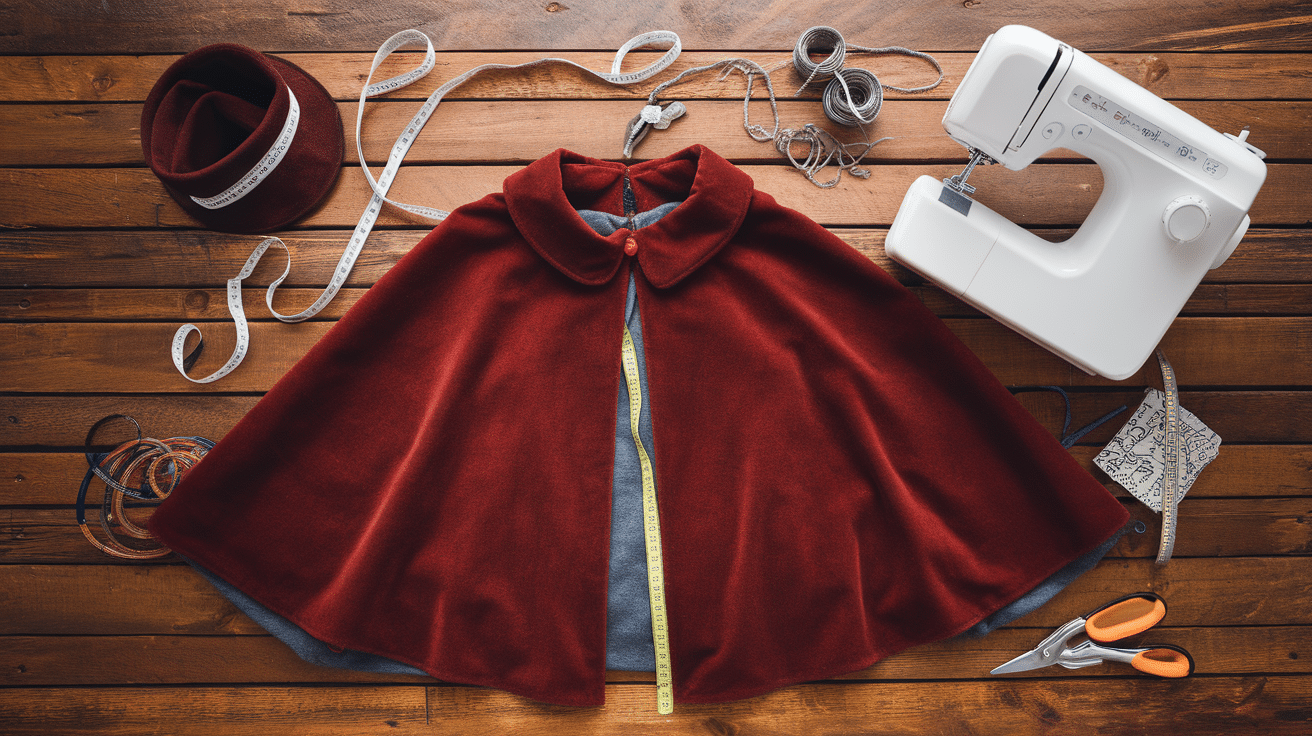
- Fabric: About 2–3 yards. Use fleece or wool for warmth, cotton for light wear, or velvet/satin for costumes.
- Thread: Match to your fabric. Strong enough for seams and closures.
- Measuring Tape: To measure the cape length from the neck down.
- Fabric Scissors: For clean, smooth cuts.
- Chalk or Fabric Marker: To draw the circle and neck opening.
- Sewing Machine or Needle: The Machine is faster, but hand sewing works too.
- Optional Closure: Ribbon, button, snap, or clasp at the neckline.
- Optional Lining: Adds polish, warmth, or a reversible look.
Step 1: Take Measurements
Measure from the base of your neck down to where you want the cape to fall, this is your cape length.
If you’re making it for a child, choose a shorter length so it’s easier for them to move around. Write down the length to draw your circle.
For a custom neckline, measure your neck instead of using the standard 2.5–3 inches. Having both measurements ready makes the next steps much easier.
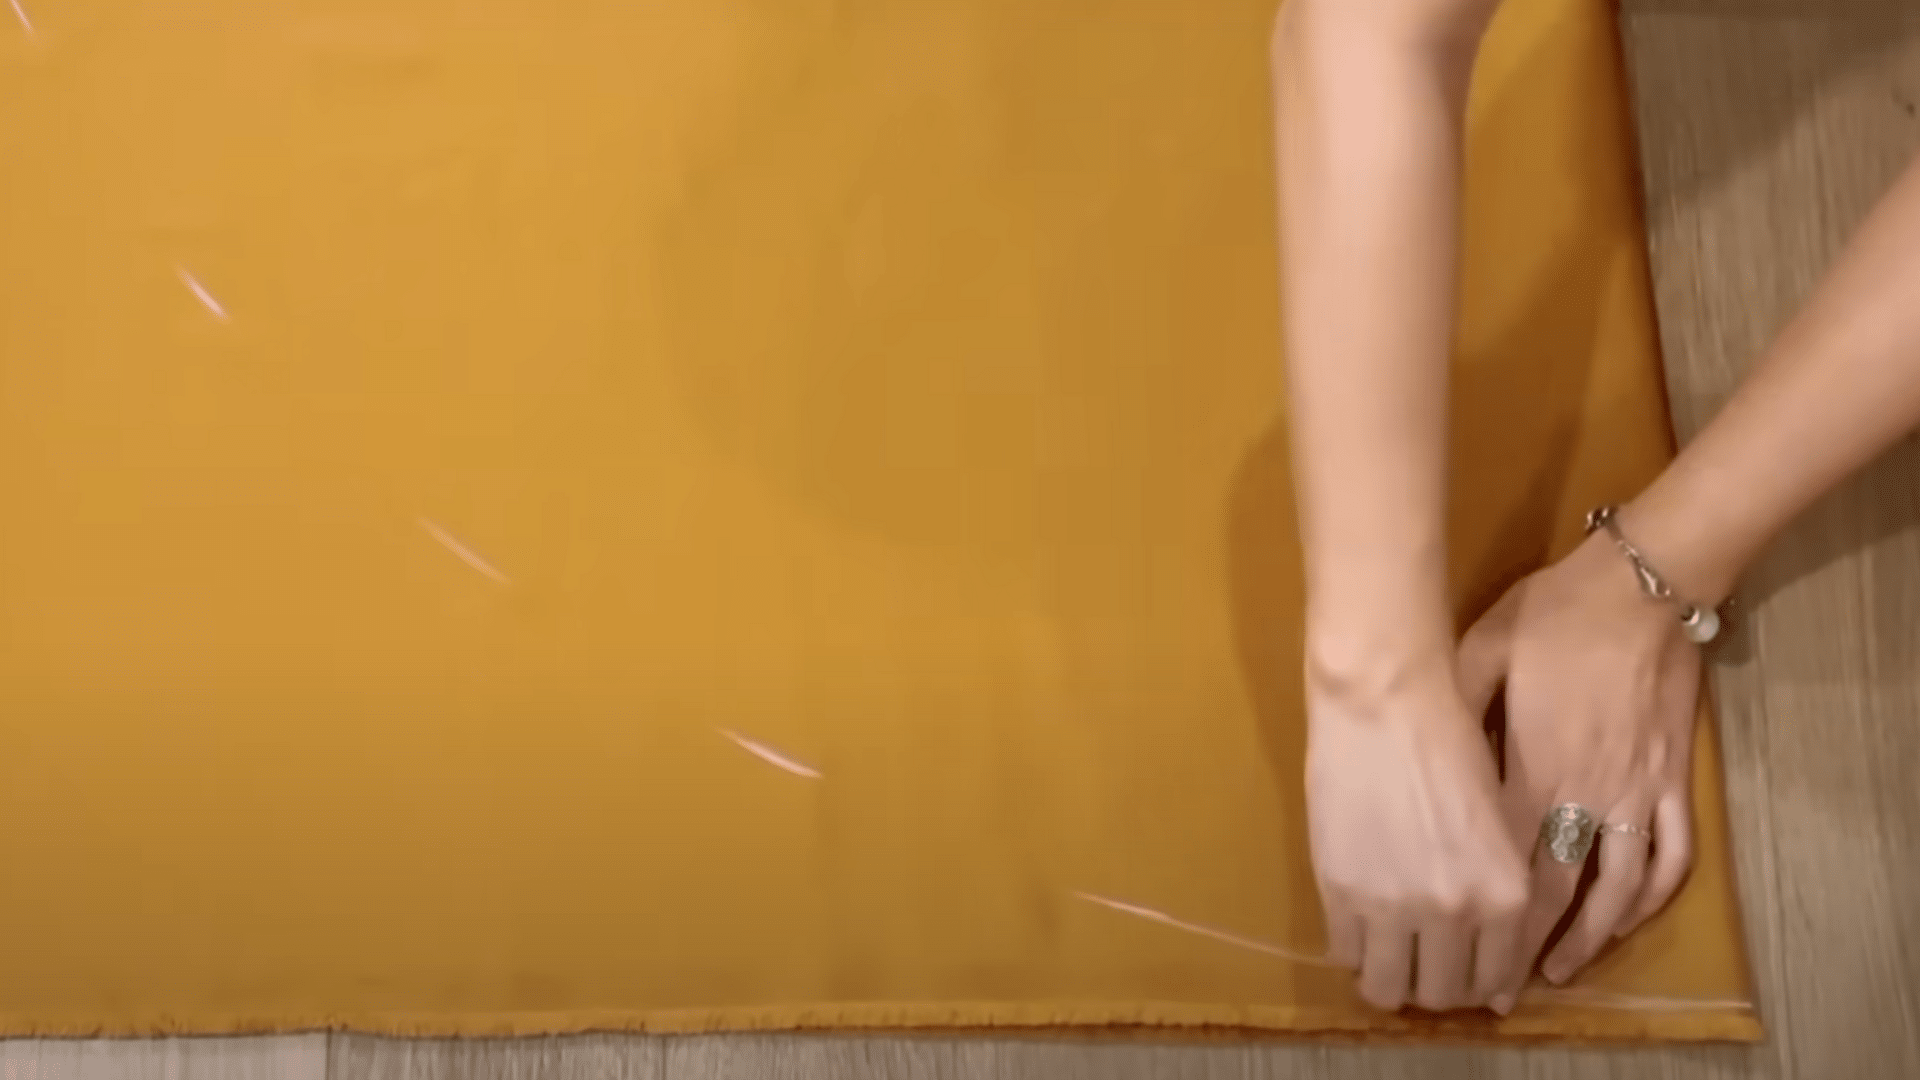
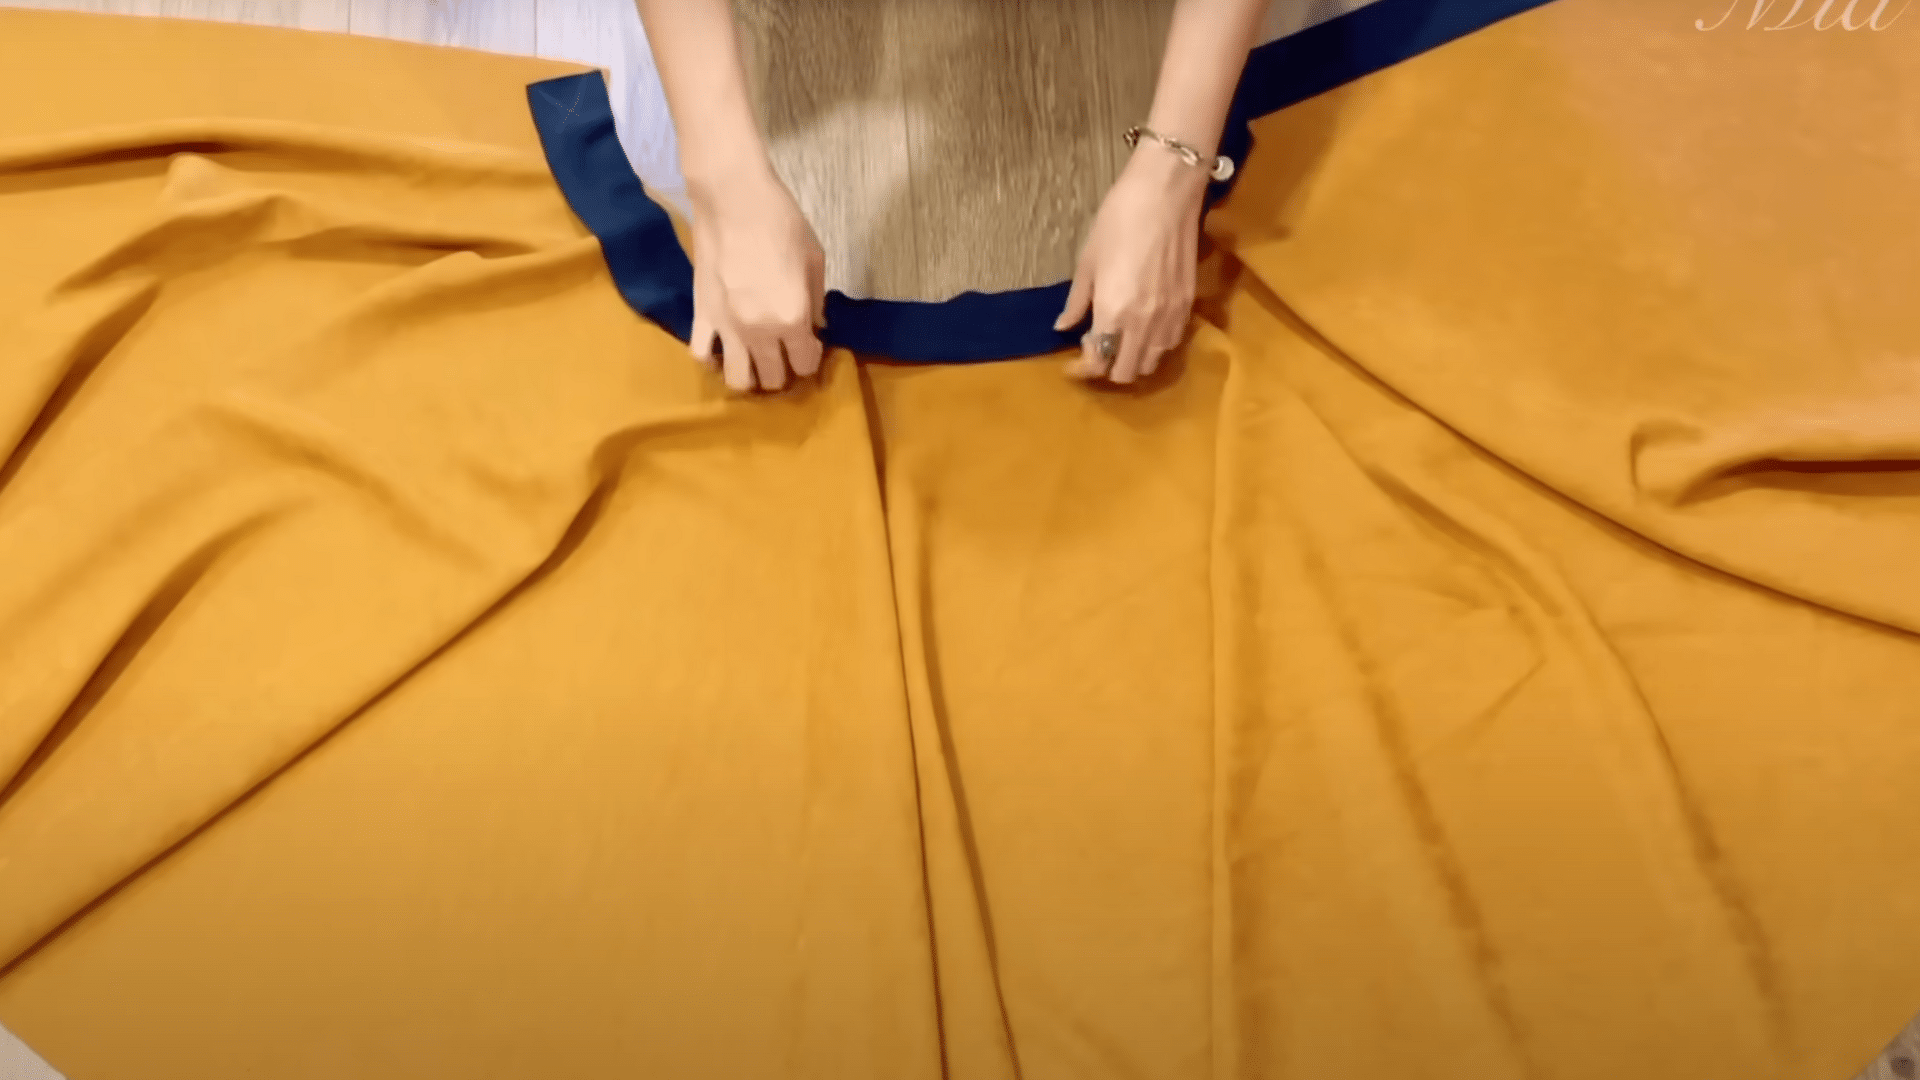
Step 2: Cut the Circle
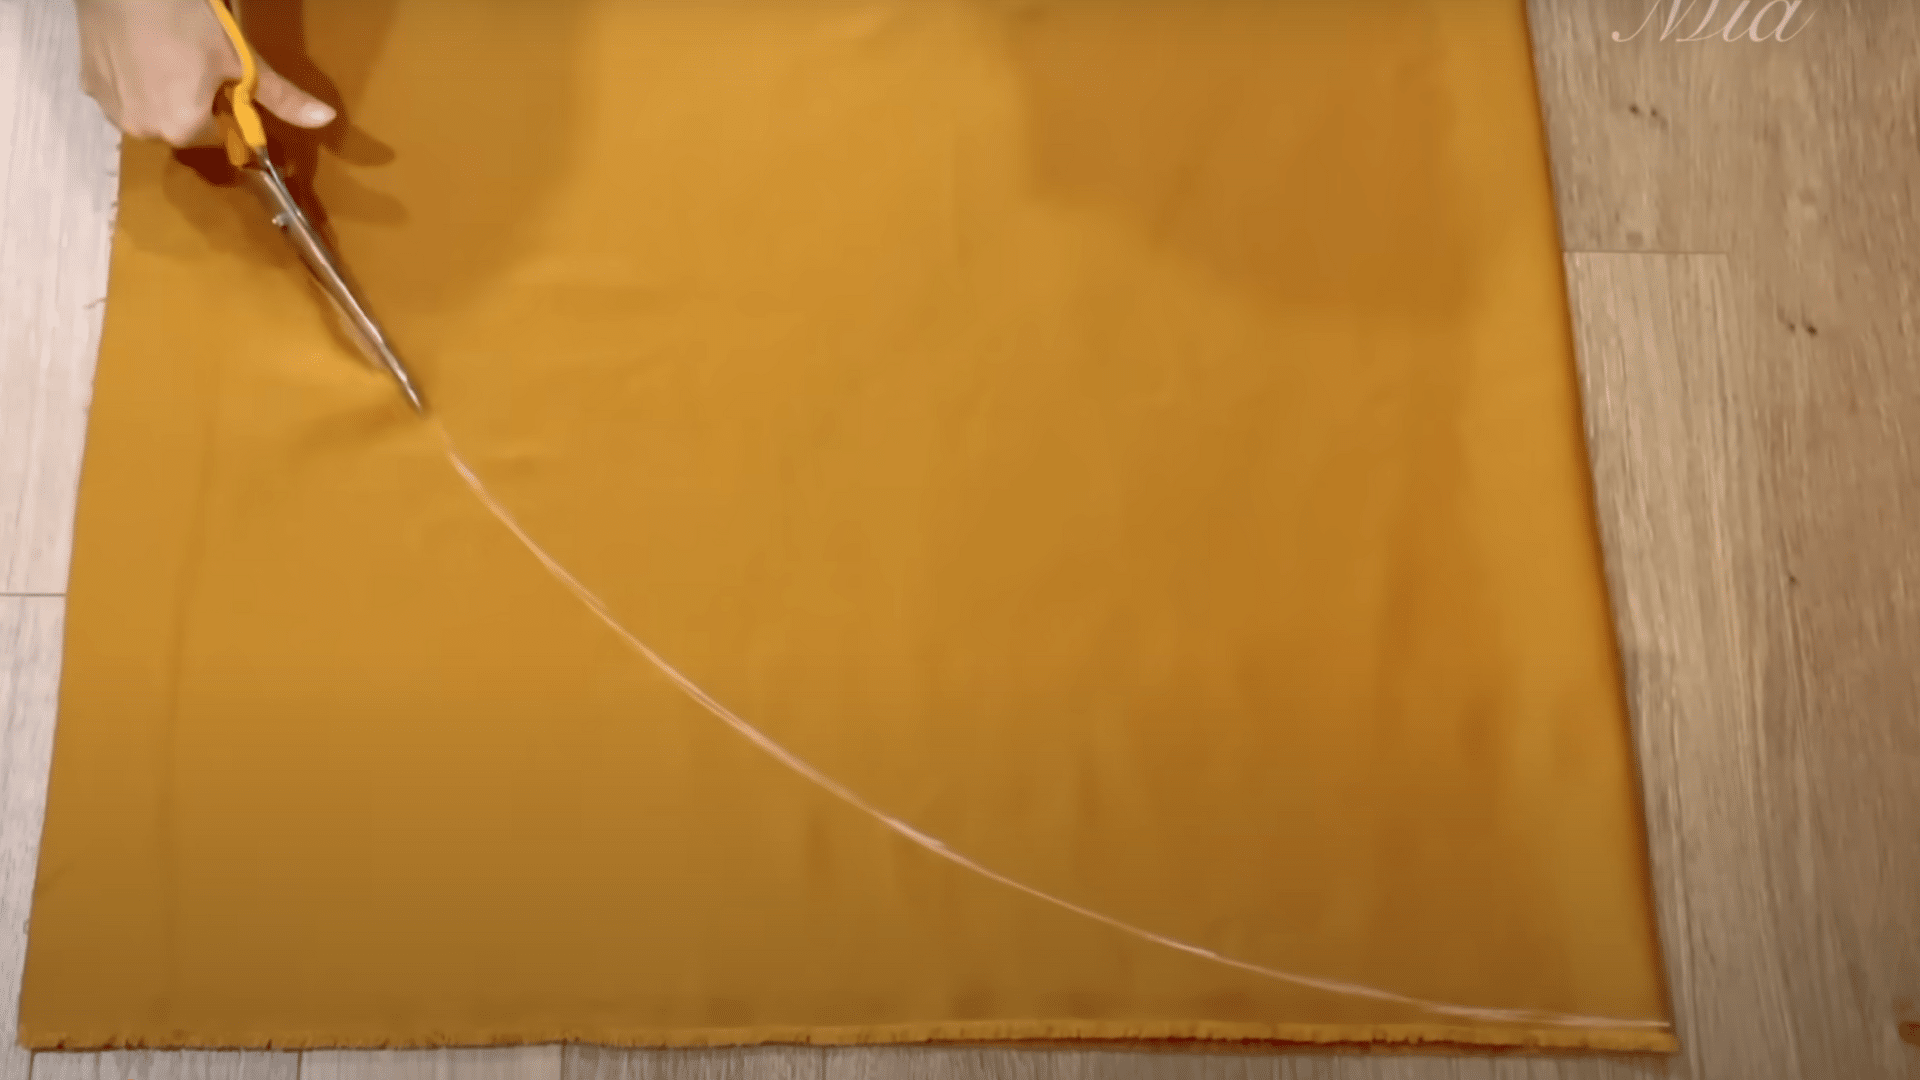
Fold your fabric in half twice to make a square. From the folded point, use chalk to mark a quarter-circle using your cape length.
Then mark a smaller quarter-circle (about 2.5–3 inches from the corner) for the neck hole.
Cut along both curves and unfold the fabric to reveal your full circle with a neck hole in the center. Use sharp scissors to avoid jagged edges and fraying.
Step 3: Add a Closure
Choose a simple closure for the neckline. Ribbon ties are quick and easy. You can also use button loops, a snap, or a decorative clasp.
Mark the front opening and cut a straight line from the neck hole to the edge of the cape if you want an open-front design. Stitch the closure pieces securely so they stay in place when you wear the cape.
Step 4: Finish the Edges
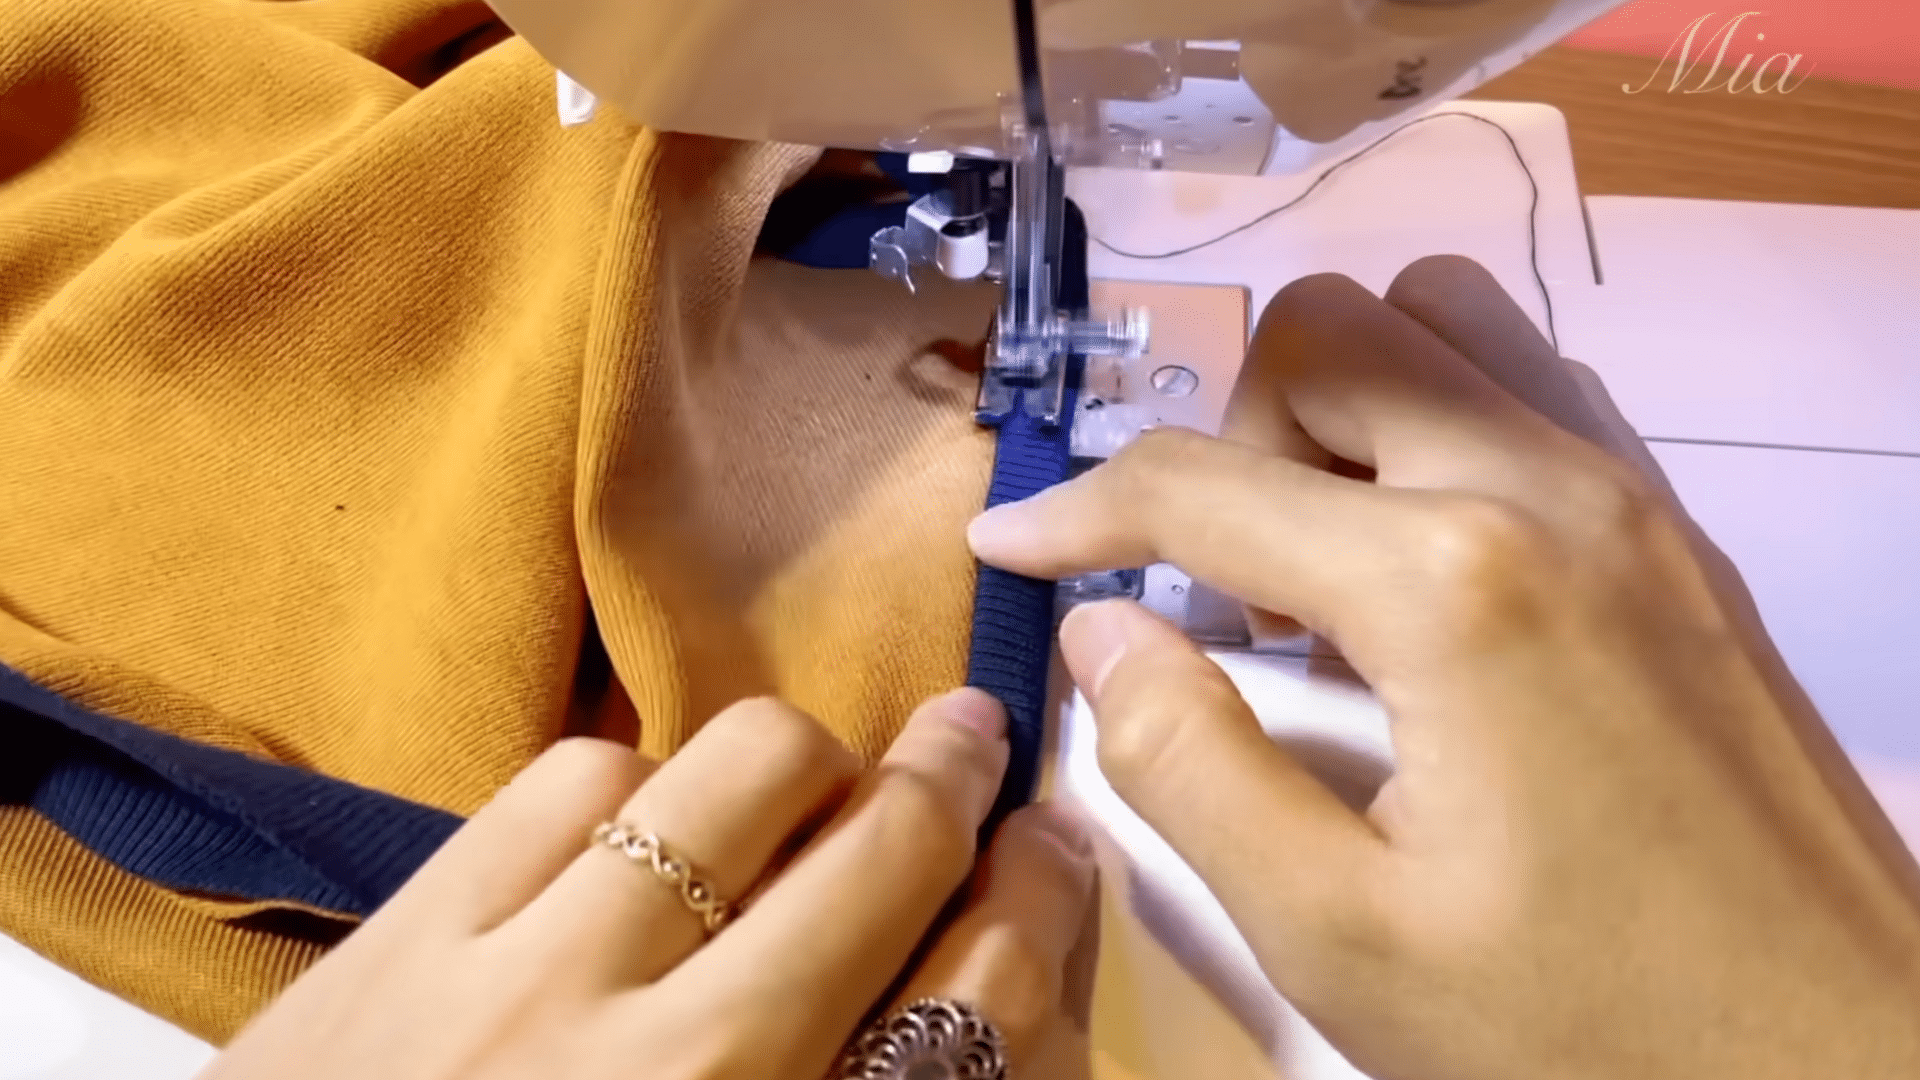
Hem the outer edge and neckline, or use bias tape to give your cape a neat finish. If you want a smoother, more finished look, add a lining before hemming.
To line the cape, place the outer fabric and lining right sides together, sew around the edges, then turn it inside out. Topstitch the edges to keep everything in place.
Press all seams flat with an iron for a clean, polished result.
Step 5: Try It On
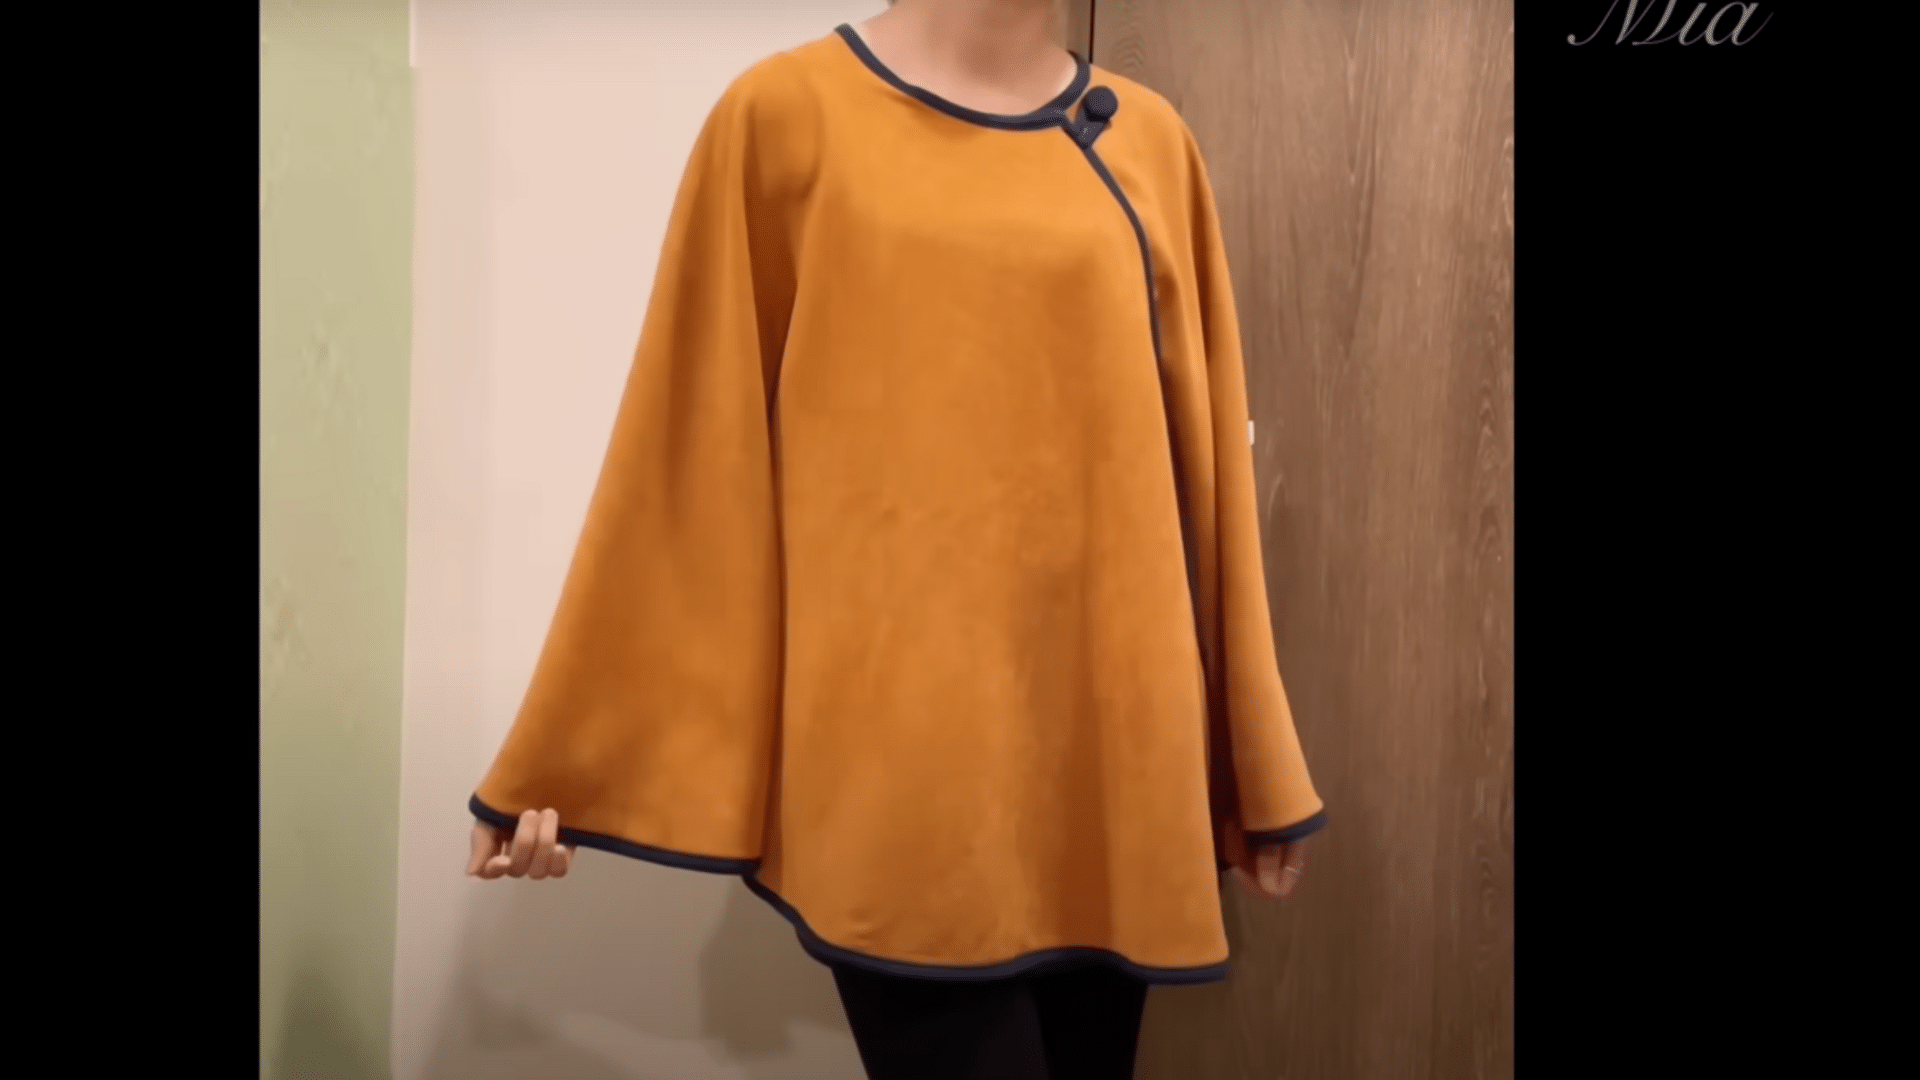
Wear your new cape and enjoy how beautifully it drapes and flows as you move. It’s a fun and useful piece you can wear in different ways.
Use it for a costume party, a renaissance fair, or just to stay warm on a cool evening. For a fall look, style it with boots and gloves, or match it with a costume for a themed event or photoshoot.
Watch the full step-by-step tutorial on YouTube by @Miafor clear, helpful visuals, or watch it below.
Best Fabrics for Circle Capes
Choosing the right fabric is key to how your cape looks, feels, and flows. This is a quick guide to the best options based on style and purpose.
- Fleece: Warm, soft, and doesn’t fray, perfect for beginners or everyday wear. Easy to sew and great for cozy capes.
- Wool or Wool Blends: Offers warmth and structure with a beautiful drape. Ideal for cold weather, but may require a lining.
- Cotton: Lightweight, breathable, and budget-friendly. Great for warmer days, but won’t drape as fully.
- Velvet: Rich, dramatic texture that suits fantasy or costume looks. It can be tough to sew and needs careful handling.
- Satin: Glossy and fluid with a touch of elegance. Shows every stitch, so it’s best for confident sewers.
Cape Variations to Try
These cape ideas let you go beyond the basics and shape the design to fit your personal style, the season, or a specific event.
1. Velvet or Satin for Fantasy Looks

Rich fabrics like velvet bring weight and texture to your cape, giving it a regal, dramatic feel. They’re ideal for costume themes like royalty, sorcerers, or fairy tale characters where a bold look matters.
Satin offers a smooth, glossy surface that reflects light with every move.
It adds flow and shine, making your cape feel elegant and eye-catching, great for formal looks, stage wear, or stylish dress-up.
2. Decorative Trim or Appliqué
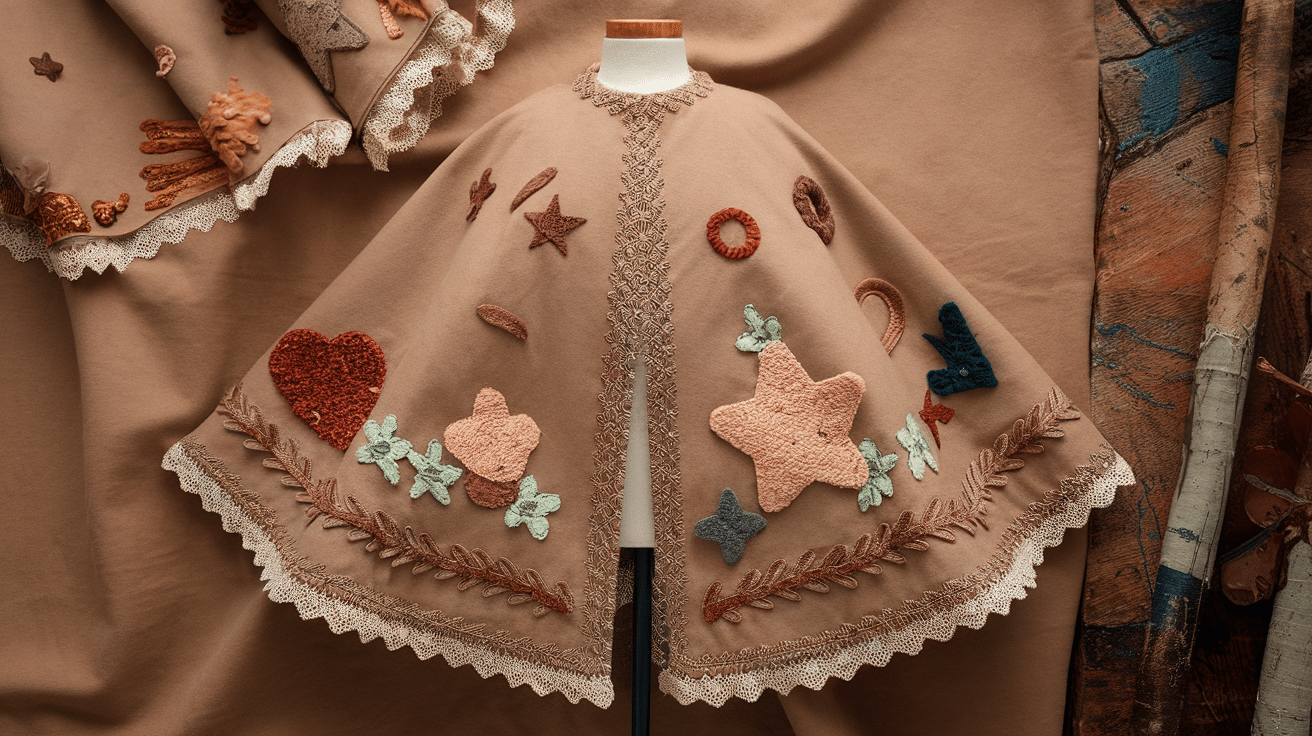
Decorating the edges with lace, ribbon, fringe, or braid adds personality and helps your cape stand out. These simple touches give it texture and a finished look.
For something more custom, try sewing on fabric appliques like stars, leaves, or fun shapes. You can match them to a theme, holiday, or character to make the cape feel special and one-of-a-kind.
3. Double-Sided for a Reversible Option
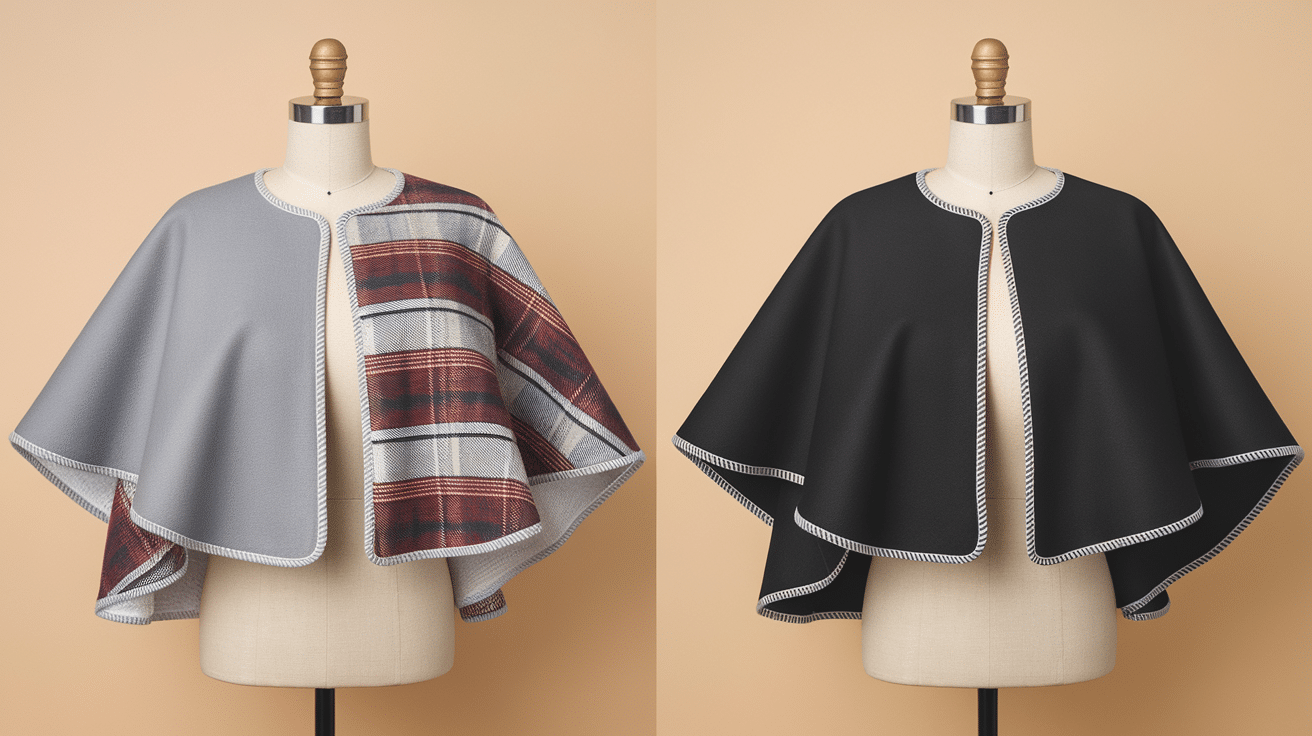
Using two different fabrics, such as cotton on one side and flannel on the other, lets you create a reversible cape with two distinct styles in one project.
You can switch between a bold print and a soft, solid depending on your mood or the occasion. This approach not only adds visual variety but also gives the cape extra weight, which helps it hang and flow nicely.
How to Care for Your Cape?
Taking a little time to care for your cape keeps it looking fresh and ready to wear. Follow these simple fabric-based tips for washing, ironing, and storing:
- Check the fabric first: Cotton and fleece are machine washable on a gentle cycle with cold water.
- Handle delicate fabrics with care: Velvet, wool, and satin should be hand-washed or dry-cleaned.
- Iron gently: Use low heat for fleece and satin. Use a pressing cloth over velvet and wool to protect the texture.
- Store properly: Hang on a padded hanger or loosely roll to avoid creases and maintain shape.
Tips for Customizing Your Cape
Make your circle cape stand out with creative touches. Try adding unique trims, fun linings, or extra features like a hood or collar.
- Add a hood or collar: Sew on a simple hood for a cozy, dramatic look or a soft collar for a more polished finish. Hoods are great for fantasy or cold-weather styles, while collars can give your cape a vintage or formal vibe.
- Use contrasting lining: Pick a bold or patterned fabric for the inside of your cape to give it a reversible look or just a fun surprise when it moves. Lining also helps the cape drape better and last longer.
- Add embellishments: Decorate the edges with lace, pom-pom trim, or decorative ribbon. You can also hand-stitch embroidery or appliqué to make your cape truly one of a kind.
Conclusion
Making a circle cape is a simple, fun, and rewarding project, perfect for beginners or anyone looking for a quick sewing win.
With just a few materials and some basic cuts and stitches, you can create a cozy, stylish, or costume-ready cape that drapes beautifully and fits your personality.
This project doesn’t require complicated skills or patterns, yet the end result looks impressive and feels special. If you’re sewing for warmth, fashion, or fun, a circle cape is a great way to get creative with fabric.
Ready to give it a try? Grab your scissors, pick your favorite fabric, and start stitching! If you make one, share a photo-I’d love to see how yours turns out.


