


If you’re looking to add some texture to your knitting projects, the herringbone stitch is a great choice.
It’s a simple yet beautiful technique that creates a solid, unique fabric.
I know it might seem tricky at first, but don’t worry-I’ll walk you through it step by step so you can master it with ease.
If you’re a beginner or have some experience, this stitch will give your projects a polished, professional look.
I’ll cover everything you need to know, from the materials to the stitch pattern itself.
By the end, you’ll be able to create your own beautiful pieces using the herringbone stitch. I’ll break it down clearly, so you won’t feel overwhelmed.
Trust me, once you get the hang of it, you’ll enjoy the results. Ready to get started? Let’s go!
What is a Herringbone Stitch?
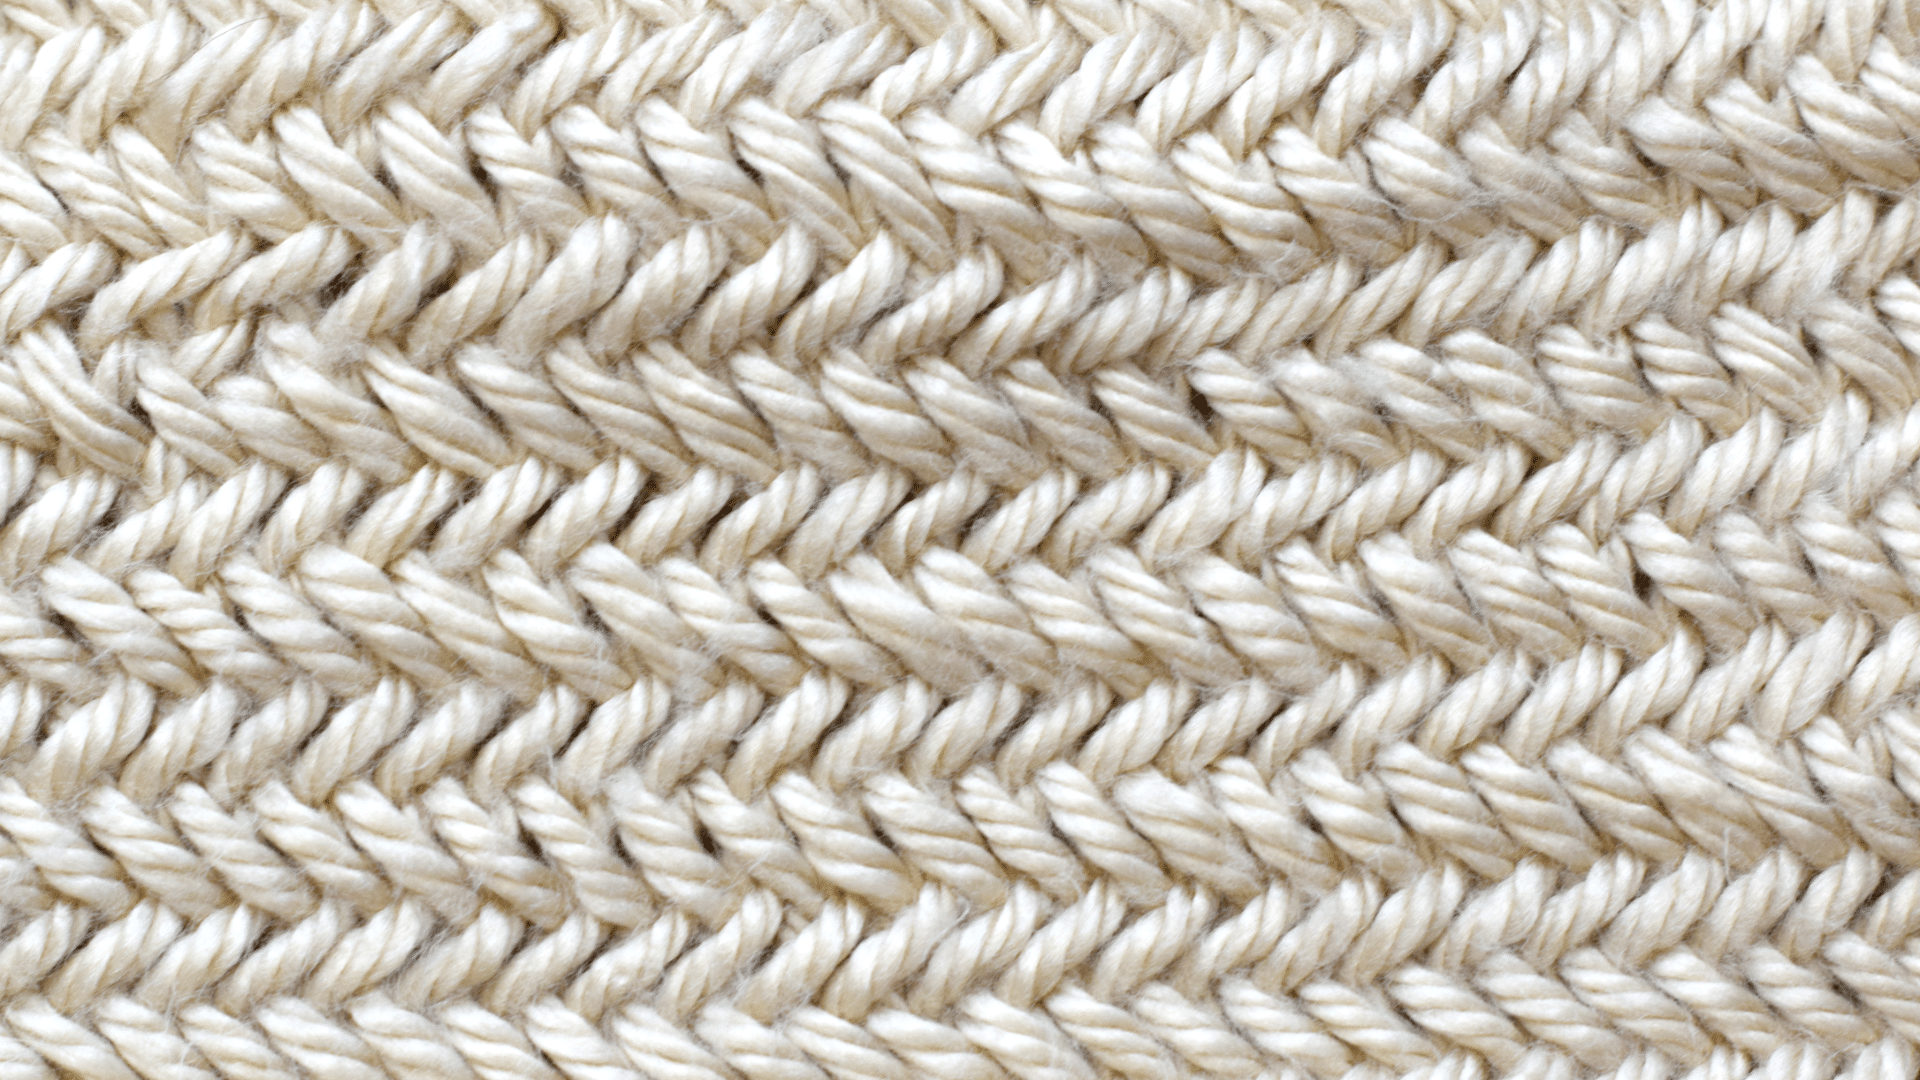
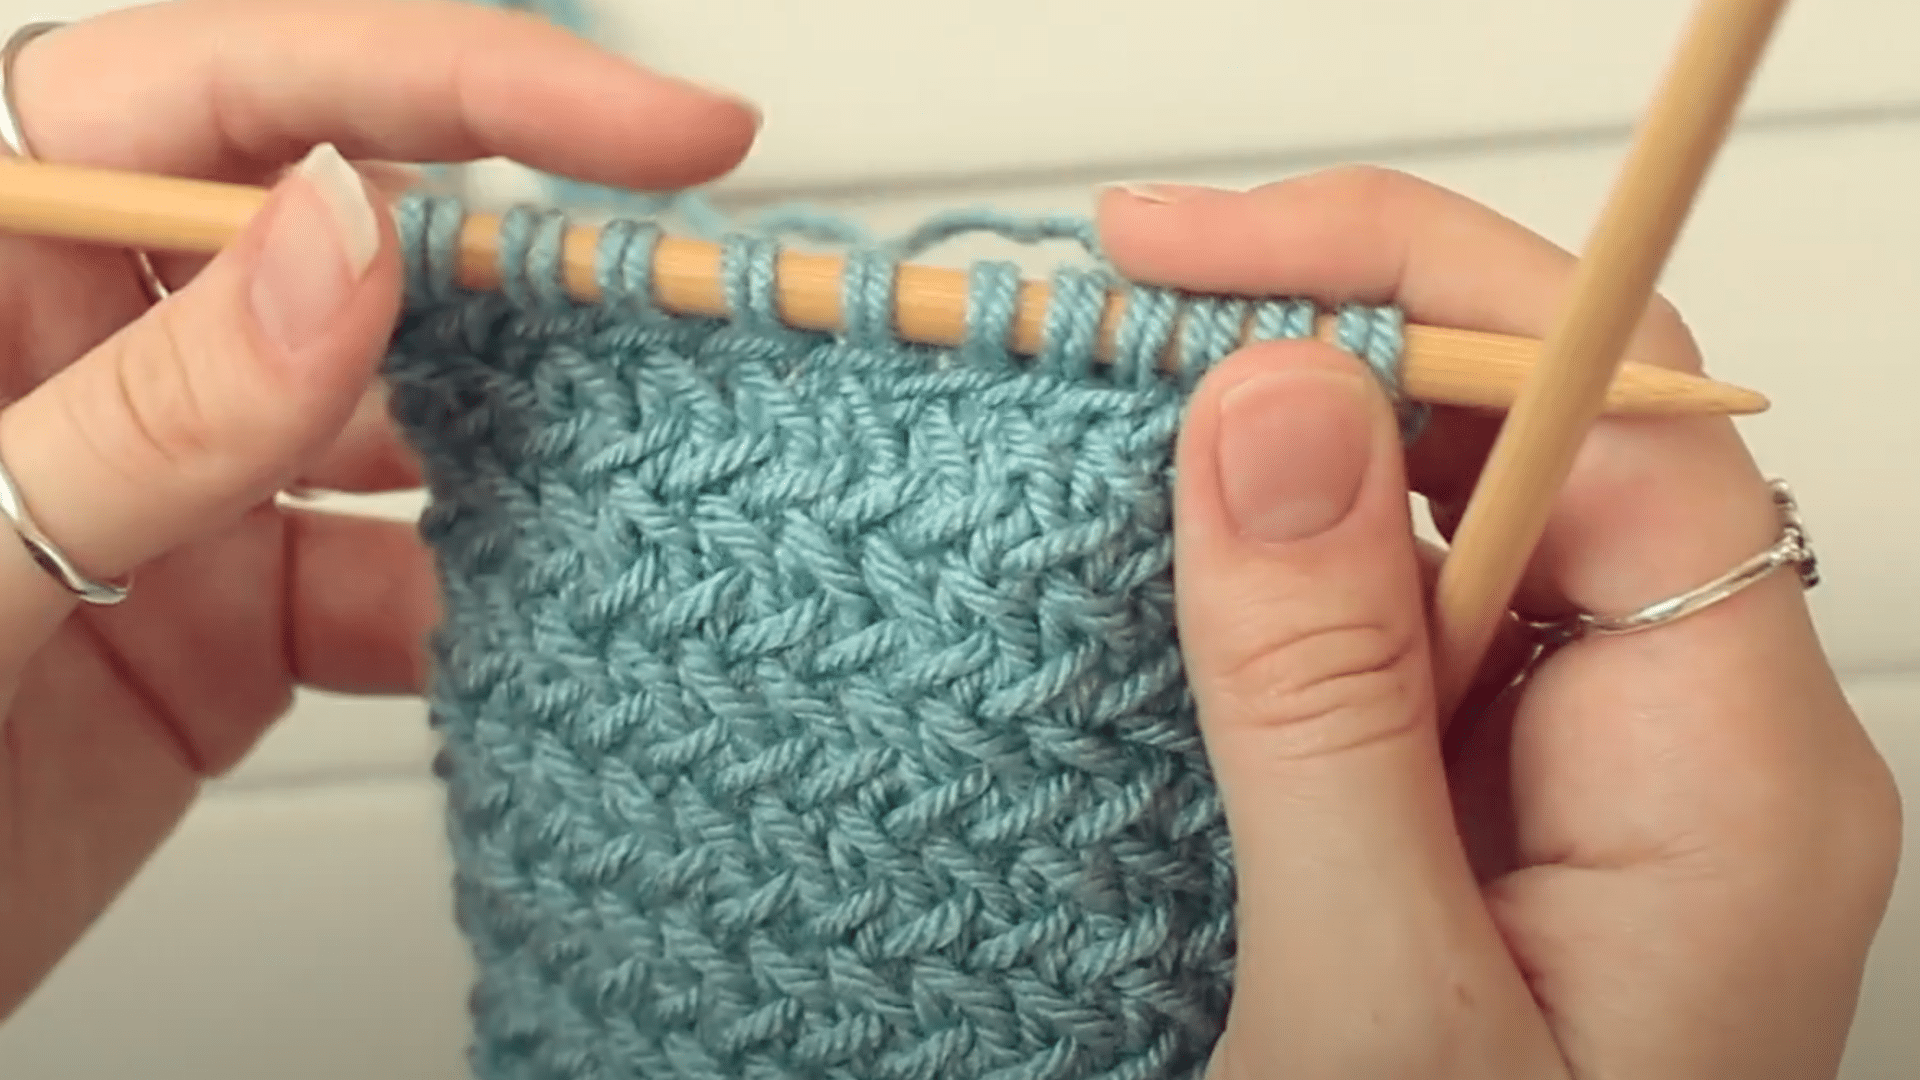
The herringbone stitch is a popular knitting technique that creates a textured, V-shaped pattern.
It’s known for its solid and dense fabric, which gives a clean, structured look to your projects.
This stitch is often used for scarves, blankets, and other items where you want a more substantial, textured finish.
What makes the herringbone stitch special is its simple two-row repeat. While it might look complex, it’s easy to learn once you break it down.
The stitch is worked in a way that interlocks the yarn to form the signature V-shape, giving your piece a unique and polished look.
This stitch is a great way to add texture and dimension to your knitting without complicated patterns.
Once you get the hang of it, you’ll find yourself using it often in your projects!
Step-by-Step Guide to Knit the Herringbone Stitch
The herringbone stitch is easy to learn once you break it down. Follow these simple steps, and you’ll be able to create beautiful textured pieces in no time.
Materials You’ll Need
- Yarn
- Needles
- Scissors
- Tapestry needle
Step 1: Knit the First Stitch
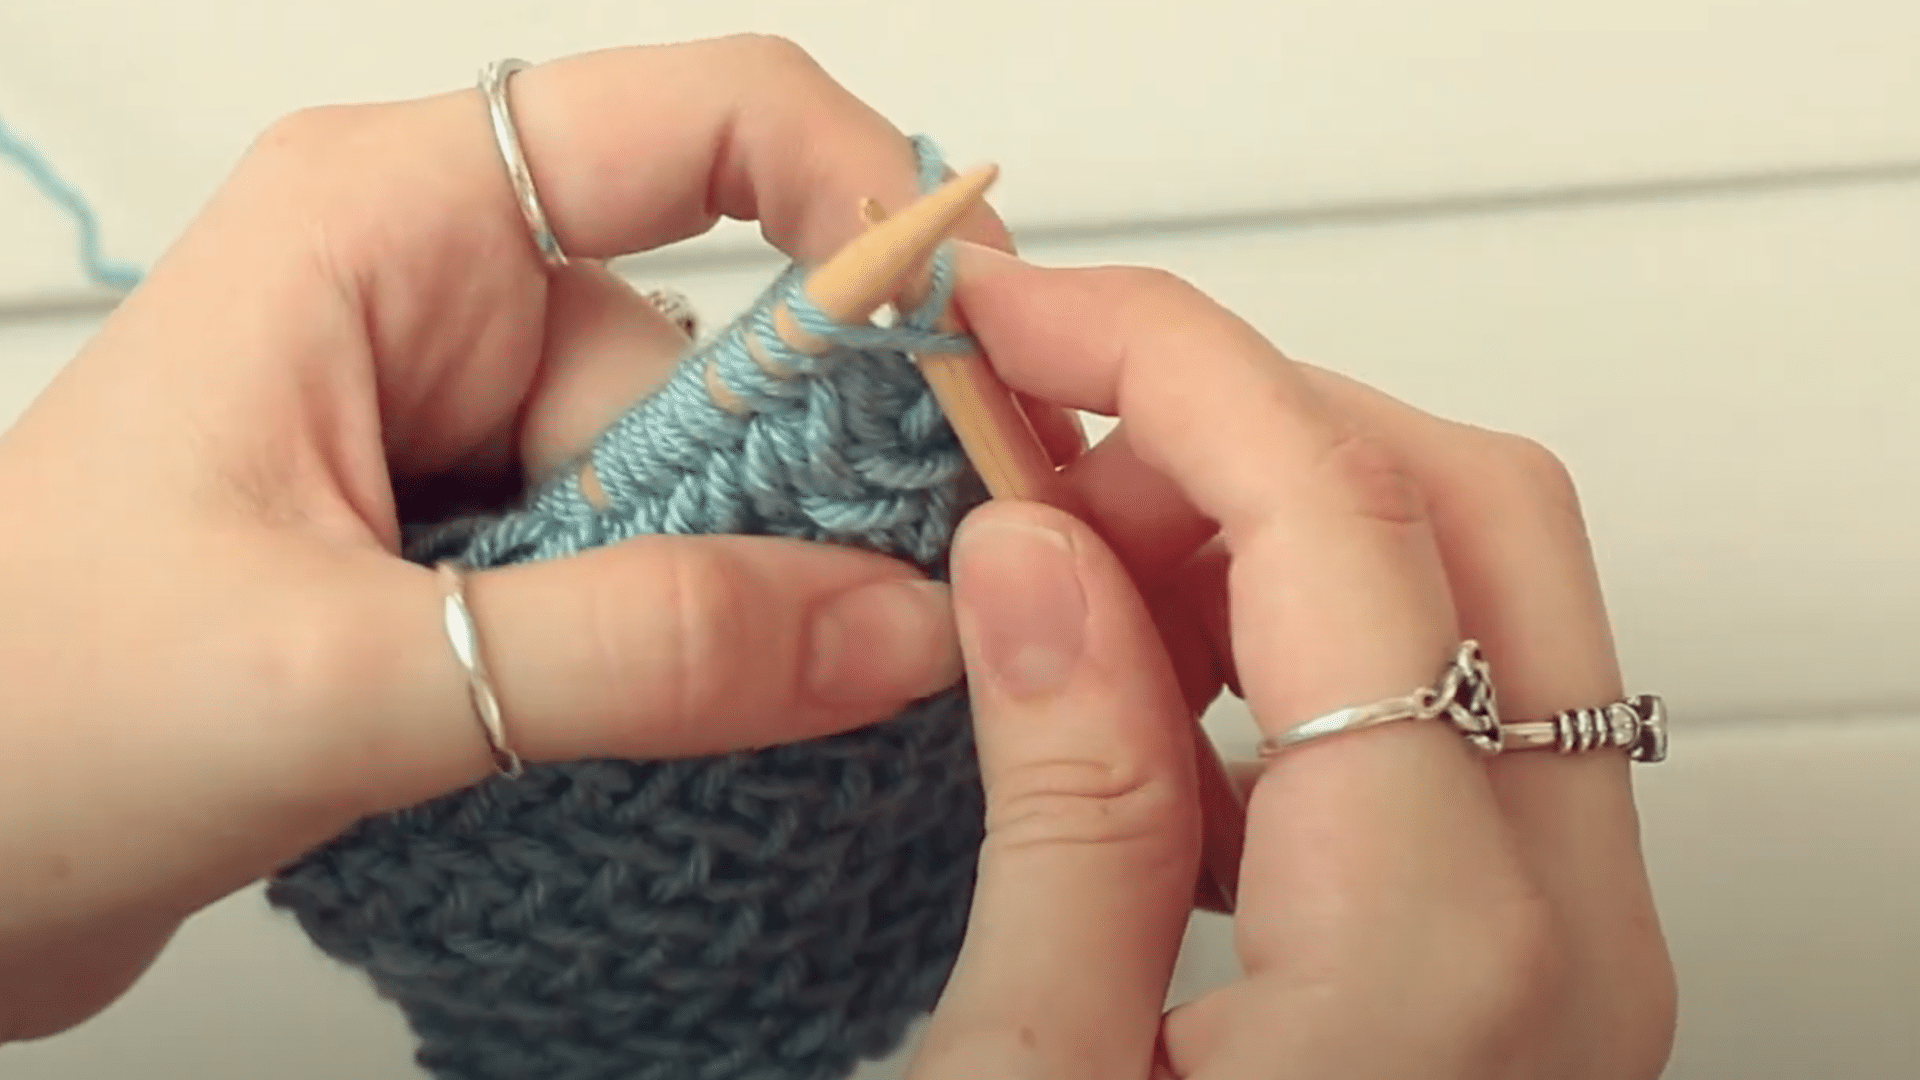
To begin, start by knitting the first stitch on your needle. Make sure you keep the tension on your yarn even, as this will help make the stitch look neat and consistent.
Don’t worry if the stitch looks a bit loose; you’ll get more control as you continue.
This is just the first step, and it sets the foundation for the rest of the stitch.
Once you knit this first stitch, you’ll be ready to move on to the next step. Keep your work steady and remember, patience is key!
Step 2: Slip the First Stitch
Now, we’ll move on to the second part of the stitch. You’ll slip the first stitch as if you were going to knit it, but instead, you just move it over to the right needle without actually knitting it.
This is an important step because it sets up the interlocking look of the herringbone stitch. Be sure to slip the stitch smoothly, so the yarn doesn’t get caught.
This step may feel a bit different, but it’s key to creating the signature look of the herringbone stitch.
Once you slip the stitch, you’re ready for the next part!
Step 3: Knit the Second Stitch
Next, you’ll knit the second stitch as you normally would. Insert your needle into the second stitch on your left needle and wrap the yarn around the needle to knit it.
This is the part where your knitting begins to take shape. The key is to make sure the tension is just right to keep the stitches looking even and neat.
Don’t pull too tight, but also avoid leaving the yarn too loose. Once you’ve knitted the second stitch, you’re one step closer to mastering the herringbone stitch!
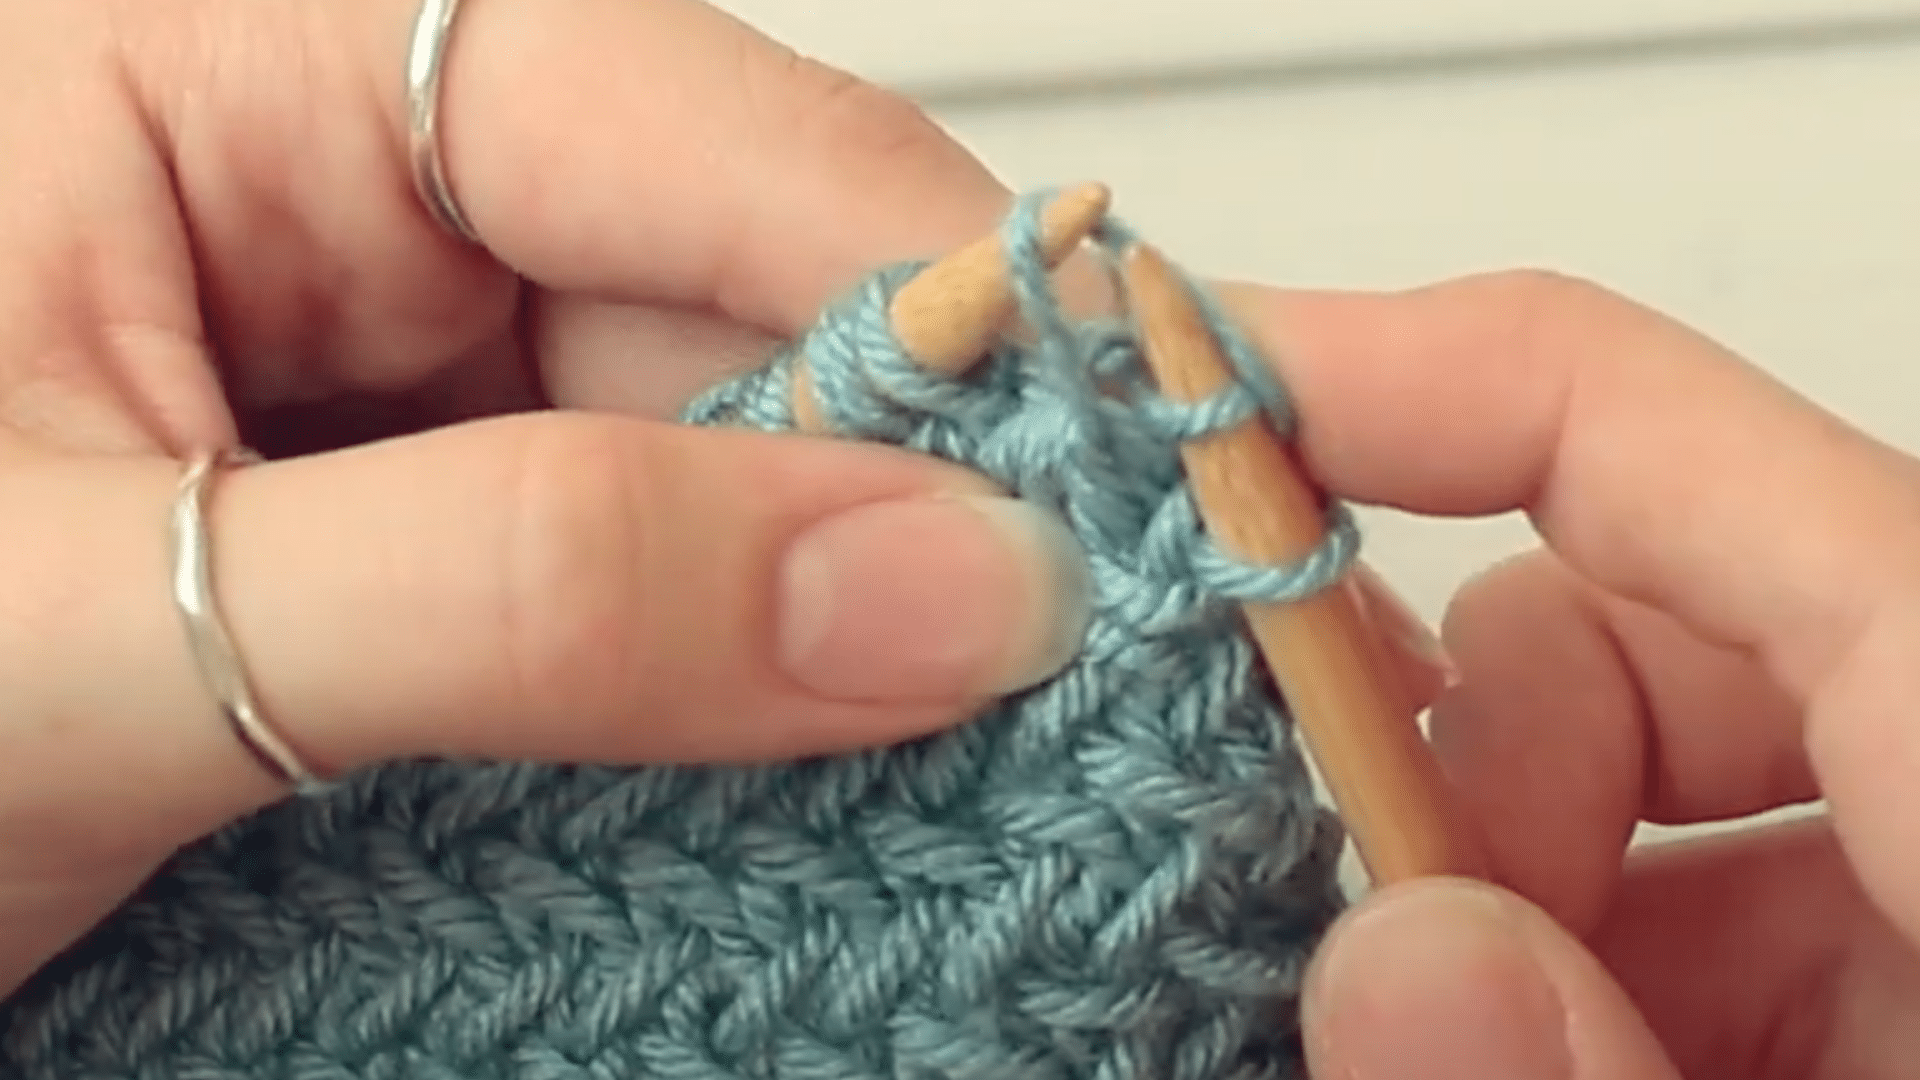
Step 4: Insert the Needle into the Slipped Stitch
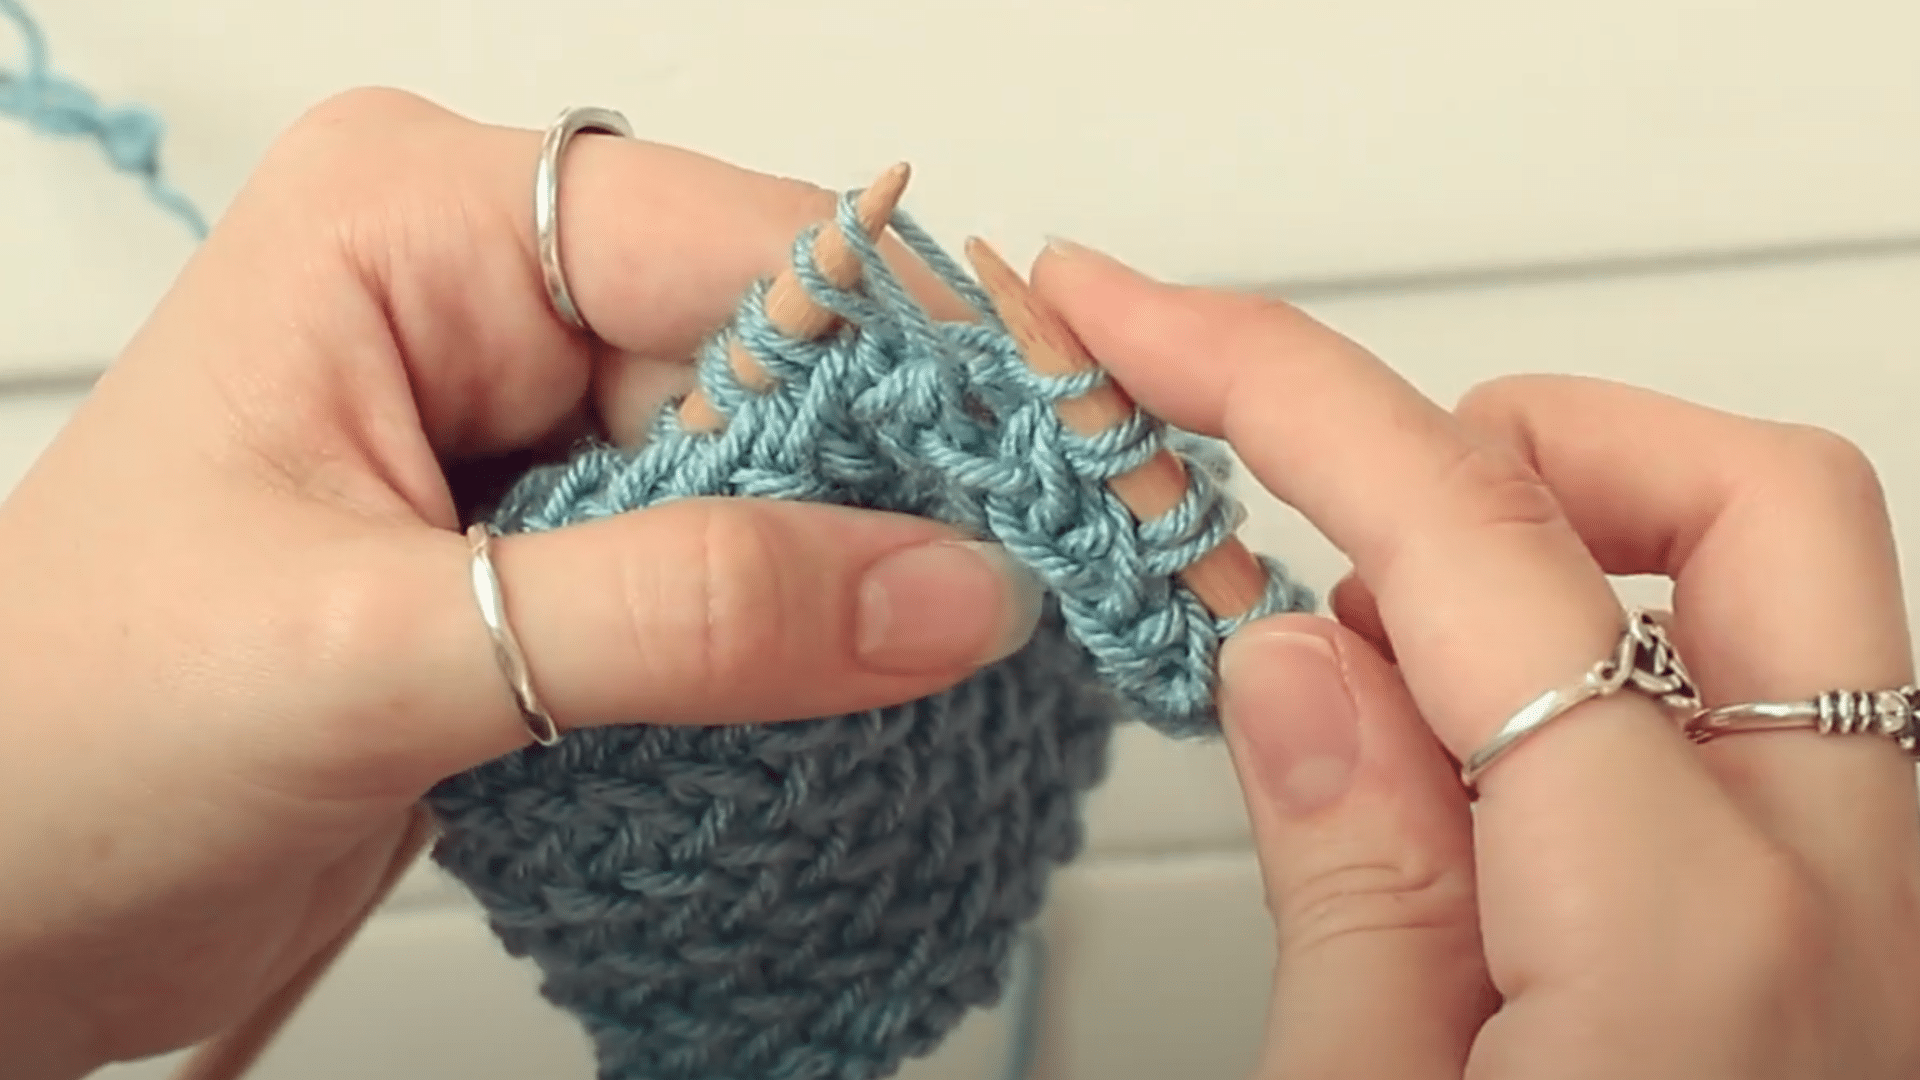
Now it’s time for the next step. You’ll insert your left-hand needle into the slipped stitch on the right needle.
This step is important because it prepares the stitches for the next action that makes the stitch stand out.
Carefully place the left needle into the slipped stitch, being mindful not to drop any stitches.
If you insert the needle too quickly or in the wrong place, it might cause the stitches to look uneven.
Make sure it goes into the right spot for a clean and neat result!
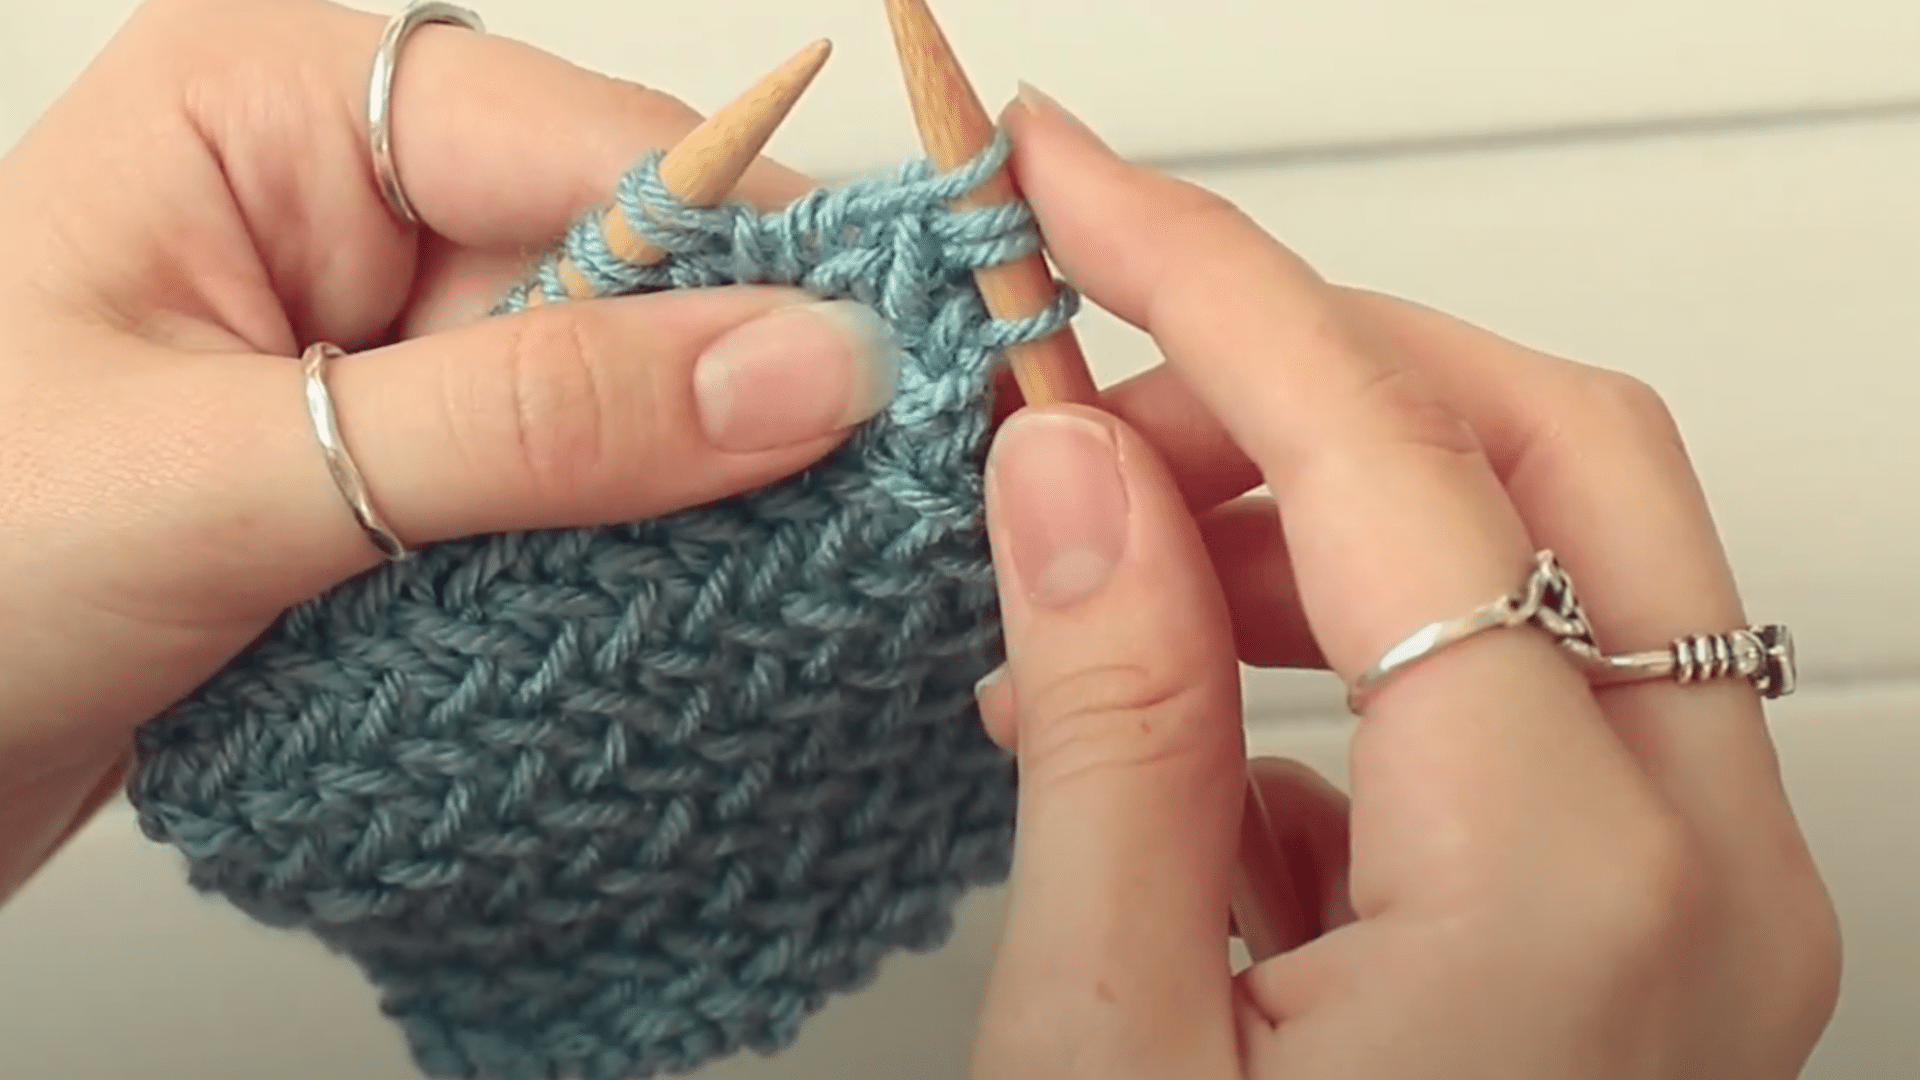
Step 5: Pass the Slipped Stitch Over
Once your needle is inserted into the slipped stitch, the next thing you’ll do is pass the slipped stitch over the second stitch that you just knitted.
This is a key part of the herringbone pattern because it helps create the V-shape.
You’ll need to gently pull the slipped stitch over the knit stitch without pulling too hard on the yarn.
If the stitch is too tight, it might be difficult to pass it over. Keep it smooth and steady as you pass the slipped stitch over.
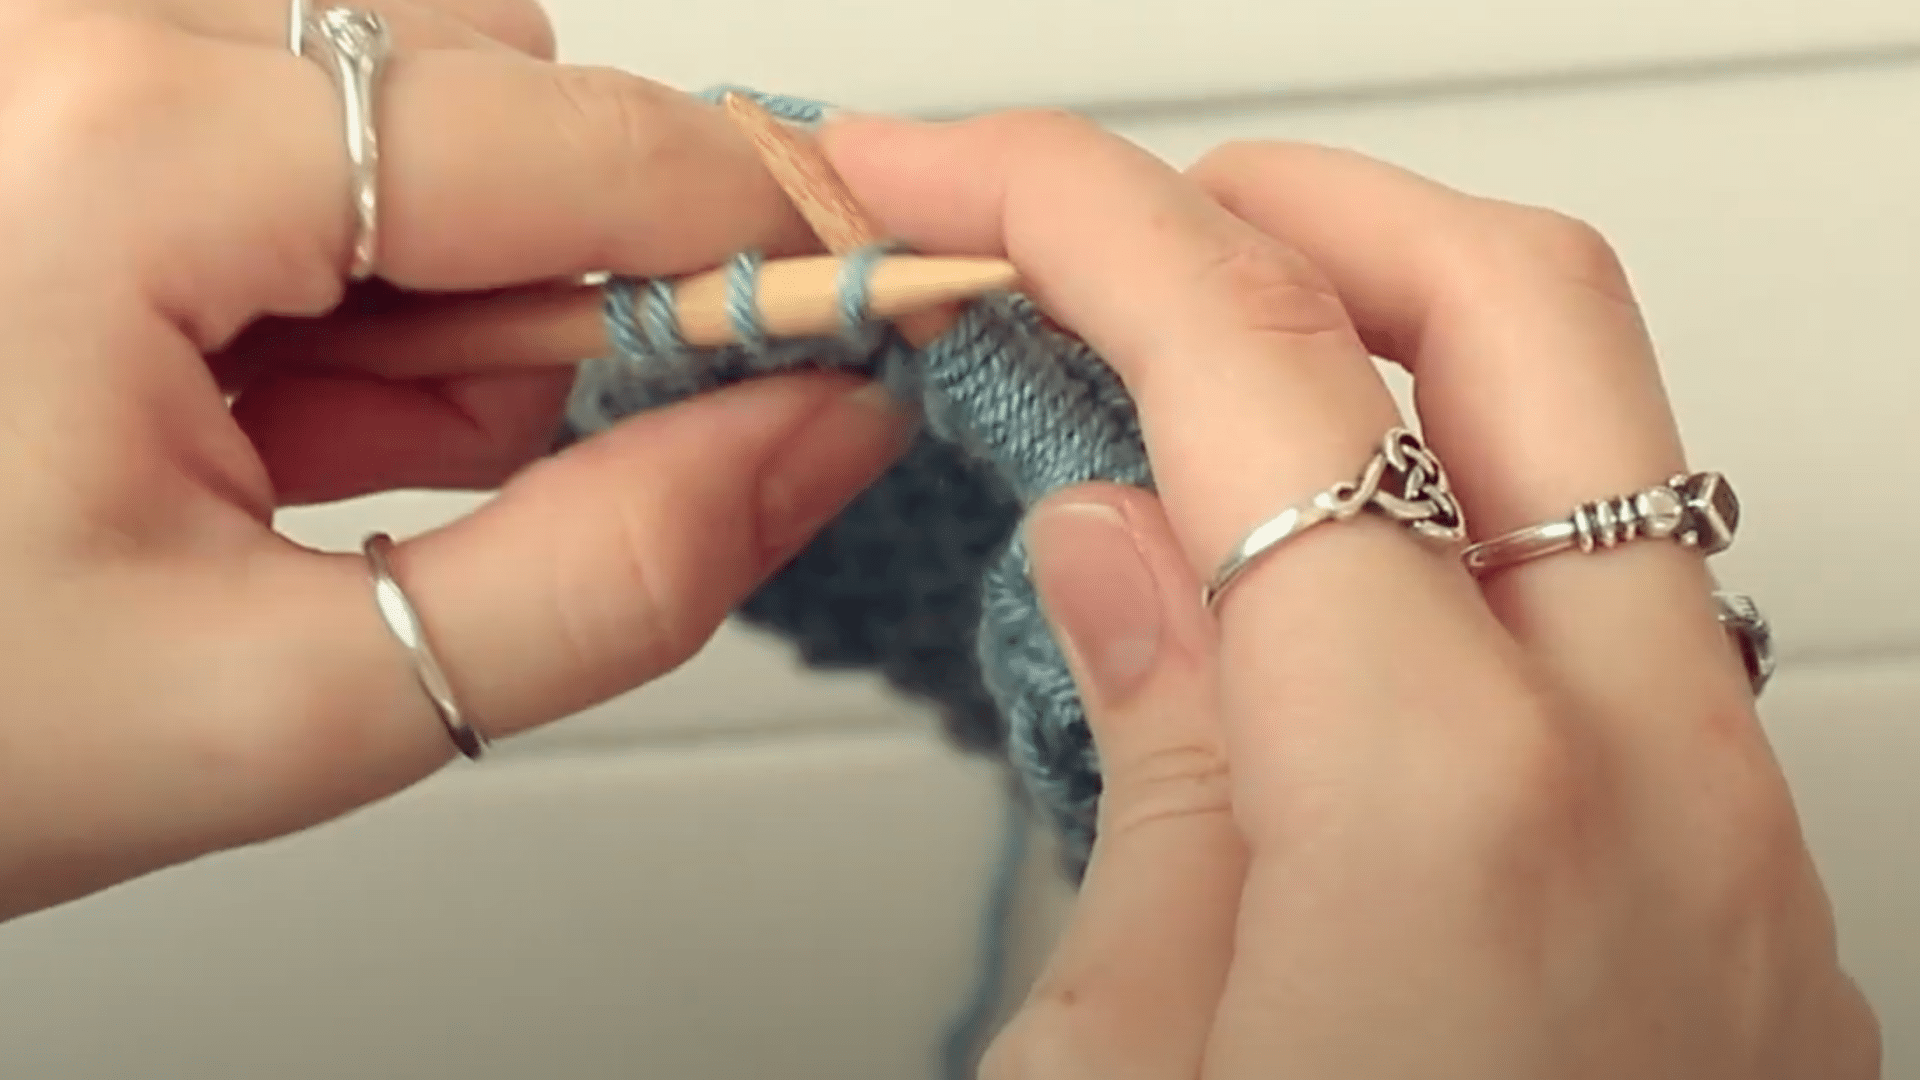
Step 6: Knit Through the Back Loop
Now that the slipped stitch is passed over, you’ll need to knit through the back loop of the stitch you just worked.
This is what makes the herringbone stitch so unique. It creates a nice twist in the yarn, adding to the textured effect.
Be careful when you knit through the back loop, as it can be a little tricky. Make sure your needle goes into the back of the stitch, not the front.
Once you’ve knitted through the back loop, you’re almost done with this part of the stitch!
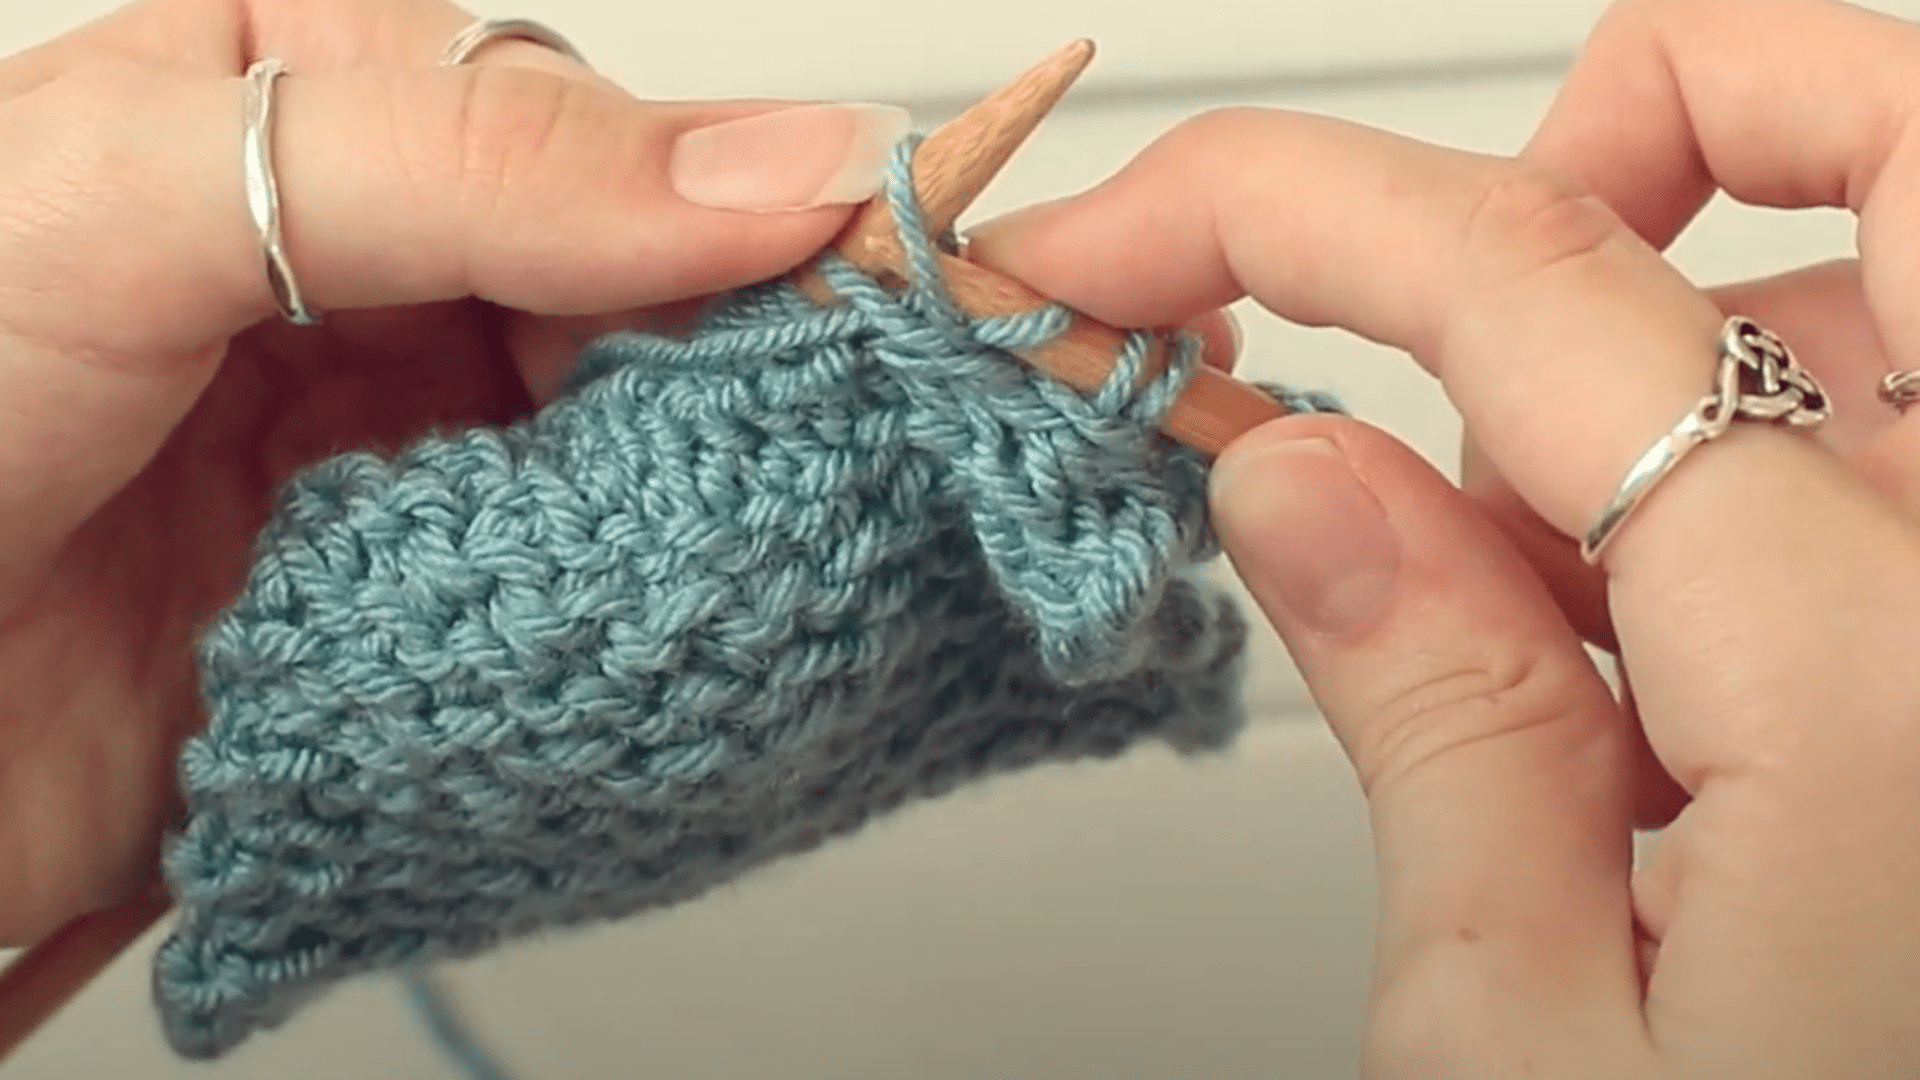
Step 7: Slide the Stitch Off and Repeat
Finally, slide the stitch off your needle and repeat the process. After you complete the first set of steps, it’s time to move on and continue the stitch.
Keep repeating the steps until you reach the end of the row. As you get more comfortable, you’ll find the process becomes faster and more natural.
The herringbone stitch takes a little time to master, but once you get the hang of it, it’s a great addition to any project.
Keep practicing, and you’ll see the beautiful texture build with every row!
To get a clearer picture of the steps, check out this helpful video from @The Blue Mouse Knits. It breaks everything down and makes it even easier to follow along!
Tips for Knitting the Herringbone Stitch
Here are some helpful tips to make knitting the herringbone stitch easier and more enjoyable.
These simple suggestions will ensure your project looks neat and turns out just the way you want.
- Use a Larger Needle Size: This helps create a softer, more flexible fabric, as the stitch can be dense.
- Maintain Even Tension: Keep your yarn tension consistent for neat, uniform stitches.
- Practice the Two-Row Repeat: The stitch is based on a two-row repeat, so practice until the movement feels natural.
- Keep Stitches Loose: Avoid pulling too tightly to make the process smoother and prevent tight stitches.
- Use Stitch Markers: Mark the start of each row to stay organized and avoid losing track.
Conclusion
Now that you know how to knit the herringbone stitch, you can start using it in your own projects.
It might take a little practice at first, but once you get the hang of it, you’ll see how easy it is to create beautiful, textured fabrics.
I recommend starting with a small project, like a scarf or a swatch, to practice the stitch and build your confidence.
The herringbone stitch adds such a unique touch to your knitting, and I’m sure you’ll enjoy using it in many of your future pieces.
Remember, take your time, keep your stitches even, and don’t be afraid to practice.
Knitting is all about enjoying the process, so have fun with it! With these steps, you’ll be able to create stunning, textured pieces that stand out.
Keep practicing, and soon enough, the herringbone stitch will feel like second nature!


