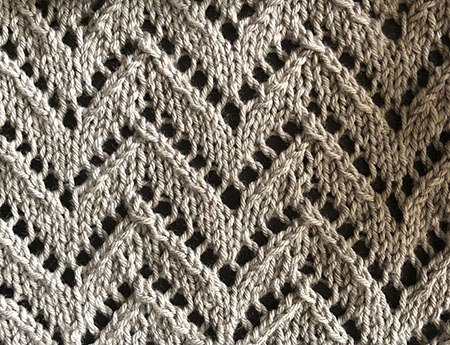
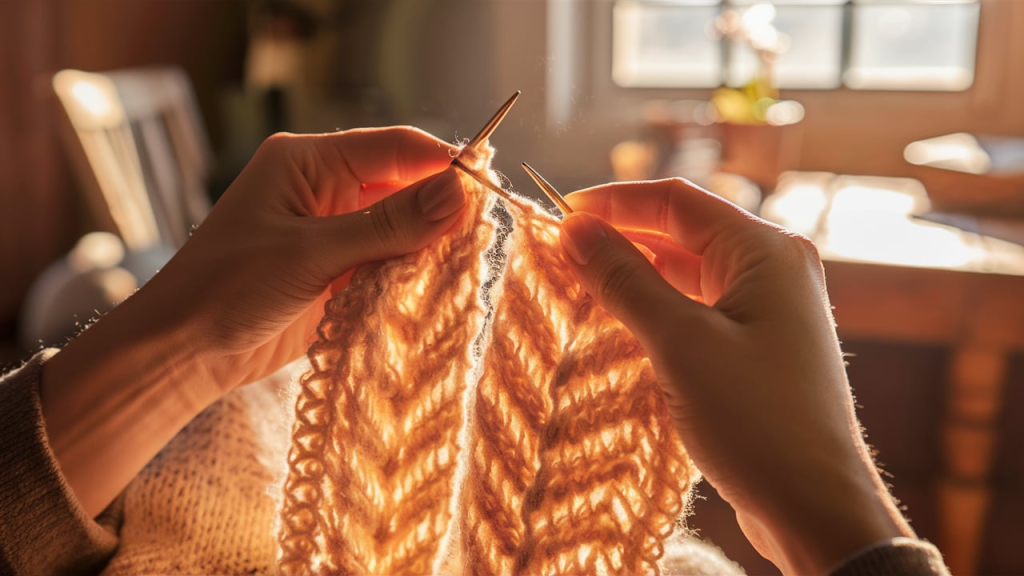
Struggling with Chevron lace knitting? You’re not alone. Those beautiful zigzag patterns might seem impossible to master, but I promise you can.
In this guide, I’ll show you how to create stunning chevron lace from your first stitch to your finished project. No more frustration or confusion! I’ve spent years teaching this technique to hundreds of knitters like you. The secret? I break it down into simple, manageable steps anyone can follow.
Whether you’re a beginner hoping to try lace or an experienced knitter looking to perfect your technique, you’ll find what you need here.
You’ll find:
- What makes Chevron lace special
- The exact tools and materials you need
- A step-by-step process that actually works
- Solutions to common problems
Let’s transform those tangled yarns into a beautiful, flowing lace together!
What Is Chevron Lace?

Chevron lace is a knitting pattern that creates zigzag lines through a combination of increases and decreases. The magic of chevron lace happens when you place yarn over (the increases that create holes) and decreases in just the right spots.
These strategic placements create a fabric that flows in waves. Unlike solid chevron patterns, chevron lace includes those lovely open spaces that give your work a delicate, airy quality.
You might hear chevron lace called by other names:
- Ripple stitch lace
- Wave lace
- Zigzag openwork
What makes chevron lace special is how it combines structure with flow. The geometric zigzags provide order, while the lace elements add grace. I’ve found that even beginners can create beautiful chevron lace with patience. Once you understand the basic concept, you can play with countless variations!
Essential Tools and Materials
Before you cast on your first chevron lace project, ensure you have everything you need. The right tools make all the difference between frustration and joy.
Yarn
- Light-colored yarn (at least for learning)
- Smooth, not fuzzy texture
- Medium weight for practice
- Wool or wool blend works great
I recommend starting with a light-colored yarn because it makes it easier to see your stitches. Dark colors hide the beautiful lace pattern you’re working so hard to create!
Needles
- Pointy tips (crucial for lacework!)
- Size appropriate for your yarn
- Circular needles (even for flat work)
Why circular needles? They hold more stitches and put less strain on your wrists. Your hands will thank you!
Other Must-Haves
- Stitch markers
- Tapestry needle
- Blocking tools (pins, mats)
- Row counter
A little secret: Blocking transforms your knitting from “nice” to “wow!” We’ll talk more about this magic later.
Step-By-Step Guide to Knitting Chevron Lace
Chevron lace knitting is a beautiful pattern that creates a stunning wave-like design. With this step-by-step guide, you’ll learn how to master it easily.
Ready to make your first chevron lace? Let’s break it down into manageable steps.
Basic Chevron Lace Pattern
Cast on: 25 stitches (for 2 pattern repeats)
- Row 1 (Right Side): K1, *k2tog, k1, yo, k1, yo, k1, k2tog, k1, ssk, k1, yo, k1, yo, k1, ssk; repeat from * to end.
- Row 2 (Wrong Side): Purl all stitches.
- Row 3: K1, *k2tog, k1, k1, yo, k1, yo, k2tog, ssk, yo, k1, yo, k1, k1, ssk; repeat from * to end.
- Row 4: Purl all stitches.
Repeat these 4 rows for the pattern.
Step 1- Cast On and Set Up
- Count carefully as you cast on
- Place markers every 12 stitches if helpful
- Work a few rows of garter or stockinette if you want a solid edge
Step 2- Working the Pattern
- Take it slow at first
- Read each step out loud as you do it
- Remember, yarn overs create holes AND add stitches
- Count your stitches after each pattern row
Step 3- Reading Your Knitting
- Stop and look at your work after each row
- Check that your zigzag is forming correctly
- Make sure your yarn overs are creating nice eyelets
- Count stitches regularly to catch mistakes early
Step 4- Blocking Your Work
- Soak your finished piece in lukewarm water with gentle soap
- Press (don’t wring) out excess water
- Lay flat on a blocking mat
- Pin along the points of the zigzags
- Let dry completely
My Top Tips for Beautiful Chevron Lace
- Use lifelines: Thread dental floss or smooth yarn through your stitches every few pattern repeats. If you make a mistake, you can rip back to the lifeline.
- Knit in good lighting: Your eyes will thank you!
- Take breaks: Lace knitting requires concentration.
- Be patient with yourself: Each mistake teaches you something valuable.
- Trust the blocking process: Your unblocked lace might look lumpy or uneven, but blocking works wonders.
I once spent hours on a chevron lace scarf that looked terrible on the needles. After blocking? It was gorgeous! Don’t judge your lace until after blocking.
Design Your Own Chevron Lace Pattern
Once you understand the basics, you can create your unique patterns! The secret to designing chevron lace is balance. For every decrease, you need an increase to maintain your stitch count.
Start by drawing your pattern on graph paper:
- Mark where you want the “peaks” and “valleys”
- Place yarn overs where you want holes
- Add decreases to create the zigzag shape
Some ideas to customize your pattern:
- Change the width between peaks
- Add additional yarn-overs for more openwork
- Incorporate other stitch patterns between the zigzags
Remember: Test your design on a small swatch before committing to a full project. I love tweaking existing patterns to make them my own. Even changing the number of stitches between increases and decreases creates a new look!
Creative Ways to Use Chevron Lace
Chevron lace creates stunning zigzag patterns that add visual interest and texture to your knitting projects. These are some inspired ways to incorporate this beautiful technique:
Projects Perfect for Chevron Lace
- Shawls and wraps: The drape of lace is perfect for beautiful shawls
- Baby blankets: Use a washable yarn for a special heirloom
- Summer tops: Lightweight and breathable
- Home decor: Think table runners and pillow covers
- Bookmarks: Small projects to practice the technique
Combining Chevron with Other Techniques
- Solid Chevron Sections
- Beaded rows (add beads to yarn overs)
- Color changes at the peaks or valleys
- Textured stitches between lace sections
One of my favorite projects was a chevron lace cowl, where I added tiny glass beads to the peaks. The way they caught the light was magical!
Conclusion
Congratulations! You’ve mastered the beautiful art of chevron lace knitting, which opens up a world of creative possibilities for your fiber crafts.
Start with a small, manageable project like a bookmark or dishcloth to build your confidence. Embrace the learning process – mistakes are valuable teachers on your knitting journey. Your first chevron lace project might have imperfections, but each stitch brings improvement.
Blocking is essential for lacework. This finishing step transforms your knitting by opening up the pattern and creating crisp definition. Soak your finished piece in lukewarm water with mild soap, then gently shape it to measurements on a flat surface.
As your skills grow, challenge yourself with scarves, shawls, and even garments featuring this elegant pattern. Each project will strengthen your technique and confidence.
I’m excited to see your creative journey with chevron lace unfold. Grab your needles, choose some beautiful yarn, and start creating today!
Happy knitting!
Frequently Asked Questions
What if I Drop a Stitch in My Chevron Lace?
Don’t panic! Place a safety pin in the dropped stitch to stop it from running. Later, you can fix it with a crochet hook or lifeline.
Can Beginners Really Learn Chevron Lace?
Yes! Start with a simple pattern and light-colored yarn. Practice the basic repeat on a small swatch before making a big project.
Why Does My Chevron Lace Look Wavy and Uneven?
This is normal before blocking. Wet blocking will even out your stitches and make the pattern pop. Trust the process!
Do I Need Special Needles for Chevron Lace?
Needles with pointy tips work best for lace. They make working the decreases and yarn overs that create the pattern easier.
How Long Does It Take to Knit a Chevron Lace Scarf?
It depends on your speed and the scarf size. Most knitters need 15-20 hours for a medium-sized scarf. Take your time and enjoy the process.


