genericviagra

buy cheap cialis pill online lloyds pharmacy viagra cheapest without prescription farmacia online alprostadil

viagra no prescription required

cheap without prescription Cialis Super Active online meds where can i buy viagra cheap without prescription brand viagra online sildenafil online

canadian discount pharmacy

cheap without prescription Generic Levitra purchase tadalafil amoxicillin no prescription cheap without prescription pill online buy cheap generic viagra

yohimbe

Generic Viagra buy cheap cheap cialis impotence treatment cheapest without prescription buy viagra online stamina rx

buy prescriptions

buy cheap Viagra Super Active sildenafil citrate tablets soma pharmacy buy online cheap pharmacy cialis online

next day cialis

Zithromax cheap without prescription viagra sale online abortion pill online cheapest without prescription brooks pharmacy no prescription required

online pharma

buy cheap Viagra Soft viagra price comparison can i buy viagra online buy online order kamagra net pharmacy

viagra herbal

cheap without prescription Xenical discount viagra online lowest price viagra cheapest without prescription get viagra prescription online doctor

cialis generic

Levitra cheapest without prescription canadian rx canadian viagra online buy cheap canadian prescription drugs buy amoxil

Archive for the 'Bargain-crafting' Category

Rosie’s Sheets and other Goodies

Friday, October 10th, 2008

I’m on the road again, this time visiting my parents for my dad’s 70th birthday (the Munich airport has a big toy store that’s open at 7:00 a.m. if you’re ever in need for something like that) , but I wanted to share these links with you if you are looking for projects for this weekend.

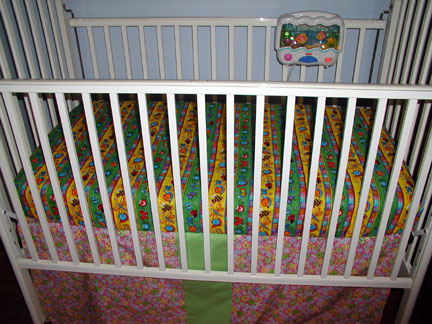
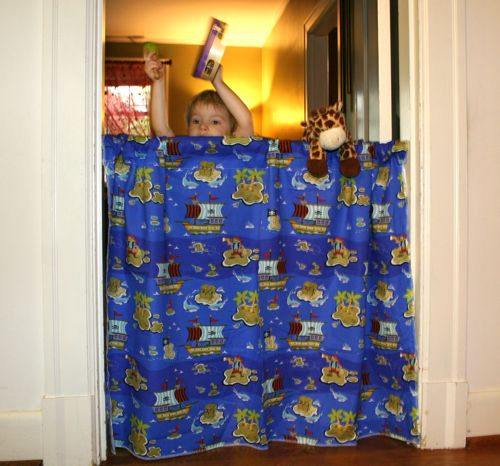
First off, Jeannie of whatthehay is sharing a tutorial on sewing your own cribsheets. She writes:

After finding out that we were pregnant with our first baby, I began the long and fun process of collecting all of the things that a new human needs to survive. First on the list? A CRIB of course! Beyond the crib (which we found at a consignment sale, along with the crib mattress) a baby needs crib sheets. Happily, Rosie has a talented grandma who was more than happy to provide her with many of the essentials of baby survival – a quilt (with strict instructions to USE it), a few totally cute outfits and 4 crib sheets.

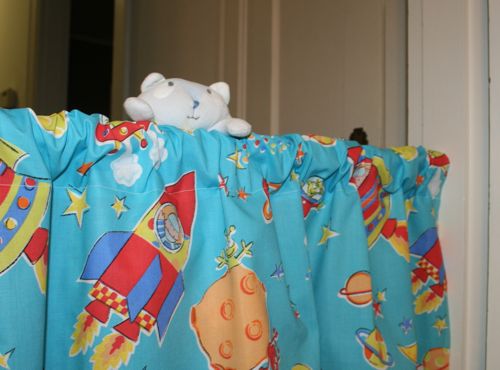
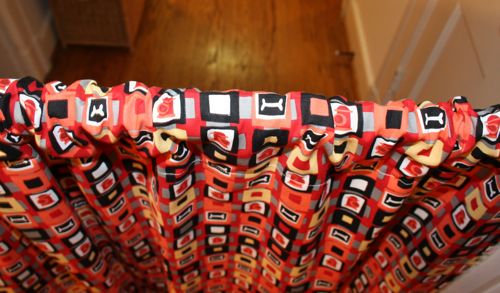
Rosie’s Grandma is a sewing kind of lady and back when I was a kid, money was tight and so, well, she sewed. Beyond making nearly all of our clothes that weren’t hand-me-downs, she also devised a pattern for a crib sheet. Back in the day, people actually made their own sheets for their big beds, too, and she adapted this pattern from one of those patterns.

If you have a baby shower coming up, check out her crib sheet tutorial for a very useful, unique gift.

Secondly, I started another blog called craftevolution.com. It’s still in early development, but come visit to see some ideas for Halloween costumes based on basic sewing patterns and let me know what you think about the blog.

Kids’ Puppet Show Curtain

Thursday, September 25th, 2008

I am all about- what can you make with 1 yard, 1 skein, etc. And so in a pinch for a gift I used one yard of fun fabric to make a doorway puppet show curtain.

img_3073.jpg

With a $4 tension rod and 1 yard of fabric we have already had hours of fun around our house playing with puppets and stuffed animals, having musical concerts, and using as a special door into my son’s room with a “doorbell” you have to ring.

img_3087.jpg

Two of the sides of fabric didn’t even need hemming because they were the finished edge off the bolt and the other 2 ends I serged and turned over and hemmed across to make a casing for the rod. I have specialized curtains too by “monogramming” with a large felt letter sewn on and sequin ribbon stripe near the top, to make it more girly. There is so much you could do to personalize this to your child’s taste, like the different fabrics shown that I have used. And with it less that 3 feet tall it is perfect for a toddler to stand behind or an adult to sit behind.

img_3107.jpg

I love a 10 minute project that can really spark his imagination and turn our ordinary hallway into a fun place!

Complete Embellishing by Kayte Terry

Thursday, September 18th, 2008

A few weeks ago, I received this gorgeous book from Kayte Terry. Kayte describes herself as a “stylist/writer/crafty lady from Brooklyn, NY”. She grew up in a household where the motto was not “Where do I buy it?” but “How do I make it?”

comleteembcover.jpg

With her first book, Kayte shares a glimpse of her crafty life by introducing us to basic embellishing techniques and demonstrating how to apply them to enhance clothing, accessories, and home furnishings. The comprehensive Tools and Techniques section of the book is a great resource. Kayte covers embroidery, crochet, trims, felting, beads and sequins, applique, fabric printing, and painting and etching. This is followed by the Projects section where she seeks to inspire you to combine these techniques and create your own, unique style.

kaytemosaic.jpg

1. Romance Skirt, 2. Glasses, 3. Victoriana Cardigan, 4. Lampshade

I took on this challenge by first shopping in my crafting stash (fabric from curtains sewed in 1993 and felted sweater remnants from a purse project) and then at the Salvation Army ($3.99 cardigan). The result is this flirty, girly cardigan based on the instructions for Kayte’s Victoriana Cardigan.

cardigan.jpg

Needless to say, I love my new jacket! My version has a crew neck instead of a V-neck. I used some leftover tape I had made for this project to embellish and clean up the edge around the cardigan and then added the ruffle. Needle felting is a new craft for me and I’m not quite ready to embark on it, so I decorated my flower with a button covered in the tape fabric. Instead of sewing the flower to the jacket, I attached it to a pin back for those days when I don’t feel quite so bloomy. At a later date, I may shorten the sleeves of the jacket and add some ruffles there, but for now I’m very excited about my new treasure.

If you want to find out more about Kayte Terry, you can read her interviews on the Craftzine blog and the Etsy Storque, and visit her blog at thisisloveforever.com. By the way, Kayte was also the fashion/prop stylist for Sew Everything Workshop, our December book club selection.

Story Booklet Tutorial

Thursday, July 10th, 2008

Bobbi-lee of TomandJasmine.wordpress.com starts off this season’s guest contributor cycle with a tutorial on how to make a very personal story booklet:

I made this little story booklet for my sisters 20th birthday which was last week and thought I should make a tutorial at the same time. This little booklet is a great gift idea for the young and old, or it can just be a little book of your illustrations or poetry. Have fun!

First of all you need to do the pages (unless you are making a blank book to draw and write in later then skip this part). I started with an A4 page of watercolour paper and divided it into 15 equal rectangles. Draw your little illustrations in pencil then paint them or colour them with your choice of paints.

watercolourpaint.jpg

Once you have done your little drawings and the paint is dry, outline them in black felt tip marker and write the poem or story in.

outline-with-fineliner.jpg

Once that’s all done you can cut out the pages neatly with a scalpel and ruler. Don’t cut yourself!

cut-the-paper.jpg

Now comes the fun part. Cut out some strips of paper for the binding. The pieces I used were about 8×4 cms but it really doesn’t matter what size as long as it is smaller than the actual pages. Now fold the strips of paper and glue one side of the fold to one side of a fold on another piece. Keep gluing the folded parts together until you get what looks like a mini book.

strips-of-paper.jpg

Now start gluing the back of the watercoloured pages to the mini book like in the image below. If this doesn’t make sense please let me know-I am terrible at explaining. Keep gluing each page until the book is all glued together. Remember to keep the pages in the right order you wanted and remember that some pages will be back to back.

gluing-pages-together.jpg

Now that the booklet is almost done it needs a cover. I cut a piece of cardboard scrap I had lying around. Glue the last two paper strips to the cardboard. The cover is one piece of cardboard not two pieces. Once glued fold it like in the picture. You might need to hold it under some weight (such as another thick book) to help it keep its shape.

glue-cover-card.jpg

Now all you have to do is line the cover with some pretty paper. I chose this gorgeous scrapbook paper that has glittery accents on it. Line both the inside and outside of the cover.

cover-lining.jpg

Now you have a cute little story booklet. I tied it with pretty ribbon to give it something extra. You can print a title on the cover, use transfers or stickers or add some beads and ribbon. It’s up to you.

final-book.jpg

Charmed: Wine Charm Tutorial and Giveaway

Wednesday, July 2nd, 2008

img_9416small.jpg

During one of your recent summer festivities, did you pick up “your” glass and, about to take a sip, discovered that the shade of lipstick on the glass rim didn’t match yours? To avoid such a shocking social faux pas consider spending 10 minutes making some wine charms.

img_9390small.jpg

Materials

  • 4 inch length of copper wire per wine charm
  • Dowel with the same circumference you want the charm to have. I used a broomstick
  • Chain-nose pliers
  • Wire cutters
  • Anything you want to use to embellish the charms (beads, buttons, small hardware)

img_9395small.jpg

With the chain-nose pliers, make a P-shaped loop at the end of the wire.

img_9397small.jpg

Wrap the wire around the dowel to shape a hoop.

img_9400small.jpg

String the embellishments on the wire. These are plastic faceted beads.

img_9401small.jpg

Using the pliers, first bend up the P-loop by 90 degrees. If you hold up the hoop, the loop should be parallel to the table top. Then bend the straight end of the wire up to shape a right angle.

img_9405small.jpg

Trim the end of the straight wire so you can comfortably close the hoop by pushing the end through the P-loop. The whole thing will look like an earring hoop.

charmcollage.jpg

Here are some ideas to decorate the charms. Plunder the hardware store, or your jar of lose bolts and nuts for a more edgy look, or find some cool buttons and string them on wire or thread to attach them to the hoop.

The Giveaway

img_9423small.jpg

Here I used ink jet shrink film to print and bake different shapes decorated with these digital papers designed by the talented Bobbi-lee. Check out her blog at tomandjasmine.wordpress.com.

You can become the proud owner of these charms by leaving a comment at the end of the tutorial. I will draw the winner on Monday, July 7.

Have a fun holiday!


Recycled Denim Fiesta Skirt: A Tutorial

Friday, June 13th, 2008

img_9289small.jpg

It’s 90 plus degrees and I could be sorting out summer clothes and putting winter stuff away, however, I’d rather be sewing! While attempting to deal with such mundane chores, I found a pair of Elizabeth’s jeans. While they are way to short for her, the waist still fits perfectly for my skinny child so they became the object of another refashioning exercise.

Part 1: Cutting up the Jeans

img_9316small.jpg

  1. Lay out the jeans and cut off the legs right below the crotch. This will be the top tier of the skirt.

    img_9318small.jpg

  2. Open up the seam between the legs.
  3. Look at the top part of the jeans and measure the distance from the waist to about one inch below the zipper of the jeans. In my case that was 6.5 inches/16.5 cm.
  4. img_9321small.jpg

  5. Mark this distance all around the tier.
  6. img_9322small.jpg

  7. Even out the bottom of the tier by cutting along your mark.

Part 2: The Math

Calculate the Width of the Ruffles

  1. Decide how long you want the skirt to be and subtract the length of the jeans top tier from this number.
  2. skirta.jpg

  3. Divide the remainder by the number of ruffles you wish to add for ruffles of equal width. This skirt is 16.5 inches long. 16.5 – 6.5 inches for the top tier = 10 inches. 10 inches divided by 2 ruffles = 5 inch width per ruffle.

Calculate the Length of the Ruffles

  1. Measure the circumference of the bottom edge of the top tier and multiply this number by two. This is the length of the second tier ruffle.
  2. Multiply the length of the second tier ruffle by two. This is the length of the third tier ruffle.

These calculations will give you two fairly full tiers of ruffles. If you want the skirt two be less full, make the ruffles a little shorter.

Part 3: Cut the Fabric

With these measurements, cut your ruffles. You may have to join one or more strips of fabric to get the requisite length. For example, my first ruffle had to be 50 inches long and the fabric was 45 inches wide, so I had to cut another 5 inch strip to make up the 50 inches.

Part 4: Ruffle the Ruffles

  1. For each ruffle, join the lengths of fabric you cut out to make a long strip.
  2. Use your preferred method to finish the raw edges of the strips. I sewed a zigzag stitch along the edges.
  3. For each ruffle, sew the long strip together to make a loop.
  4. Ruffle the second tier ruffle by sewing long basting stitches along the top edge of the fabric.
  5. Mark each quarter of the top jeans tier, e.g., front middle, left side, back middle, right side.
  6. img_9327small-copy.jpg

  7. Repeat this for the second tier ruffle.
  8. With right sides together, pin the second tier ruffle to the top jeans tier matching the quarter markings.
  9. img_9326small.jpg

  10. Gather the fabric between the markings by pulling the top thread of the basting stitch.
  11. Evenly distribute the gathers.
  12. Sew the second tier ruffle to the top jeans tier. Repeat this process for the next ruffle(s).

Part 5: Finish the Skirt

At this point you should have attached all the ruffles.

  1. Hem the bottom tier.

I’m currently infatuated with bias tape hems. This skirt features homemade tape made out of matching fabric. For instructions on making this tape check out Step Four of the cashmere blanket tutorial. You could also just make a traditional double fold hem. (Fold the bottom edge to the inside and press, fold again, press and stitch.)

Dance the night away. This is the perfect party skirt.

Book Review: Cute Dolls & Softie Swap Pictures

Wednesday, June 4th, 2008

aranzi.jpg

This post continues the series of book reviews with Cute Dolls by Aranzi Aronzo. At the end of this entry you’ll find a slide show of a selection of softies exchanged during the course of last month’s softie swap.

aronzo.jpg

This book provides instructions for 21 different cute dolls. The instructions are very simple and entertaining with comments such as

Bear is a slacker.
He’s always looking spaced out.
But it’s strange how relaxing his spaced-out, slacker look is.
It’s also strange how someone like him is actually an Aranzi Aronzo store manager.

Most of the patterns need to be enlarged by 125% to 150% for ultimate sizing. I scanned the pattern and enlarged it with Photoshop. You could also take the book to your local copy shop and enlarge the patterns there.

Each doll is made out of felt scraps and jersey fabric. “Jersey? Ugh, I don’t want to buy more fabric,” was my initial reaction. But then my glance fell on my Goodwill bag filled to the brim with ultra soft t-shirts from last year. So, if you have a special shirt you’d like to recycle, like Elizabeth’s Cape Cod t-shirt on the cat doll, take some shears to your clothing and create a softie. Speaking of softies, check out the softies made by the participants in our softie swap:

You can also read about them at the Flickr Crafty Daisies Softie Swap Group

Scrap Sack Tutorial

Sunday, May 18th, 2008

By request I wanted to do a tutorial on the Scrap Sack I posted using up scrap fabric and disguising your seam with a stripe of ribbon.

img_2210.jpg

There are no measurements for the fabric because you will want to use up what strips or scraps that you have and make size bag you desire. You will need: measuring tape, pins, fabric, wide grosgrain ribbon, iron, & sewing machine/serger.

1. Lay out the fabric strips that you want to use. Fold it to picture what the bag will look like finished. My seam will be on a side, though it could be at the bottom, depending on your pieces. You can see one piece in taller than the other.

img_2190.jpg

2. Cut ribbon the same width as fabric. Measure and cut 2 ribbon handles, either short handbag length or longer to fit over the shoulder. (Cut 1-2″ longer than you want the finished handles to turn out.) I cut red handles here but decided to do white as you can see in my finished product.

img_2191.jpg

3. Lay right sides of fabric together and sandwich in the ribbon. Match up the 3 layers at the top edge, pin together, and sew across this top edge.

img_2192.jpg

4. Turn fabric right side up to inspect that the 3 layers are all included in seam. Pretty already!!

img_2193.jpg

5. On wrong side, press seam to one side and iron fabrics flat. Do not iron over right side of ribbon. Trust me!

img_2194.jpg

6. Turn top edge down twice about 1/2″ each time and press. This will be the casing your handles will slip under.

img_2195.jpg

7. Do not sew over the edge you just pressed. We will do that last. Next, sew down the other sides of the bag. You can see the pins pointed to where I am going to sew. (I am using a serger to make that enclosed edge but a regular machine seam is the same.)

img_2197.jpg

img_2200.jpg

8. The handles: I like to point the open, top edge toward myself. Take a ribbon handle (or whatever you want to use for a handle, fabric will work too), measure in from the edge where you want the handles placed and slip the handle in.

img_2202.jpg

9. Fold the handle then toward yourself and pin. Curve the handle over and pin it the same distance from the opposite side. Flip bag over to back and repeat with second handle.

img_2203.jpg

img_2204.jpg

*Note: There are many ways to make and attach handles, this is just the way that I made up that I like.

10. Last step – Choose a stitch and sew across the top edge that you pressed. I like to use a wide, tight, zigzag stitch. Turn inside out and you are done.

img_2206.jpg

img_2212.jpg

Suggestions: Use different fabric stripes; quilt pieces together; sew several stripes of ribbon; square the bottom of the bag.

If you follow these directions and want to share what you come up with, email your picture to us by June 1 and we will post them to spread the ideas. Send name and pic to [email protected]. Thanks!

Practical Denim

Tuesday, May 13th, 2008

This post features the remains of my unloved jeans that I cut up for this bag. I’ve been toying with the idea of a recycled denim bag, but was trying to come up with a variation on the theme. So here it is, a reversible bag.

jeansbag1.gif

You can either display the jeans side and make a recycled fashion statement, or you can be more low key about your lifestyle, turn the whole thing inside out and display a cool lining.

jeansbag2.gif

The jeans pockets become practical places to stash away your phone, mp3 player, glass baby bottles, in other words, all those treasures you find in your jeans pockets every day. So before you send your denims off to the Goodwill store, take a good luck at them and consider what kind of reincarnation you could create with a sharp pair of shears.

All Tied Up With A Bow

Wednesday, May 7th, 2008

img_9183web.jpg

As my handiwork attests I’m a terrible stamper. I never seem to be able to avoid getting the rim of the stamp onto the paper, the ink doesn’t distribute evenly, I could go on and on. Any hints on how this is done would be greatly appreciated. However, as a concept piece and for a birthday present for a seven-year-old, I think this works: I cut out a piece of brown wrapping paper to fit the present, and then proceeded to stamp Daniel’s name all over it. For recycling purposes a brown paper bag would work equally well, but for some reason they only do plastic in NYC.

While stamping the D-A-N was still a very Zen experience, by the time I got to the I-E-L part, I was ready to pack it up. Fortunately he didn’t have a lengthy name like Balthazar. (That would have been Elizabeth’s name if my husband had had his druthers and she had been a boy.)

The bow used to be part of an exercise video tape. I got that idea from Danny Seo.

Note to self: Don’t try to remove the ribbon from the tape case five minutes before you have to leave for the party.