genericviagra

buy cheap cialis pill online lloyds pharmacy viagra cheapest without prescription farmacia online alprostadil

viagra no prescription required

cheap without prescription Cialis Super Active online meds where can i buy viagra cheap without prescription brand viagra online sildenafil online

canadian discount pharmacy

cheap without prescription Generic Levitra purchase tadalafil amoxicillin no prescription cheap without prescription pill online buy cheap generic viagra

yohimbe

Generic Viagra buy cheap cheap cialis impotence treatment cheapest without prescription buy viagra online stamina rx

buy prescriptions

buy cheap Viagra Super Active sildenafil citrate tablets soma pharmacy buy online cheap pharmacy cialis online

next day cialis

Zithromax cheap without prescription viagra sale online abortion pill online cheapest without prescription brooks pharmacy no prescription required

online pharma

buy cheap Viagra Soft viagra price comparison can i buy viagra online buy online order kamagra net pharmacy

viagra herbal

cheap without prescription Xenical discount viagra online lowest price viagra cheapest without prescription get viagra prescription online doctor

cialis generic

Levitra cheapest without prescription canadian rx canadian viagra online buy cheap canadian prescription drugs buy amoxil

Archive for the 'Oops' Category

I should have used a pattern

Thursday, April 19th, 2007

I’m doing a “diaper and a shirt” swap with the messageboard I post on. The idea is that you can embellish a T-shirt to match a diaper that you sew. My partner has a 2 month old boy, and I couldn’t find a shirt in his size, so I decided to sew one. However, I couldn’t find my pattern that has baby shirts in it, so I decided to try and create my own.

I grabbed a onesie that my daughter has outgrown, and for the fabric for the T-shirt I used an adults XL shirt I got on sale from Michaels.

crafty-001.jpg

I cut off the bottom of the onesie to make it into a shirt, and then cut along the seams to take the onesie apart. This gave me a general idea of the shapes I was looking for, and using them as reference I drew the pieces out freehand on the yellow T-shirt.

crafty-002.jpg

I sewed along happily, thinking that I was going t have an cute little shirt that would work with the diaper I was making. I am making a brown and yellow wool cover and a fitted diaper with giraffes on it, so I used brown thread on the yellow shirt so that it all matches.

Well, here is how the shirt turned out:
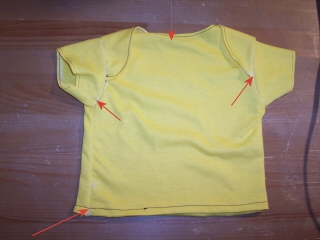
crafty-003.jpg

I’ve used the arrows to show the errors I made. I missed part of the neckline on the right hand side, the neckline itself is much too high and would choke the baby if they wore it. My left seam was about a half inch towards the middle of the shirt (must have made the back wider than the front) and the left arm seam doesn’t line up with the left side seam.

All in all, its not that bad considering I didn’t use a pattern. But definitely not wearable! Guess its time to search and find that pattern I have and use that :)

Easter Disaster

Thursday, April 5th, 2007

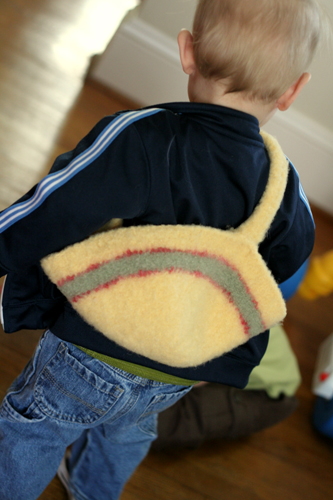
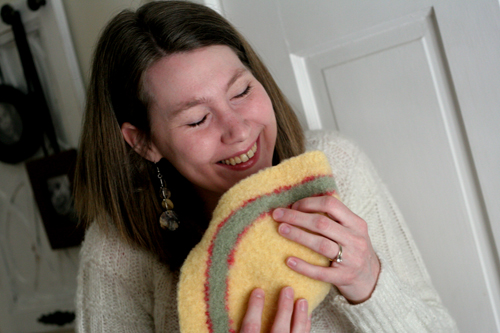
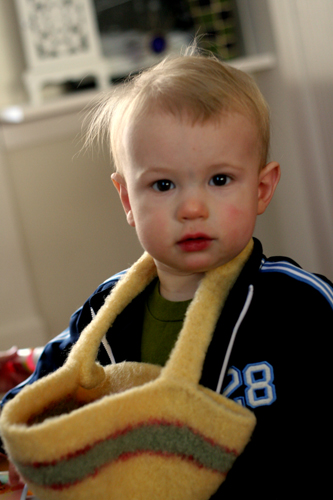
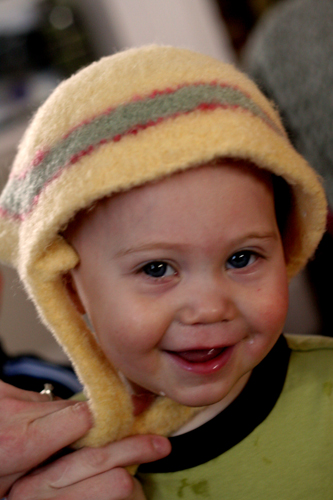
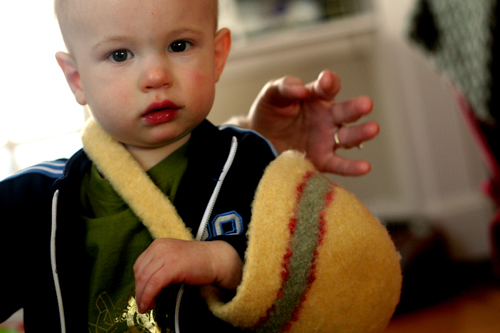
I was really excited to share with the world my first felted Easter basket. The first of many baskets designed by me that every mom would have to have for their child. But instead I ended up with this: a floppy bag with no shape, that does not curve in, that does not look like a basket! I should not have been as frustrated as I was considering I did not use a pattern, by say, those who have actually successfully made a basket. So Candace and I decided to try and come up with some other uses to salvage this attempt, most involving our favorite models (and me…). Here’s what we came up with:

The mini messenger bag-

jenmessengerbag.jpg

A taco holder, to keep your lap clean-

jentaco.jpg

A trough for snacks-

jenfoodtrough.jpg

The Easter bonnet- (yes, Candace you can borrow it Sunday, alright!)

jenbonnet.jpg

The toddler arm sling-

jensling.jpg

What do you think? Have I cornered a new market with any of these?
Better luck next year!

Purse Problems

Tuesday, March 20th, 2007
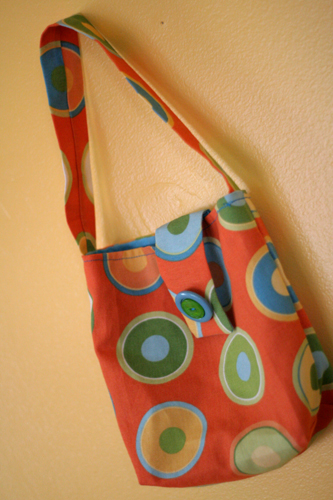
jenbag1.jpg

This orange bag is one of the first bags that I have attempted to sew and I have to say I’m pretty proud of myself. I still have some questions about lining and better construction, but pretty proud. I did make the lining a tad smaller in width than the outside fabric so that when I pinned it to sew, it did not line up all the way around. My husband though came up with a clever solution- I readjusted it so that there is a small pintuck in the front center of the bag that is hidden by the flap. (He often is the brains behind my projects!) I sewed two buttons together for more color and I like the way that turned out.

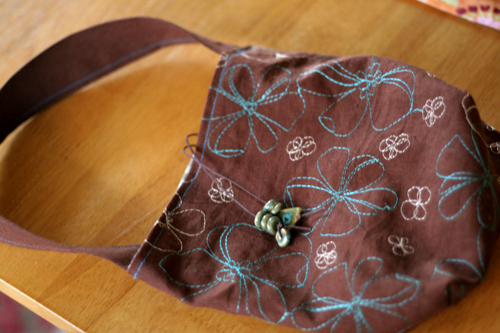
My next mission was to try and make some bags that were reversible. I am enjoying my sewing machine again (it comes and goes) so I whipped up this brown bag. With this second one again I thought I cut the 2 fabrics the same width and yet when I sewed them together there was still more of the outer fabric. Since I love the idea of making these I am now seeking outside of myself for further help. Do you cut both fabrics the exact same size when making it reversible? Does adding the handle between the 2 layers throw it off?

jenbag2.jpg
The second challenge I wanted to face was to find a way to make the bags stiffer no matter what fabric I choose. I bought some Iron-on Bond stuff to strengthen my lining and ironed it on the little piece of fabric I had left for the strap. I made the piece of iron-on too wide so when I folded the fabric together it bonded to itself and I had to leave the strap with the seam visible on the outside. Oops! Needless to say I did not want to iron-on to my main fabric. Any tips or feedback?

jenbag3.jpg

The “Ok” Diaper Bag Set

Thursday, March 15th, 2007

Before Lucy was born I was a sewing mad woman. Things have *ahem* slowed down since then. The desire is still there, just no time. One of the things I HAD to finish before she came was a diaper bag. I put this little ensemble together for our diapering needs. A diaper bag, a changing pad and little bag for my stuff. The changing pad was a towel that I died to match the fabric and quilted it sorta. If you can call that quilting- adding some batting to the back and sewing fabric on the other side. I love it when she’s on it cause it seems so comfy, but it’s too big and takes up most of my space. I’m also afraid to wash it cause the color might bleed into the fabric.
img_0117.jpg

The bag has tons of pockets, I like that but it’s a little too floppy. I made it from some left over ikea curtains we used for our craft room at church and some floral fabric I found at Walmart. I also made the straps so I could remove them and just slip the bag into another bag and still have all the great pockets. Yeah that didn’t work so well. Again, too floppy. darn. Oh, the detail on the pocket is from an old shiny head band I had. You know me, gotta have my bling!
img_0121.jpg

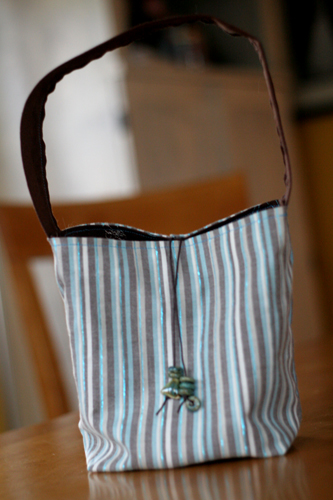
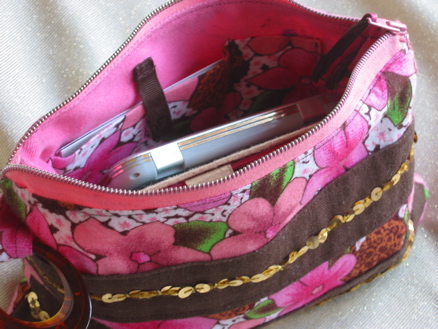
The little pouch for my things is the only thing I’m really in love with. I carry it with me everywhere. I even made a little side pocket for my “business” cards. Brian made me some Bloom cards so I could give out my number when I met a new crafting friend. I also love the bead on the side. It just gives it a little vintage somethin’. I am already designing a new bag in my mind with some Anna Maria Horner fabric that will be bigger and better! We’ll see when I’ll actually get to that…
img_0123.jpg

Felted Hat Disaster

Thursday, March 1st, 2007

I thought I would share this knitting mistake I made last year. So that you don’t get the wrong idea that everything we make here at Crafty Daisies is “perfect”. I would even like to think that everything I make is incredible. But lets face it, not every project turns out great or even close to great. And that’s a good thing. Because sometimes my head gets big enough to almost fit into the hat you’re about to see. So let this be an example to you of what not to do.
Lesson 1: When knitting a hat, use a pattern or your hat will turn out like this.

img_0396.jpg

“oh no it’s too big, I don’t think it will work. Maybe if I felt it…” she thinks to herself

Lesson 2: never felt wool knitted with acrylic yarn or you’ll get this.

img_0397.jpg

Yes, the knitted pizza. It is flat as a pancake.

Lesson 3: use a freekin’ pattern, Joy!

PS. I’d like to also say, thank you all for your kind comments on our work. You make this fun blog worth while! We love you!!

A special breed

Sunday, February 11th, 2007

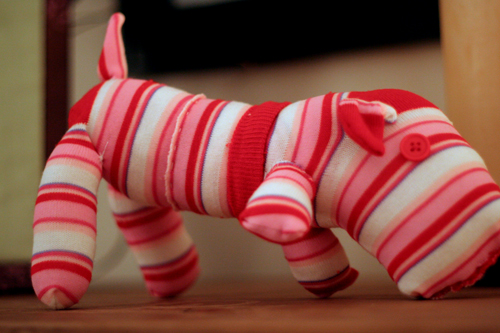
I’ve been seeing these sock puppies around the internet lately and decided that I would try my hand at making one. I mean, how hard can it be? Pair of socks – check. Fiberfil – check. Matching thread and buttons – check, check. So with all my tools, I began cutting, sewing and filling my sock puppy. The finished product is one that, while it’s not entirely embarrassing, it’s definitely not something I want to put on display. But for your amusement, I shall.

sockpuppy1.jpg

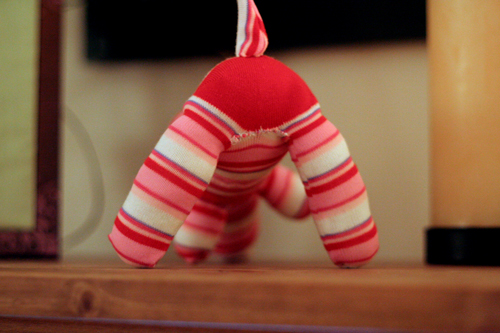
As you can see, it’s hind legs are way too long and his front legs are too short. And uneven.

sockpuppy2.jpg

And it looks like he’s been *fixed* and the doctor didn’t do a very good job sutchering him.

sockpuppy3.jpg

It’s not too bad, but I do feel bad for the poor pup. I did have an overwhelming sense of pride that I completed it. But that faded when my son wouldn’t even play with it. *Sigh* I guess I shall stick with my love affair with felt and leave the sock puppies to a professional.