genericviagra

buy cheap cialis pill online lloyds pharmacy viagra cheapest without prescription farmacia online alprostadil

viagra no prescription required

cheap without prescription Cialis Super Active online meds where can i buy viagra cheap without prescription brand viagra online sildenafil online

canadian discount pharmacy

cheap without prescription Generic Levitra purchase tadalafil amoxicillin no prescription cheap without prescription pill online buy cheap generic viagra

yohimbe

Generic Viagra buy cheap cheap cialis impotence treatment cheapest without prescription buy viagra online stamina rx

buy prescriptions

buy cheap Viagra Super Active sildenafil citrate tablets soma pharmacy buy online cheap pharmacy cialis online

next day cialis

Zithromax cheap without prescription viagra sale online abortion pill online cheapest without prescription brooks pharmacy no prescription required

online pharma

buy cheap Viagra Soft viagra price comparison can i buy viagra online buy online order kamagra net pharmacy

viagra herbal

cheap without prescription Xenical discount viagra online lowest price viagra cheapest without prescription get viagra prescription online doctor

cialis generic

Levitra cheapest without prescription canadian rx canadian viagra online buy cheap canadian prescription drugs buy amoxil

Archive for the 'Recycled' Category

Recycled Denim Fiesta Skirt: A Tutorial

Friday, June 13th, 2008

img_9289small.jpg

It’s 90 plus degrees and I could be sorting out summer clothes and putting winter stuff away, however, I’d rather be sewing! While attempting to deal with such mundane chores, I found a pair of Elizabeth’s jeans. While they are way to short for her, the waist still fits perfectly for my skinny child so they became the object of another refashioning exercise.

Part 1: Cutting up the Jeans

img_9316small.jpg

  1. Lay out the jeans and cut off the legs right below the crotch. This will be the top tier of the skirt.

    img_9318small.jpg

  2. Open up the seam between the legs.
  3. Look at the top part of the jeans and measure the distance from the waist to about one inch below the zipper of the jeans. In my case that was 6.5 inches/16.5 cm.
  4. img_9321small.jpg

  5. Mark this distance all around the tier.
  6. img_9322small.jpg

  7. Even out the bottom of the tier by cutting along your mark.

Part 2: The Math

Calculate the Width of the Ruffles

  1. Decide how long you want the skirt to be and subtract the length of the jeans top tier from this number.
  2. skirta.jpg

  3. Divide the remainder by the number of ruffles you wish to add for ruffles of equal width. This skirt is 16.5 inches long. 16.5 – 6.5 inches for the top tier = 10 inches. 10 inches divided by 2 ruffles = 5 inch width per ruffle.

Calculate the Length of the Ruffles

  1. Measure the circumference of the bottom edge of the top tier and multiply this number by two. This is the length of the second tier ruffle.
  2. Multiply the length of the second tier ruffle by two. This is the length of the third tier ruffle.

These calculations will give you two fairly full tiers of ruffles. If you want the skirt two be less full, make the ruffles a little shorter.

Part 3: Cut the Fabric

With these measurements, cut your ruffles. You may have to join one or more strips of fabric to get the requisite length. For example, my first ruffle had to be 50 inches long and the fabric was 45 inches wide, so I had to cut another 5 inch strip to make up the 50 inches.

Part 4: Ruffle the Ruffles

  1. For each ruffle, join the lengths of fabric you cut out to make a long strip.
  2. Use your preferred method to finish the raw edges of the strips. I sewed a zigzag stitch along the edges.
  3. For each ruffle, sew the long strip together to make a loop.
  4. Ruffle the second tier ruffle by sewing long basting stitches along the top edge of the fabric.
  5. Mark each quarter of the top jeans tier, e.g., front middle, left side, back middle, right side.
  6. img_9327small-copy.jpg

  7. Repeat this for the second tier ruffle.
  8. With right sides together, pin the second tier ruffle to the top jeans tier matching the quarter markings.
  9. img_9326small.jpg

  10. Gather the fabric between the markings by pulling the top thread of the basting stitch.
  11. Evenly distribute the gathers.
  12. Sew the second tier ruffle to the top jeans tier. Repeat this process for the next ruffle(s).

Part 5: Finish the Skirt

At this point you should have attached all the ruffles.

  1. Hem the bottom tier.

I’m currently infatuated with bias tape hems. This skirt features homemade tape made out of matching fabric. For instructions on making this tape check out Step Four of the cashmere blanket tutorial. You could also just make a traditional double fold hem. (Fold the bottom edge to the inside and press, fold again, press and stitch.)

Dance the night away. This is the perfect party skirt.

Book Review: Cute Dolls & Softie Swap Pictures

Wednesday, June 4th, 2008

aranzi.jpg

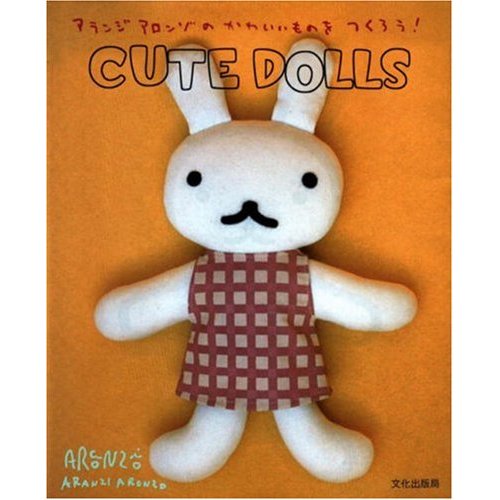
This post continues the series of book reviews with Cute Dolls by Aranzi Aronzo. At the end of this entry you’ll find a slide show of a selection of softies exchanged during the course of last month’s softie swap.

aronzo.jpg

This book provides instructions for 21 different cute dolls. The instructions are very simple and entertaining with comments such as

Bear is a slacker.
He’s always looking spaced out.
But it’s strange how relaxing his spaced-out, slacker look is.
It’s also strange how someone like him is actually an Aranzi Aronzo store manager.

Most of the patterns need to be enlarged by 125% to 150% for ultimate sizing. I scanned the pattern and enlarged it with Photoshop. You could also take the book to your local copy shop and enlarge the patterns there.

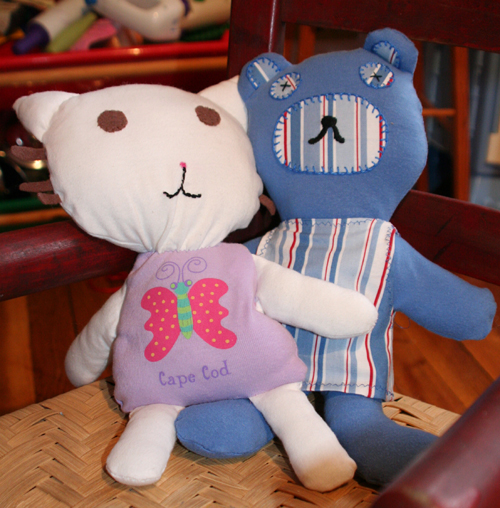
Each doll is made out of felt scraps and jersey fabric. “Jersey? Ugh, I don’t want to buy more fabric,” was my initial reaction. But then my glance fell on my Goodwill bag filled to the brim with ultra soft t-shirts from last year. So, if you have a special shirt you’d like to recycle, like Elizabeth’s Cape Cod t-shirt on the cat doll, take some shears to your clothing and create a softie. Speaking of softies, check out the softies made by the participants in our softie swap:

You can also read about them at the Flickr Crafty Daisies Softie Swap Group

Practical Denim

Tuesday, May 13th, 2008

This post features the remains of my unloved jeans that I cut up for this bag. I’ve been toying with the idea of a recycled denim bag, but was trying to come up with a variation on the theme. So here it is, a reversible bag.

jeansbag1.gif

You can either display the jeans side and make a recycled fashion statement, or you can be more low key about your lifestyle, turn the whole thing inside out and display a cool lining.

jeansbag2.gif

The jeans pockets become practical places to stash away your phone, mp3 player, glass baby bottles, in other words, all those treasures you find in your jeans pockets every day. So before you send your denims off to the Goodwill store, take a good luck at them and consider what kind of reincarnation you could create with a sharp pair of shears.

All Tied Up With A Bow

Wednesday, May 7th, 2008

img_9183web.jpg

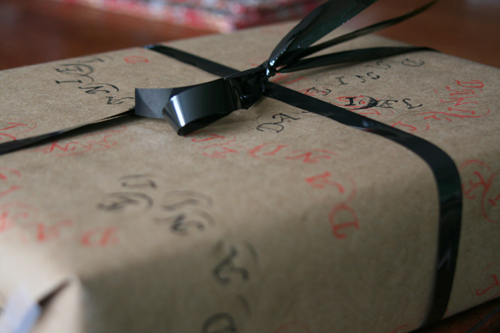
As my handiwork attests I’m a terrible stamper. I never seem to be able to avoid getting the rim of the stamp onto the paper, the ink doesn’t distribute evenly, I could go on and on. Any hints on how this is done would be greatly appreciated. However, as a concept piece and for a birthday present for a seven-year-old, I think this works: I cut out a piece of brown wrapping paper to fit the present, and then proceeded to stamp Daniel’s name all over it. For recycling purposes a brown paper bag would work equally well, but for some reason they only do plastic in NYC.

While stamping the D-A-N was still a very Zen experience, by the time I got to the I-E-L part, I was ready to pack it up. Fortunately he didn’t have a lengthy name like Balthazar. (That would have been Elizabeth’s name if my husband had had his druthers and she had been a boy.)

The bow used to be part of an exercise video tape. I got that idea from Danny Seo.

Note to self: Don’t try to remove the ribbon from the tape case five minutes before you have to leave for the party.

This ‘n That

Saturday, March 29th, 2008

mosaic3178784web.gif

Here are a couple of projects and works-in-progress currently pending at my household:

Cashmere Sweater Blanket

img_8996web.gif

This is for my grandmother for her 90th birthday. Her birthday is on March 31th. Do you think I can finish and ship it by then?

Stenciled Baby Top

img_9003web.gif

I’ve been wanting to follow Joy’s stenciling instructions for a year now. Here’s the perfect project: a tiny little shirt for my friend Vanessa who is due in April.

img_8992web.gif

My daughter became inspired by the whole process, although she deemed the color choices lacking, she did manage to pull together a cool design.

Another Vest

img_9013web.gif

There was a time when I actually finished an entire adult sweater, usually for the boy friend de jour. Then I started making children’s sweaters, again with collars and full length sleeves. Now I can’t even be bothered to start on sleeves and Elizabeth did not want a collar, which leaves me with another vest.

Elizabeth picked the colors and decided she liked stripes. I thought stripes alone were boring and went through some knitting books to try some new patterns. Now she has a stripy sampler just in time for spring.

So, what are you working on?

Sham Pillow

Friday, February 15th, 2008

I can’t believe how expensive decorative pillows are to buy!! We recently moved and I want to change some of my old pillows with new colors so I headed to my favorite aisle for inspiration- the clearance aisle at TJMaxx.

sham-pillow-finished.gif

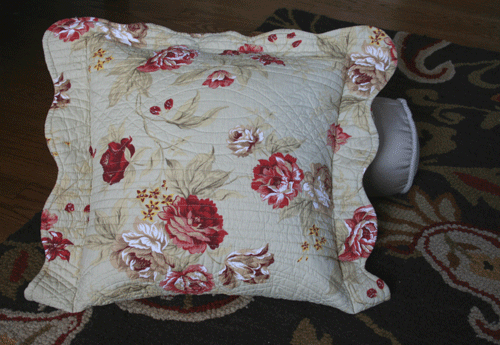
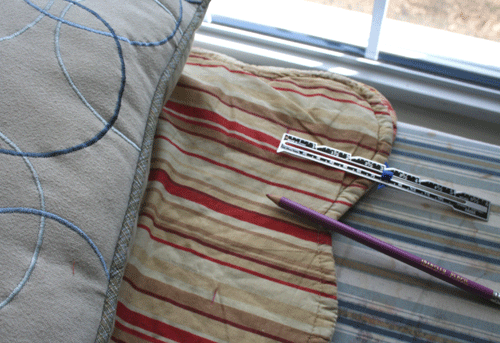
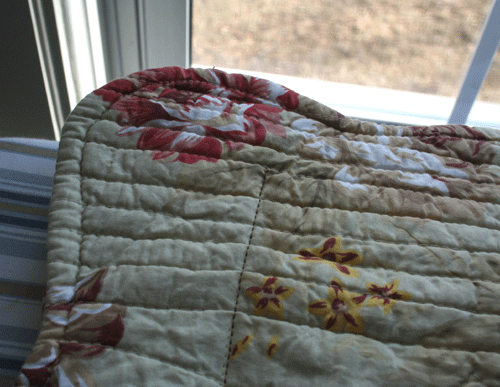
I found a single king-sized sham to make a cover for my old couch pillow. I like using shams because they are already lined, thick, and since they are quilted already have style to them. I also like to be able to take the pillow cover off and wash it since we snack alot on our couch. The sham was so long that I could fold it in half and perfectly surround my old pillow.

To make your own:
1. Fit pillow (or make one desired size) and measure how far in to make the seams. I made a mark all the way down with chalk. I liked the striped fabric the inside was lined with and the scalloped edges, so I decided to sew the seams on the right and left on the right side of the pillow sham, stopping a few inches from the top. This left a slight flap so I could see the reverse lining. (do not sew on the wrong sides as I marked to do here!)

sham-pillow-measure.gif

2. Sew down chalk line on top (right side) of sham, or on reverse side if you want to turn it inside out (like making a normal pillowcase).

sham-pillow-edge.gif

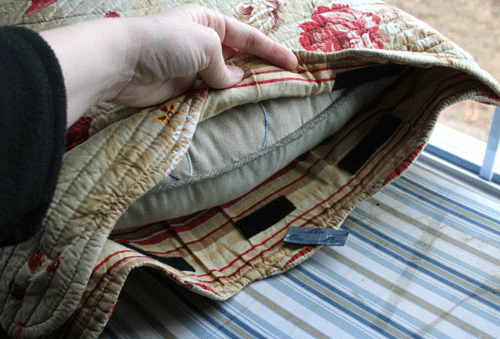
3. Measuring down on the inside along the top I used adhesive strips of velcro every few inches to attach at the top. Even though this doesn’t need to be opened every day I am going to now sew a line down the middle of the velcro because it hasn’t stuck as well as I’d hoped.

sham-pillow-stuffed.gif

I liked that this was $5 update and the recycling of my old pillow!

A Ball, A Box, A Book. . .

Monday, December 31st, 2007

ballboxbook.jpg

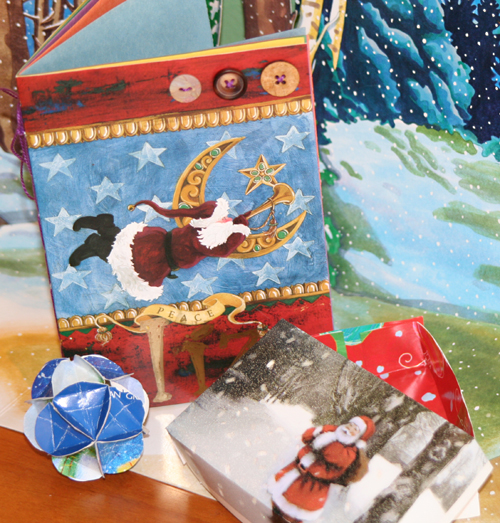
Okay, I understand, enough with the holiday theme already. However, as the year draws to a close and you are contemplating the pretty cards on your mantle, consider saving them for one of these projects:

A Ball

ball.jpg

All Free Crafts.com has a tutorial on making a ball shaped ornament out of a card. This is a fun little project that turned out better than I had expected.

A Box

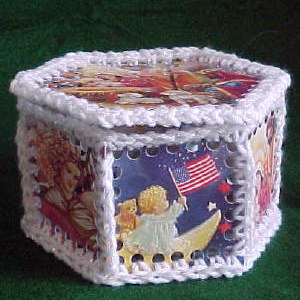
hexbox-copy.jpg

Julie Bolduc has instructions for a hexagon shaped lidded box. I actually didn’t receive enough suitable cards to make this box (16), but it looks like a cool project that you could make out of a variety of papers.

A Book

book.jpg

In July, Jennifer shared a guest posting on making a mini journal. You could follow her instructions and create a similar journal using a holiday card as a cover. The book could be left blank, you could turn it into an Advent journal with a little thought or activity for each day, or you could make a special address book for next year’s holiday cards.

A Luminary

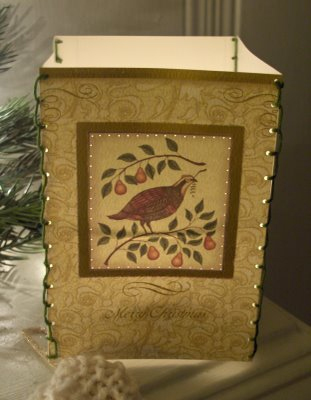
luminary.jpg

Kawaii Crafter made these pretty luminaries out of Christmas Cards. I think the picture says it all. They are the perfect thing for dreary days during the next three months, at least in the Northeast.

Other Cool Ideas

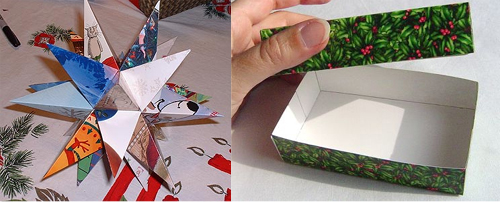
star_box.jpg

Jenny Harada made a funky star. It looks like you’ll need about 10 cards for this project.

And here is Diane Gilleland’s popular greeting card gift box as featured on her blog CraftyPod

I hope this is some inspiration to Reuse before you Recycle. Maybe you can make a little something before 2008 begins.

From all of us at Crafty Daisies: Happy New Year!

The Year of the Bag

Tuesday, November 27th, 2007

1712872128_2824a9cd25.jpg

This year has become my ‘Year of the Bag.’ In the past, I’ve usually bought a bag a year or maybe every other year. Then Kristin La Flamme’s bag pattern
caught my eye and since then my household has been inundated with bags, purses, and pouches.

496330692_b0e5bde510.jpg

Currently, my favorite pattern is the basket bag designed by Lisa Lam on her blog U-Handblog.

orangedaisies.jpg

It is the perfect size, amenable to countless variations and a great gift. I make mine out of felted sweaters, but you can obviously use any kind of sewable fabric. If you are thinking of pledging handmade gifting this year, this would make a fabulous present.

stripeddaisies.jpg

Quick Costumes

Monday, October 29th, 2007

For those of you parents who are thinking of this last minute (and I’m assuming that you are if you are reading this on Oct. 30!) I have a few ideas that are quick and also cheap! Mostly made from clothes my son already had or stuff found around the house and best of all not wasteful!

Here are just a few on my favorite model:

First, using overalls, bandana, kids’ cowboy hat, and a party favor badge- the Cowboy!
j-as-cowboy.gif

Repeating with the overalls and bandana, a train bucket and whistle, and striped hat and jacket (that I got second hand for $1!) – the Train engineer!

j-as-train-eng.gif

Camo pants, vest, fisherman hat, toy fishing pole that came with a puzzle, a small camo backpack of mine, and I cut fish out of felt and strung through twine – the Lucky Sportsman!

j-as-fisher.gif

Why not borrow from another holiday? Green sweatpants, a red shirt inside out with felt cut out collar (also good on green for Kermit), a red gift bag or stocking for candy, green shoes, and a dollar store elf hat (which I would pin smaller) – the Cutest Little Elf!

j-as-elf.gif

Or try getting use out of that suit bought just for a wedding or Easter – carry a Bible and go as a Preacher, put on a campaign button and be a Politician, a bow tie, beard, and book as a Professor, a little suitcase as a salesman!

I saw a few other inspiring ideas on the Today show last week like a:
Train Conductor costume - a dark 3-piece suit with a pocket watch chain and piece of gold braiding glued on a hat with toy train in hand.
Cheerleader or Football player - with mop heads for pom pons and colorful electrical tape for uniform stripes and numbers.

Remember it just needs to be fun, cute, and easy for the child to wear. I like to dress my child up as something he can be when he grows up since he wants to copy his dad so much anyway. I like cute and simple better than scary! So look through the kid’s dresser and pair things together you wouldn’t normally. It will be fun to dig together and get their imagination going too!

Any other ideas you want to share?

Pumpkin Coffee Canister

Friday, October 19th, 2007
pumpkincan7.jpg

Don’t know what to do with those empty coffee canisters? Turn them into pumpkins! My mom used to do this and they make great fall decorations and you can fill them with just about anything, or give them to the kids to use for trick-or-treating. Even if you’re not a crafty person, this project is easy and quick and virtually fool-proof.

Supplies needed:

Empty metal cans
Two different shades of acrylic orange paint
Black acrylic paint
Pencil
Sponge or sponge brush
Small paint brush or small sponge
Paper plate
nail and hammer, or electric drill and bit
Craft wire or a wire coat hangar

1) You’ll first peel the packaging off the can, and wash with soapy water to remove any residue; dry completely.

2) Drill two holes (or use the nail and hammer) about an inch below the rim on opposite sides of each other to place the handle. Be careful handling the can afterwards – the holes will be sharp on the inside, so you may want to file them down a bit.

pumpkincan1.jpg

3) Take the darker color orange paint and pour a little into the paper plate, then sponge the paint over the outer surface of the can. You can brush it on first if you like and them dab it to create texture. Let the paint dry completely.

pumpkincan2.jpg

4) Take the lighter color orange paint, pour a little into the paper place, and then using the sponge dab it into both colors and sponge onto the can, creating more texture and a more saturated color. Let the paint dry completely.

pumpkincan3.jpg
 
pumpkincan4.jpg

5) Using your pencil, draw on the eyes, nose, and mouth, using whatever template you already have or whatever’s in your minds eye. Then fill in with the black paint (in the same manner – sponging it on or dabbing it with a paint brush). You may need to do two coats so no orange shoes through.

pumpkincan5.jpg

6) The final step is attaching your handle. If you have a wire coat hangar around you may certainly use this, but you must also have pliers or a big, strong man to help twist the wire. Since I had a coat hangar, I decided to use one, but using craft wire may be the easiest to work with. You’ll stick one end through one of the holes, and twist it at the sides to keep it in the hole. Then you’ll do it from the other side.

pumpkincan6.jpg
 
pumpkincan8.jpg

To protect yourself from being poked by the sharp ends, you may want to sand them down a smidge. Then place on a mantle or table and voila! A pumpkin coffee canister that can hold cookies, candies, potpourri or even your art supplies.