
Winter blues got you down? I’ve been there too. Those long January days can feel endless, especially once the holiday excitement fades.
Luckily, I’ve found the activities that anyone can do at home with basic supplies. No fancy art degree is needed!
In this article, I’ll walk you through each project step-by-step. You’ll find everything from watercolor winter landscapes to recycled paper crafts that look good on your walls.
I’ve tested these projects with my family and friends (even those who swear they “can’t draw a stick figure”). Everyone found something they could create and enjoy.
These projects won’t just brighten your home—they’ll lift your mood during the darkest month of the year. Trust me, there’s something magical about creating something with your own hands.
Supplies You’ll Need
Before we begin our January art projects, let’s discuss what you’ll need. I’ve kept these projects simple on purpose, and you probably already have many of these items at home.
List of common materials for DIY art projects
- Watercolor paints (basic set)
- Drawing paper or watercolor paper
- Paintbrushes (thin and thick)
- Scissors
- White glue or craft glue
- Markers or colored pencils
- Old magazines or gift wrap
- Cardboard from boxes
- Mason jars or glass containers
- String or yarn
- Tea lights
Don’t worry if you’re missing something. These projects are flexible, so you can swap materials or skip certain steps.
My 8-year-old niece completed all these projects with me last winter. If she can do it, so can you.
Tips for finding affordable supplies
Where should you shop? I never pay full price for art supplies.
Dollar stores carry many basics at great prices. Check thrift shops for yarn, fabric scraps, and frames.
Have you tried asking friends or neighbors? Many people have craft supplies gathering dust.
Look for after-holiday clearance sales this month. That’s when I stock up for the whole year.
Remember – beautiful art doesn’t require expensive materials. It’s about creativity, not cost.
What project are you excited to try first?
DIY Project Ideas
Project 1- Winter-Themed Wall Art
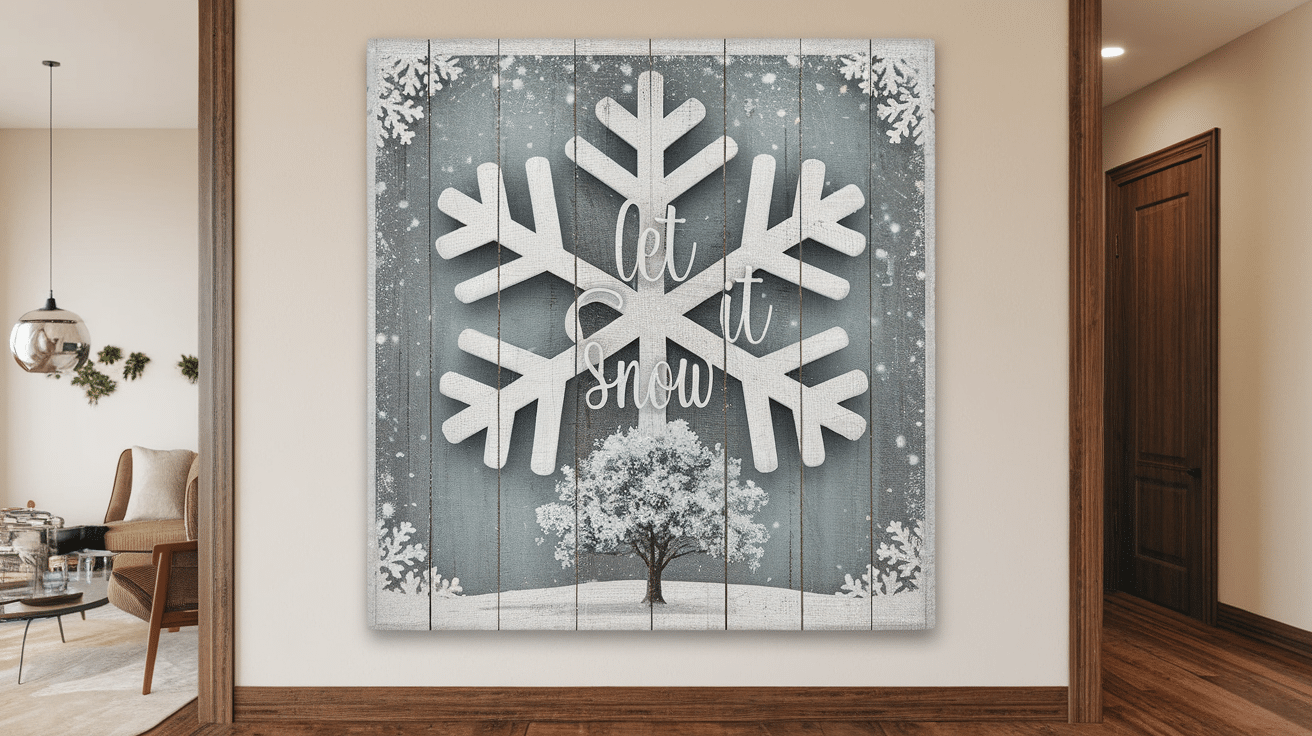
Ready to brighten your walls with some seasonal charm? This winter-themed art project is one of my favorites. It captures the quiet beauty of the season without being too “holiday-specific.”
Materials Needed
- Watercolor paper (thick paper works best)
- Blue, white, and silver watercolor paints
- Round paintbrush (medium size)
- Fine-tipped black marker or pen
- White gel pen or white paint marker
- Picture frame (optional)
- Reference photos of winter trees (optional)
Simple Steps to Create a Cozy, Seasonal Piece
- Prep your paper: Lightly dampen your watercolor paper with a clean brush and water. This helps the colors flow better.
- Create your background: Mix light blue watercolor paint with plenty of water. Brush it across your paper in gentle, horizontal strokes. Let some areas stay lighter than others for a sky effect.
- Add depth: While the background is still damp, add a few spots of slightly darker blue. Let the colors blend naturally.
- Let it dry completely: This is important! Your next steps won’t work on wet paper.
- Sketch your trees: Use your black pen or marker to draw simple tree silhouettes. Don’t worry about making them perfect—real trees aren’t perfect either! Start with the trunk, then add branches reaching upward.
- Add winter magic: Use a white gel pen or paint marker to make small dots for falling snow. You can also add highlights on tree branches.
- Frame it up: Once dry, trim if needed and place in a frame for a finished look.
The beauty of this project is its simplicity. Even if you’ve never painted, you can create something that captures winter’s peaceful mood. Each piece is unique—just like a real winter day.
Project 2- Hand-Painted Mugs

Transform plain mugs into personal works of art that brighten your morning coffee ritual. This project makes a perfect weekend activity when it’s too cold to venture outside.
What You’ll Need:
- Plain white ceramic mugs
- Oil-based paint markers (Sharpie brand works well)
- Rubbing alcohol for cleaning
- Oven
- Paper towels
Instructions for Painting and Sealing Designs
- Prep your mugs: Wash them thoroughly with soap and water, then wipe with rubbing alcohol to remove any oils or residue. Let dry completely.
- Plan your design: I like to sketch ideas on paper first. Keep it simple – intricate designs can be tricky on curved surfaces.
- Start painting: Hold the mug steady and apply your design with the paint markers. Work slowly – these markers can’t be erased once they dry!
- Let dry: Allow your design to air dry for at least 24 hours.
- Seal your artwork: Place the mugs in a cold oven and set the temperature to 350°F. Once heated, bake for 30 minutes. Please turn off the oven and let the mugs cool completely inside before removing them.
- Care instructions: Hand wash your mugs rather than using the dishwasher to preserve your designs longer.
Suggestions for Seasonal or Inspirational Motifs
- Winter themes: Snowflakes, bare trees, cozy cabins, or simple mountain landscapes
- Warm thoughts: Sunshine, hearts, or “warm wishes” text for cold January days
- Inspirational words: “Begin,” “Create,” or “New Day” can set a positive tone for the year
- Geometric patterns: Simple dots, lines, or triangles in winter colors
- Personalized gifts: Names or initials for family members or friends
I made a set of these last January with small constellations on each mug. They still look great a year later and always spark conversations when friends visit.
Remember that less is more with this project. A beautiful snowflake or simple word can look more professional than covering the entire mug.
Project 3- Personalized Calendars

Start the year right with a custom calendar that’s both practical and beautiful. This project lets you display your creativity all year while keeping track of important dates.
Materials Needed
- Card stock or thick paper (white or light colors work best)
- Ruler and pencil
- Fine-tip markers or pens
- Watercolors, colored pencils, or markers for decorating
- Hole punch
- String, ribbon, or metal rings to bind pages
- Optional: stickers, washi tape, or pressed flowers for embellishments
How to Create Your Custom Calendar
- Design your template: First, decide on your calendar size. I recommend 8.5 x 11 inches for a wall calendar or 5 x 7 inches for a desk version.
- Create your grid: For each month, use your ruler to draw a 7-column grid (for days of the week) with enough rows for all the dates. Leave space at the top of each page for the month’s name and decorations.
- Mark your dates: Add numbers for each day of the month. Remember to check which day each month starts in 2025!
- Add personal touches. This is where the fun begins! Decorate each month with:
- Seasonal colors and images
- Birthday reminders
- Holiday decorations
- Inspirational quotes
- Small sketches that represent each month
My favorite part is highlighting special dates with little drawings. A tiny cake for birthdays, hearts for anniversaries, or flowers for spring events makes your calendar truly personal.
These calendars also make thoughtful gifts. I made one for my mom last January with family photos sketched for each month – she still mentions how much she loves it!
Project 4- Miniature Acrylic Paintings
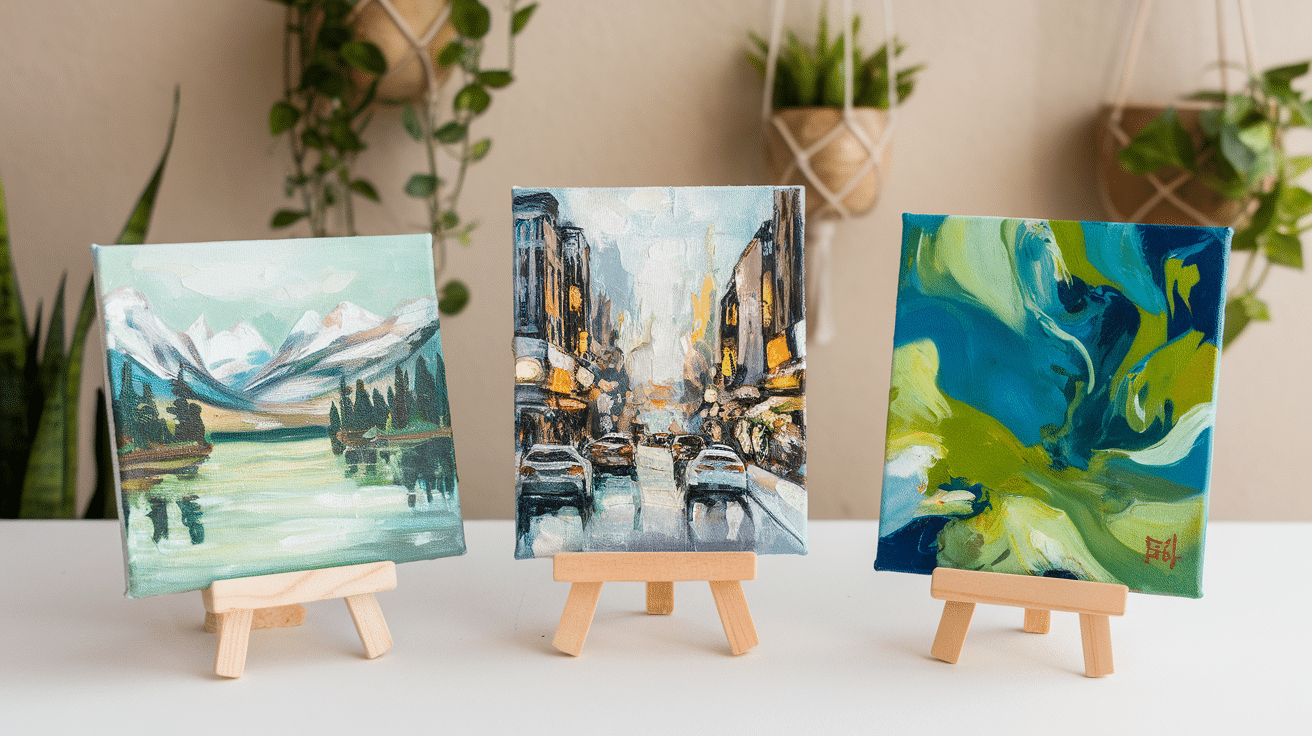
Small canvases, big impact! These tiny masterpieces are perfect for brightening up small spaces or giving as meaningful gifts.
Even better, they’re quick to complete, giving you the satisfaction of finishing a project in one sitting.
Materials needed
- Mini canvases (3×3 or 4×4 inches)
- Acrylic paints in various colors
- Small paintbrushes (detail, flat, and round)
- Cup of water for rinsing
- Paper towels
- Pencil for sketching ideas
- Optional: miniature easels for display
- Optional: clear acrylic sealer spray
Creating Your Miniature Masterpieces
- Start with a plan: Sketch your idea lightly on the canvas with a pencil. Simple subjects work best for small spaces – think single objects, simplified landscapes, or abstract patterns.
- Begin with background colors: Paint the largest areas first, using thin layers. Acrylics dry quickly, so you won’t need to wait long between coats.
- Add middle-ground elements: Once your background is dry, add the middle parts of your scene or subject.
- Finish with details: Use your smallest brush to add highlights, shadows, and fine lines. These finishing touches bring your tiny painting to life!
- Let dry completely: Acrylic paint typically dries to the touch within 20-30 minutes, but I like to give it a few hours to be safe.
- Display with pride. Miniature easels make perfect stands for your tiny art. You can also create a gallery wall with several miniature paintings grouped.
I love creating sets of these with related themes – the four seasons, different flowers from my garden, or abstract studies in similar color palettes.
The best part about mini paintings is that if you don’t love how one turns out, you haven’t wasted much time or materials. Just flip it over or paint over it and start fresh!
Project 5- Custom Tote Bags
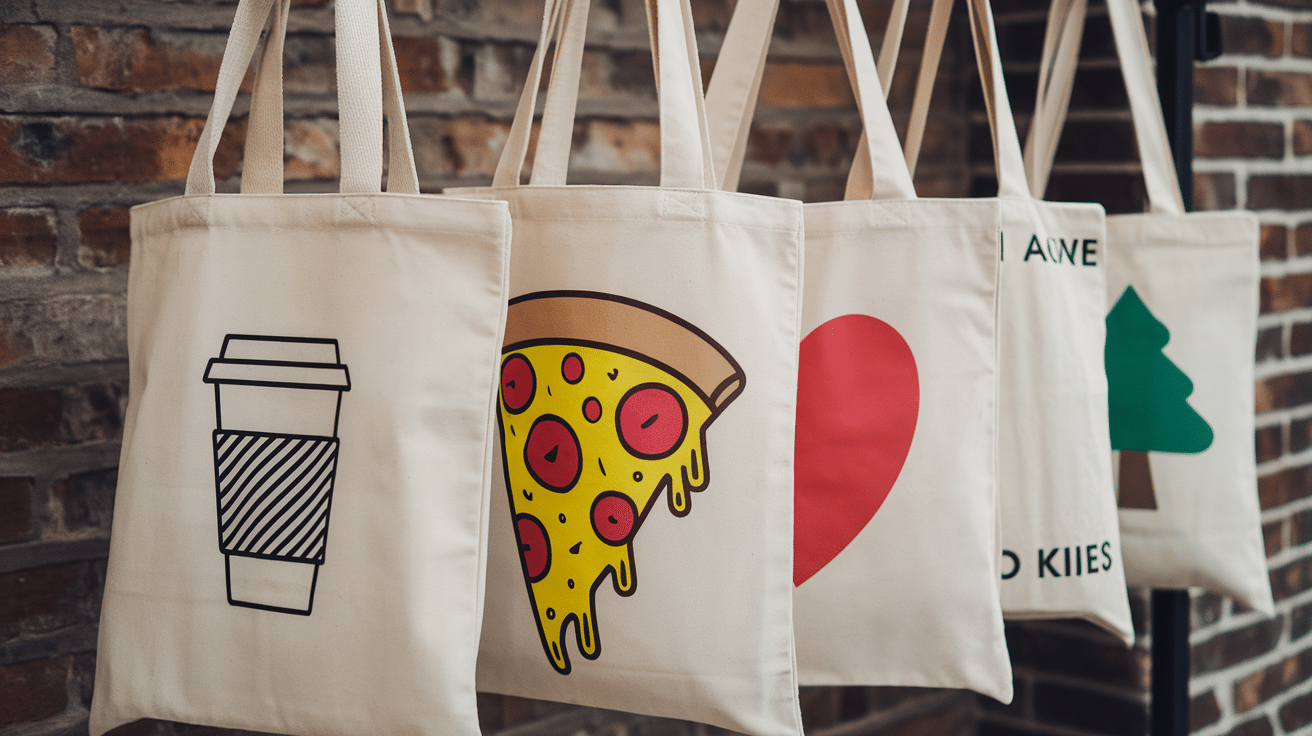
Turn plain canvas bags into personalized works of art you’ll actually use! This project combines creativity with practicality – perfect for grocery shopping, library visits, or just showing off your artistic skills.
Materials needed
- Plain canvas tote bags (natural or white color works best)
- Fabric paint or textile markers
- Cardboard (to insert inside the bag)
- Paintbrushes (various sizes)
- Pencil for sketching
- Paper for testing designs
- Iron
- Optional: fabric stamps, stencils, or sponges
- Optional: fabric glue and embellishments like buttons or patches
Creating your custom tote
- Prep your bag: Wash and dry your tote first to remove any coatings. Iron it flat for an easier painting surface.
- Insert cardboard: Place a piece of cardboard inside the bag to prevent paint from bleeding through to the other side.
- Plan your design: Sketch ideas on paper before committing to the bag. Simple, bold designs usually look best and last longer.
- Transfer your design: Lightly sketch your design on the bag with a pencil. Keep designs at least 1-2 inches from the edges and handles.
- Start painting: Apply fabric paint with brushes, sponges, or stamps. Work from larger areas to smaller details. Let each color dry before adding adjacent colors.
- Add finishing touches: Once the base design is dry, add any final details, outlines, or text.
- Set the design. Follow the instructions on your fabric paint – most require heat-setting with an iron after 24 hours of drying time.
I made winter-themed totes with simple snowflake patterns last January, but you could also try:
- Your favorite inspirational quote
- A pattern of small repeated shapes
- Simple landscape silhouettes
- Abstract designs that showcase your favorite colors
- Monograms or name designs
These bags make great gifts, and people are always impressed when you tell them you made it yourself!
Project 6- Decorative Candles
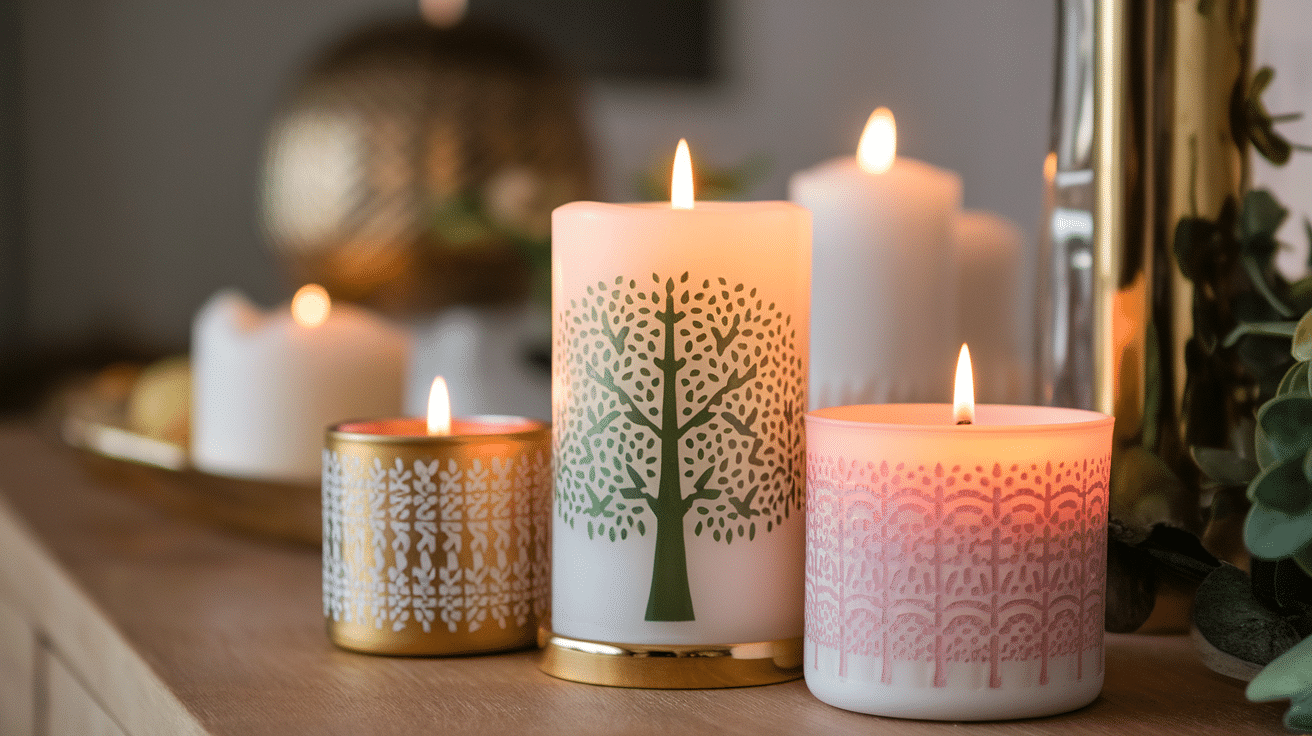
With this simple yet elegant project, transform plain candles into stunning home decor. These custom candles create the perfect cozy atmosphere for those long January evenings.
Materials needed
- Plain pillar candles (white or cream work best)
- Tissue paper with designs or patterns
- Scissors
- White craft glue or Mod Podge
- Small paintbrush
- Paper towels
- Optional: dried herbs, flowers, or spices
- Optional: ribbon, twine, or decorative string
- Optional: clear wax paper
Creating your decorative candles
- Prep your workspace: Cover your table with newspaper or a craft mat. This project can get a bit messy!
- Cut your tissue paper: Decide what design you want on your candle. Cut the tissue paper to fit around the candle with a small overlap.
- Mix your adhesive: In a small bowl, mix equal parts white glue and water until smooth.
- Apply the tissue paper: Brush a thin layer of glue mixture onto the candle. Carefully wrap the tissue paper around, smoothing out air bubbles as you go.
- Seal the design: Apply another thin layer of glue mixture over the tissue paper. Work gently to avoid tearing.
- Let it dry completely: This usually takes 1-2 hours. The candle will look cloudy at first but will dry clear.
- Add finishing touches: Wrap twine or ribbon around the candle or attach small dried flowers for extra detail.
I love making these with tissue paper that has snowflake patterns or delicate botanical prints. The light shines through beautifully when the candle burns, creating a magical glow.
Safety tip: These candles are for decoration only. Never leave burning candles unattended, and keep the flame away from the tissue paper decorations.
These make thoughtful housewarming gifts or add a personal touch to your winter decor. Best of all, they’re much cheaper than fancy store-bought candles!
Project 7- Hand-Stamped Stationery

Create beautiful custom stationery that makes writing notes and letters a joy. This project brings a personal touch to your communications during a month when many of us are stuck indoors.
Materials Needed
- Blank cards and envelopes (white or light colors work best)
- Stamps (store-bought or homemade)
- Stamp pads in your favorite colors
- Scrap paper for testing
- Pencil and ruler
- Baby wipes for quick cleanup
- Optional: embossing powder and heat tool
- Optional: markers for adding details
- Optional: stickers or washi tape for embellishments
Creating Your Custom Stationery
- Plan your design: Decide on a pattern or layout before stamping. Simple borders, corner designs, or center motifs work beautifully.
- Practice first: Test your stamps on scrap paper to get a feel for the pressure needed and how the ink transfers.
- Mark guidelines: Use a pencil to mark where you want your stamps to go lightly. This helps create even borders or patterns.
- Start stamping: Press your stamp firmly onto the ink pad, then onto your paper with even pressure. Don’t rock the stamp, as this can cause smudging.
- Let the ink dry: This only takes a few minutes, but it’s important to avoid smearing.
- Add details: Once your stamped design is dry, you can add hand-drawn elements with fine-tip markers if desired.
- Store properly: Keep your finished stationery in a folder or box to protect it until use.
I like making winter-themed stationery with simple snowflake stamps in silver or blue ink. You could also try nature motifs, geometric patterns, or meaningful symbols.
No stamps? No problem! You can create your own using craft foam, cardboard, wine corks, or even carved potatoes.
Cut your design into the material, attach it to a block of wood for easier handling, and you’ve got a custom stamp!
These handmade cards make receiving mail special again. In a world of texts and emails, a hand-stamped note shows you truly care.
Project 8- Fabric Wall Hangings
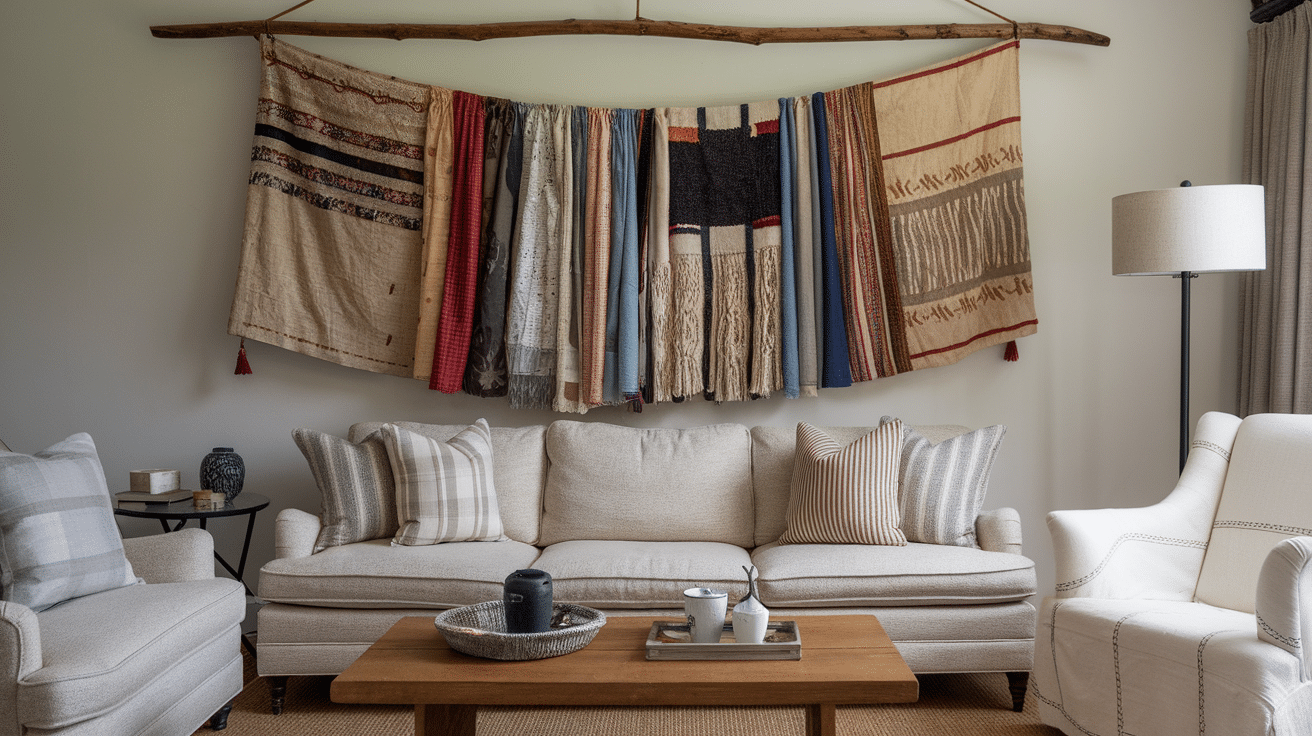
Add warmth and texture to your January walls with these simple fabric hangings. This no-sew project creates impressive art without any complicated crafting skills.
Materials Needed
- Wooden dowel or driftwood piece (12-24 inches long)
- Fabric scraps in complementary colors
- Yarn, string, or embroidery floss
- Scissors
- Hot glue gun and glue sticks
- Measuring tape
- Optional: beads, bells, or other small embellishments
- Optional: fabric paint or markers
Creating Your Wall Hanging
- Choose your base: To hang your fabric, select a wooden dowel or piece of driftwood. Natural materials add a nice organic touch.
- Cut your fabric: Tear or cut strips of fabric in varying lengths. For a good variety, I like to make mine between 12 and 24 inches long and 1 and 3 inches wide.
- Plan your pattern: Arrange your fabric strips in the order you want them to hang. Play with colors and textures to create an interesting mix.
- Attach the strips: Fold each fabric strip in half. Place the folded middle behind the dowel, bring the ends forward over the dowel, then pull them through the loop created by the fold. Pull tight to secure.
- Add yarn elements: Mix in some yarn pieces using the same loop technique for textural contrast.
- Create a hanger: Tie a piece of yarn or string to each end of your dowel to create a hanging loop.
- Add finishing touches: Trim the bottom into a V-shape or straight across, depending on your preference. Add beads or other embellishments if desired.
This project is incredibly forgiving—there’s no “wrong” way to arrange your fabrics. I made one using leftover blue, white, and silver fabrics, which gives my living room a peaceful winter feel.
These hangings add a cozy, handmade element to rooms that can feel stark after holiday decorations come down. Plus, they’re a perfect way to use up fabric scraps from other projects!
Project 9- Photo Collage Art
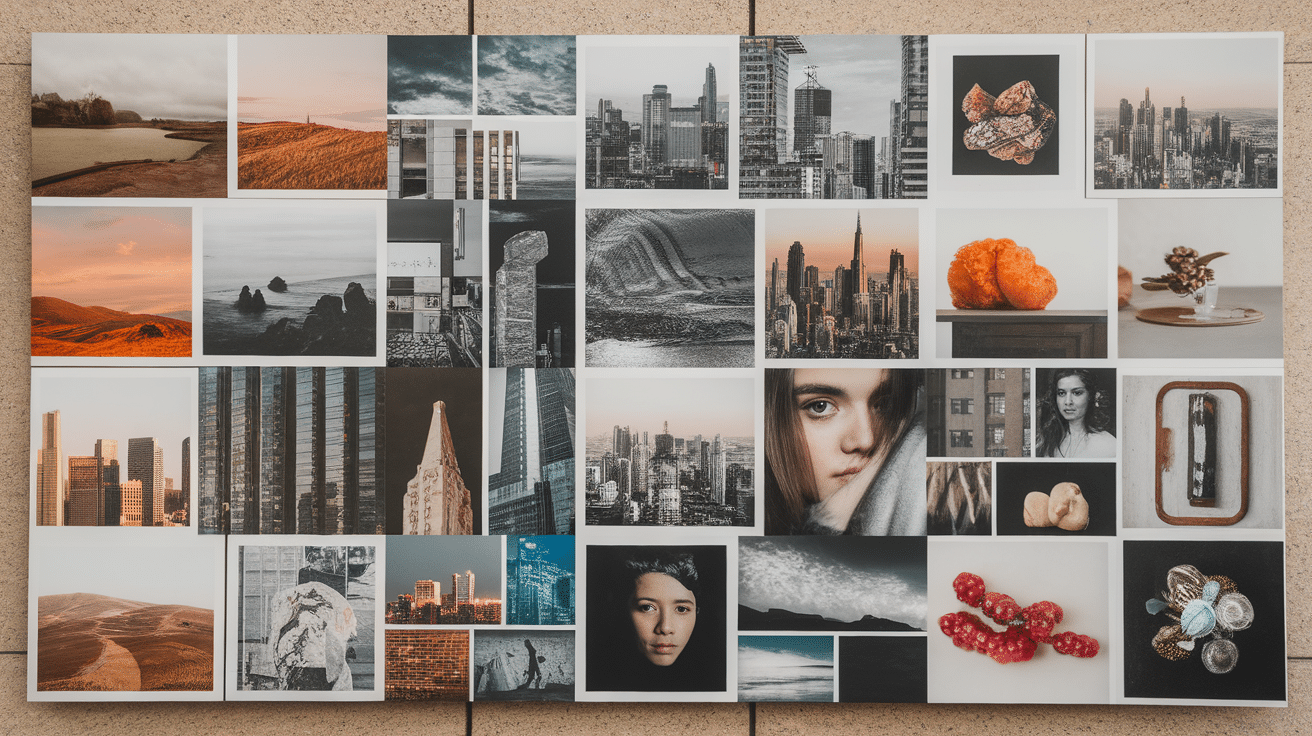
Transform your favorite photos into a creative wall display that is perfect for brightening up those January days. This project lets you showcase memories while creating something truly unique.
Materials Needed
- Printed photos (color or black and white)
- Foam board, canvas, or thick cardstock for backing
- Scissors
- Craft glue or Mod Podge
- Paintbrush for applying glue
- Ruler
- Pencil
- Optional: decorative paper for background or borders
- Optional: markers, paint, or stickers for embellishments
- Optional: picture frame
Creating Your Photo Collage
- Select your photos: Choose images that tell a story or share a common theme. Winter memories, family gatherings, or nature shots work beautifully for January projects.
- Prep your base: Cut your backing board to the size you want. If using decorative paper as a background, glue it to your board now and let it dry.
- Plan your layout: Arrange photos on your board before gluing. Try different patterns – overlapping edges, grid patterns, or free-form arrangements all create different effects.
- Trim as needed: If desired, cut photos into different shapes. You can remove backgrounds, crop to focus on faces, or cut into geometric shapes.
- Secure your design: Once you’re happy with the arrangement, glue each photo in place. Work from the center outward to maintain your layout.
- Add finishing touches: Write captions, dates, or memories with markers. If desired, add small decorative elements in empty spaces.
- Seal your work: For extra durability, brush a thin layer of Mod Podge over the entire collage. This creates a protective finish and unifies the look.
I created one of these using photos from last winter’s adventures – hiking trails, snow days, and evenings by the fire. Looking at it reminds me that winter can be beautiful, even on the dreariest January days.
These collages make meaningful gifts for birthdays or anniversaries in January when people might need an emotional boost after the holiday season ends.
Project 10- Painted Rocks or Pebbles
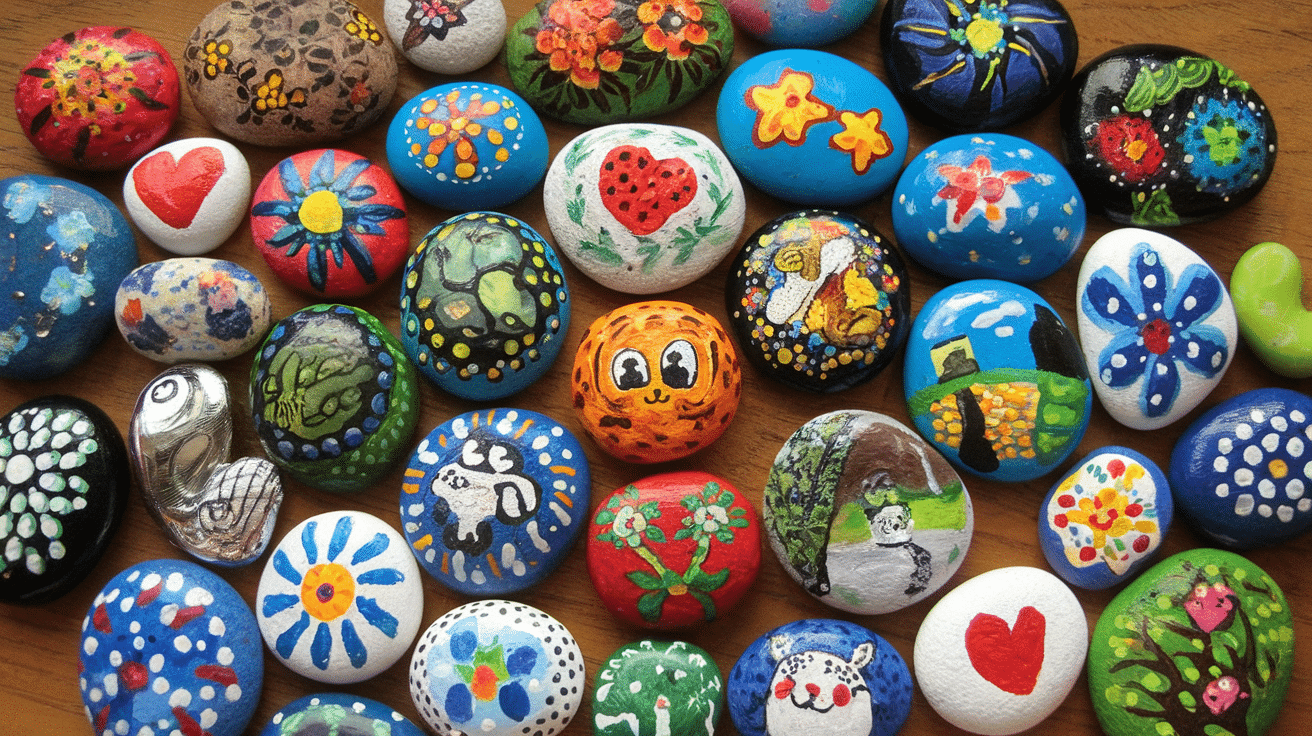
I love painted rocks. They bring joy to any space. You might think they’re just stones, but they’re so much more.
With a few supplies and some creativity, ordinary pebbles transform into tiny works of art. Magic in your hands!
Painted rocks work perfectly as indoor decorations. Place them on bookshelves, desks, or windowsills. But they shine just as brightly outside! Scatter them throughout your garden for surprising pops of color.
What You’ll Need
- Smooth rocks or pebbles (different sizes)
- Acrylic paints
- Paintbrushes (thin and thick)
- Clear sealer or Mod Podge
- Pencil for sketching designs
- Optional: paint pens for details
Fun Design Ideas
Animals are always winners. Try painting ladybugs, bees, or turtles. Their simple shapes make them perfect for beginners.
Words have power. Paint stones with single words like “Hope,” “Dream,” or “Smile.” Place them where you’ll see them daily for inspiration.
Patterns catch the eye. Dots, stripes, or swirls create stunning effects. No artistic experience is needed!
Garden rocks can be practical, too. Paint plant names on stones and use them as markers.
Tips for Success
- Wash and dry the rocks completely before painting.
- Apply a base coat of white or light color for brighter designs.
- Let each layer dry before adding the next color.
- Finish with a sealer to protect your art from the weather.
Have fun with this project! Each rock becomes its tiny canvas. What will you create first?
Project 11- Recycled Jar Lanterns
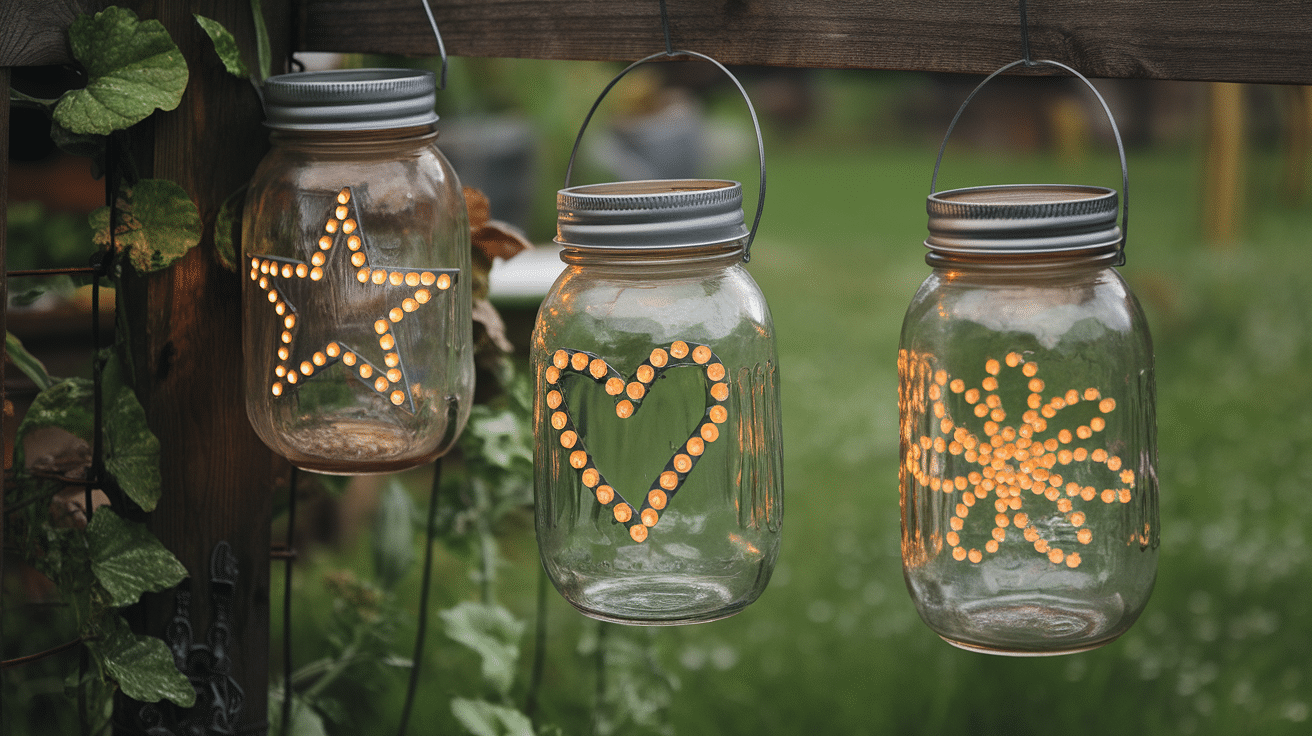
Don’t throw those jars away! They have hidden potential. You might see trash, but I see magical light catchers waiting to happen.
With just a few tweaks, empty jars can transform into beautiful lanterns. The glow they create is worth the effort.
These lanterns work perfectly indoors or out. Hang them from trees for summer parties, line them along a walkway, or put them on your table for a special dinner. The possibilities are endless.
What You’ll Need
- Clean glass jars (any size)
- Wire for hanging handles
- Tea lights or battery-operated candles
- Decorative materials (your choice):
- Tissue paper
- Paint
- Glitter
- Lace or ribbon
- Mod Podge or craft glue
Design Ideas
The stained glass effect is stunning and simple. Cut colorful tissue paper into shapes, then glue them to the outside of your jar. The light shines through beautifully.
Frosted look: creates a soft glow. Mix white glue with a little water and paint the outside. While wet, sprinkle with salt or sugar for texture.
Painted patterns make each lantern unique. Try dots, stars, or swirling designs. Let your creativity flow!
Safety Tips
- Never leave real candles burning unattended.
- For kids’ projects, use battery-operated lights only.
- Keep lanterns away from flammable materials.
- For outdoor use, make sure decorations are waterproof.
Imagine your backyard lit up with these glowing treasures or your dinner table with soft, flickering light. What will you create with your recycled jars?
Conclusion
Crafting connects us. It brings joy through simple materials and creative energy. You’ve now explored 11 different projects to try, each offering something special.
From painted rocks to jar lanterns, these crafts transform ordinary objects into extraordinary creations. The magic happens in your hands.
What I love most about these projects is their accessibility. No fancy tools or expert skills are required—just curiosity and a willingness to try.
Start small. Choose one project that speaks to you. Gather your materials and set aside some time. The process matters more than perfection.
Remember that crafting benefits go beyond the finished product – it reduces stress, boosts creativity, creates meaningful gifts, provides screen-free activities, and builds confidence. Your crafting journey is personal.
Some projects will challenge you. Others will flow easily. All of them offer chances to learn and grow. Which project will you try first? Are the painted rocks waiting for your designs? Or perhaps those empty jars calling to be transformed into glowing lanterns?
The choice is yours. Happy crafting!