

Blocking acrylic yarn is a great way to improve the look and shape of your finished crochet or knitting projects.
Many crafters wonder if acrylic yarn can be blocked since it does not behave like natural fibers such as wool or cotton. The good news is that acrylic yarn can be blocked using special methods that help set its shape and give it a polished finish.
This guide will explain different blocking techniques, including steam blocking, hair dryer blocking, and wet blocking.
You will also learn about the tools needed, precautions to take, and the benefits of blocking acrylic yarn. With the right approach, you can enhance the appearance, drape, and stitch definition of your acrylic projects.
Understanding Acrylic Yarn
Acrylic yarn is made from synthetic fibers rather than natural materials like wool or cotton. It is known for being durable, affordable, and resistant to shrinking. Unlike natural fibers, acrylic does not absorb water, so traditional wet blocking is less effective.
Because acrylic is plastic-based, it reacts to heat rather than moisture. Applying controlled heat allows the fibers to relax and take on a new shape. Too much heat, however, can permanently damage the yarn. This is why it is important to use safe blocking techniques.
Composition and Properties
Acrylic yarn is made from polymer-based fibers, which give it strength and flexibility. It holds its shape well and does not shrink or felt when washed. This makes it a popular choice for long-lasting projects.
Since acrylic does not have the same elasticity as wool, it requires different handling when blocking. Instead of relying on water absorption, blocking acrylic involves applying heat to soften and reshape the fibers.
Differences from Natural Fibers
Wool and cotton respond well to traditional wet blocking because they absorb water and reshape easily. Acrylic yarn repels water, so soaking it does not have the same effect.
Steam blocking and other heat-based methods work better for acrylic because they relax the fibers, allowing them to be reshaped. The key is to use the right amount of heat without damaging the yarn.
Tools and Materials Needed
Having the right tools makes blocking easier and more effective. Each item helps shape the project, maintain even tension, and prevent damage. Using proper materials ensures a professional finish and long-lasting results.
- Blocking Boards or Mats: Blocking boards or mats provide a flat surface for pinning the project in place. They help maintain the correct shape and prevent fabric from shifting.
- T-Pins or Rust-Proof Pins: Pins secure the fabric while it sets. T-pins are strong and work well for thicker yarns, while rust-proof pins prevent staining on light-colored projects.
- Measuring Tape: A measuring tape ensures that the project is shaped evenly. Checking dimensions while pinning helps keep edges straight and maintains consistency.
- Steam Iron, Garment Steamer, or Hair Dryer: These tools provide heat to relax acrylic fibers and set the shape of the project. A garment steamer or steam iron helps soften the yarn, allowing it to hold its new shape.
Effective Blocking Methods for Acrylic Yarn
Blocking acrylic yarn can be done in several ways. Each method has its own advantages depending on the project and the level of shaping needed.
Steam Blocking
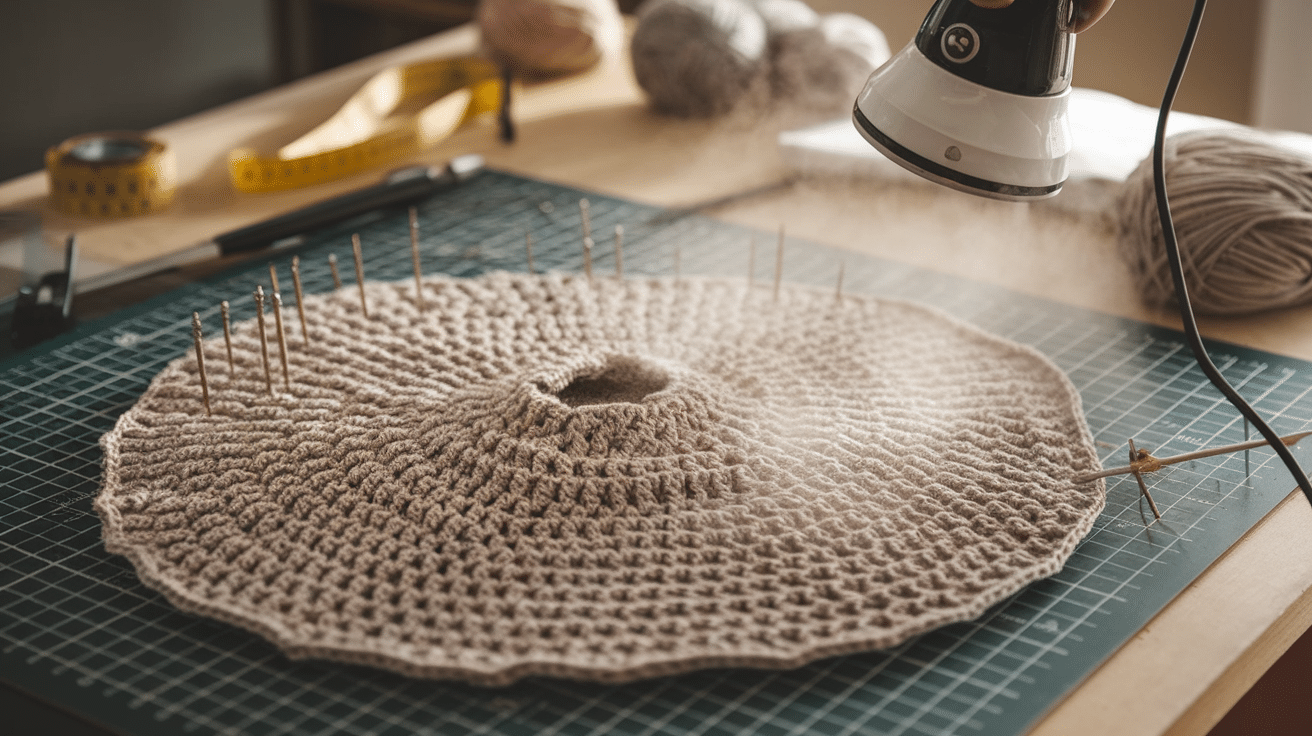
Steam blocking is one of the most reliable methods for acrylic yarn. The heat from the steam helps the fibers relax and hold a new shape.
Pin the project onto a blocking board, making sure it is shaped as desired. Hold a steam iron or garment steamer a few inches above the fabric and release steam over the surface. Avoid touching the yarn with the iron, as direct heat can melt the fibers.
Allow the project to cool completely before removing the pins. Once dry, the stitches will stay in place. This method works well for projects that need crisp edges and well-defined stitches.
Hair Dryer Method
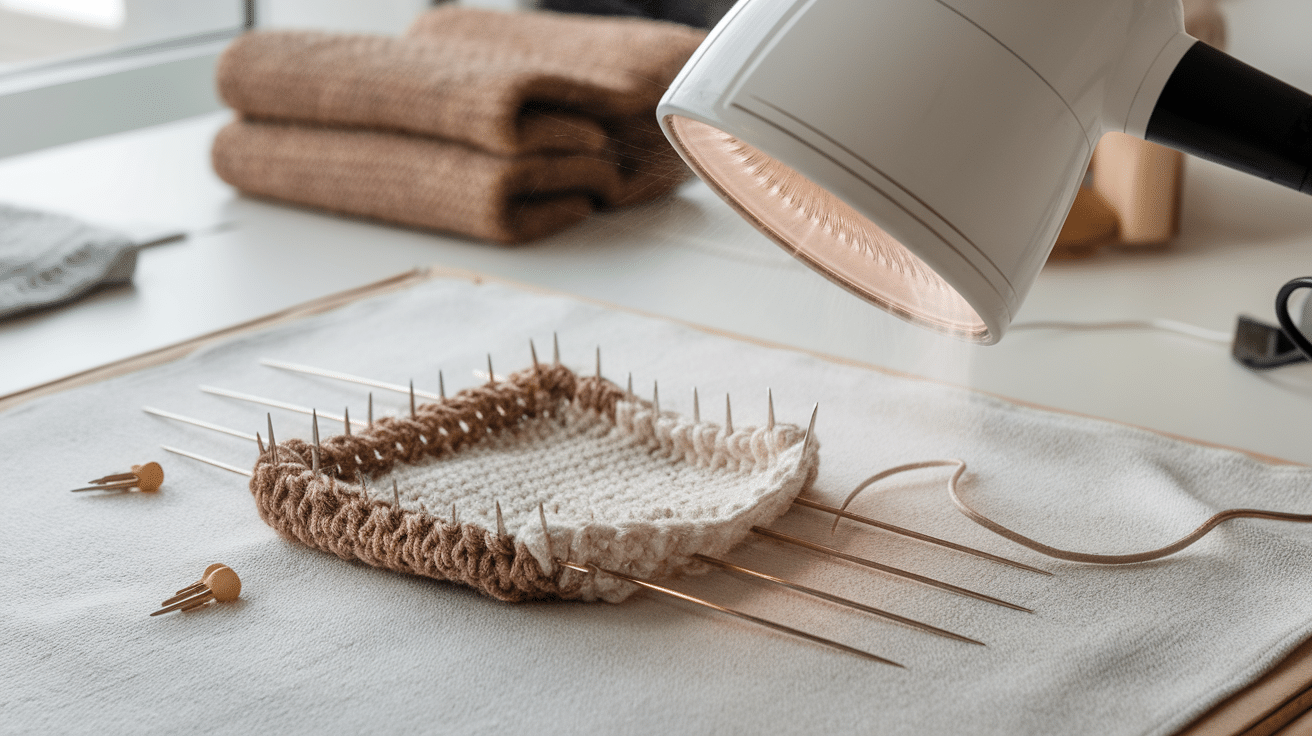
A hairdryer can also be used to block acrylic yarn. This method is similar to steam blocking but does not require a steam iron.
Pin the project into shape on a flat surface. Use a hair dryer on high heat, keeping it several inches away from the fabric. Move the dryer evenly across the piece until the fibers relax. Allow the project to cool before unpinning.
This method is useful for small projects or for those who do not have a steamer. It provides a quick way to set stitches without extra equipment.
Wet Blocking
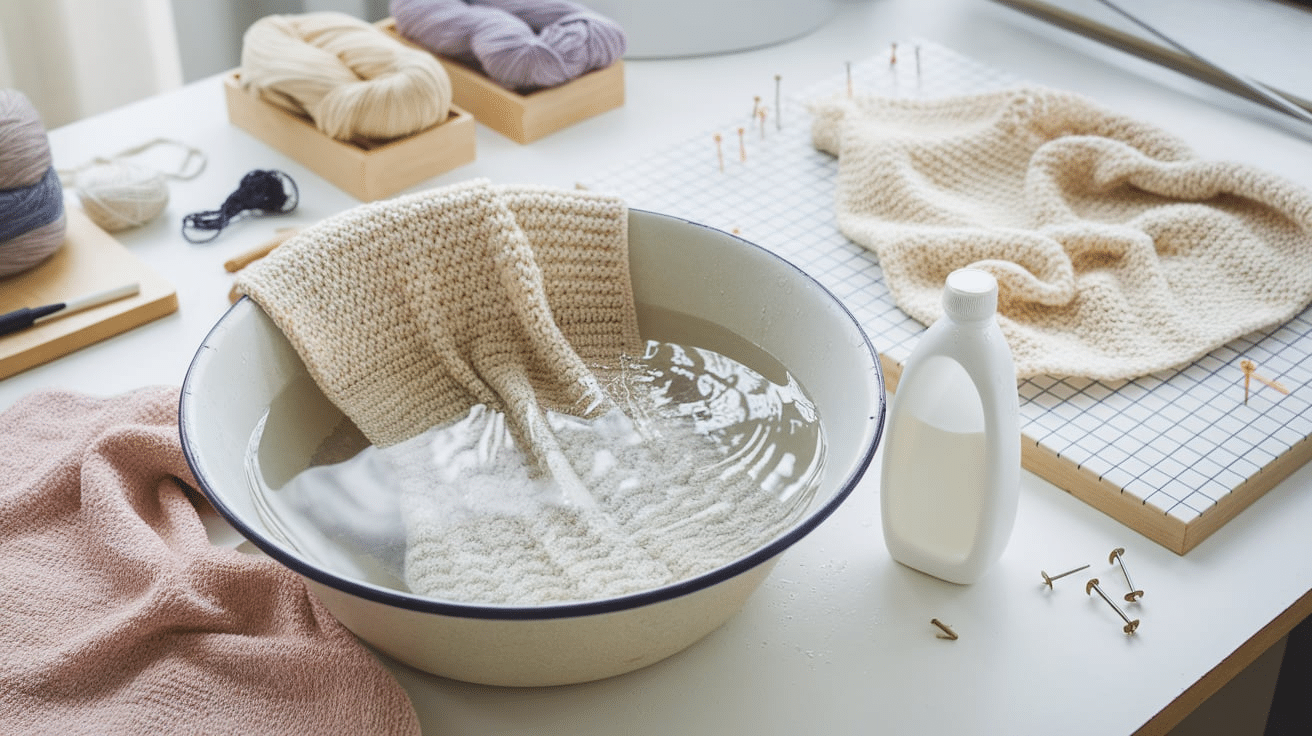
Wet blocking is less effective for acrylic yarn, but it can help with minor adjustments. This method is best for projects that need gentle shaping rather than strong structure.
Wash the project in cool water with mild detergent. Press out excess water without wringing. Pin the damp piece onto a blocking board and let it air dry.
Acrylic does not absorb water like wool, so wet blocking will not create strong shaping effects. However, it can smooth out wrinkles and give the project a neater look.
Precautions When Blocking Acrylic Yarn
Blocking acrylic yarn requires careful handling to avoid damage. Unlike wool or cotton, acrylic does not respond well to excessive heat or moisture.
Applying too much heat or blocking incorrectly can ruin the fibers, making the yarn stiff, shiny, or even melted. Following the right precautions ensures the yarn keeps its structure and appearance while setting properly.
Avoiding Fiber Damage
Acrylic fibers are plastic-based, which means they can melt under direct heat. Steam blocking and hair dryer methods work well, but the heat source should never touch the yarn.
Keeping a safe distance of at least a few inches between the fabric and the heat source prevents the fibers from becoming stiff or shiny.
To avoid overheating, it is recommended to use a low or medium heat setting. If using a steam iron, it should always hover above the fabric rather than pressing directly onto it.
This prevents flattening the texture of the stitches. Moving the heat source evenly over the fabric also helps distribute the heat, preventing certain areas from being exposed to too much heat at once.
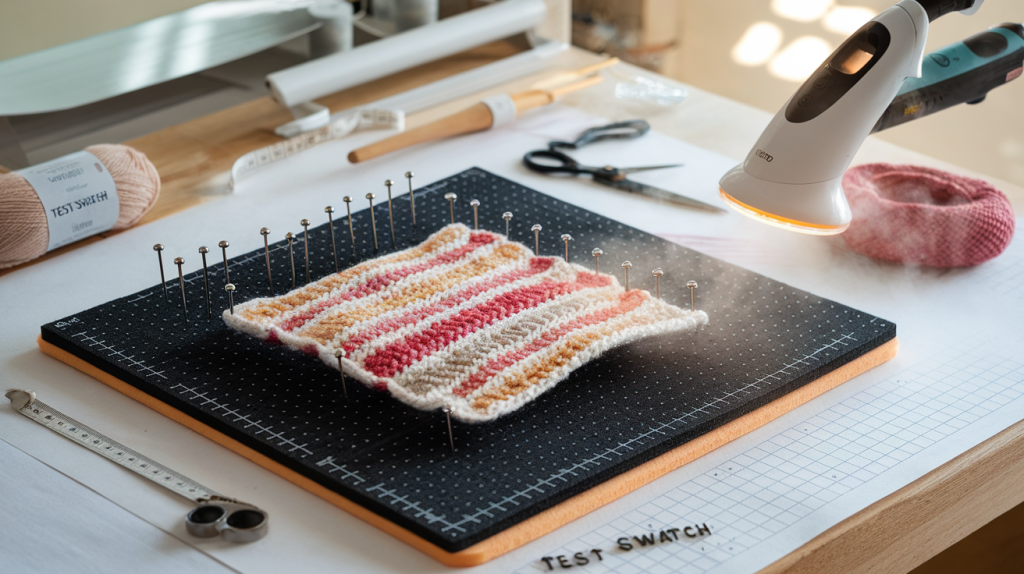
Testing on Swatches
Before blocking an entire project, testing on a small swatch helps determine how the yarn reacts to heat. Different brands and types of acrylic yarn may behave differently when exposed to steam or warm air.
To test a swatch, crochet or knit a small sample using the same yarn and stitch pattern as the main project. Pin the swatch in place and apply the chosen blocking method.
Observe how the yarn responds—if it stretches too much, stiffens, or loses its original texture, adjustments should be made before blocking the final piece.
Understanding ‘Killing’ Acrylic
Killing acrylic is a term for applying excessive heat to permanently alter the yarn’s texture. When acrylic is “killed,” the fibers lose their elasticity and become softer, creating a drapey effect. This process is often used for scarves, shawls, and other projects that require a flowing look.
However, once acrylic is killed, the effect cannot be reversed. The yarn will not bounce back to its original form, and the stitches may lose their definition. Crafters who choose to kill acrylic yarn should test on a swatch first to ensure they are happy with the outcome.
Killing acrylic can be done intentionally for specific projects, but it should be approached with caution.
Benefits of Blocking Acrylic Projects
Blocking is an important finishing step that improves the overall look and feel of a crochet or knitting project. While acrylic yarn does not react to blocking the same way as wool or cotton, using the right blocking method can still provide noticeable improvements.
When properly blocked, acrylic projects look smoother, hold their shape better, and showcase stitch patterns more clearly. This is especially useful for garments, accessories, and home decor items that require a structured or refined finish.
Enhanced Appearance
Blocking helps remove wrinkles and evens out stitches, making the final project look more polished. Stitches that appear uneven or tight can relax, creating a more uniform texture across the fabric.
Projects such as blankets and scarves often have edges that curl or pull in different directions. Blocking can help straighten these edges, ensuring the project lays flat. For large projects with multiple pieces, blocking makes it easier to match seams when assembling sections together.
Improved Drape and Fit
Blocking is especially useful for wearable items like shawls, sweaters, and scarves. Acrylic yarn tends to hold its shape firmly, which can sometimes result in stiff or bulky fabric. Blocking helps relax the fibers slightly, allowing the fabric to drape more naturally.
For garments, blocking ensures that the fabric moves properly when worn. A sweater that appears stiff before blocking may become softer and more flexible after the process.
Similarly, shawls with lace or openwork designs benefit from blocking, as it helps spread out the stitches and gives the fabric a lighter, airier feel.
Stitch Definition
Blocking helps highlight intricate stitch patterns by gently opening up the fabric. This is particularly useful for lacework, cables, and other textured designs that may appear compressed when first completed.
For lace projects, blocking allows each stitch to take its intended shape, making the pattern more visible. Without blocking, lace designs can look too tight or uneven, making it hard to see the full effect of the pattern.
Textured stitches, such as ribbing or cables, also benefit from blocking. The process helps stitches sit neatly and evenly, giving the project a refined look. Even simple stitch patterns, like basic crochet or knit fabric, can look neater and more defined with proper blocking.
Conclusion
Blocking acrylic yarn is possible and can greatly improve a project’s final look. Unlike wool, acrylic does not respond to traditional wet blocking, but steam and heat-based methods can be used effectively.
Steam blocking, hair dryer blocking, and wet blocking each have advantages. The right method depends on the level of shaping needed. Using proper tools and taking precautions will help prevent fiber damage and ensure the best results.
Blocking helps projects look more polished, improves drape, and enhances stitch definition. If you are shaping a blanket, scarf, or garment, applying the right blocking method can make a noticeable difference. With these techniques, acrylic yarn projects can achieve a refined and professional finish.
Frequently Asked Questions
Can Acrylic Yarn Be Blocked Like Wool or Cotton?
No, acrylic yarn does not block the same way as wool or cotton. Since it is synthetic, it does not absorb water well, so traditional wet blocking is less effective—heat-based methods like steam blocking or using a hair dryer work better for shaping acrylic yarn.
Will Blocking Change the Texture of Acrylic Yarn?
Blocking can relax the fibers slightly, but it will not permanently change the texture unless high heat is applied. If too much heat is used, the yarn may become softer and lose its elasticity, a process called “killing” acrylic.
How Long Does It Take to Block an Acrylic Project?
The time depends on the blocking method used. Steam blocking takes just a few minutes, while wet blocking can take several hours to dry completely. Hair dryer blocking is a faster option, usually taking about 15-30 minutes.
Does Blocking Acrylic Yarn Make Stitches Look Better?
Yes, blocking helps even out stitches, improve stitch definition, and straighten curled edges. It is especially useful for lacework, textured patterns, and projects with multiple pieces that need to match in size.
Do I Need to Re-Block Acrylic Yarn After Washing?
Acrylic yarn usually holds its shape after blocking, but some projects may need reshaping after washing. If the project loses its shape, a light steam blocking or pinning it back into place while drying can help restore it.


