

Are you looking for creative ways to use a culture jar?
In this article, I’ll share unique ideas for turning your culture jar into a handy tool for home projects. These jars are incredibly versatile, and they can be used for everything from making yogurt and pickles to brewing kombucha.
I know you want to get the most out of your culture jar, and I’m here to help. If you’re new to fermenting or just looking for fresh ideas, this guide has something for everyone. You’ll learn simple tips and avoid common mistakes.
A culture jar is a great way to ferment food, create healthy drinks, and even experiment with skincare. Trust me, by the end of this post, you’ll have plenty of ways to make the most of your jar at home.
Creative Uses of Culture Jars
In this article, I’ll show you creative ways to use a culture jar. If you’re into homemade yogurt, pickles, or fermented drinks, this guide will help you get the most out of your jars.
If you’ve been wondering how to start fermenting at home or need fresh ideas, you’re in the right place. I’ll walk you through simple tips and common mistakes to avoid.
You can trust that these methods are easy to follow and work in any kitchen. The goal is to make fermentation fun and approachable for everyone.
Let’s get started and solve your fermentation problems today!
1. Making Yogurt at Home
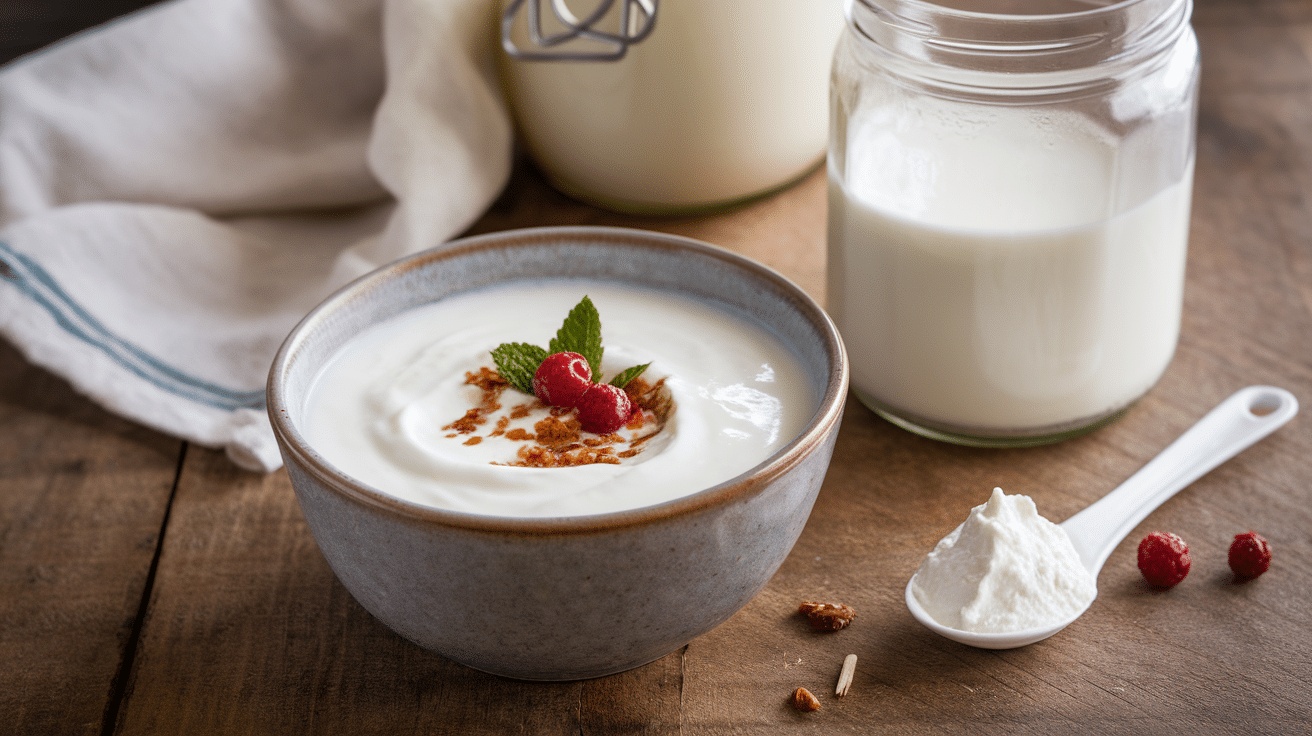
Making yogurt at home is easier than you might think. I ferment it in a culture jar, and the process is simple. You don’t need fancy equipment. All you need is patience and the right ingredients.
Here’s what you’ll need:
- Milk (about 1 liter)
- Yogurt starter culture (a small spoonful or a little bit of store-bought yogurt)
The first thing to do is heat the milk. Pour it into a pot and heat it gently until it’s warm but not boiling. This helps create the right environment for the culture to grow. Don’t rush this step.
Once the milk is warm, stir in the yogurt starter culture. Mix it well so the culture spreads evenly.
Next, pour the milk into your culture jar. Cover it with a clean lid or cloth. Let it sit in a warm spot for 6-12 hours. The longer it sits, the thicker and tangier it gets.
That’s it! You now have homemade yogurt. It’s simple, healthy, and tasty.
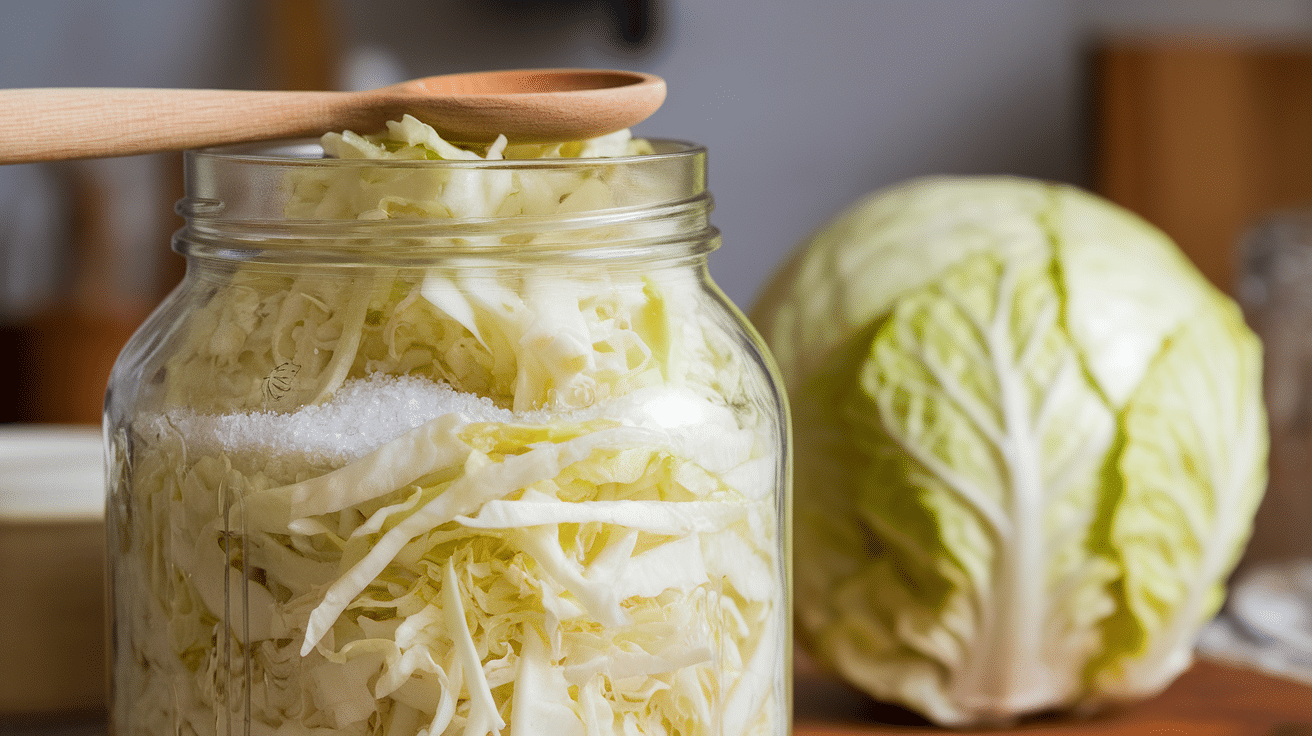
2. Fermenting Vegetables
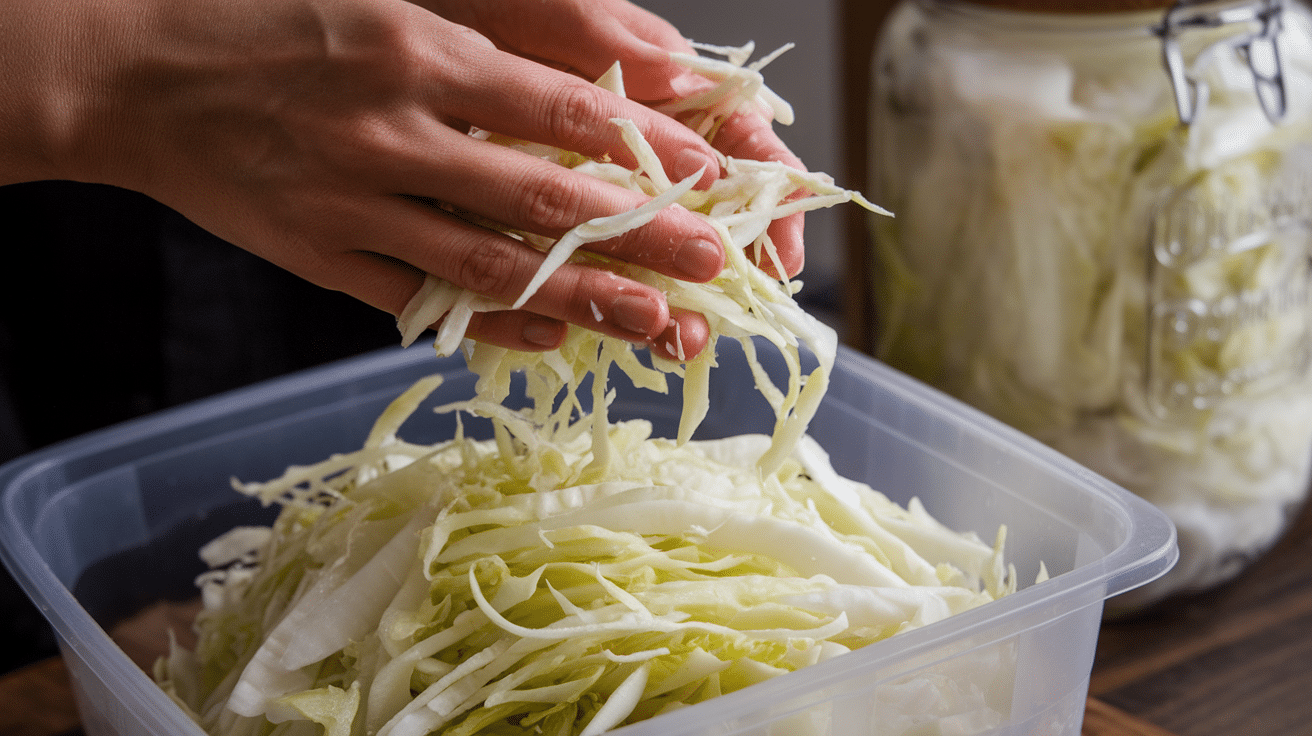
Fermenting vegetables in a culture jar is so easy. I use it to make homemade sauerkraut, and it always turns out great. The best part? You don’t need any special skills.
Here’s what you’ll need:
- Cabbage (1 medium head)
- Salt (about 2 tablespoons)
- Water (filtered, enough to cover the cabbage)
First, shred the cabbage. You can use a knife or a grater, depending on your preference. Once it’s shredded, sprinkle the salt over the cabbage.
Now, here’s the trick: Massage the cabbage with your hands. This helps release the water, making the brine for fermentation.
Once that’s done, pack the cabbage into your culture jar. Press it down tightly so the cabbage is submerged in the water. If needed, add a little extra water to make sure it’s fully covered.
Cover the jar with a lid or cloth, and let it sit in a cool, dark place for about 3-7 days. Check it daily. If the cabbage is floating above the water, push it down to keep it submerged.
After a few days, your fermented veggies are ready to enjoy. It’s simple, tasty, and full of healthy probiotics.
3. Kefir Production
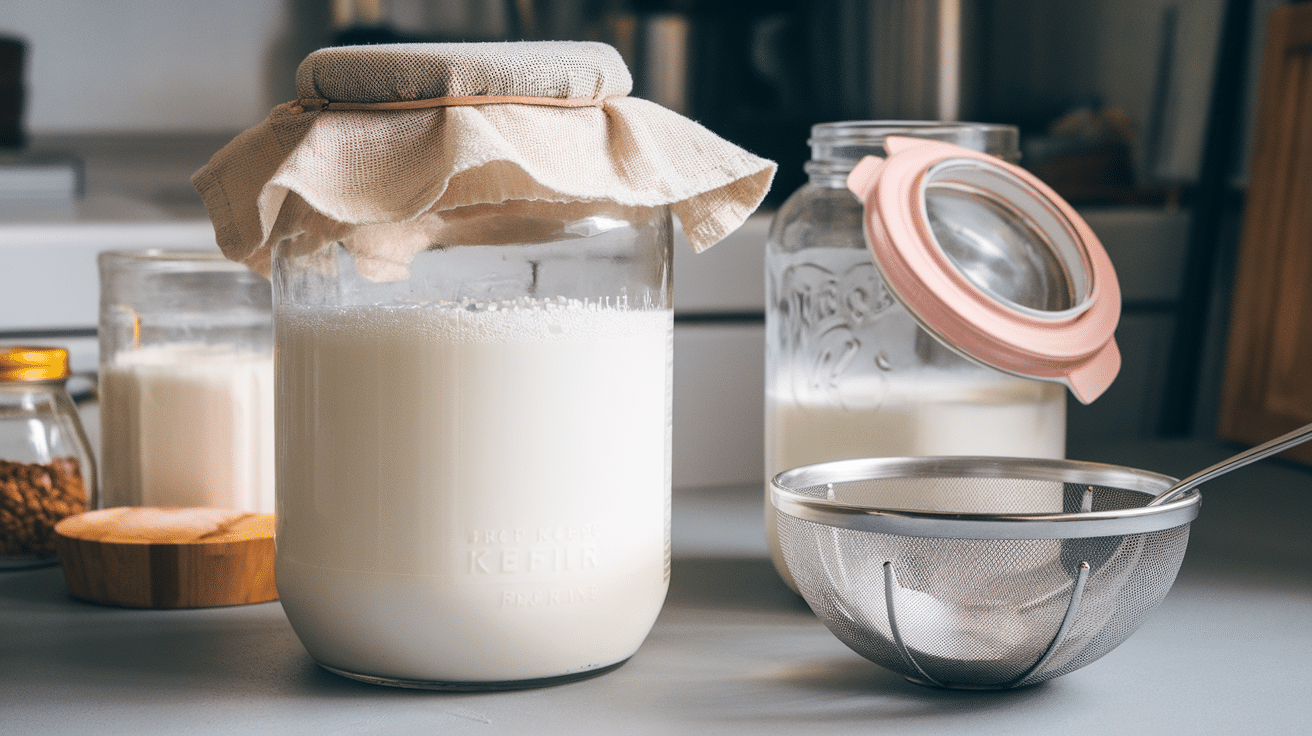
Making homemade kefir is one of the easiest things I do with a culture jar. And it’s so good for you. Kefir is full of probiotics, and making it at home is simple.
Here’s what you need:
- Milk (about 1 liter)
- Kefir grains (a few tablespoons)
Start by pouring the milk into your culture jar. I usually use regular whole milk, but you can use any milk you like.
Next, add the kefir grains to the jar. Be gentle with the grains—they help ferment the milk and turn it into kefir.
Cover the jar with a cloth or loose lid and let it sit at room temperature for 24-48 hours. The fermentation process starts when the milk thickens and bubbles.
Here’s a quick tip: If you want your kefir to be thicker, leave it longer. For a milder flavor, check it after 24 hours.
Once it’s ready, strain out the kefir grains. You can reuse them for your next batch. Then, enjoy your homemade kefir!
4. Homemade Sauerkraut
Making sauerkraut at home is one of my favorite things to do with a culture jar. It’s so simple, and the flavor is amazing.
Here’s what you need:
- Cabbage (1 medium head)
- Salt (about 2 tablespoons)
First, slice the cabbage thinly. The more finely you slice it, the quicker it will ferment. Then, sprinkle the salt over the cabbage. Don’t skip this step. The salt helps draw out the water from the cabbage, creating the brine needed for fermentation.
Now comes the fun part—massaging the cabbage. Get your hands in there and squeeze the cabbage to help release its juices. The more you work it, the more liquid you’ll get.
Once the cabbage is ready, pack it tightly into your culture jar. Make sure the cabbage is submerged in its brine. If the cabbage isn’t covered in liquid, add a little water.
Cover the jar with a cloth or lid and let it sit at room temperature for 3-7 days. Check on it each day. If you see any cabbage floating above the brine, press it down.
When it tastes tangy enough for you, it’s done! Store it in the fridge to slow down the fermentation. Enjoy your homemade sauerkraut!
5. Culturing Kombucha
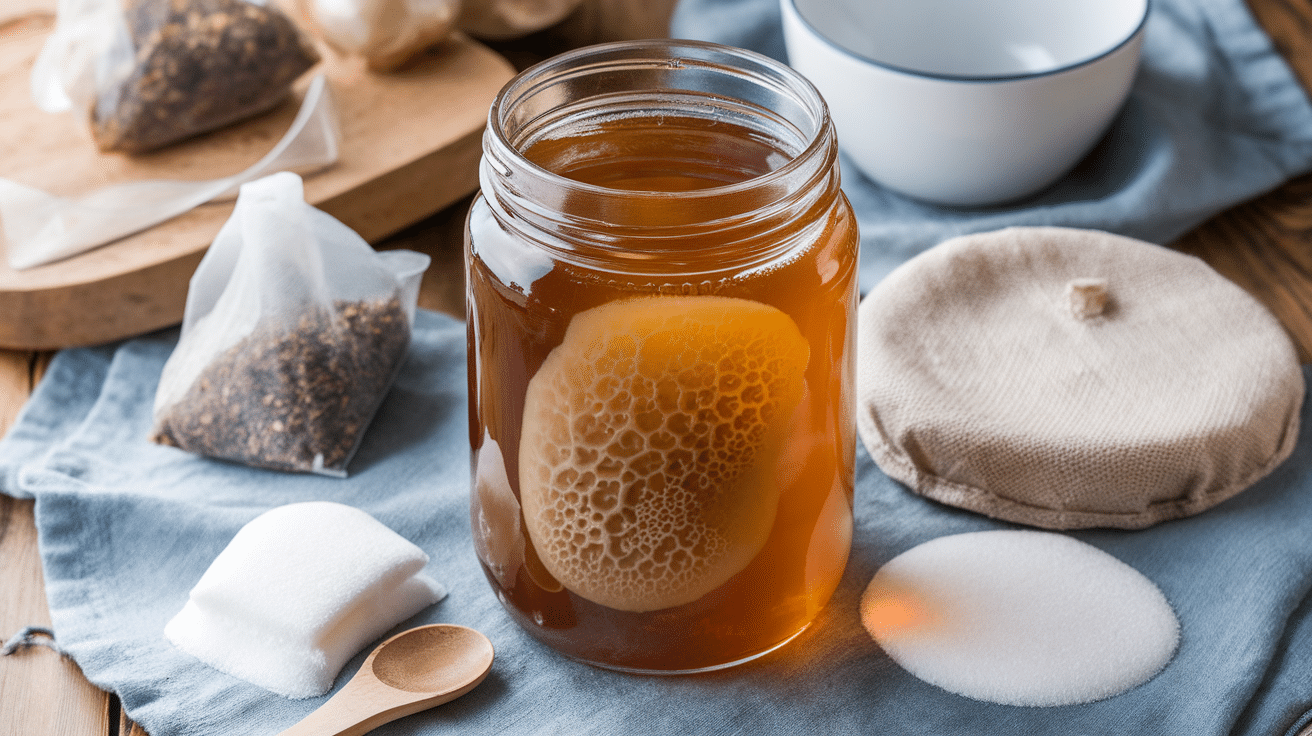
Making kombucha at home is one of my favorite uses for a culture jar. It’s fun and simple. Plus, you get a tasty, healthy drink with probiotics.
Here’s what you need:
- Tea (black or green, about 4-5 bags)
- Sugar (1 cup)
- SCOBY (Symbiotic Culture of Bacteria and Yeast, about 1)
First, brew the tea. Boil water and add the tea bags. Let it steep for about 5-10 minutes. Once the tea is strong, add the sugar and stir until it’s completely dissolved.
Now, let the tea cool to room temperature. Don’t rush this step. If it’s too hot, it will hurt the SCOBY.
When the tea is cool, pour it into your culture jar. Then, add the SCOBY. It might float or sink. Either way, it’s okay.
Cover the jar with a cloth or a loose lid. Let it sit at room temperature for 7-14 days. The longer it sits, the stronger the taste.
Each day, check on your kombucha. You can taste it to see if it’s ready. Once it’s the way you like, remove the SCOBY. You can start a new batch with it.
Now you have homemade kombucha! It’s refreshing, healthy, and full of probiotics.
6. Making Sourdough Starter
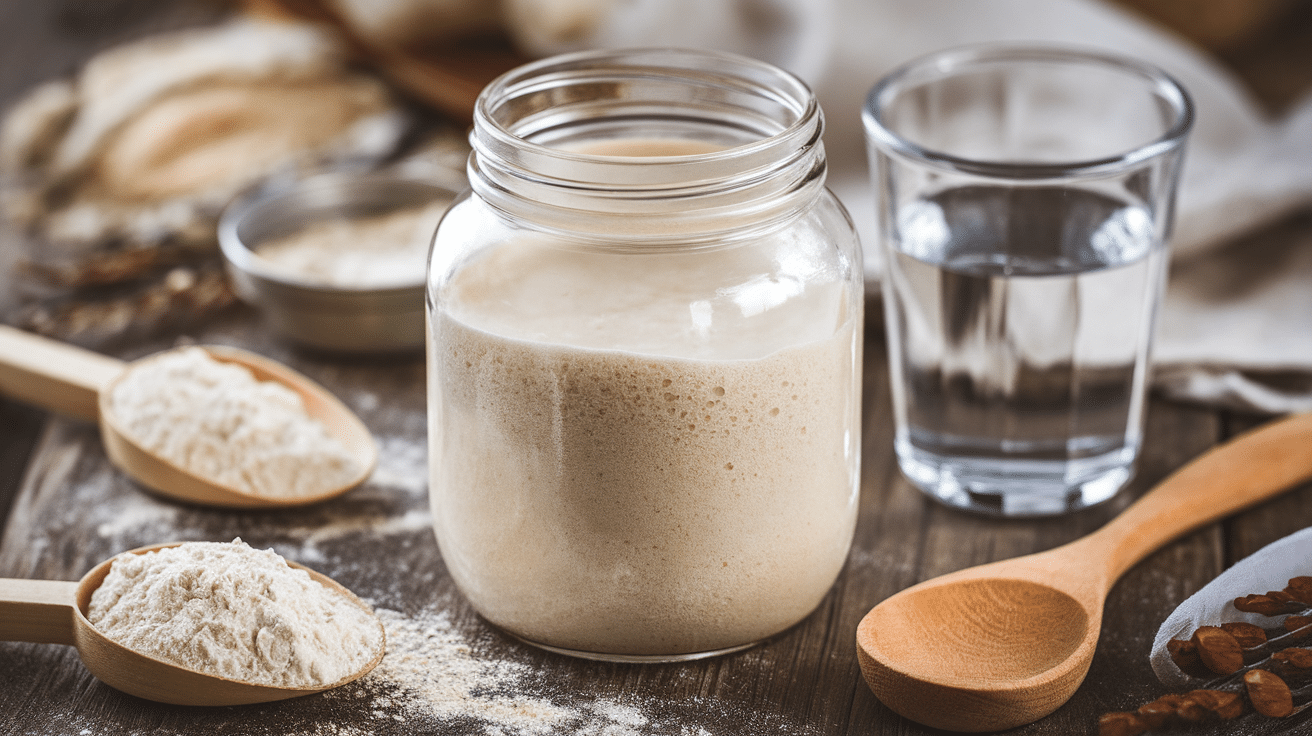
Making a sourdough starter in a culture jar is easy, and it’s the first step to making your own sourdough bread. It’s fun and doesn’t need a lot of ingredients.
Here’s what you’ll need:
- Flour (about 1 cup)
- Water (about 1/2 cup)
- Wild yeast (naturally found in the air or from previous batches)
Start by mixing the flour and water in your culture jar. Stir them well until the mixture is smooth. No need to worry about exact measurements. The goal is to create a thick, sticky paste.
Now, cover the jar loosely with a lid or cloth and leave it in a warm spot for 24 hours. This is important because it gives the wild yeast time to start working.
On the second day, add another 1/2 cup of flour and 1/4 cup of water. Mix it up and cover the jar again. Repeat this process for about 5-7 days.
You’ll start to see bubbles and notice a sour smell. That’s a good sign! It means the yeast is growing.
Your sourdough starter should be ready after about a week. If it’s bubbly and smells tangy, you’re all set! Use it to bake your sourdough bread.
7. Cultivating Fermented Hot Sauce
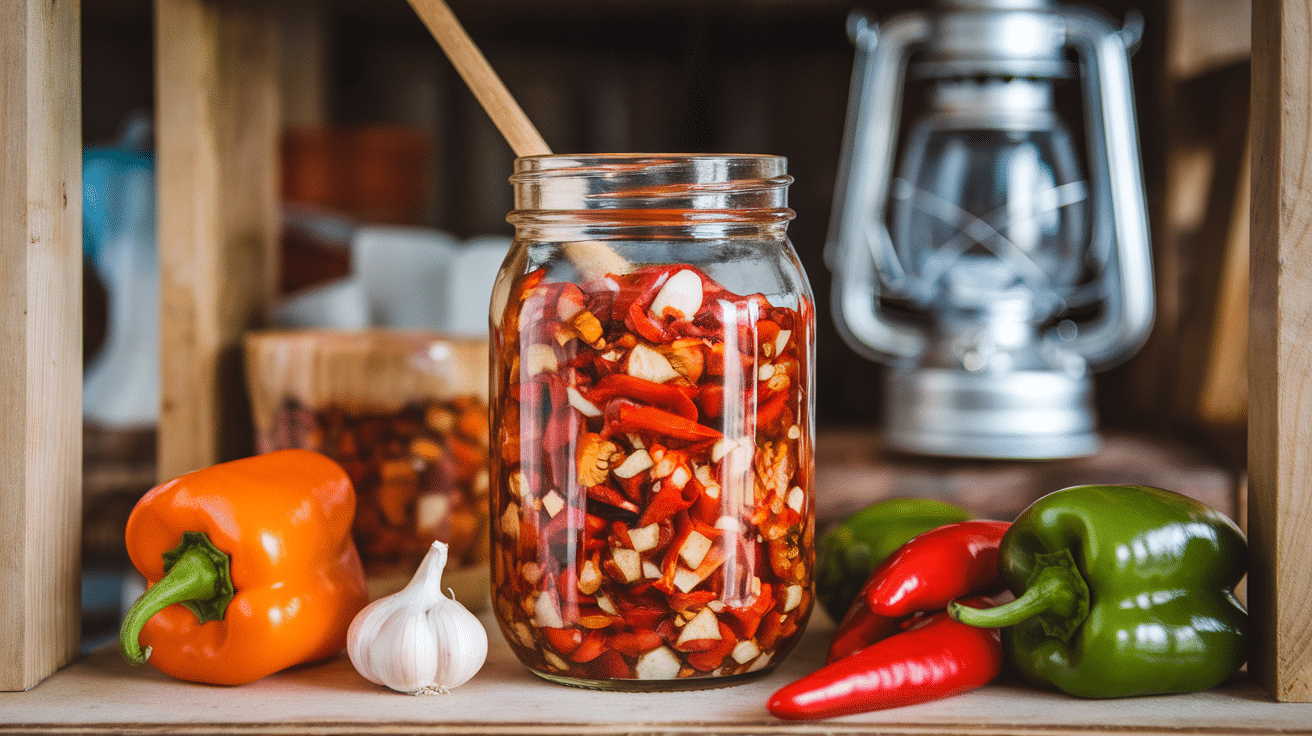
Fermenting hot sauce in a culture jar is a great way to make unique, flavorful sauces. It’s easier than you think, and you can control the heat and flavor. Plus, it adds a special depth to your sauces.
Here’s what you’ll need:
- Chili peppers (fresh, about 10-12)
- Garlic (3-4 cloves)
- Salt (1-2 tablespoons)
Start by chopping the chili peppers and garlic. Be careful when handling the peppers—wear gloves if needed to avoid irritation. You don’t want to touch your eyes accidentally.
Put the chopped peppers and garlic into the culture jar. Add salt on top, then fill the jar with water until the ingredients are submerged. This is important because the salt helps with the fermentation process.
Cover the jar loosely with a cloth or lid. Let it sit in a warm spot for about 5-7 days. Check on it daily. You’ll start to notice bubbles, which means the fermentation is happening.
Once it’s fermented to your liking, blend everything in the jar to make the hot sauce. You can strain it if you prefer a smoother sauce or leave it chunky.
Now, you have your own homemade fermented hot sauce with a rich, tangy flavor. Enjoy it on tacos, sandwiches, or anything that needs a spicy kick!
8. Creating Probiotic-Rich Smoothies
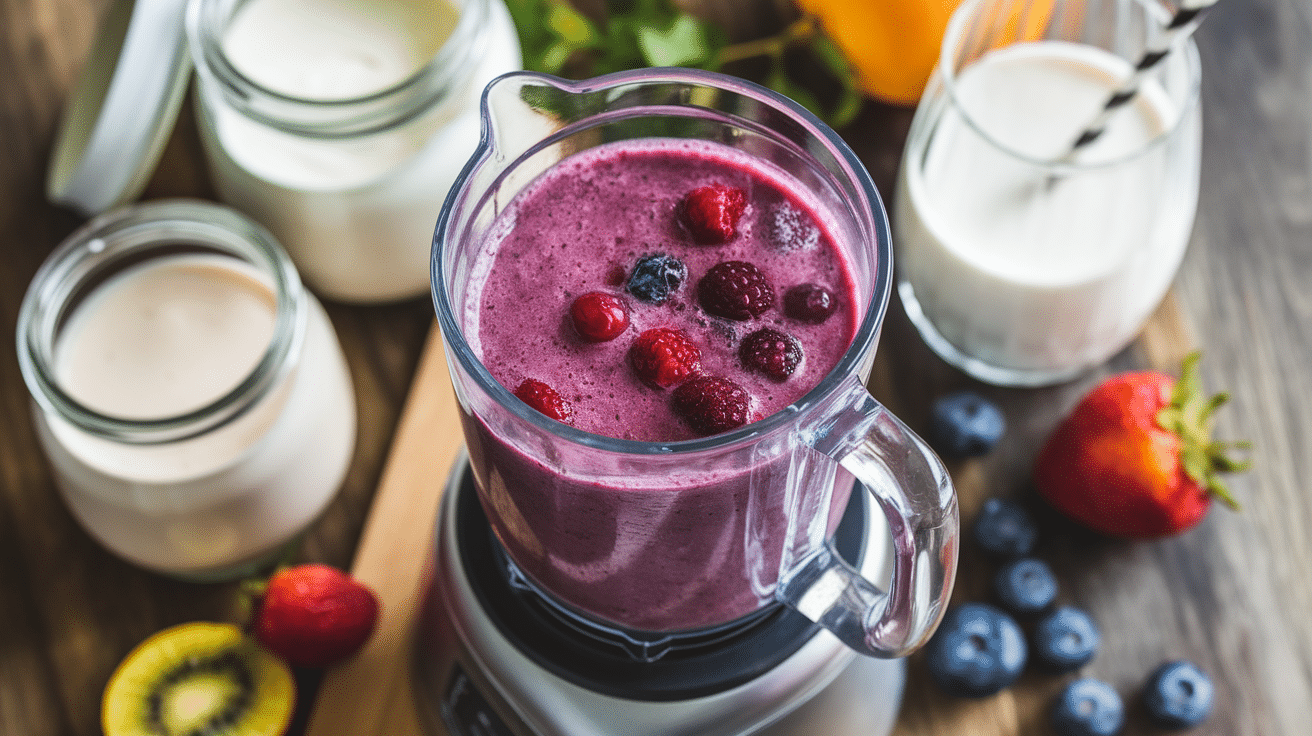
Adding cultured ingredients like yogurt, kefir, or even fermented vegetables to smoothies is a great way to boost their health benefits. It’s simple, and you get extra probiotics that are good for your gut.
Here’s how to do it:
-
Use yogurt or kefir: Both are rich in probiotics. I love adding homemade yogurt or kefir to my smoothies. It gives them a creamy texture and a little tang.
-
Add fermented fruits: You can try adding fermented fruits like pickled pineapple or berries. They bring a fun twist to your smoothie and add extra nutrients.
-
Start with a base: Choose a base like almond milk, coconut water, or regular milk. Then, add in your cultured ingredients.
-
Mix well: Blend everything. The key is to balance the flavors—if the cultured ingredient is too sour, you can add a bit of honey or fruit to sweeten it.
-
Experiment: Don’t be afraid to try different combinations. It’s all about finding what tastes good to you.
By adding cultured ingredients, you’ll make your smoothie tastier and give your body a boost of probiotics. Give it a try!
9. Storing Homemade Pickles

Culture jars are perfect for making and storing homemade pickles. They keep everything in place while the pickles ferment and develop that delicious tang.
Here’s what you’ll need:
- Cucumbers (about 4-6)
- Vinegar (1 cup)
- Salt (2 tablespoons)
First, slice the cucumbers. Depending on your preference, you can cut them into spears or rounds or leave them whole. There is no need for perfection—just make them fit into your jar.
Next, add the vinegar and salt to the jar. Fill it with water until the cucumbers are fully submerged. For flavor, you can add extra spices like garlic, dill, or peppercorns.
Once everything is in the jar, cover it loosely with a lid or cloth. Let it sit at room temperature for 2-3 days. Check on the cucumbers each day to ensure they stay covered by the brine.
After a few days, your pickles will be ready. The best part? You can store them in the fridge to keep them fresh longer. Enjoy your crunchy, homemade pickles!
10. Growing Fermented Dairy Products Like Cheese
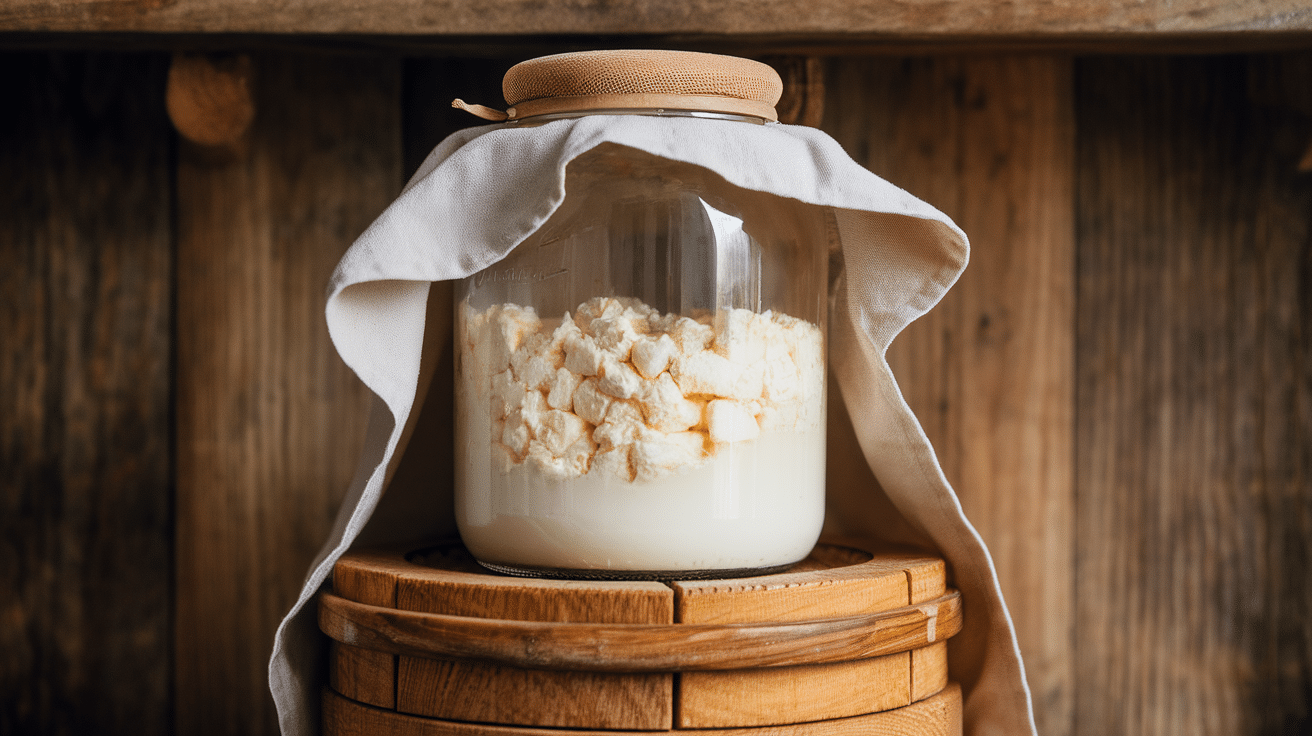
Culture jars are great for culturing dairy into cheeses and other fermented dairy products. It’s easier than it sounds. You can make soft cheeses like ricotta or cream cheese right in your kitchen.
Here’s what you’ll need:
- Milk (about 1 liter)
- Cheese culture or yogurt starter
- Rennet (optional, depending on the type of cheese)
Start by heating the milk gently in a pot. Don’t let it boil. Warm it up to about 80°F (27°C). Once it’s warm, stir in the cheese culture or yogurt starter. If you’re making a firmer cheese, add rennet as well.
Now, pour the milk mixture into your culture jar. Cover it loosely with a cloth or lid. Let it sit at room temperature for several hours or overnight. Patience is key here. The milk will thicken and start turning into curds.
Once the curds have formed, strain out the liquid (this is the whey). You now have cheese! You can press the curds to make them firmer or keep them soft.
The jar makes it easy to monitor the fermentation process, keeps the environment controlled, and allows you to create fresh, homemade cheese.
Whether you want soft cheese or something firmer, using a culture jar makes the process simple and fun.
11. Brewing Ginger Beer
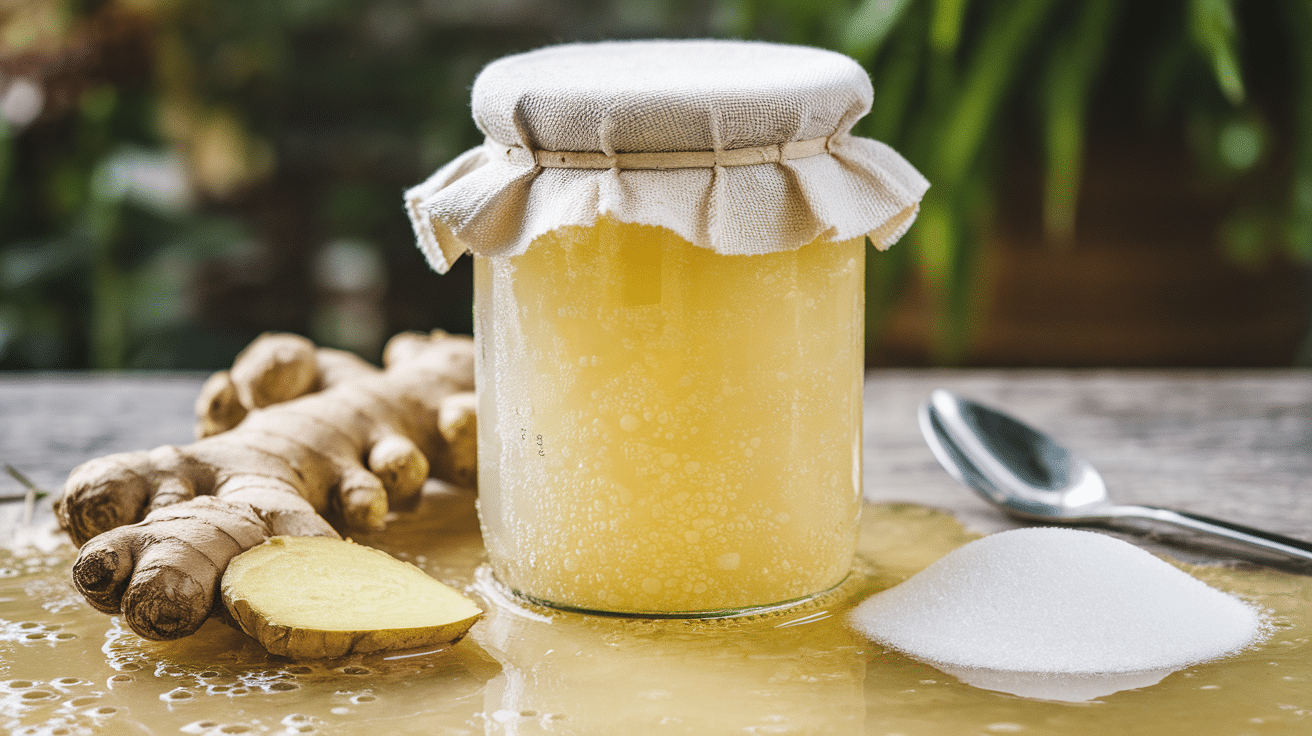
Brewing ginger beer in a culture jar is a fun and easy way to make your fizzy drink. It’s refreshing, and you can control how sweet or spicy it is.
Here’s what you’ll need:
- Fresh ginger (about 3-4 inches, peeled and grated)
- Sugar (1 cup)
- Water (about 4 cups)
Start by boiling the water. Once it’s boiling, add the grated ginger and sugar. Stir until the sugar is completely dissolved. Don’t rush this part. Let it simmer for about 10 minutes.
Next, let the ginger water cool to room temperature. This is important—if it’s too hot, it will kill the yeast you add later.
Once it’s cool, pour the ginger mixture into your culture jar. Add a little yeast (about 1/4 teaspoon). Stir it in gently, then cover the jar loosely with a cloth or lid.
Let it sit at room temperature for 2-3 days. You’ll see bubbles forming—that’s the fermentation process! The longer you let it sit, the fizzier and more flavorful your ginger beer will be.
Once it’s ready, strain out the ginger bits and transfer the liquid to bottles. Chill it in the fridge. Now, you have a homemade ginger beer that’s both refreshing and full of flavor!
12. Creating Fermented Beverages Like Water Kefir
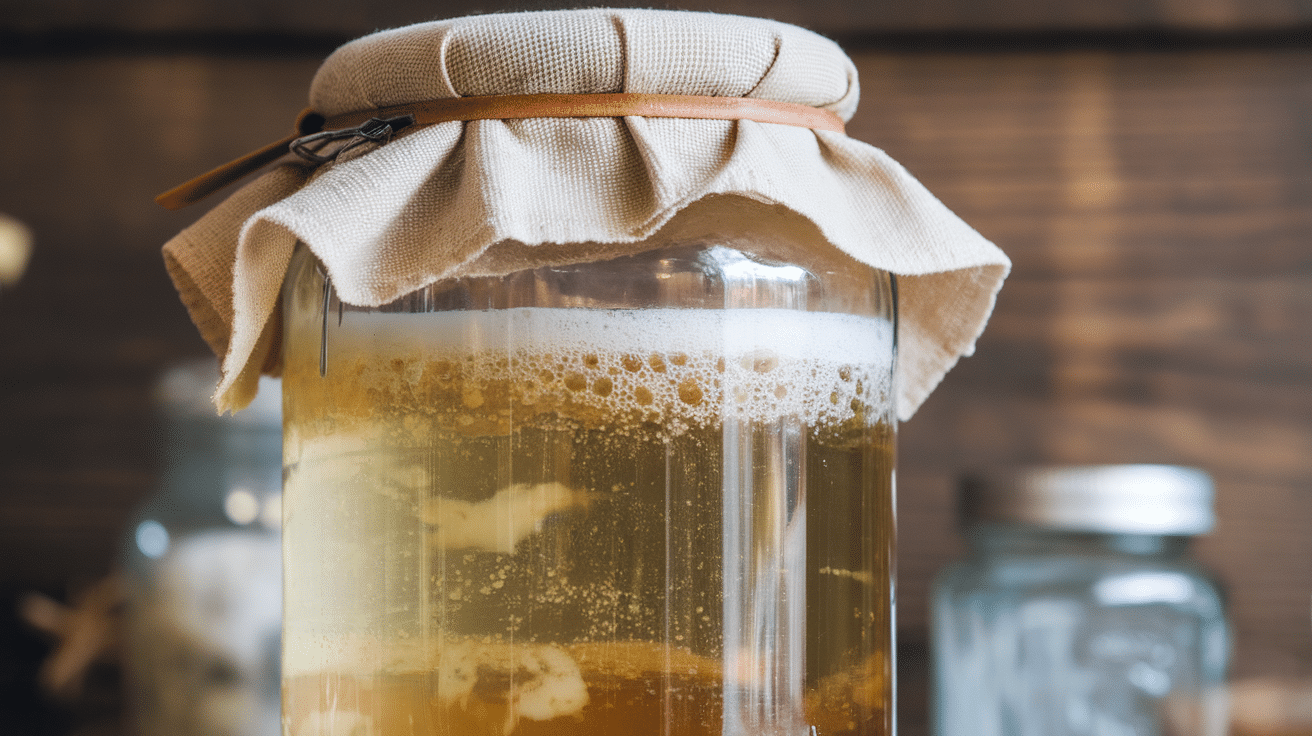
Making fermented drinks like water kefir is simple and packed with benefits. It’s easy to do with a culture jar, and the results are delicious and healthy.
Here’s what you need for water kefir:
- Water (about 4 cups)
- Sugar (1/4 cup)
- Water kefir grains (about 2 tablespoons)
Start by dissolving the sugar in warm water. Stir it until the sugar is fully dissolved. Don’t make it too hot, or it will hurt the grains.
Once the sugar water is at room temperature, add the water kefir grains to the jar. Cover the jar loosely with a cloth and let it sit at room temperature for 24-48 hours. The longer it sits, the more tangy it gets.
After it ferments, strain out the grains. You can use them for your next batch. Now, you’ve got water, kefir!
Water kefir is full of probiotics, which are great for gut health. After fermentation, you can experiment with adding flavors like lemon, ginger, or fruit. The jar makes it easy to control the fermentation and create a drink that’s just right for you.
Fermented drinks are a great, natural way to add extra health benefits to your day. With a culture jar, you can easily make your own at home!
13. DIY Body Care Products
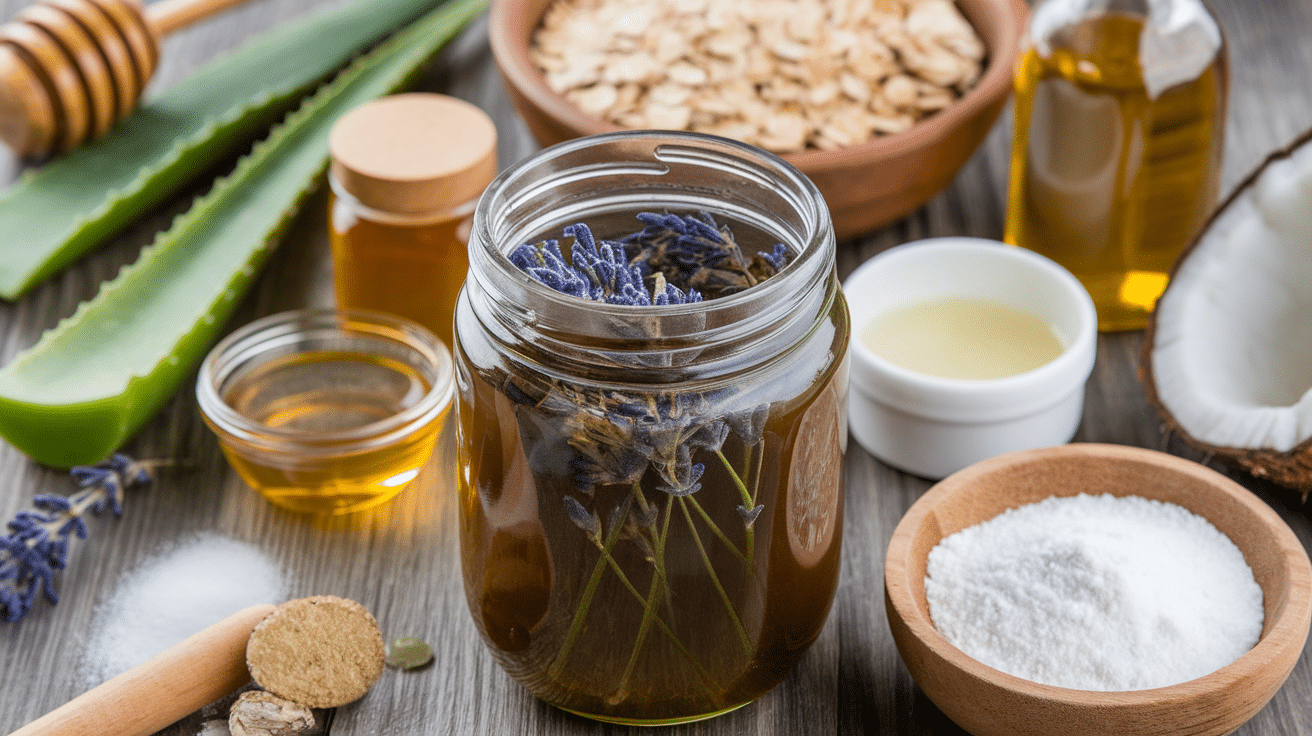
Using culture jars to make DIY body care products is a great way to create natural skincare at home. It’s easy, and you know exactly what goes into your products.
One simple thing I make is a fermented skin toner. Here’s what you need:
- Green tea (1 cup)
- Apple cider vinegar (1/4 cup)
- Herbs like lavender or chamomile (optional)
Start by brewing the green tea and letting it cool. Once it’s room temperature, pour it into your culture jar. Add the apple cider vinegar and herbs if you’re using them, and mix it well.
Now, cover the jar with a cloth or loose lid and leave it at room temperature for 2-3 days. The fermentation process will help create a toner that’s gentle on your skin and has natural antibacterial properties.
After a few days, strain out the herbs (if you used them), and your toner is ready to use. Store it in the fridge for freshness. It’s that simple!
Using a culture jar to make body care products is a fun and natural way to take care of your skin. You can experiment with different ingredients and see what works best for you!
14. Mushroom Cultivation
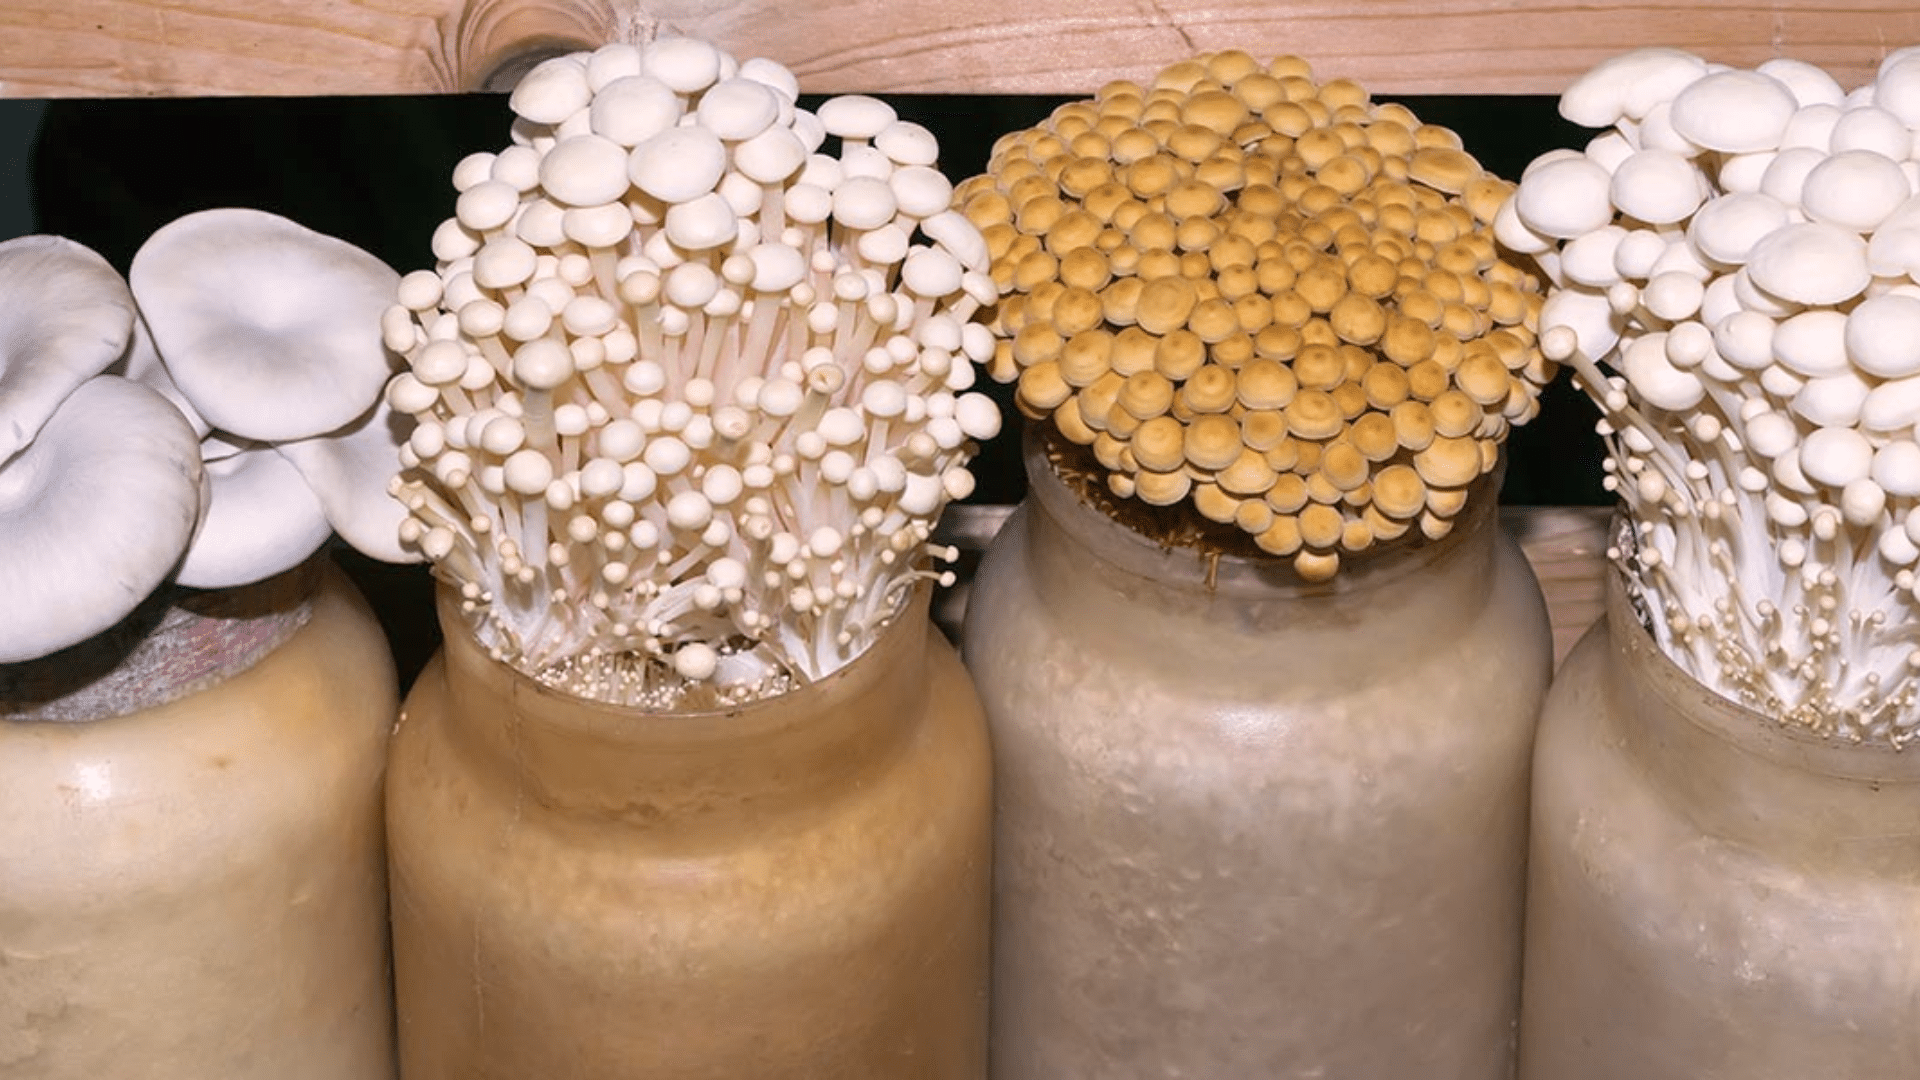
Using a culture jar to grow mushrooms is a fun and rewarding way to bring fresh food into your home. It’s easier than it sounds, and it requires just a few simple steps.
Here’s what you’ll need:
- Mushroom spores (from a mushroom growing kit or purchased online)
- Growing medium (like sawdust, straw, or a mushroom-growing block)
- Culture jar (with a tight lid or cloth covering)
Start by sterilizing your growing medium. You can do this by steaming or boiling it to kill off any unwanted bacteria. Once it’s cool, fill your culture jar with the medium.
Next, sprinkle the mushroom spores onto the medium. Be gentle so you don’t disturb the spores too much. Then, cover the jar with a cloth or loosely fitted lid. This lets the air flow but keeps the jar protected.
Place the jar in a warm, dark place for about 1-2 weeks. Check the jar regularly. You should start seeing tiny mushroom sprouts.
Once the mushrooms begin to grow, move the jar to a cooler area with indirect light. The right environment will help the mushrooms grow faster.
It’s exciting to watch your mushrooms grow! Once they reach the right size, you can harvest them and use them fresh in your cooking.
Using a culture jar to cultivate mushrooms is a simple way to enjoy homegrown, edible mushrooms. It doesn’t take up much space and can be done in almost any kitchen.
15. Homemade Facial Masks
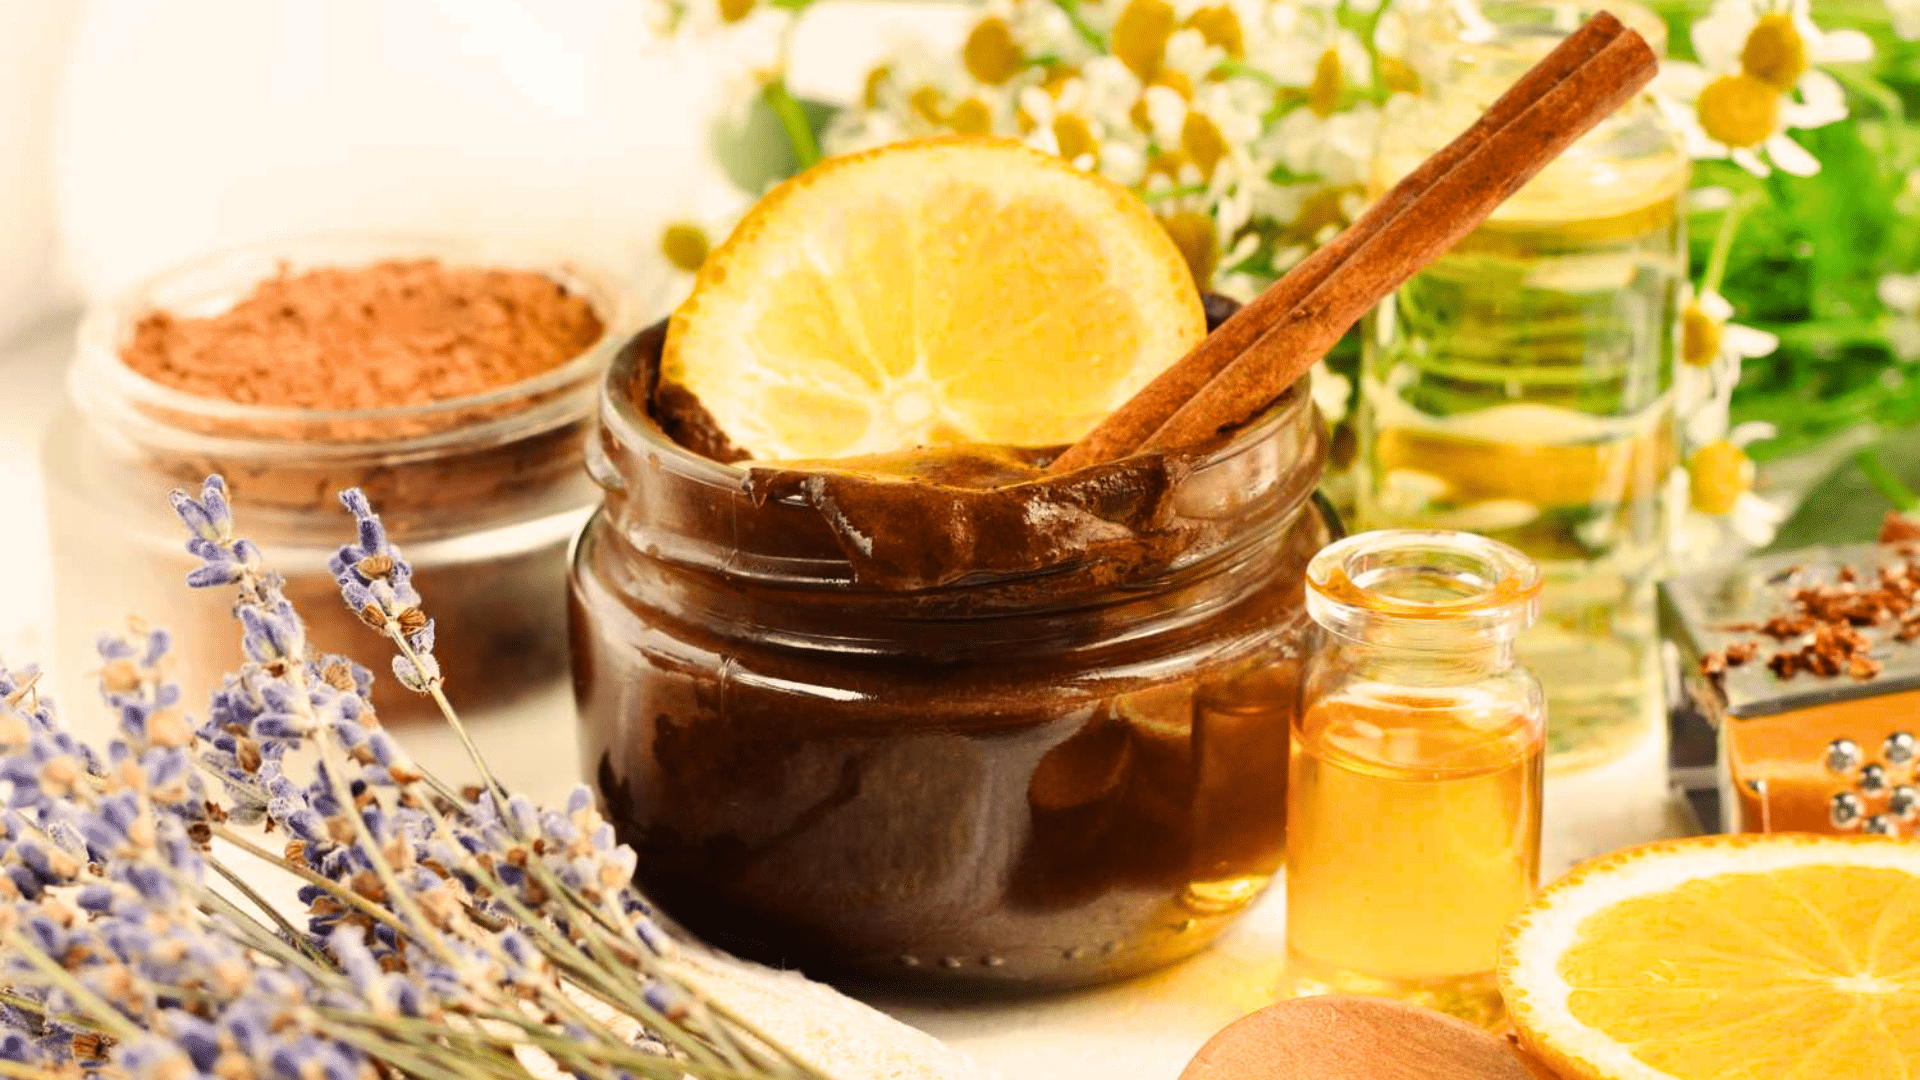
Using a culture jar to make your facial masks is a simple way to create natural skincare at home. It’s easy, and you can customize the mask to suit your skin.
Here’s what you need:
- Yogurt (1 tablespoon)
- Honey (1 teaspoon)
- Fresh fruit or herbs (like mashed avocado or lavender)
Start by mixing the yogurt and honey in your culture jar. These ingredients help hydrate and soothe your skin. You can add your favorite fruits or herbs to the mix for extra benefits.
For example, avocado is great for dry skin, and lavender has calming properties. Add your chosen ingredient to the jar and mix everything well.
Now, cover the jar loosely with a lid or cloth and let it sit for 1-2 days. This fermentation process can help bring out the full benefits of the ingredients.
Your facial mask is ready after a couple of days. To use it, apply it to your face for about 15-20 minutes, then rinse off with warm water.
Creating homemade facial masks with a culture jar is a great way to pamper your skin. You know exactly what’s in it, and you can experiment with different ingredients to see what works best for you.
Tips for Using a Culture Jar Effectively
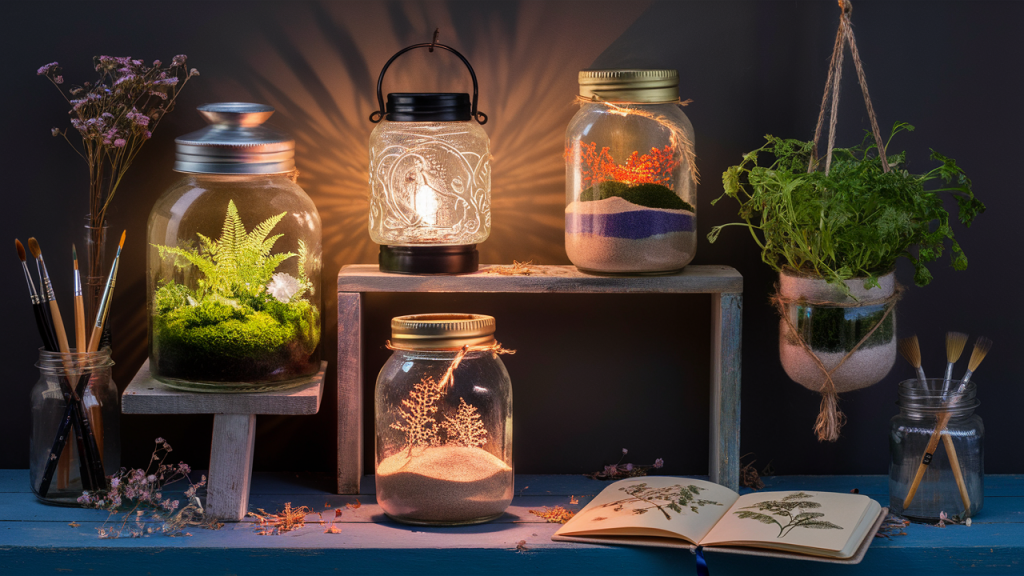
A culture jar is a controlled environment used to grow and observe microorganisms, plant cuttings, or small ecosystems. It can be used for scientific study, education, or art projects.
1. Ensure Cleanliness to Prevent Unwanted Bacteria
When using a culture jar, cleanliness is key.
Before starting, wash your jar thoroughly with hot water and soap. This helps avoid contamination from unwanted bacteria. Any leftover food or germs can spoil your fermentation process.
Unique Features:
- Prevents spoilage: Clean jars reduce the risk of mold and other harmful bacteria growing during fermentation.
- Improves results: A clean jar allows good bacteria or yeast to thrive without competition.
- Easy to maintain: Regular cleaning ensures that you won’t have any leftover odors or sticky spots.
2. Keep Jars in A Cool and Dark Place for Proper Fermentation
Fermentation works best in a cool, dark environment.
Direct sunlight or heat can mess with the process and change the taste of your food. Store your culture jar in a cupboard or pantry, away from heat sources like stoves or windows.
Unique Features:
- Controls temperature: Keeping it cool helps regulate fermentation speed and keeps flavors balanced.
- Prevents over-fermentation: A cooler spot slows down fermentation, allowing the flavors to develop properly without becoming too sour.
- Encourages healthy growth: The right temperature ensures that beneficial bacteria or yeast grow while harmful ones are kept at bay.
3. Use Non-Reactive Lids or Cloth Covers for Best Results
When covering your culture jar, use a non-reactive lid or cloth.
Metal lids can interact with acidic foods and affect the fermentation process. Cloth covers allow airflow, which is important for proper fermentation, but also keep dust and debris out.
Unique Features:
- Promotes airflow: Cloth covers allow the right amount of oxygen for fermentation, which helps the process.
- Prevents contamination: Non-reactive lids ensure that your food doesn’t pick up unwanted flavors or metals.
- Flexible use: Depending on the type of ferment you’re working with, you can easily switch between cloth or plastic lids.
Common Mistakes to Avoid
Using a culture jar effectively requires attention to detail and proper handling. Avoid these common mistakes to ensure a successful experiment or project:
1. Not Using the Right Amount of Culture or Starter
It’s important to use the correct amount of culture or starter when fermenting.
Too much or too little can mess up the process. If you add too much, your food might ferment too quickly or taste too sour. If you add too little, the fermentation might not happen properly.
Unique Features:
- Balanced results: Using the right amount helps ensure consistent and controlled fermentation.
- Better flavor: Correct amounts allow flavors to develop at the right pace without overpowering sourness.
- Prevents waste: Using the right amount of culture or starter keeps things efficient and avoids unnecessary resources.
2. Forgetting to Monitor Temperature
Temperature is crucial during fermentation.
If it’s too hot or too cold, the fermentation can slow down or stop altogether. Sometimes, we forget to check the temperature, which can lead to under- or over-fermented food.
Unique Features:
- Consistent fermentation: Monitoring temperature helps fermentation happen at a steady pace.
- Proper texture: Keeping the right temperature ensures the right texture, whether it’s for yogurt, bread, or pickles.
- Prevents spoilage: The right temperature helps keep harmful bacteria from growing while promoting the growth of beneficial ones.
3. Using Incorrect Ingredients that Don’t Ferment Well
Not all ingredients are made for fermentation.
Some foods don’t ferment well, or they need specific conditions. If you use the wrong ingredients, your fermentation might not work at all, or it could taste off.
Unique Features:
- Improved results: Using the right ingredients ensures your food ferments properly and tastes great.
- Easier fermentation: The right ingredients, like the proper salt content or starter culture, make fermentation more predictable.
- Avoids frustration: Choosing ingredients that are good for fermentation helps prevent wasted time and effort.
Benefits of Using a Culture Jar
Using a culture jar has many benefits, especially when it comes to making your fermented foods at home. It’s a simple and effective way to improve your diet while reducing waste.
- Encourages probiotic-rich foods for gut health: Fermented foods like yogurt, sauerkraut, and kefir are full of healthy bacteria that are great for digestion. These probiotics help support your gut and boost your immune system.
- Fermenting leftovers reduces food waste: If you have extra vegetables or fruits, you can ferment them in a culture jar. This helps you use up leftovers instead of throwing them away, making the most of your food.
- The simple, cost-effective way to create fermented foods at home: Buying fermented foods at the store can be expensive. With a culture jar, you can easily make them yourself at home for a fraction of the cost. Plus, you control the ingredients and flavors!
Using a culture jar is an easy and affordable way to add healthy, homemade fermented foods to your meals while reducing waste.
Conclusion
In this article, I’ve shared creative uses for a culture jar, from making yogurt and kefir to fermenting vegetables and brewing ginger beer.
If you’ve been looking for new ways to incorporate fermented foods into your diet, this guide will help you find them.
You can trust that these methods are simple and effective. By following the tips and steps provided, you’ll be able to create homemade fermented foods with ease.
I encourage you to try different fermentation projects. It’s a fun and rewarding way to add healthy, probiotic-rich foods to your meals.
Experiment and find what works best for you!
Frequently Asked Questions
Can I Reuse Culture Jars?
Yes, you can reuse culture jars as long as they are thoroughly cleaned between uses to prevent contamination and ensure proper fermentation.
What Temperature Is Best for Fermentation?
A temperature of 65-75°F (18-24°C) is ideal for most fermenting foods. Too hot or too cold can slow or stop the fermentation process.
How Do I Store Fermented Foods After Fermentation?
Once fermentation is complete, store the jars in the fridge to slow down the process and keep the food fresh longer.


