

The Finchley graft is a simple yet effective knitting technique for creating a seamless, invisible join between stitches. It’s ideal for projects requiring a smooth and professional finish, such as socks, mittens, and scarves.
Unlike more complex grafting methods, the Finchley graft is easy to learn and remember. It’s perfect for beginners who want a neat, seamless look without much effort.
This method is especially useful for projects that require a reversible finish, as it allows both sides to look the same. With the right technique, you can prevent gaps, avoid visible seams, and ensure the edges of your work remain clean and uniform.
Let’s see how to do the Finchley graft and how it can improve your knitting projects.
What Is the Finchley Graft?
The Finchley graft is a straightforward and effective technique used in knitting to create an invisible, seamless join between stitches. It’s often compared to the Kitchener stitch, but many knitters find the Finchley graft simpler and easier to remember.
This method is perfect for projects like sock toes, where a smooth, seamless join is needed to connect the fabric without leaving any visible seams.
One key advantage of the Finchley graft is its simplicity. Unlike other grafting techniques, which may require extra setup steps or finishing touches, the Finchley graft avoids these complications.
This means there is no need to worry about unwanted “ears” at the edges of the graft, common in some techniques where the edge does not line up neatly. The result is a clean and professional finish, even for knitters who are new to grafting techniques.
This technique is ideal for projects where both sides of the fabric must look the same. Since it doesn’t leave a seam or edge visible from either side, the Finchley graft works well for reversible items like socks, mittens, and scarves, where the join should be invisible to the eye.
Why Use the Finchley Graft?
The Finchley graft offers several benefits over other grafting techniques like the Kitchener stitch. It’s especially helpful for knitters looking for a simpler and faster method to achieve a professional finish.
Below are the key reasons why you might choose the Finchley graft for your next project:
- Easier to remember: The Finchley graft requires fewer steps than the Kitchener stitch, making it easier to learn and quicker to perform.
- Saves time: Unlike the more complex Kitchener stitch, which takes time to master, the Finchley graft helps you achieve smooth, professional results without memorizing long, detailed steps.
- Creates a clean, invisible join: This technique ensures that no visible seams or bumps appear at the join, making it perfect for projects like socks, where you need a smooth toe or heel.
- Works for both stockinette and reverse stockinette fabrics: This method adapts well to both fabric types, offering flexibility in your projects, whether you’re working with stockinette or reverse stockinette.
- Avoids “ears” at the edges: One of the main advantages of the Finchley graft is that it eliminates the common problem of “ears” on sock toes, ensuring the edge stays neat and flawless.
- Ideal for beginners: Since this method is easier to master than the Kitchener stitch, it is especially helpful for beginner knitters who want to create a seamless, smooth join without complications.
In short, the Finchley graft is perfect for knitters who want to create a seamless finish with minimal effort. It is ideal for beginner knitters or anyone who finds the Kitchener stitch too complicated.
This method allows knitters to achieve professional-looking results while avoiding the common problems associated with other grafting techniques.
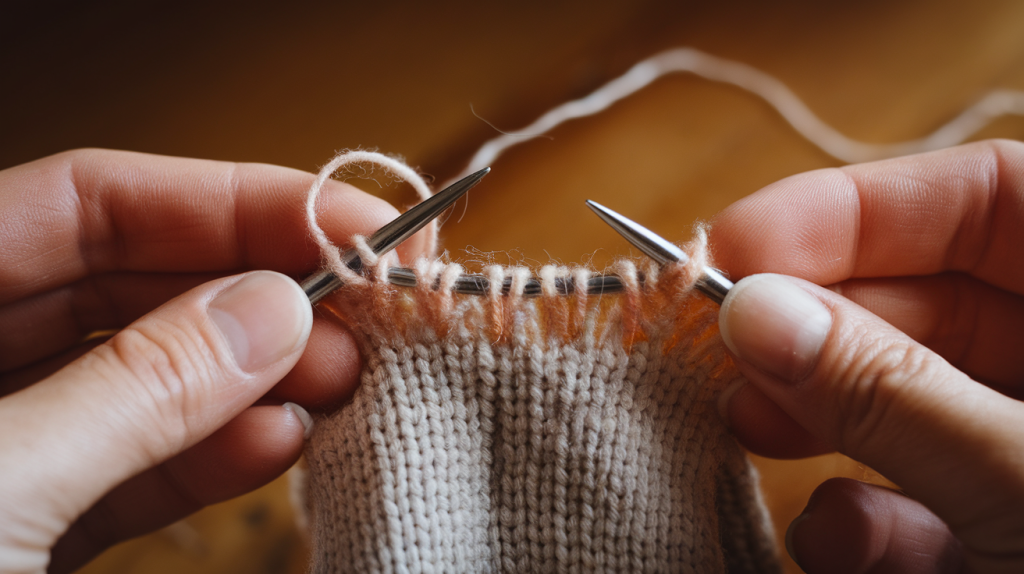
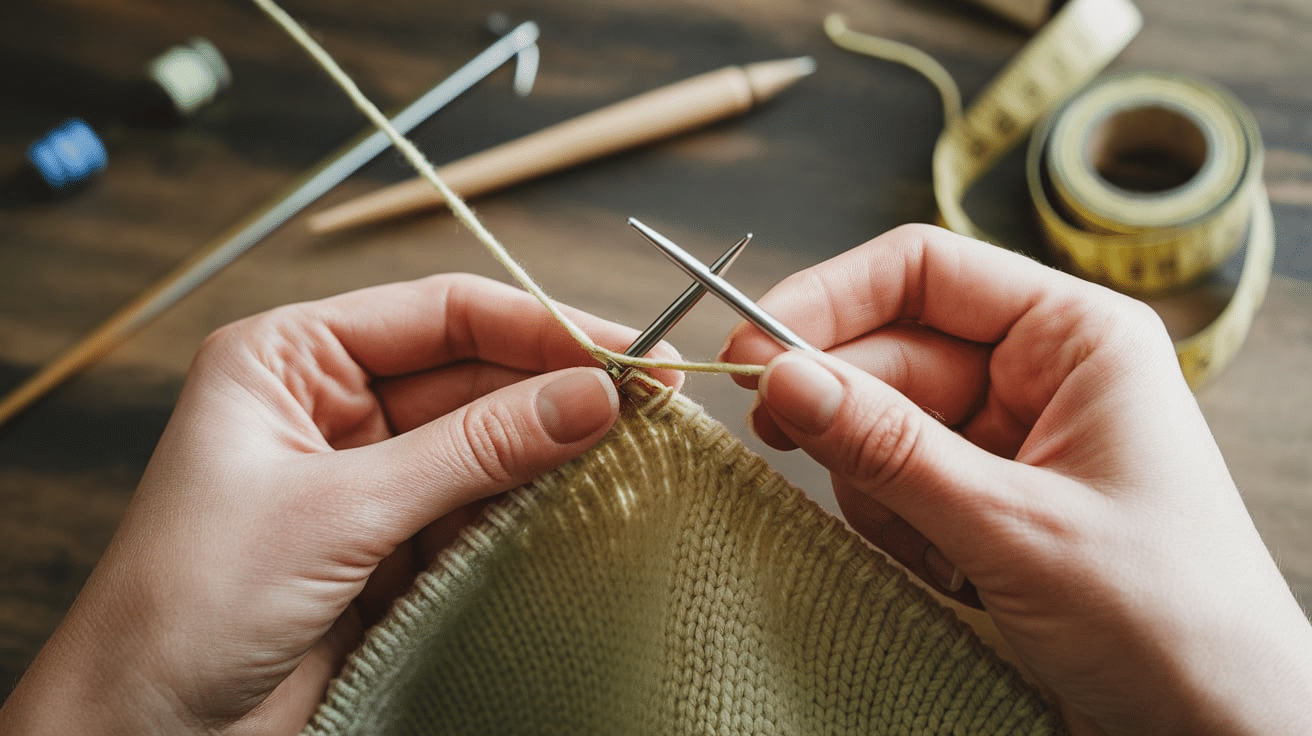
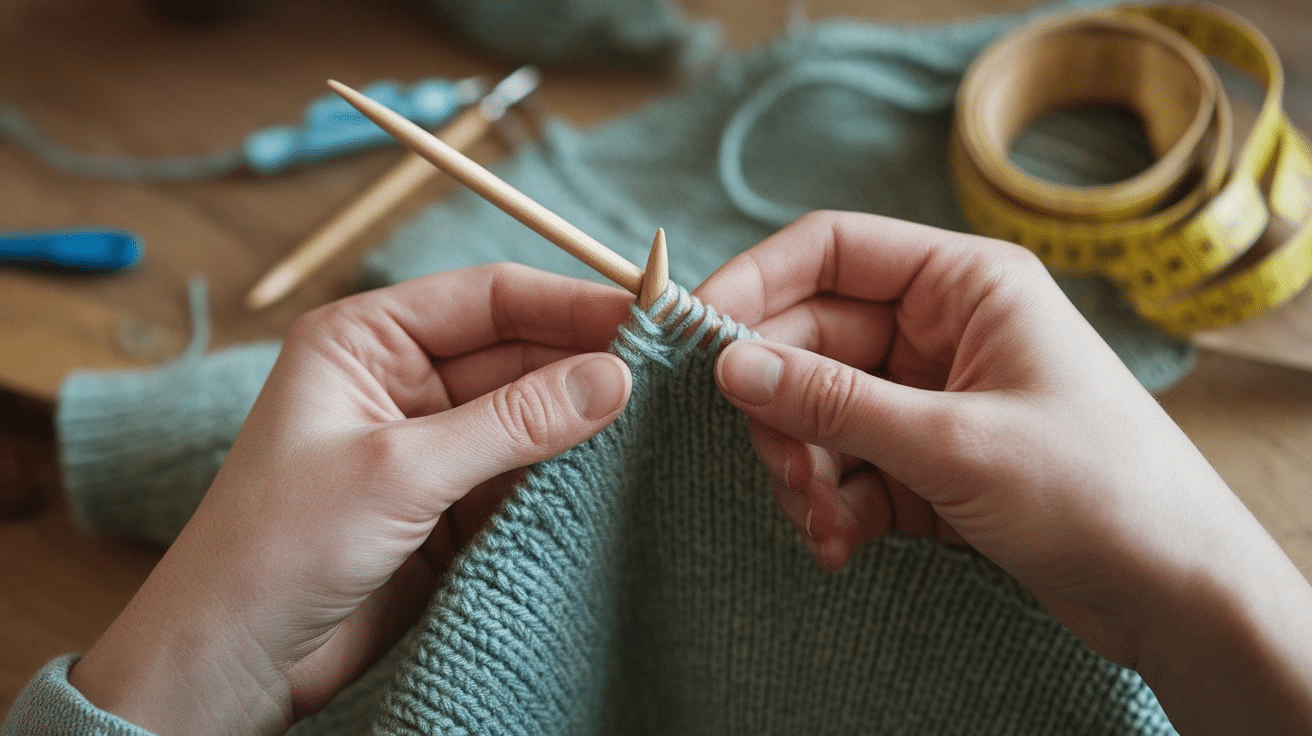
Step-By-Step Guide to The Finchley Graft
The Finchley graft is a simple yet effective method for creating a seamless and invisible join between two sets of stitches. This technique is especially useful for knitters who want to achieve a polished, professional finish without the complexity of more advanced grafting methods.
You can create a smooth and flawless join by following these detailed steps.
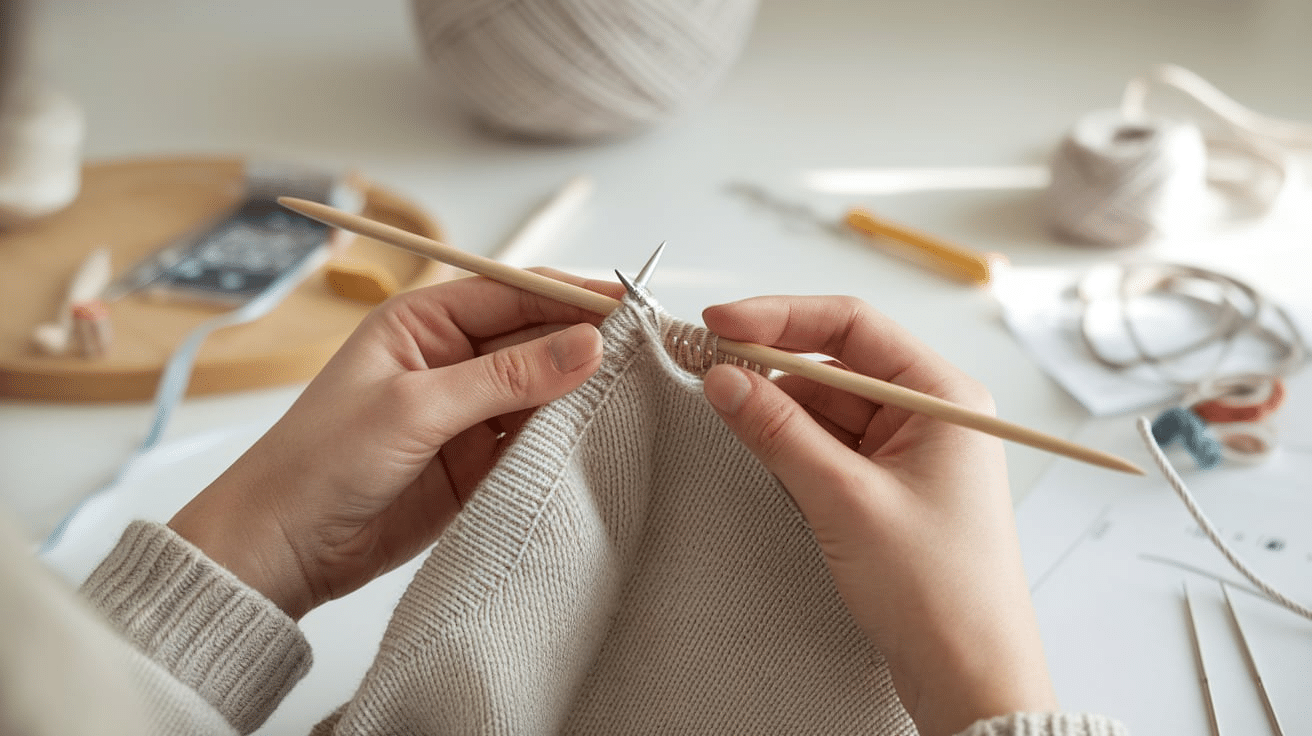
Divide Stitches Evenly
Begin by separating your stitches into two equal parts—one for the front needle and one for the back needle. This is an important step to ensure that both sides of the fabric are aligned and that the grafted section looks uniform.
If your stitch count is odd, one side will have one extra stitch, but the method can still work with a small adjustment.
Thread a Yarn Needle
Cut a piece of yarn that is about three times the length of the grafted area. This is enough yarn to comfortably finish the graft without running out.
Thread the yarn through a yarn needle, making sure that the yarn is strong and smooth, as this will help the stitches pull together seamlessly.
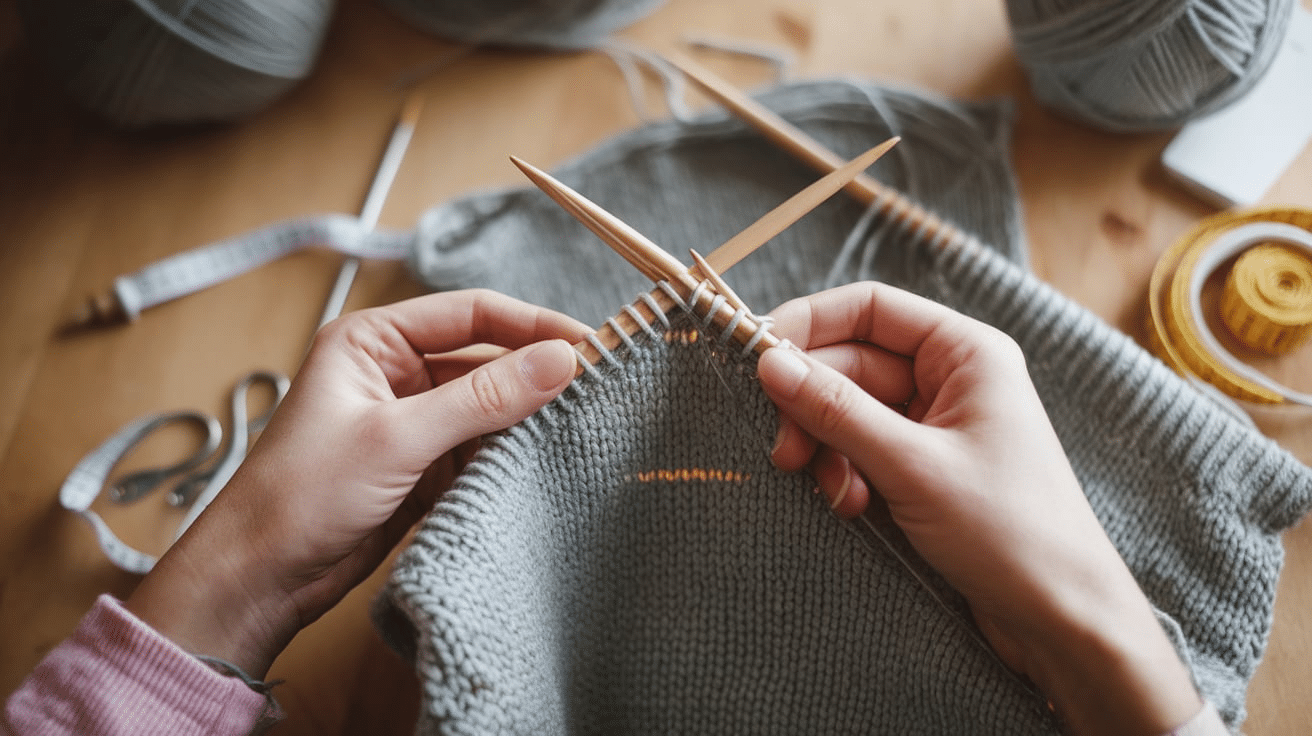
Knitwise and Purlwise Instructions
To start the graft, insert the needle into the first stitch on the front needle and then into the first stitch on the back needle. Alternately, insert the needle through the stitches, following the pattern of knitwise and purlwise.
This will create an invisible join between the two sides, ensuring that both fabric layers are connected smoothly. The key here is alternating between knitwise and purlwise to maintain the natural flow of the fabric.
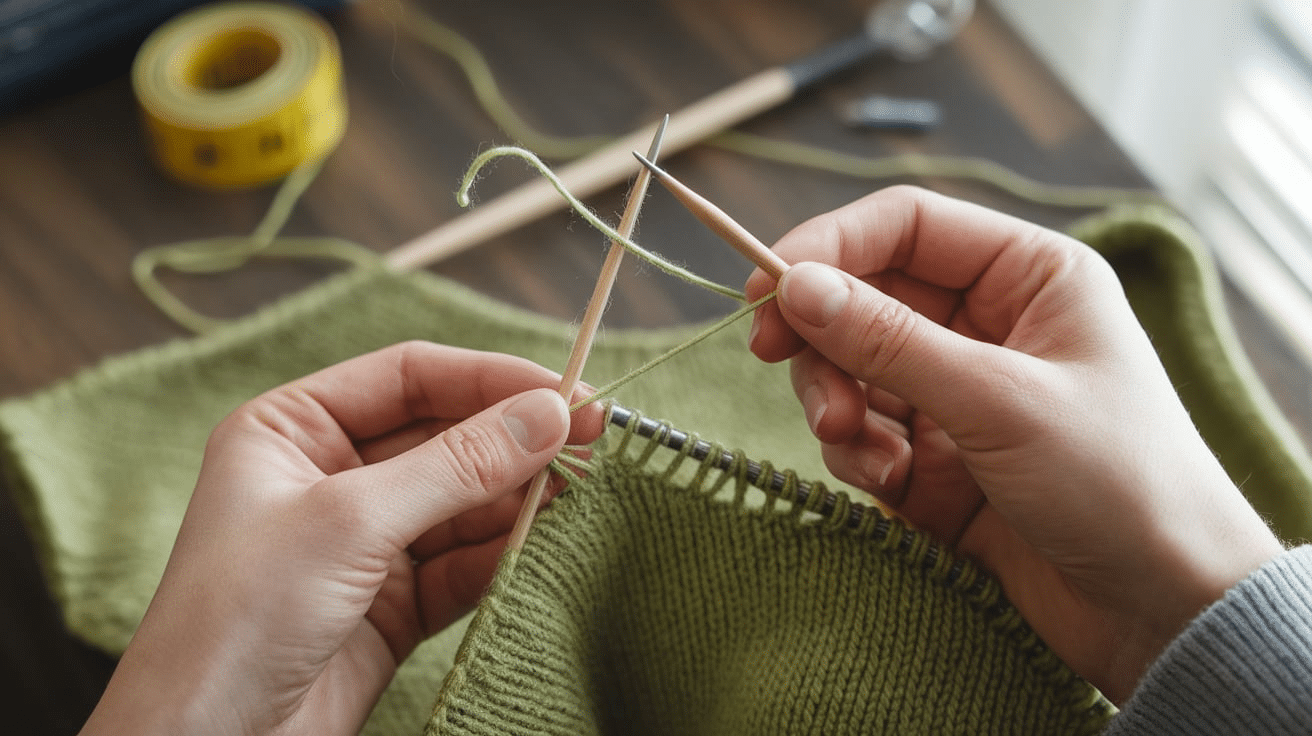
Repeat until Completion
Continue this process, stitch by stitch, until all the stitches have been grafted together. Each stitch should be carefully grafted in the same alternating pattern to maintain evenness across the project.
After completing the grafting process, pull the yarn through the final stitch and gently tighten the yarn to secure the seam. You’ll want to check that the seam is not too tight or too loose at this point.
By following these steps carefully, you will have a smooth, seamless join that blends effortlessly with the surrounding fabric. When you finish a sock toe, a hat, or a sleeve, the Finchley graft provides a professional finish without visible seams or bumps.
Tips for A Successful Finchley Graft
Achieving a perfect Finchley graft requires attention to detail and practice. Here are some helpful tips to make sure your grafting technique is successful.
Tension Control
One of the most important aspects of grafting is maintaining even tension throughout the process. The grafted area may become puckered or raised if your tension is too tight, creating an uneven finish.
Conversely, if your tension is too loose, the stitches may appear baggy, leaving gaps between them. The key is to maintain a steady and consistent tension throughout the grafting process. If you’re unsure about the right tension, practice on a scrap piece of yarn to get a feel for the process.
Practice Makes Perfect
The more you practice the Finchley graft, the more comfortable and confident you will become with the technique. It’s a good idea to practice on a small swatch before attempting it on your main project.
This will help you get used to handling the yarn and needle, and you can experiment with different tensions to find what works best for you. As you practice, you’ll become quicker and more efficient, and your grafts will become more uniform and smooth.
Visual Guidance
Watching a video tutorial or referring to step-by-step photos can be incredibly helpful for visual learners.
These resources can provide a clearer view of how the stitches should be positioned and how the needle should be threaded. Some video tutorials slow down the process, allowing you to follow the technique at your own pace.
Take Your Time
One of the most important things to remember when grafting is not to rush the process. Taking your time ensures that the graft is even and tidy.
If you rush through it, you may have uneven tension, loose stitches, or gaps. Grafting requires patience and attention to detail, so focus on each stitch. Counting the number of stitches left to graft can be helpful so you don’t lose track of the process.
Use a Matching Yarn
When choosing yarn for grafting, try to use the same type of yarn as the one used in your project. This ensures that the graft blends well with the rest of the fabric, making the join nearly invisible.
If you don’t have the exact yarn, use something close in color and texture to minimize the contrast between the grafted area and the rest of the piece.
Common Mistakes and How to Avoid Them
Even though the Finchley graft is a simple technique, there are common mistakes knitters might make that can affect the final result. By being mindful of these issues, you can achieve a smooth, professional finish every time.
Uneven Tension
One of the most common issues when grafting is uneven tension. If your stitches are too tight, it can cause the grafted area to pucker or become distorted. If the stitches are too loose, you may end up with gaps between the stitches, which can make the graft visible.
To avoid this, make sure to keep your stitches relaxed but not too loose. Finding the right balance is key to a smooth and even graft.
Incorrect Needle Insertion
Another mistake is inserting the needle in the wrong direction. The needle should always go through the front and back stitches in a specific way, alternating between knitwise and purlwise.
If the needle is inserted incorrectly, it can lead to uneven joins and visible seams. Always check that the needle is going in the correct direction to maintain symmetry and create an invisible join.
Skipping Steps
Rushing through the grafting process can cause mistakes. If you skip steps, you risk making the graft uneven or inconsistent.
Be sure to follow the method carefully, paying attention to each step so you don’t have a noticeable seam or uneven stitches. Taking your time ensures a seamless and flawless finish.
Comparing the Finchley Graft to Other Methods
The Finchley graft is a popular choice for knitters due to its simplicity and effectiveness, but there are other grafting methods to consider. Here’s how the Finchley graft compares to two other well-known techniques.
| Aspect | Finchley Graft | Kitchener Stitch | Three-Needle Bind-Off |
|---|---|---|---|
| Procedure | Involves a skin graft taken from a donor site on the patient’s body | A technique used to join two pieces of knitting seamlessly | A method to join two pieces of knitting with a clean edge |
| Success Rate | High success rate with minimal rejection | High success rate when done correctly | Reliable, creates a strong seam |
| Recovery Time | Typically 2-4 weeks for initial recovery | No recovery time (used for finishing knitting projects) | No recovery time (used for finishing knitting projects) |
| Cost | Moderate cost | No cost (requires only a knitting needle and yarn) | No cost (requires only a knitting needle and yarn) |
| Complexity | Moderate complexity; requires skillful surgery | Moderate complexity; requires careful technique | Moderate complexity; requires careful stitch placement |
| Best For | Patients needing reconstructive skin grafting or skin restoration | Joining knitted pieces like socks or seamless items | Binding off edges of two knitted pieces for a strong seam |
Why Every Knitter Should Learn the Finchley Graft
The Finchley graft is a simple and effective alternative to the Kitchener stitch, especially for those struggling to remember all the steps.
Here are several reasons why learning the Finchley graft is a great choice:
- An easier alternative to the Kitchener stitch: The Finchley graft requires fewer steps and is easier to remember, making it perfect for beginners.
- Professional, clean finish: It creates a smooth, invisible join, ideal for projects like socks, mittens, and any item needing grafting.
- Improves grafting skills: The Finchley graft helps you master grafting techniques quickly, making it a great starting point for beginners.
- Faster and more efficient: This method is quicker than the Kitchener stitch, providing a seamless finish without compromising quality.
By learning the Finchley graft, you can achieve a neat, seamless join with minimal effort, making your knitting projects look polished and professional.
Conclusion
The Finchley graft is a valuable technique for knitters who want to create a clean, professional finish with minimal effort. It’s especially useful for projects like socks, mittens, and other items that require a seamless join. The method is simpler and easier to learn than the Kitchener stitch, making it a great option for beginners.
By mastering the Finchley graft, knitters can improve their grafting skills and quickly complete projects. This method works well for both stockinette and reverse stockinette fabrics, offering flexibility for various projects.
The Finchley graft helps knitters avoid common issues, like visible seams, and ensures a smooth, even join every time. With practice, it will become an essential technique in your knitting toolkit, providing an easy, professional finish.
Frequently Asked Questions
What Types of Projects Can I Use the Finchley Graft For?
The Finchley graft is perfect for any project that requires a seamless join, such as sock toes, mittens, and other reversible designs. It works well with both stockinette and reverse stockinette fabrics.
Do I Need Special Tools to Do the Finchley Graft?
All you need is a yarn needle and a piece of yarn, usually about three times the length of the graft. A smooth, strong yarn works best to ensure a clean finish.
How Can I Avoid Mistakes When Doing the Finchley Graft?
Practice is key. Make sure to maintain consistent tension to avoid gaps or puckers. Also, double-check your needle placement to ensure you’re grafting the stitches correctly.
Is the Finchley Graft Suitable for Beginners?
Yes! The Finchley graft is beginner-friendly, involving fewer steps than the Kitchener stitch. With practice, it can quickly become a go-to method for seamless grafting.


