


Last week, I needed tablecloths for my son’s birthday party in the backyard. With kids ready to spill juice and drop cake, I needed something easy to clean.
Store-bought options were expensive, so I made my own oilcloth instead. Making oilcloth at home is simple, quick, and budget-friendly.
In this post, you’ll learn:
- What materials do you need (most are already in your home)
- Step-by-step instructions anyone can follow
- Tips to fix common mistakes
Even if you’ve never made anything by hand before, you can do this! The process takes just a few hours, and the results last for years. No special skills are needed – just basic supplies and a bit of patience.
Ready to make something useful that will keep your tables clean and looking good? Let’s get started!
Materials You’ll Need for DIY Oil Cloth

Before you start making your oilcloth, gather everything you need. Most of these items are probably already in your kitchen or craft area. I like to set everything out on my work table before I begin.
Basic Tools
- Cotton fabric – Plain white or patterned cotton works best. I recommend using medium-weight fabric that isn’t too thin. Wash and dry it first to prevent shrinking later.
- Linseed oil – This is the main ingredient that makes your cloth water-resistant. Look for boiled linseed oil at hardware stores or craft shops. It dries faster than raw linseed oil.
- Paint brushes – Wide, flat brushes (2-3 inches) help cover large areas quickly. Foam brushes also work well and can be thrown away after use.
- Mixing bowl – Use a glass or metal bowl if you don’t mind getting oily. Plastic bowls might absorb the oil and become ruined.
- Measuring cups – For mixing the right amounts of ingredients. Metal measuring cups are better than plastic for this project.
- Drying area – You’ll need a flat surface where your fabric can stay untouched for 24-48 hours. I use a clothesline in my garage or backyard.
- Drop cloth or newspaper – This project gets messy! Cover your work area completely.
Optional Tools
- Mineral spirits – Adding this thins the mixture and helps it soak into the fabric better. It also speeds up drying time.
- Beeswax pellets – These make your oilcloth more water resistant and give it a firmer finish.
- Old pot – If using beeswax, you’ll need a pot you don’t plan to use for food again to melt the wax.
- Heat gun – This helps speed up the drying process if you’re in a hurry.
Check that you have everything before starting. Nothing’s more frustrating than having to stop mid-project for a supply run!
Step-By-Step Guide for Making Your DIY Oil Cloth at Home
Oil cloth is a versatile, water-resistant fabric that’s perfect for tablecloths, outdoor cushions, bags, and more. Making your own at home is economical and allows you to customize patterns.
1. Prep the Fabric
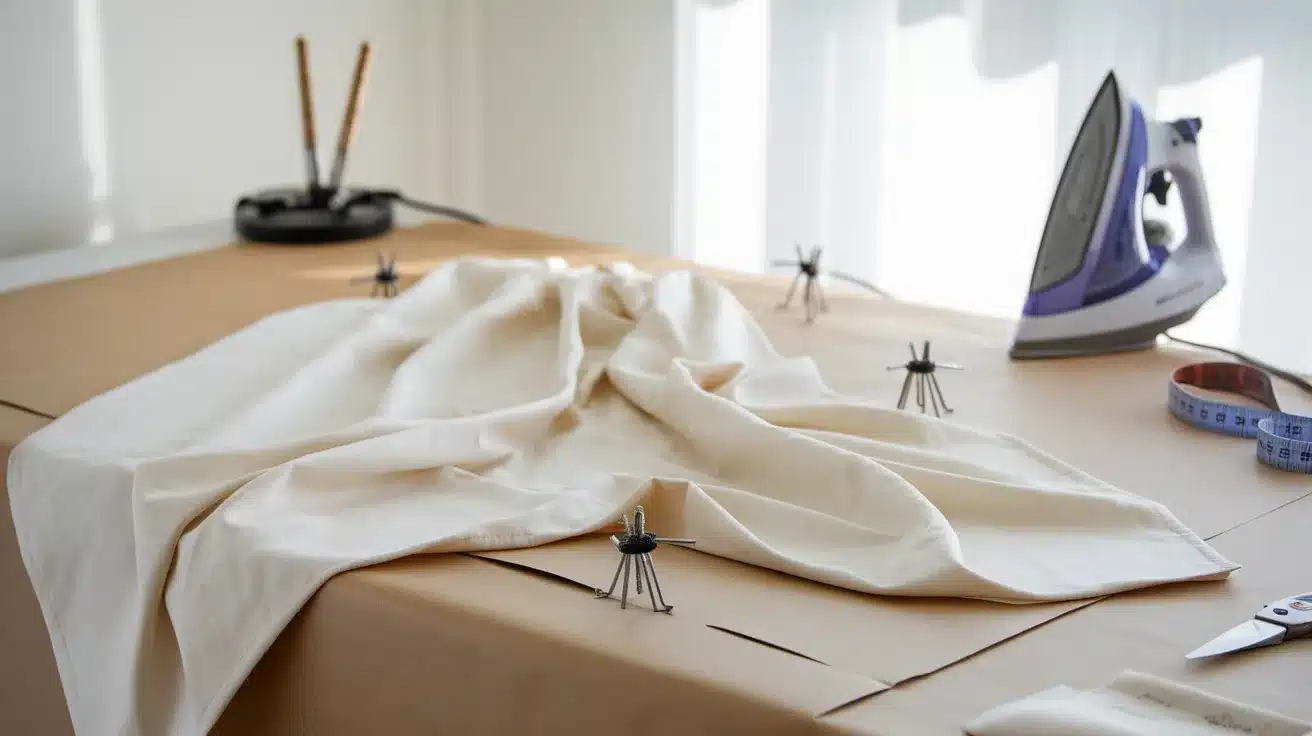
Start with clean, dry fabric. I always iron my fabric first to remove any wrinkles – this makes a big difference in the final product.
Lay your fabric on your covered work surface and smooth it out completely. If you’re working with a large piece, you might need to use weights at the corners to keep it flat.
Cut your fabric about 2 inches larger than you need, as it might shrink slightly during the process.
2. Mix or Melt Your Chosen Sealant
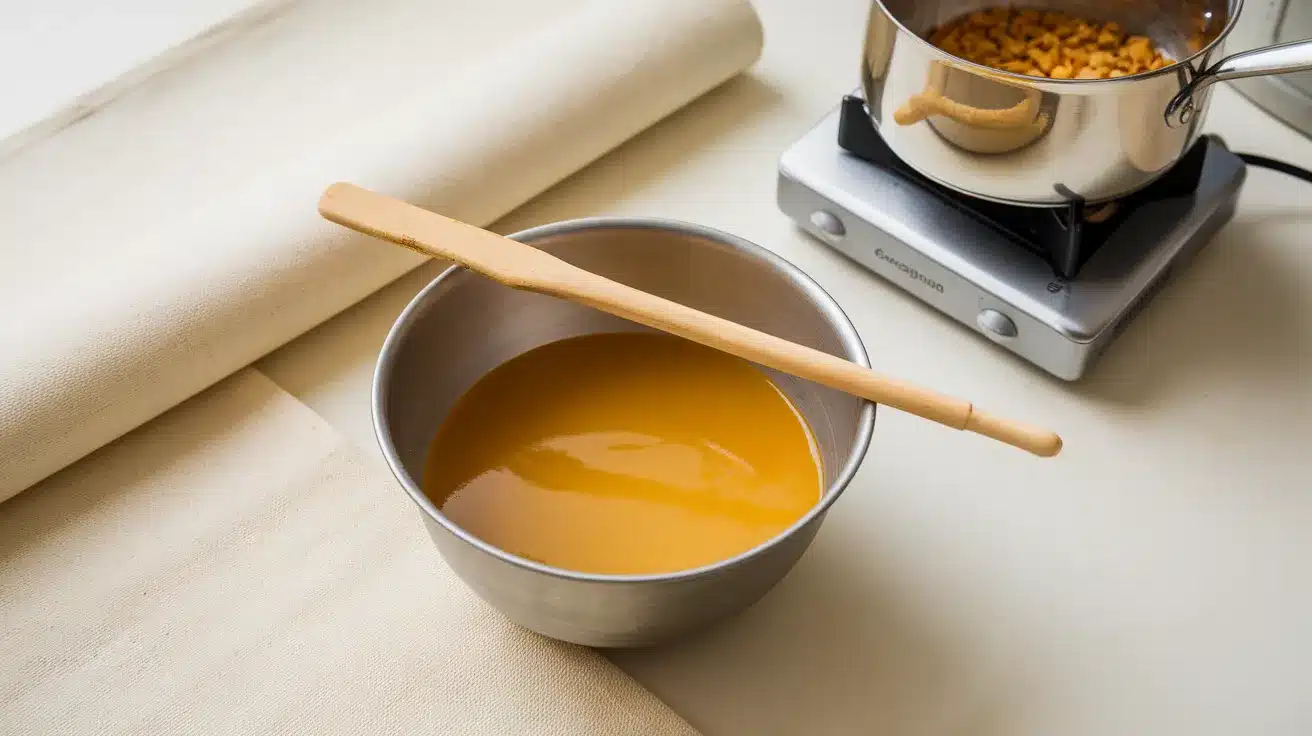
For a basic oil cloth, mix two parts boiled linseed oil with 1 part mineral spirits in your bowl. This mixture soaks into fabric better than pure oil.
Stir well until completely combined. If you’re adding beeswax for extra durability, melt it in your old pot over low heat.
Once melted, remove from heat and mix in the linseed oil. The mixture should be warm but not hot when you apply it.
3. Application Process
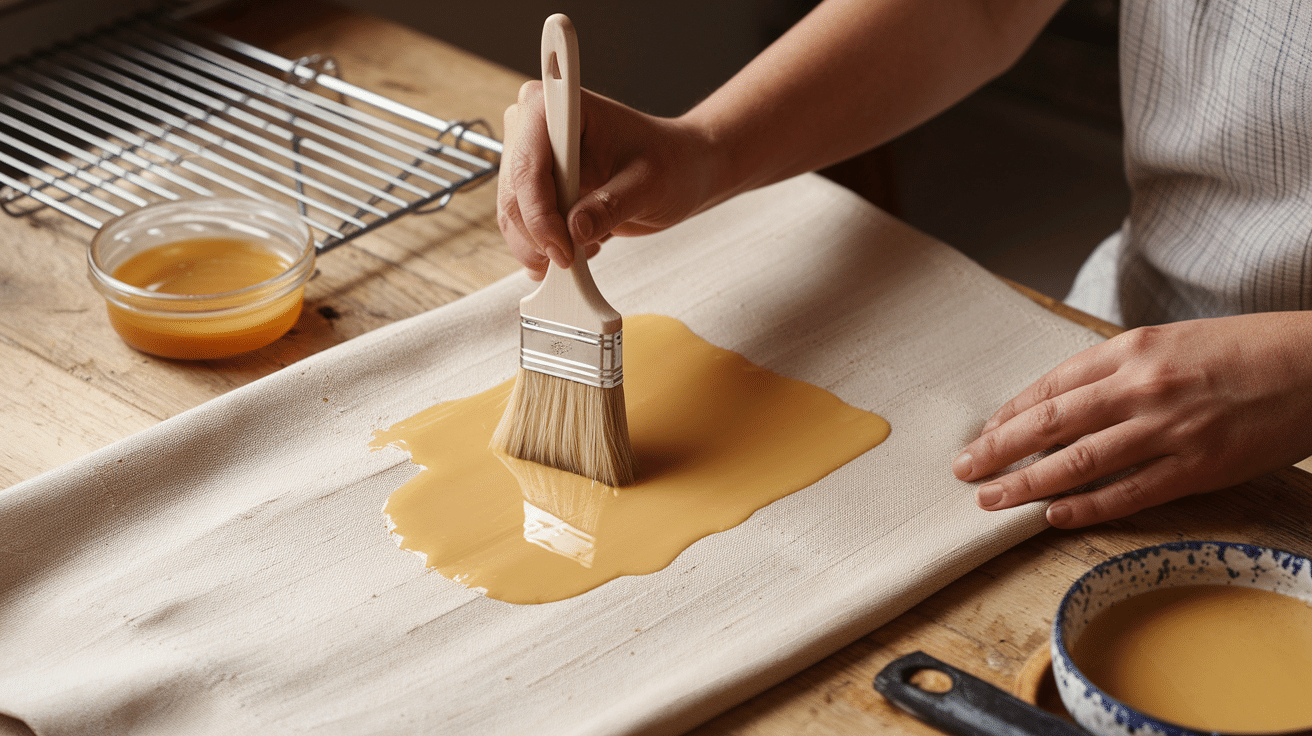
Pour a small amount of your mixture onto the fabric and spread it evenly with your brush. Work in sections about 1 foot square at a time.
Apply in thin, even layers – thick spots will take forever to dry and might remain sticky. Make sure you get full coverage, including the edges.
The fabric will quickly absorb the first coat and look darker. Don’t worry if it seems uneven at first.
4. Drying and Curing
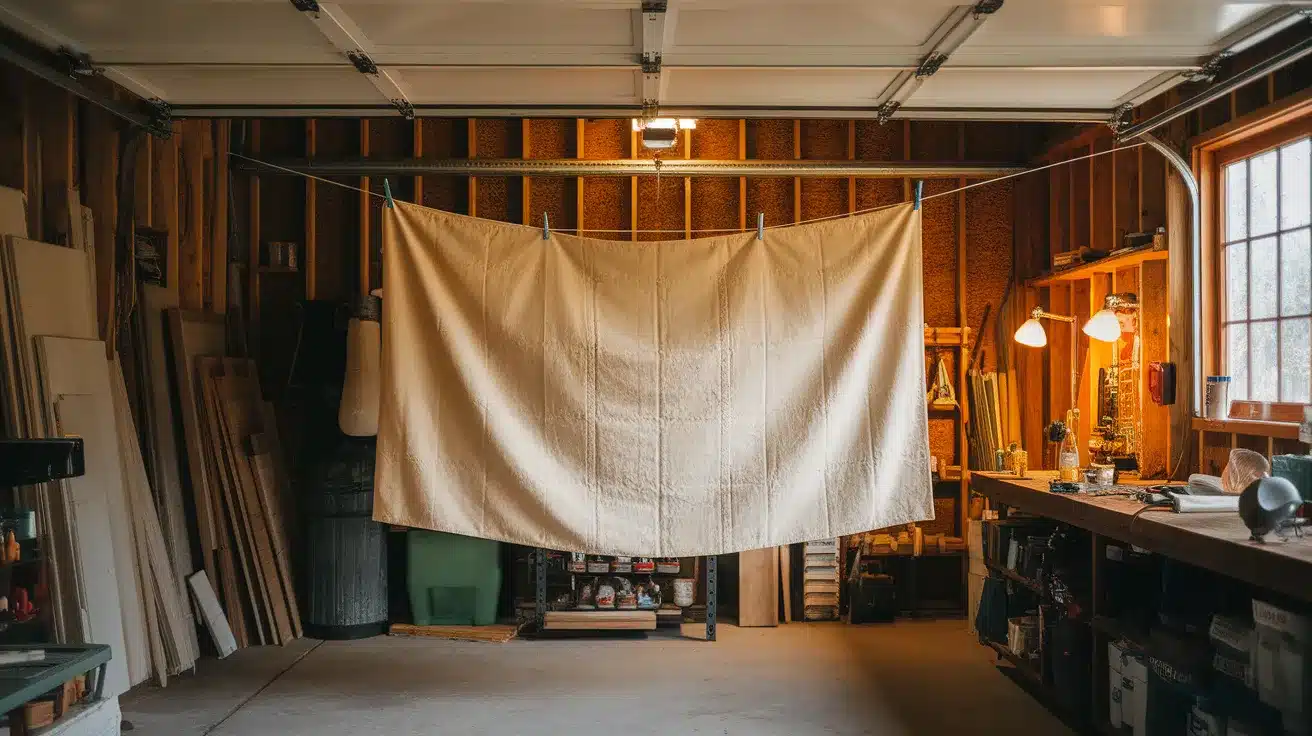
Hang your fabric or lay it flat in your prepared drying area. This step takes patience! The oil needs at least 24-48 hours to start drying properly.
I hang mine on a clothesline in my garage, where dust won’t stick to it. The full curing process takes about 7-10 days for the cloth to stop feeling tacky.
You’ll know it’s ready when it feels dry to the touch and doesn’t smell strongly of oil.
Why Make Your Own DIY Oil Cloth?
Making your own oilcloth saves money and lets you choose exactly what you want. Store-bought oil cloths can cost around $15-25 per yard, but making your own cuts that price in half. I started making mine when I couldn’t find the right pattern for my kitchen table.
1. Cost Savings
When you make oilcloth yourself, you pay mainly for the fabric and linseed oil. These basic supplies cost much less than finished products. I made three tablecloths for what one would have cost at the store. Plus, once you have the oil, you can make multiple projects from just one bottle.
2. Quality Control
When you make it yourself, you control how thick the coating is. Some store-bought options feel too plastic-like or too thin. I prefer my homemade version because it has a softer feel while still being water-resistant.
3. Learning New Skills
There’s something satisfying about creating useful things with your hands. Each time you make oilcloth, you get better at it. The skills you learn transfer to other DIY projects, too. My first attempt wasn’t perfect, but by the third one, I felt like a pro!
4. Environmental Benefits
Making your own cloth reduces packaging waste. You can also choose organic cotton fabric and natural linseed oil for a more earth-friendly option than mass-produced vinyl tablecloths.
Tips for Creating a Durable and Waterproof DIY Oil Cloth
Making your own oilcloth at home can save money while allowing you to create custom designs. These are essential tips to ensure your DIY oil cloth turns out durable and truly waterproof:
1. Multiple Layers
Adding more than one coat makes your oil cloth truly water resistant. I wait 24 hours between layers to let each coat dry properly.
Start with a thin layer, then add 1-2 more for best results. Don’t rush this step! Too many layers at once will make your clothes stay sticky for weeks.
Three thin coats work much better than one thick coat. If water still soaks through after your first treatment, simply add another layer after the first one dries.
2. Proper Ventilation
Work in a well-aired space when using linseed oil. The fumes aren’t good to breathe, and good airflow helps your project dry faster.
I work in my garage with the door open or outside on a calm day. Never use linseed oil near open flames, as it can catch fire.
Keep your work area away from your kitchen and heating appliances. Set up a fan if you’re working indoors to keep air moving across your project.
3. Patience with Curing
Rushing the drying process ruins your oilcloth. The full curing time takes 7-10 days, depending on your climate.
I ruined my first tablecloth by using it too soon – it stuck to everything I put on it! The wait is worth it for a smooth, non-sticky finish.
You can touch the surface to check if it feels dry or tacky. If your finger leaves a print or feels sticky, give it more time. Keep your cloth away from dust while it dries.
4. Test Swatches
Always test on a small piece of your fabric before treating the whole thing. I cut a 6×6 inch square and treated it exactly as I planned to treat the full piece.
This shows you how the color will change and how many coats you’ll need. Small tests save big disappointments.
If your test piece turns out too dark or too sticky, you can adjust your mixture or method. I keep my test swatches to compare different fabrics and recipes over time.
5. Surface Protection
Hang your cloth to dry rather than laying it flat if possible. When cloth lays on a surface, it can stick as it dries. I hang mine on a clothesline with clothespins, making sure the edges don’t touch each other.
If you must dry it flat, place it on wax paper or parchment paper. Flip your project every few hours while it’s still wet to prevent pooling and ensure even coverage.
How to Care for Your Homemade DIY Oil Cloth?
With proper care, your homemade oilcloth can last for years. I’ve had some of mine for over five years, and they still look good with basic maintenance.
Taking care of an oilcloth is much easier than washing fabric tablecloths after every spill.
1. Cleaning
Wipe your oil cloth with a damp sponge or soft cloth when it gets dirty. For tougher spots, use mild soap and water.
Avoid scrubbing too hard or using harsh cleaners that can break down the oil coating. I clean my kitchen tablecloth daily with just a quick wipe, and it keeps looking fresh.
For sticky spills like honey or syrup, a bit of warm water helps lift the residue without damaging the surface.
2. Storage
Never fold your oilcloth for long periods. Folding creates permanent creases that can crack the oil coating.
Roll your cloth with the treated side facing outward when not in use. I store my seasonal tablecloths on cardboard tubes from wrapping paper to keep them crease-free.
If you must fold for short-term storage, use soft folds, and don’t stack heavy items on top of your oilcloth.
3. Re-Sealing
After about a year of regular use, you might notice water starting to soak in rather than bead up. This means it’s time for a fresh coat of oil.
Apply a thin layer of linseed oil mix to restore the water-resistant properties. I touch up my most-used oil cloth once a year to keep it working well.
You don’t need to do the full process again – just a light coat on the top surface is enough to refresh it.
4. Avoiding Heat Damage
Keep your oilcloth away from hot items that could melt the finish. Use trivets under hot dishes and pans. Direct heat can soften the oil coating and make it sticky or damaged.
I learned this the hard way when I put a hot pan directly on my tablecloth, and it left a permanent mark. Heat damage can’t be fixed, so prevention is key.
5. Fixing Minor Damage
Small scratches or worn spots can be touched up easily. Apply a tiny amount of your original oil mixture just to the damaged area. Let it cure fully before using it again.
I keep a small jar of my oil mix stored specifically for repairs.
For torn edges or seams, you can stitch them like normal fabric, then seal the stitched area with a bit of oil to keep it waterproof.
Troubleshooting Common Oil Cloth Issues
Even with careful work, you might run into some problems when making an oilcloth. Don’t worry! Most issues have simple fixes.
1. Sticky Surface
If your oilcloth stays sticky after several days of drying, you probably applied too much oil or didn’t mix it properly. Fix it by:
- Wiping the surface with a lint-free cloth to remove excess oil
- Add a small amount of mineral spirits to help it dry
- Give it more time in a warm, dry place with good airflow
2. Uneven Coverage
Spotty or streaky areas happen when the oil isn’t spread evenly. To fix uneven spots:
- Apply a small amount of oil mixture just to the lighter areas
- Use a brush to blend the edges with existing coverage
- Let it dry completely before using
3. Oilcloth Feels Too Stiff
Sometimes, the finished cloth feels too cardboard-like. This happens with too much oil or wax. You can soften it by:
- Gently rolling and unrolling it several times
- Hanging it outside on a warm (not hot) day
- Using it regularly – it will naturally soften with use
4. The Color Changed Too Much
Oil treatments can darken or yellow fabrics more than expected. If your color changed too much:
- There’s no way to lighten it once done
- Try using lighter-colored fabrics next time
- Remember this effect when choosing patterns
5. Mold or Mildew
If you store your oilcloth while it’s still damp or in a humid place, mold might grow. To fix this:
- Wipe with a solution of 1 part vinegar to 4 parts water
- Let it dry completely in direct sunlight
- Store in a dry place after cleaning
Conclusion
Making your own oilcloth is a simple process anyone can master. Remember the basic steps: prepare your fabric, apply the oil mixture evenly, and give it plenty of time to dry.
Your first try might not be perfect, but each project gets better! I love how my homemade oil clothes add color to my home while being truly useful. The feeling of wiping up spills with something you made yourself is surprisingly satisfying.
Now, it’s your turn to try! I’d love to see what you create with your new skill. Share photos in the comments or ask questions if you run into problems.
The oil cloth community is friendly and helpful – we all started as beginners once. What pattern will you choose for your first project?
Frequently Asked Questions
Can I Use Recycled Plastic Bags Instead of Linseed Oil for Waterproofing?
No, plastic bags won’t work. They can’t bond properly with fabric and will peel off. Stick with linseed oil or beeswax for lasting waterproofing.
How Long Does Homemade Oil Cloth Typically Last?
With proper care, homemade oilcloth lasts 2-3 years with regular use. Items used less frequently can last 5+ years before needing a fresh coat.
Can I Sew Through Oil Cloth with My Regular Sewing Machine?
Yes, but use a leather or denim needle. Add tissue paper on top to prevent sticking. Clean your machine afterward, as oil residue can build up.


