


Have you ever wanted to make your socks but thought it would take forever? I’ve got good news for you! In this article, I’ll show you how to knit a pair of comfy ankle socks in one weekend.
You’ll learn:
- The best yarn for beginner sock knitters
- A simple 4-step heel technique
- How to avoid the dreaded “sock gap”
- Tips for making your socks last longer
These simplified techniques have helped even my most frustrated students create beautiful socks they’re proud to wear. Whether you’re looking to save money, create personalized gifts, or enjoy a satisfying weekend project, these sock-knitting instructions will help you do so.
The best part? You only need basic knitting skills to start. Let’s get those needles clicking!
Materials Needed
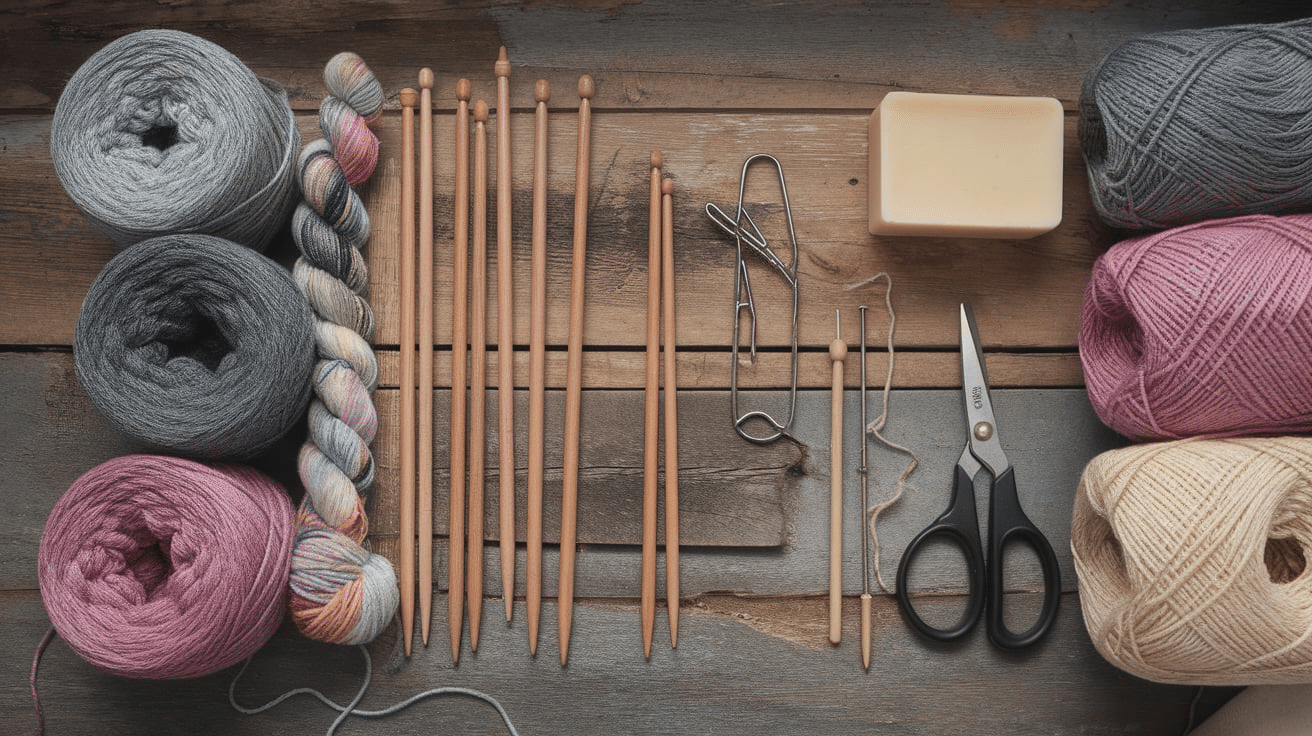
Before we start knitting, let’s gather everything. Having the right tools makes the process smooth.
- Yarn – Soft and warm. Wool or a wool blend works best.
- Knitting needles – Double-pointed (DPNs) or circular, size depends on your yarn.
- Stitch markers – To keep track of your rounds.
- Scissors – Small and sharp.
- Tapestry needle – For weaving in loose ends.
That’s it. Simple, right? But here’s something important. Pick the right yarn. Thin yarn makes lightweight socks. Thicker yarn makes them warmer. Go with what you like.
Needles matter, too. If you knit tight, use a bigger size. If your stitches are loose, go smaller. Once you have everything, you’re ready to cast on. Let’s get started!
Step-by-Step Guide to Knitting Ankle Socks
Ready to create your cozy ankle socks? Follow these simple steps to knit a perfect pair this weekend, even if you’re new to sock knitting.
Take it one section at a time, and you’ll wear your handmade socks before you know it!
Step 1- Casting on And Knitting the Cuff
I remember how lost I felt when knitting my first sock. Don’t worry – you’ve got this! Start by grabbing your double-pointed needles and yarn. Cast on 48 stitches and divide them evenly among three needles (16 on each). Join in the round, being careful not to twist your stitches.
This is crucial! A twisted cast-on means starting over. For the cuff, work in a K2, P2 ribbing pattern for about 1.5 inches. This creates a nice stretchy top that stays up on your ankle.
Need a tip? Place a stitch marker at the beginning of your round so you don’t lose your place.
Step 2- Knitting the Heel
Now for the part that scares most beginners: The Heel. The heel isn’t as hard as it looks! I use a simple flap-and-turn method: Knit across 24 stitches (half your total), turn your work, slip the first stitch, then purl across, and repeat these two rows for about 2 inches.
Next comes the heel turn, which creates a cup shape that fits your heel. Work short rows by decreasing one stitch at a time until you have 8 stitches left in the middle. Trust the process—it might look weird until you’re done!
Step 3- Knitting the Foot
Ahh, the easiest part of sock knitting! Pick up stitches along the sides of your heel flap. This might feel awkward at first. Return to knitting in the round, working: Knit across the top of the foot (instep), and work decreases along the sides to shape the gusset.
Once your gusset decreases are complete, knit every round until the foot measures about 2 inches less than your total foot length. Take breaks during this part. It’s repetitive, but the perfect time to enjoy a TV show while your hands work.
Step 4- Shaping the Toe
You’re in the home stretch now! For the toe, you’ll work decreases on both sides of the foot: Knit until 3 stitches before the middle, K2tog, K2, SSK, knit to the end of the round, knit all stitches, next round.
Repeat these two rounds until 8 stitches remain. The toe will start looking pointy – that’s exactly what you want!
Step 5- Finishing Touches
Almost done! Let’s wrap this up. Cut your yarn, leaving a 6-inch tail. Thread it onto a darning needle and run it through the remaining stitches. Pull tight to close the toe.
Don’t pull too hard, or you’ll create a pointy tip! Weave in all loose ends. I like to run them inside the sock where they won’t touch your skin. Try your sock on—how does it feel? Note anything you’d change for your second sock.
Now, cast on again and make it match! The second sock usually goes much faster. Congratulations! You hand-knit a pair of cozy ankle socks on a weekend. Wear them proudly—you’ve earned it!
Tips for A Perfect Fit
I know how difficult it can be when socks don’t fit right. But don’t worry—I have some simple tips to help you get a good fit.
1. Check Your Gauge
Before starting your sock-knitting project, it’s essential to knit a small gauge swatch to check your stitch count accurately. This preliminary step saves time and ensures proper fit, as incorrect tension can significantly impact your finished socks.
If you find your stitches are too tight during this test phase, your completed socks will likely feel stiff and uncomfortable when worn, potentially making them difficult to put on or causing discomfort throughout the day.
Conversely, if your stitches are too loose, you’ll face the opposite problem – your socks might stretch out excessively with wear, losing their shape and failing to provide the snug fit that makes hand-knit socks so enjoyable. Taking the time to perfect your tension before starting the actual project will lead to much more satisfying results.
2. Use the Right Cast-On
When beginning your sock project, choosing the right cast-on method is crucial for creating a comfortable, functional cuff. A stretchy cast-on technique helps ensure your sock cuff will stay snug against your leg without becoming uncomfortably tight or leaving marks on your skin.
For ideal results with sock cuffs, consider using either the Long Tail cast-on or the German Twisted cast-on (also known as the Old Norwegian method), as both provide excellent elasticity while maintaining structure.
These techniques create an edge that can expand comfortably when pulled over your heel while wearing, then return to its original shape to keep your socks securely in place throughout the day without sagging or binding.
3. Pick the Right Needle Size
When evaluating the fit of your hand-knit socks, needle size adjustments can make all the difference in achieving perfect comfort. If you find your finished socks feel too loose or baggy when worn, try going down a needle size for your next pair – this simple change will create a denser, more compact fabric with less stretch.
Conversely, if your socks feel uncomfortably tight or difficult to pull on, moving up to the next needle size will produce a slightly looser fabric with more give.
Remember that even a seemingly minor adjustment of just 0.25mm or 0.5mm in needle diameter can significantly impact the overall fit and feel of your socks, often transforming them from disappointing to delightful without needing to alter the pattern itself.
4. Adjust the Foot Length
The perfect fit for hand-knit socks includes a smooth toe area without bunching or excess fabric that could cause discomfort inside shoes. To achieve this ideal fit, take accurate measurements of your foot before beginning the toe section of your sock.
When knitting, continue the foot portion until you reach approximately 1.5 inches before your actual toe line, which is the point where you should begin the toe decreases.
This strategic timing for starting the toe shaping ensures your decreases will be properly distributed, creating a toe that hugs your foot comfortably while maintaining enough room to avoid constriction.
Following this measurement-based approach eliminates guesswork and leads to socks with professional-looking, comfortable toes that won’t bunch up or feel tight when worn.
5. Choose the Right Ribbing
When creating the cuff of your handmade socks, choosing the right ribbing pattern significantly impacts both comfort and functionality. A 1×1 or 2×2 rib stitch pattern naturally provides excellent elasticity, giving you a snug, secure fit around the ankle that prevents your socks from sliding down during wear.
For situations where you need even greater staying power, such as for athletic socks or when working with yarn that has less natural spring, consider using twisted ribbing instead of standard ribbing.
This variation involves knitting or purling through the back loop, which creates a more compressed, springier fabric with enhanced recovery and additional holding power.
This simple modification to your ribbing technique can make the difference between socks that gradually sag throughout the day and ones that reliably stay in place no matter how active you are.
6. Try It On
Before closing the toe, slip the sock onto it to ensure proper fit. It should feel comfortable against your foot but not loose enough to bunch up or slide around. Please take a moment to adjust the sock as needed, making sure it sits evenly around your foot.
This step is important as it allows you to check the fit while you can still make changes. A properly fitted sock will provide the right amount of warmth and support without being restrictive or causing discomfort during wear.
Once you’re satisfied with how it feels, you can proceed with closing the toe to complete your handmade sock. Knitting socks isn’t just about following steps—it’s about making them fit you. Small changes can make a big difference.
Happy knitting!
Conclusion
Congrats! You’ve just learned how to make your cozy ankle socks in a weekend. Wasn’t that easier than you thought? Remember, your first pair doesn’t have to be perfect. Even sock-knitting pros make mistakes sometimes.
The more pairs you make, the better you’ll get. Remember to show off your new socks! Please take a photo and share it with friends.
They might want you to teach them, too. Need more help? Join an online knitting group or visit your local yarn shop. Other knitters love to share tips.
Ready for a challenge? Next time, try different colors or simple patterns. You could make socks for everyone in your family!
Now, wear those handmade socks and enjoy how good they feel. You made them yourself!
Frequently Asked Questions
Do I Need to Be an Expert Knitter to Make These Ankle Socks?
Not at all! If you can knit and purl, you can make these socks. The pattern is designed for beginners and has clear, easy-to-follow steps.
What Supplies Do I Need to Get Started?
You’ll need sock-weight yarn (one skein is enough), a set of size 2 double-pointed needles, a stitch marker, and a darning needle. Any sock yarn from your local craft store will work great.
How Long Does It Take to Knit a Pair of Socks?
Most beginners finish one sock in about 6-8 hours of knitting time. If you can dedicate a few hours each day of the weekend, you’ll have a complete pair by Sunday night.
What’s the Trickiest Part of Knitting Socks?
The heel turn seems scary, but it is simple once you try it. Just follow the steps exactly as written and trust that it will work out, even if it initially looks strange.
Can I Adjust the Pattern to Fit Different Foot Sizes?
Yes! You can add or subtract sets of 4 stitches to change the width. For length, keep knitting the foot section until it’s 2 inches shorter than the actual foot length.


