


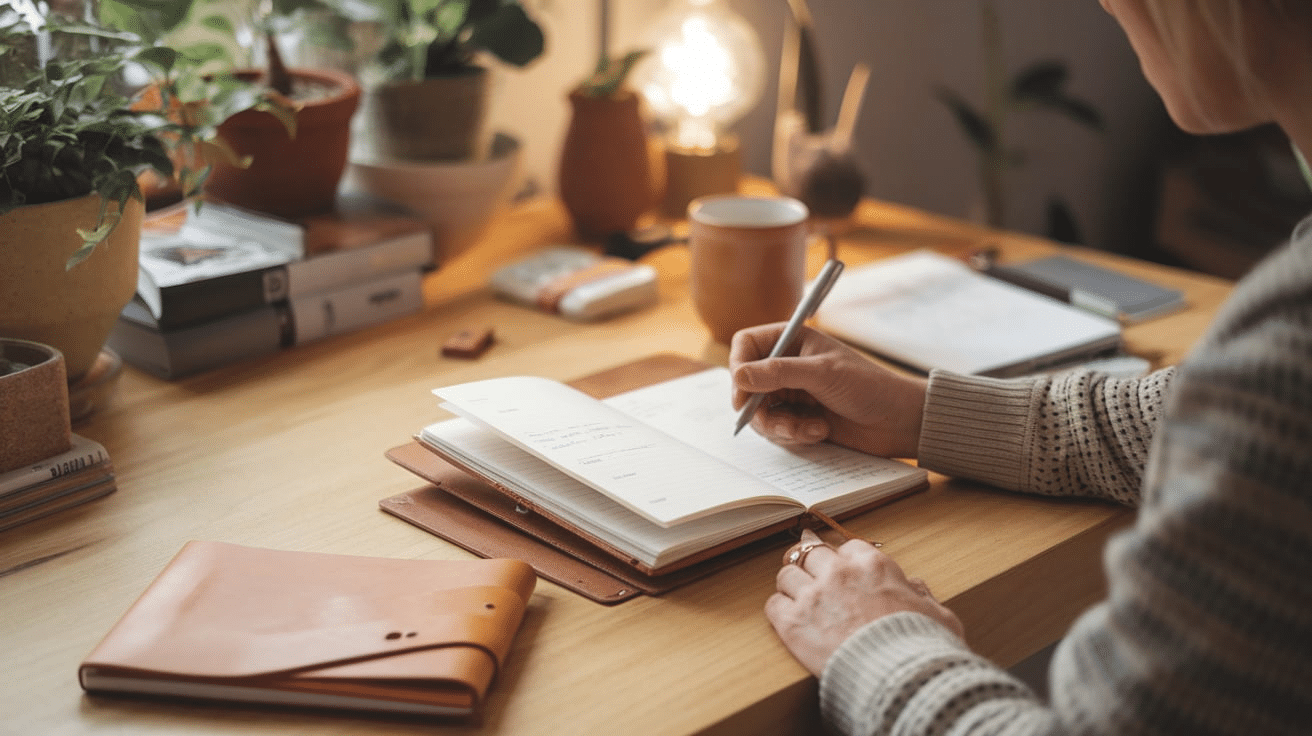
Making a leather journal is a fun and creative project anyone can try. Not only do you get to make something creative, but you also end up with a journal perfect for writing, sketching, or even gifting.
If you’ve ever thought about crafting your own journal, this guide will show you how easy and fun it can be. The best part? You don’t need any special skills—just some simple materials like leather, paper, thread, and a few tools.
I’ll take you step by step through the process, from cutting the leather to binding the pages together so you can create a personalized journal on your own.
It’s a relaxing and rewarding project that takes little time to complete. Follow along, and soon enough, you’ll have a custom-made leather journal ready to use.
Why Make a Leather Journal?
Leather journals are special for many reasons. They’re durable, look great, and can be passed down from generation to generation.
There’s something deeply satisfying about making something with your hands, especially when it’s as useful and timeless as a journal. Some reasons you might want to make your own leather journal:
- Personalization: Making your own journal allows you to choose the size, style, and color. You can even add designs, initials, or stamps for a more personal touch.
- Durability: Leather is a strong, long-lasting material that will protect your pages from wear and tear. Your journal will be something you can keep for years.
- Creativity: Crafting a leather journal gives you the opportunity to be creative. From choosing paper types to deciding on the stitching pattern, you’ll have a chance to express your style.
- Gift Giving: A handmade leather journal makes a wonderful gift. Whether for a friend, family member, or yourself, it’s a thoughtful and personal present.
- Cost-Effective: While buying a leather journal can be expensive, making one yourself is much more affordable. Plus, you get to customize it exactly how you want.
How to Make a Leather Journal
Follow these steps closely, and soon enough, you’ll have a handmade journal to call your own:
Materials and Tools Required
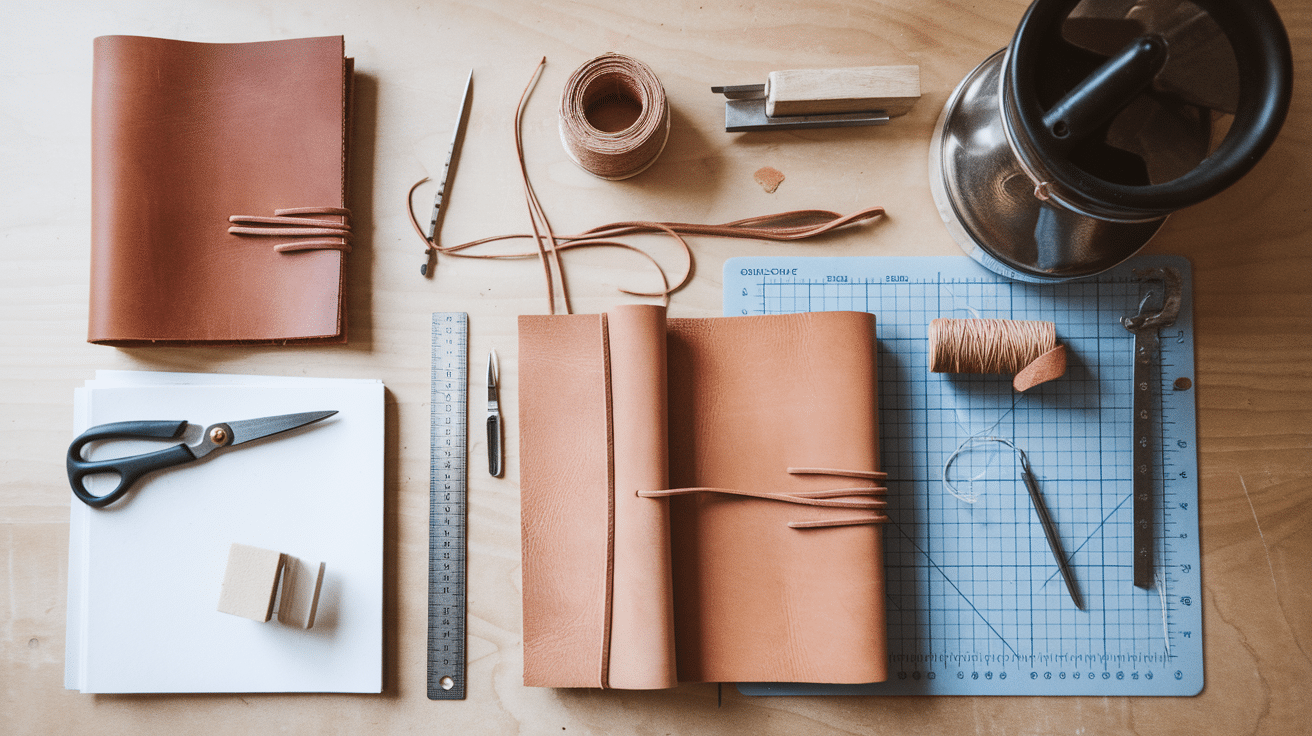
Before you get started, make sure you have all the necessary materials.
- Leather: For the cover. Vegetable-tanned or full-grain leather is a great choice.
- Thread: Waxed thread is best for stitching leather, as it’s strong and durable.
- Paper: You can use any paper you like. For a professional feel, you may want to use thicker paper or even handmade paper.
- Needle: A leather or bookbinding needle works best.
- Ruler: To measure and cut your leather and paper.
- Hole Punch: A leather hole punch or an awl is useful for making clean holes in the leather and paper.
- Scissors: For cutting the paper and leather.
- Craft Glue (optional): For securing the edges of the paper if needed.
- Cutting Mat: A mat to protect your work surface while cutting.
- Edge Beveler and Sandpaper (optional): For smoothing the edges of the leather.
Step-by-Step Guide to Making a Leather Journal
Follow this detailed guide to create your personalized leather journal, step by step:
1. Cut the Leather
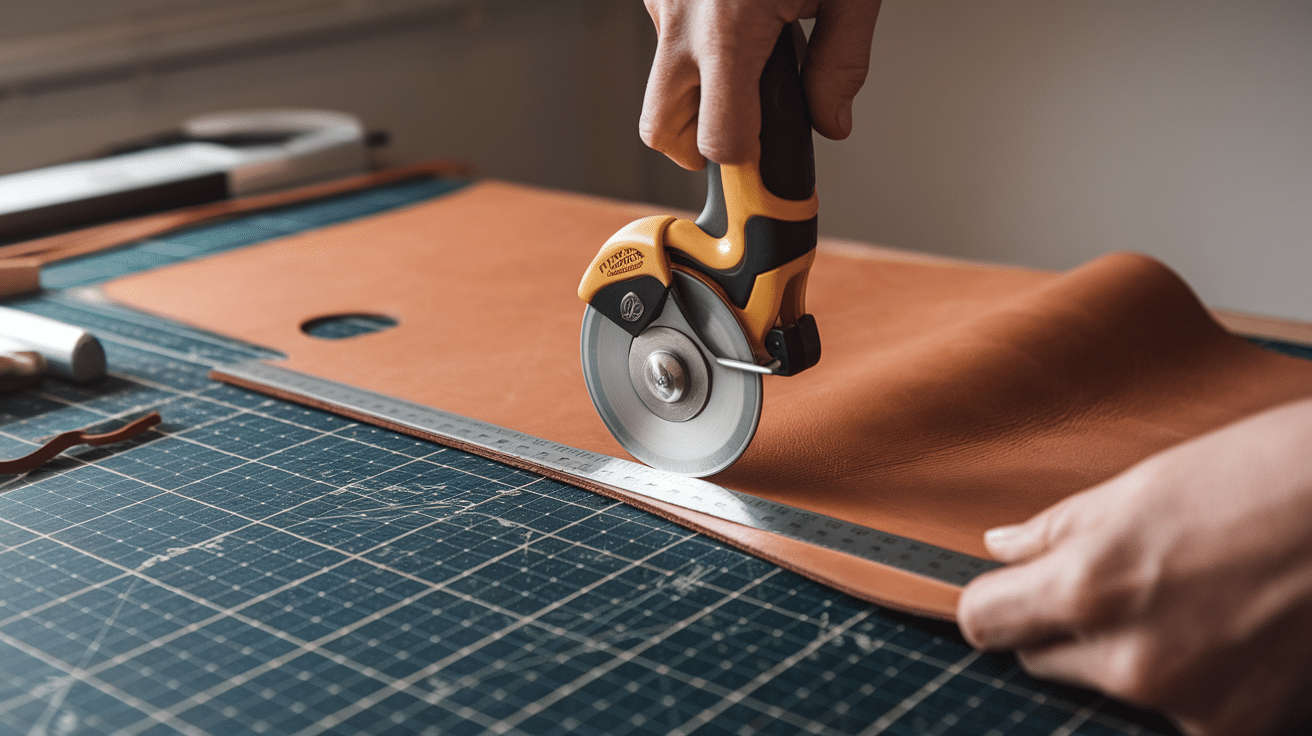
Start by cutting the leather for your journal cover. The size will depend on your preferred journal dimensions.
- For a 5″ x 7″ journal, You will need a piece of leather that is about 11″ x 8″ (the extra is for folding over the spine and creating the cover’s thickness).
- For an 8″ x 10″ journal, Cut your leather to approximately 14″ x 12″.
Use a ruler and rotary cutter or sharp scissors to make sure the edges are straight and even. It’s important to work slowly when cutting leather, as it’s a bit more challenging than paper.
2. Prepare the Paper
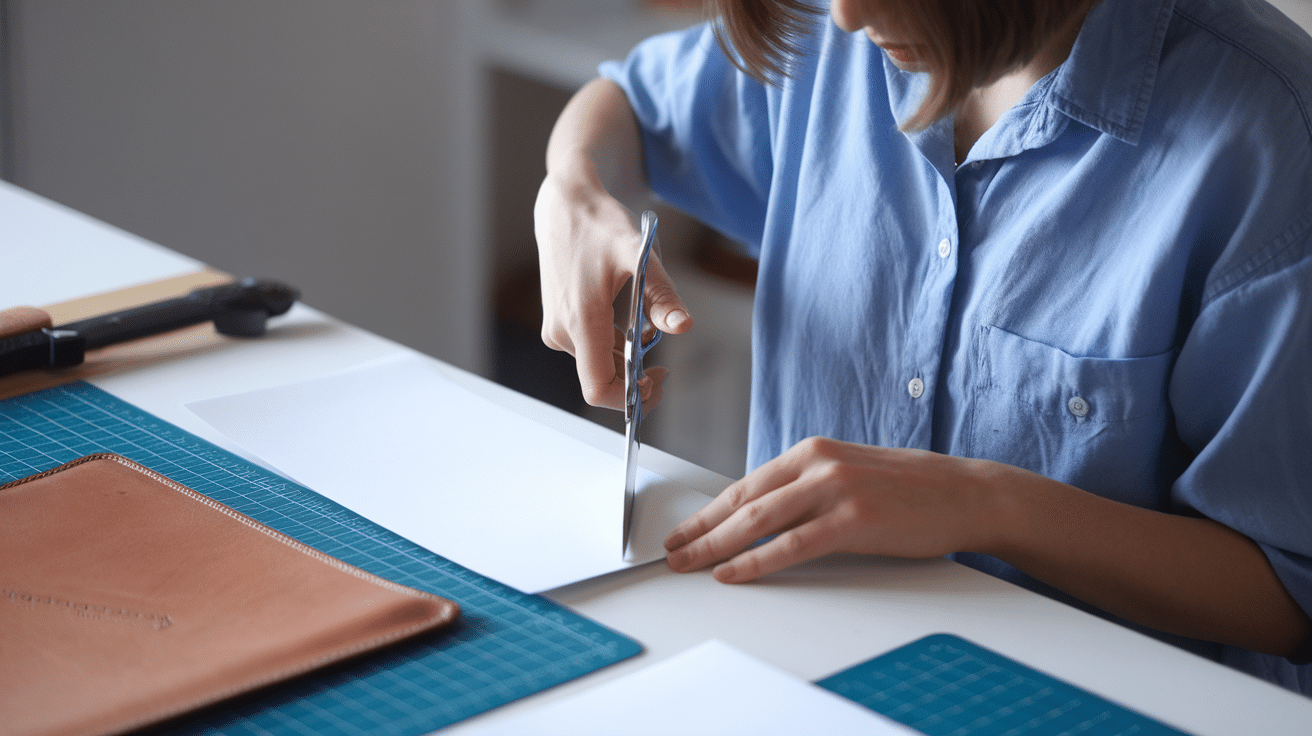
Now, prepare the pages for your journal.
- Cut the Paper: The paper should be slightly smaller than your leather cover. For example, for a 5″ x 7″ journal, the paper should be around 4.75″ x 6.75″.
- Make Signatures: Fold the paper into groups or “signatures” of about 4–6 pages each. The folds should be neat and aligned. You can stack multiple signatures, depending on how thick you want the journal to be. If you want a thicker journal, you can make 4-6 signatures with 10-12 pages each.
3. Mark and Punch Holes
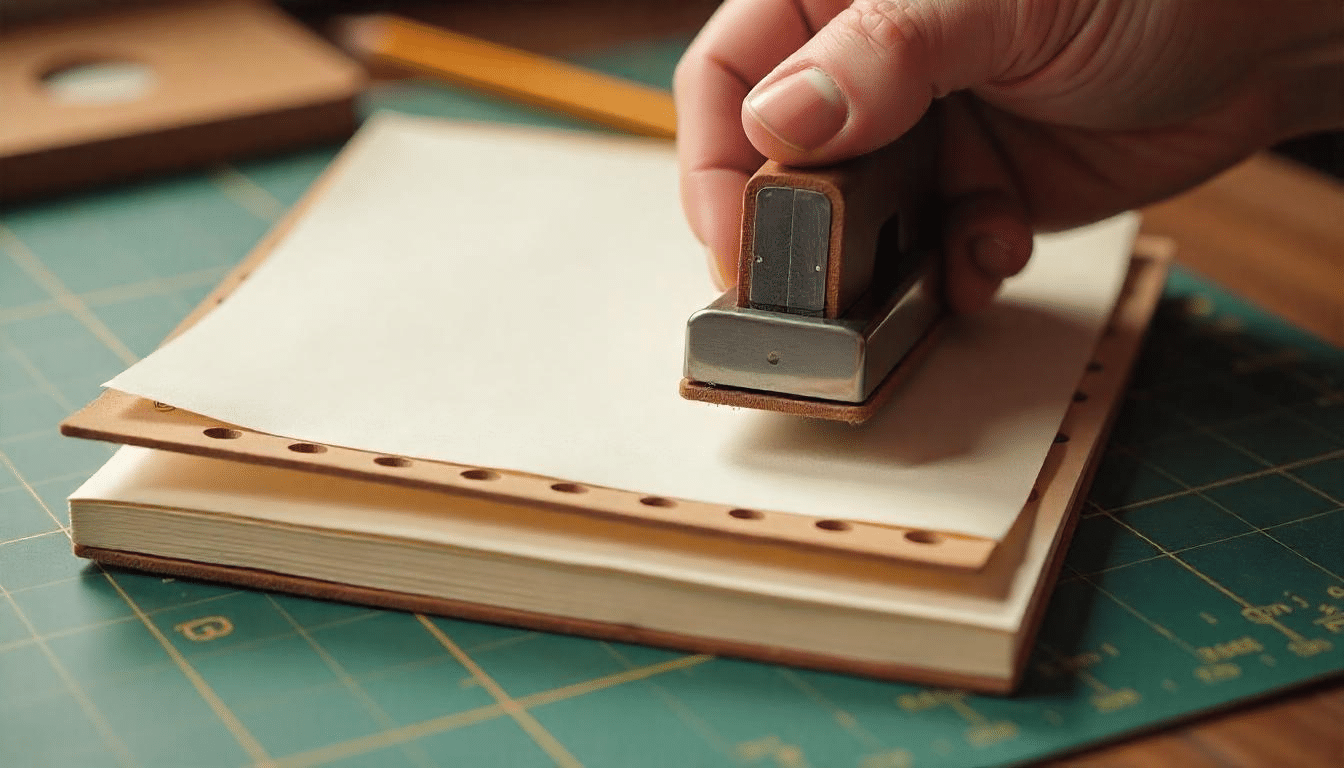
Next, it’s time to mark where the holes will go for binding.
-
Marking the Holes on the Leather: Place your leather piece on a flat surface. Use a ruler to measure equal spaces along the spine of the leather (typically, 1″ from the edge). Mark small dots where the holes will go. A good rule of thumb is to space the holes about 1/2″ apart, with around 4-6 holes in total for smaller journals.
-
Marking the Holes on the Pages: Stack your paper signatures on top of each other. Use the ruler and a pencil to mark where the holes will go along the spine of the paper. Make sure they align with the holes you’ve marked on the leather.
-
Punching the Holes: Using a hole punch or awl, carefully punch through the leather and paper at each marked point. Be sure to punch all layers at once so everything lines up properly. Make clean, straight holes for the best results.
4. Bind the Journal Together
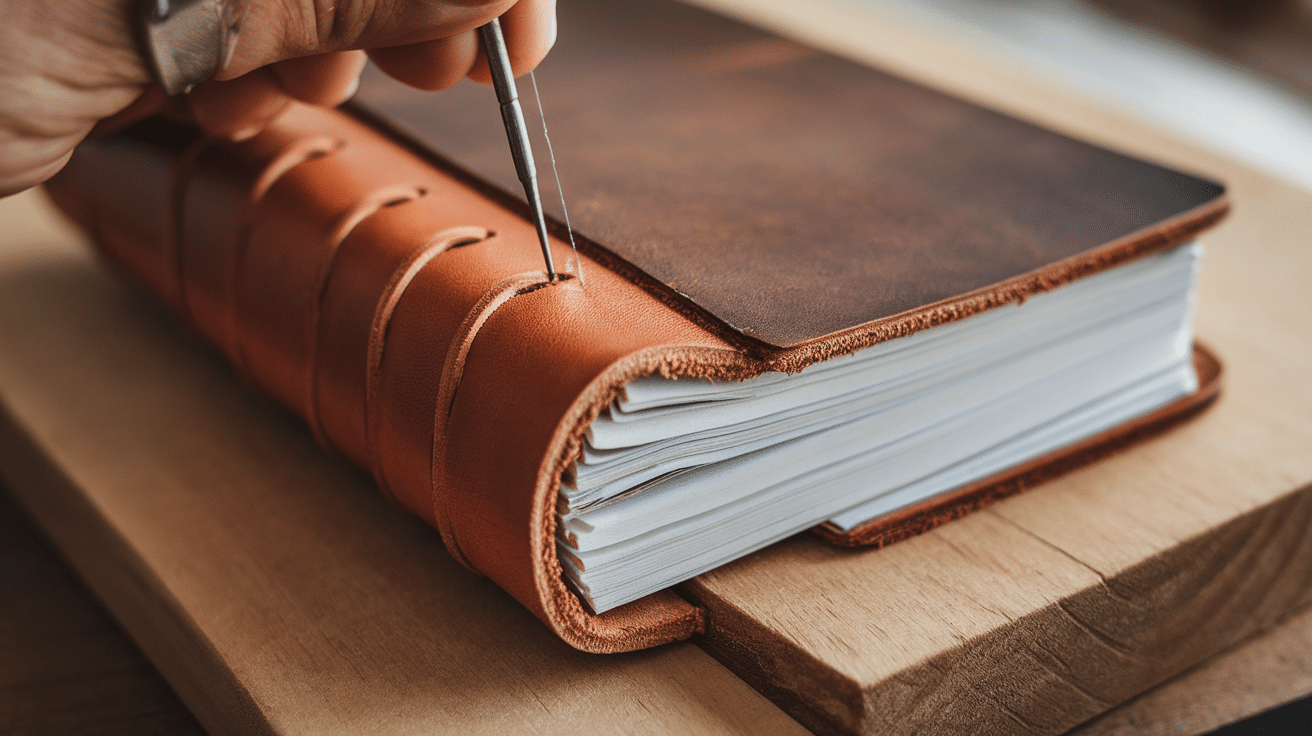
Now comes the binding!
-
Insert Needle Through the First Hole: Begin by pushing the needle through the first hole in the leather cover. Pull the thread all the way through, leaving a small tail at the end. Insert the needle through the corresponding hole in the paper signature.
-
Add the Second Needle: Insert the needle back through the hole from the other side, pulling the thread tight to ensure it stays secure. Repeat this process for each hole.
-
Continue the Stitching: Work your way along the spine of the journal, stitching through each hole with both needles. After each stitch, pull the thread tightly to ensure the pages are securely bound.
-
Tie the Knot: When you’ve reached the last hole, tie a secure knot with the two ends of the thread to finish the stitching. Trim any excess thread.
5. Finish the Edges
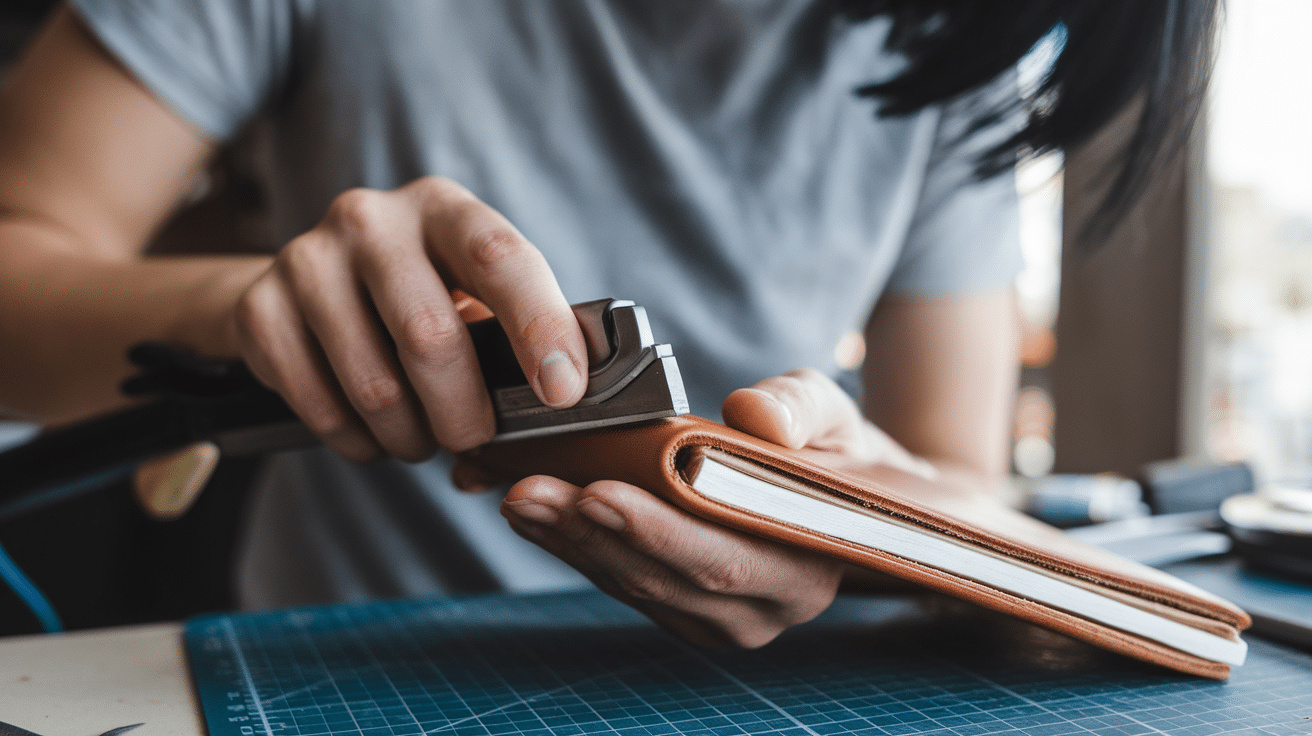
After your journal is bound, you’ll want to give it a polished look by finishing the edges of the leather.
- Round the Edges: If you prefer, use an edge beveler to round off the edges of the leather, creating a smooth, finished look.
- Sand the Edges: Use fine-grit sandpaper to smooth out any rough or uneven areas along the edges of the leather.
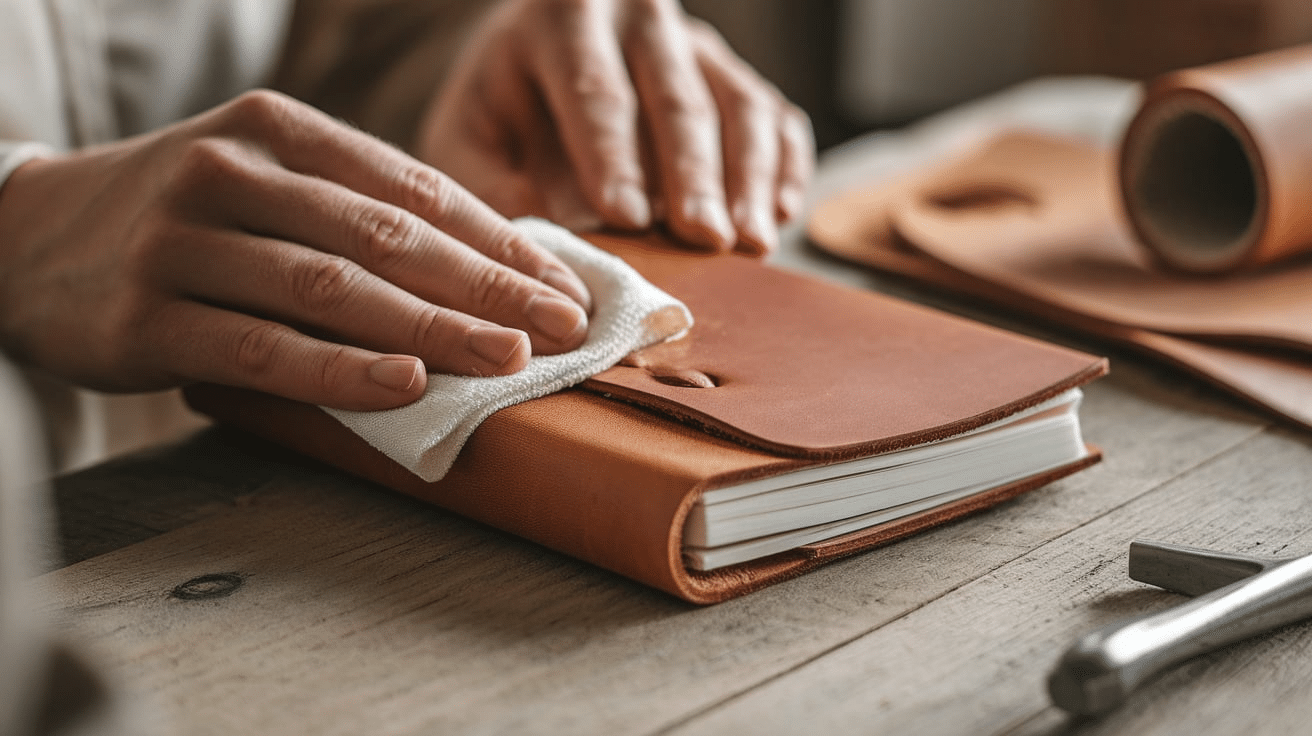
- Condition the Leather: Apply a leather conditioner to keep the leather soft and supple, helping to maintain its durability and appearance over time.
6. Customize Your Journal
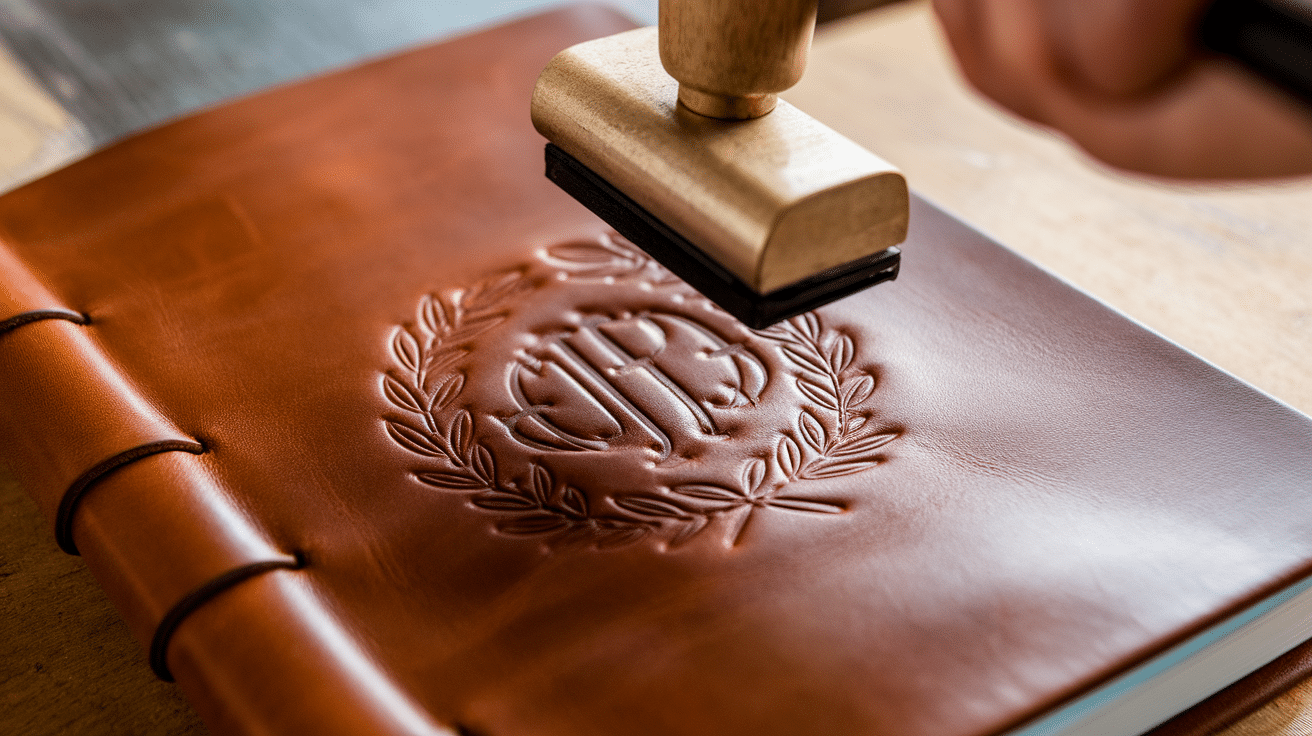
This step is optional, but it’s a great way to personalize your leather journal.
- Leather Dye or Paint: You can dye your leather a different color for a unique look. Apply the dye in thin coats and allow it to dry between applications. Be sure to use leather-specific dyes.
- Add a Design: If you want to emboss initials or a small design onto the cover, now’s the time. You can use a leather stamp and mallet to create the design, or you can hand-tool your patterns.
- Add a Closure: You can attach a simple leather strap or elastic band to the journal for easy closure.
Choosing the Right Leather for Your Journal
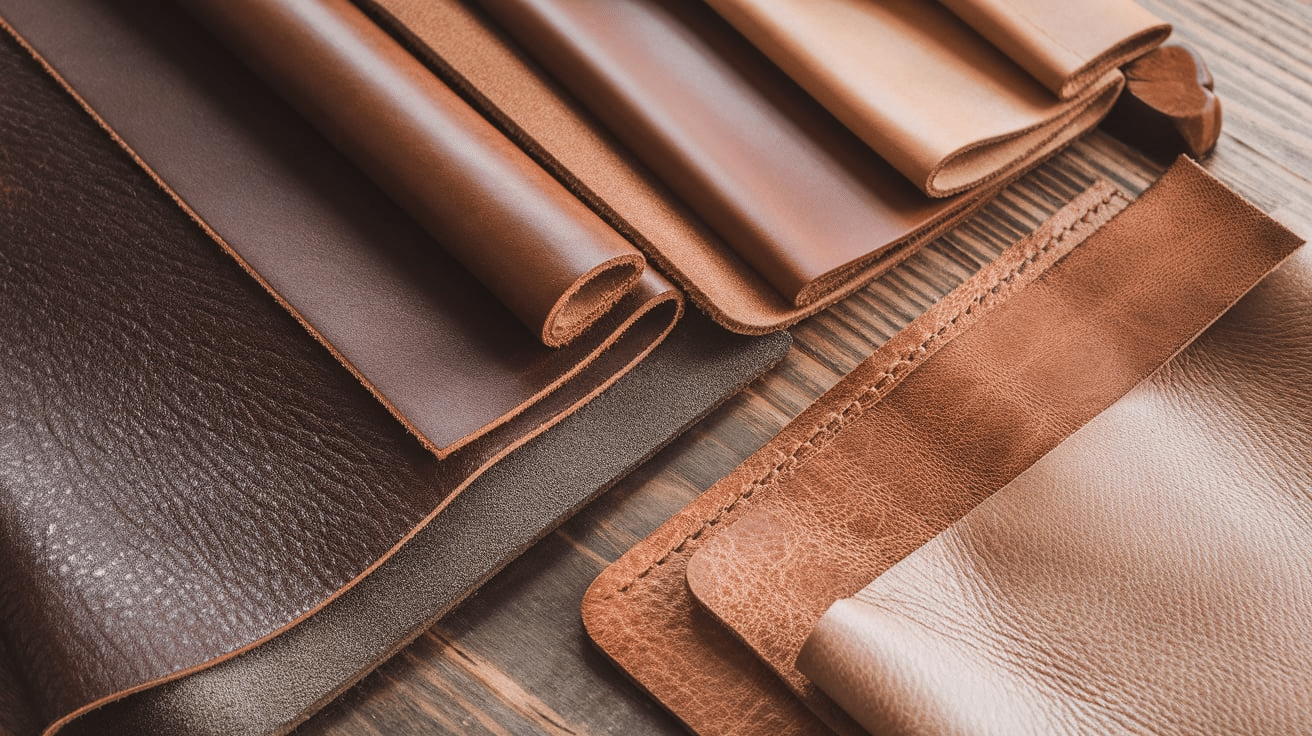
The leather you choose for your journal will greatly affect how it looks and feels. Not all leather is created equal, so it’s important to pick the right type for your project.
1. Vegetable-Tanned Leather
Vegetable-tanned leather is one of the most popular choices for crafting leather journals. It’s made using natural plant-based tannins, making it eco-friendly and long-lasting.
Over time, it will develop a unique patina that makes it even more beautiful. It’s a bit stiff at first but softens up nicely with use.
2. Full-Grain Leather
Full-grain leather is the highest quality leather you can use for your journal. It retains the full texture and natural markings of the hide, giving it a rich, authentic look.
It’s durable, strong, and will last for many years, but it’s also more expensive than other types.
3. Top-Grain Leather
Top-grain leather is slightly lower quality than full-grain but still a great choice for a leather journal. It’s been sanded and treated to remove imperfections, which results in a smoother texture.
It’s also more affordable than full-grain leather.
4. Soft or Thin Leather
If you prefer a softer, more flexible leather, look for softer options such as lambskin or goat leather. These leathers are thin, soft, and perfect for crafting a flexible journal that’s easy to carry around.
They also have a beautiful texture that adds character to your journal.
5. Leather Color and Texture
Leather comes in a variety of colors and textures. You can go for the classic brown or black look or choose something more vibrant, like red or blue. There are also different finishes available, including smooth, pebbled, or even distressed textures.
Choose a leather color and texture that reflects your style.
When buying leather, make sure to get a piece large enough for the journal you want to create. It’s better to have a bit extra than to end up with too little material.
Alternative Binding Methods for Leather Journals
If you’re feeling creative or want to try something different, there are many alternative binding methods you can find:
-
Coptic Stitch: This is a popular method for creating journals with exposed spines. It involves a series of interconnected stitches that form a beautiful, decorative pattern on the book’s spine.
-
Long Stitch: Long stitch binding creates a beautiful, flexible spine. It’s often used for books that require a bit more durability. The stitches run vertically along the book’s spine and can be a bit more challenging to master.
-
Japanese Stab Binding: This binding method is known for its unique, intricate stitching patterns. It’s often used for smaller journals or notebooks and is a great way to add a decorative touch to your leather journal.
How to Care for Your Leather Journal
Once your journal is finished, it’s important to care for it to ensure it lasts.
- Condition the Leather: Leather can dry out over time, so it’s important to condition it regularly using a leather conditioner.
- Store Properly: Keep your leather journal in a cool, dry place away from direct sunlight to prevent it from becoming brittle or discolored.
- Protect from Water: Leather is not waterproof, so avoid getting it wet. If it gets wet, let it air dry naturally.
- Avoid Overstuffing: If your journal has a lot of pages, don’t force more into it than it can comfortably hold.
Common Mistakes to Avoid
Creating a leather journal can be a rewarding process, but there are a few common mistakes that beginners often make.
- Not Measuring Correctly: Proper measurements ensure your journal looks good. If you don’t measure your leather or paper correctly, your pages might not fit inside your cover, or your holes might be off-center. Always double-check your measurements before cutting.
- Cutting the Leather Too Quickly: Leather can be tricky to cut, especially if you’re new to the process. Make sure you use a sharp knife or rotary cutter and go slow. Take your time to make clean cuts to ensure your journal looks polished.
- Poor Hole Placement: If you bind your journal by hand, hole placement is very important. If the holes are too far apart or uneven, your journal will look sloppy, and the stitching might not hold up well. Use a ruler and a pencil to mark the spots where you’ll punch the holes.
- Overcomplicating the Binding: There are many types of bookbinding, but if you’re new to this project, keep it simple. The saddle stitch is a great choice for beginners. Don’t overcomplicate things by trying to use fancy binding techniques on your first try.
- Skipping the Edge Treatment: If you skip treating the edges of your leather, they might look rough or unfinished. Take a moment to smooth and round the edges of the leather for a more polished, professional look. You can use an edge beveler or sandpaper to do this.
Conclusion
Making a leather journal is a fun and creative project that allows you to craft something personal and unique. Following the steps in this guide, you can create a journal reflecting your style and needs.
The process is simple, and with the right materials, anyone can do it. From cutting the leather to binding the pages, each step brings you closer to creating something special.
And the sense of accomplishment when you finish is truly rewarding.
Not only will you have a handmade journal for yourself, but you can also share your creation with others as a thoughtful gift. The best part is that no two journals will ever be the same.
Each one will have its character, making it even more valuable. Enjoy the process, take your time, and remember that the finished journal is just the beginning of many new ideas, notes, and memories.
Frequently Asked Questions
How do I choose the right leather for my journal?
When choosing leather, look for vegetable-tanned or full-grain leather for durability. If you want a softer feel, go for lambskin or goat leather. Make sure the leather is large enough for your desired journal size.
How long will it take to make a leather journal?
The time to make a leather journal depends on your experience and the journal size, but it typically takes about 2-4 hours to complete the entire process.
Can I dye the leather?
Yes, you can dye the leather with a leather-specific dye. This allows you to personalize the journal and give it a different look. Make sure to apply the dye in thin layers and let it dry between coats.


