


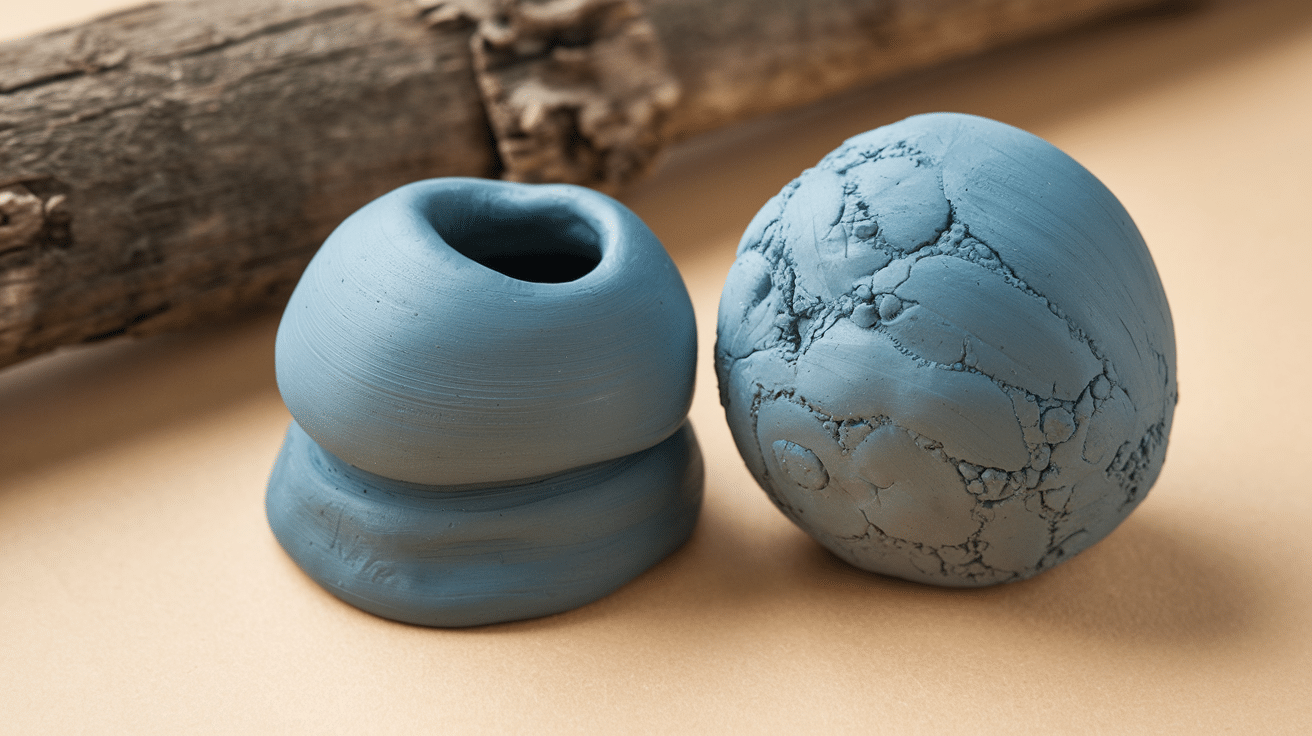
Clay projects can be tricky to finish. You’ve spent hours molding and shaping, but those tiny bumps and rough spots ruin your masterpiece. I’ve been there too.
After years of working with clay, I’ve mastered the techniques for achieving the perfect, smooth finish you want. In this article, I’ll walk you through:
- Choosing the right sandpaper for different clay types
- Setting up your workspace safely
- A step-by-step sanding process that actually works
- Troubleshooting common problems
I know how frustrating it is when your clay piece looks unprofessional. Trust me—with these tips, even beginners can achieve glass-like results.
The methods I’ll share have been tested on hundreds of projects, whether working with air-dry, polymer, or ceramic clay. Let’s change your rough clay pieces into smooth works of art!
Understanding Clay Types and Their Sanding Requirements
Sanding clay starts with understanding your material. Air-dry, polymer, and ceramic clays each need different sanding approaches for the best results. Not all clay responds the same way to sanding.
- Air-dry clay is the easiest to sand. When dry, it’s soft but firm, perfect for beginners.
- Polymer clay needs special attention. You must cure it completely in an oven before sanding, or you’ll create smears.
- Ceramic clay requires the most care. It must be “bone dry” before sanding, but it’s very fragile at this stage.
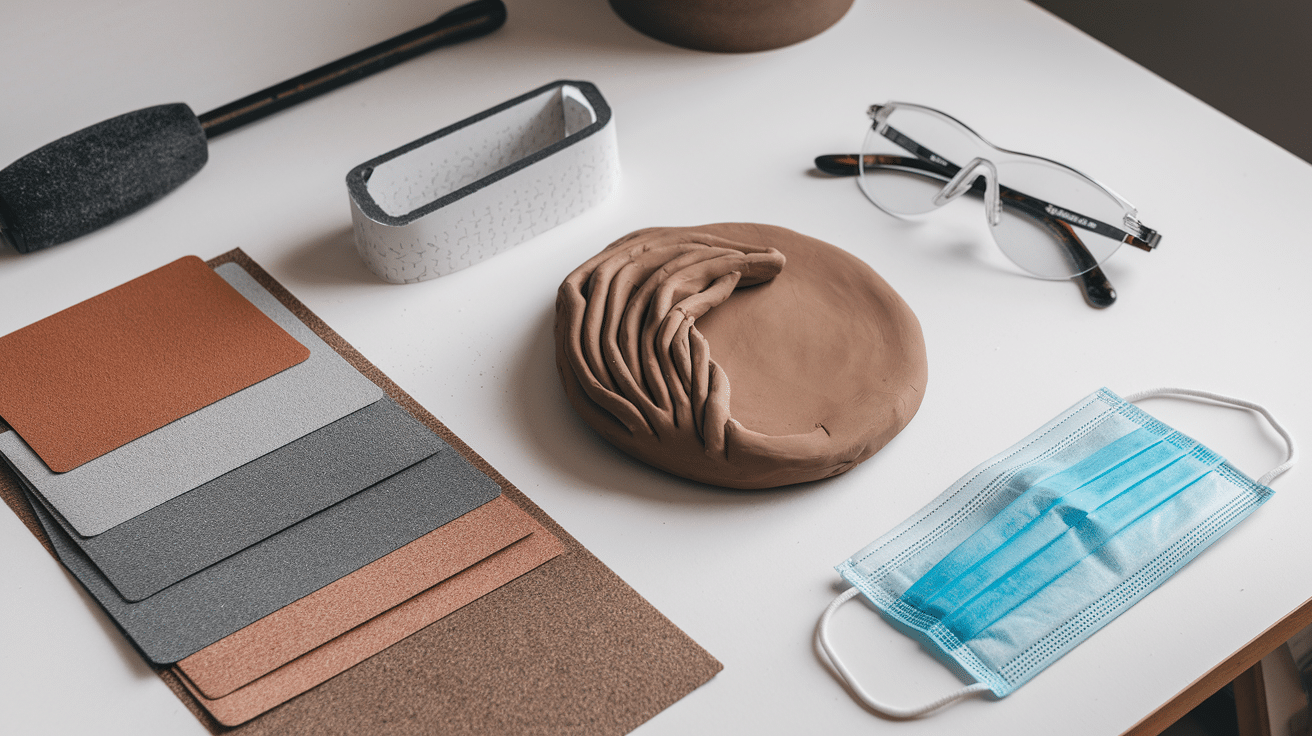
Remember: Always wear a mask when sanding clay. The dust isn’t good for your lungs!
Materials You’ll Need
- Various grits of sandpaper (120, 220, 400, 600, 800, 1000+)
- Sanding blocks or sponges
- Dust mask (very important!)
- Clean, damp cloth
- Small bowl of water
- Good lighting
- Optional: electric sander for large projects
Did you gather everything? Great! Now we can begin.
Getting Started
Before sanding, ensure your clay piece is fully dry and cured. A clean, well-prepared workspace will help you achieve a smooth, even finish. Take a moment to gather your materials and choose the right sandpaper grit for the job.
1. Drying and Curing
Before you even consider sanding, your clay must be completely dry or cured.
- For air-dry clay: Wait at least 24 hours for thicker pieces.
- For polymer clay: Follow the package instructions for baking time and temperature.
- For ceramic clay: Wait until it’s “bone dry” (completely white and at room temperature throughout).
Rushing this step will ruin your project!
2. Workspace Setup
- Find a well-lit area with good ventilation. I like to work near a window with a fan blowing outward.
- Cover your work surface with newspaper or a drop cloth. Clay dust gets everywhere!
- Place your materials within easy reach and fill a small bowl with clean water.
Step-By-Step Sanding Process
Sanding is a gradual process that requires the right materials and a steady approach to achieve the perfect finish. With each step, you’ll smooth out imperfections and refine the surface, leaving you with a beautifully polished piece. Follow these steps to learn how to sand clay effectively from start to finish:
1. Rough Sanding
When sanding your polymer clay project, begin with 120-grit sandpaper to tackle any major imperfections on the surface. Always use gentle, circular motions while you work, letting the sandpaper do the heavy lifting rather than applying excessive pressure.
For best results with polymer clay, try “wet sanding” by dipping your sandpaper in water first – this technique significantly reduces dust and creates a noticeably smoother finish on your piece.
Remember to pause occasionally during the sanding process to wipe away accumulated dust with a damp cloth, which will help you better see your progress and ensure an even surface.
2. Smoothing Out
After working with the 120-grit sandpaper, switch to a finer 220-grit sandpaper to continue refining your polymer clay surface. Make sure to sand in different directions rather than just one way, as this technique helps you catch all the rough spots that might be missed with unidirectional sanding.
Periodically pause to feel the surface with your fingertips, which are sensitive enough to detect subtle imperfections that your eyes might miss.
Throughout the process, maintain a light touch – don’t press too hard on the sandpaper, as excessive pressure can accidentally create divots or potentially break thinner areas of your project. This gentle approach takes a bit more time but results in a much more professional and even finish.
3. Fine Finishing
After completing the 220-grit stage, progress to even finer sandpapers, first using 400-grit and then moving to 600-grit for further refinement. At this point in the sanding process, your clay piece should begin to look quite smooth, with most imperfections having disappeared.
If you’re working with air-dry clay, this level of sanding may be sufficient for most projects, providing a clean, professional finish without further work.
However, suppose you’re working with polymer clay. In that case, it’s worth continuing the sanding progression to achieve even greater smoothness. Remember that with polymer clay creations, the smoother the surface, the better your final piece will look, especially if you plan to add glazes or other finishes that would highlight any remaining texture.
4. Final Polish
For those seeking a truly glass-like finish on polymer clay, continue the sanding progression with even finer grits of 800 and 1000-grit sandpaper. When working with these ultra-fine abrasives, always use them wet – adding water creates a slurry that helps achieve an exceptionally smooth result while preventing dust.
After completing this thorough sanding sequence, run your fingertips over the surface—it should feel remarkably silky and smooth, almost like touching glass. Keep in mind that different clay types require different approaches.
If you’re working with ceramic clay that will eventually be fired in a kiln, you’ll want to use a much lighter touch with your sanding, as excessive sanding can potentially create problems during the firing process.
Troubleshooting and Tips
- Cracking during sanding? Your clay might not be dry enough, or you’re pressing too hard.
- Can’t get rid of a scratch? Start with a coarser grit and work your way up again.
- Is sanding taking forever? Try wrapping sandpaper around a block of wood for large, flat areas.
- Tired arms? Take breaks! Sanding is a marathon, not a sprint.
- Is dust getting everywhere? Wet sanding helps tremendously with this problem.
Finishing Touches
Once you’ve sanded your clay to perfection, it’s time to add the finishing touches. A few extra steps can transform your project from polished to professional, giving your piece the perfect final look. After sanding, your piece deserves special treatment:
- Wipe it with a damp cloth to remove all dust.
- For air-dry clay, you can seal it with Mod Podge or an acrylic sealer.
- For polymer clay, buff it with a soft cloth or apply a glaze for extra shine.
- For ceramic clay, prepare it for firing according to your kiln instructions.
Conclusion
I’ve shared these sanding techniques with hundreds of students, and they work every time. You can trust this process. The key is moving through the grits patiently and listening to what your clay needs.
Remember:
- Start rough and finish fine
- Let your fingers be your guide
- Take your time
Your search for perfectly smooth clay ends here. With practice, you’ll develop an instinct for when each piece is “just right.” The satisfaction of running your fingers over a flawlessly sanded surface makes all the effort worthwhile.
Now go make something beautiful! If you ever get stuck, return to this guide—I’m here to help.


