

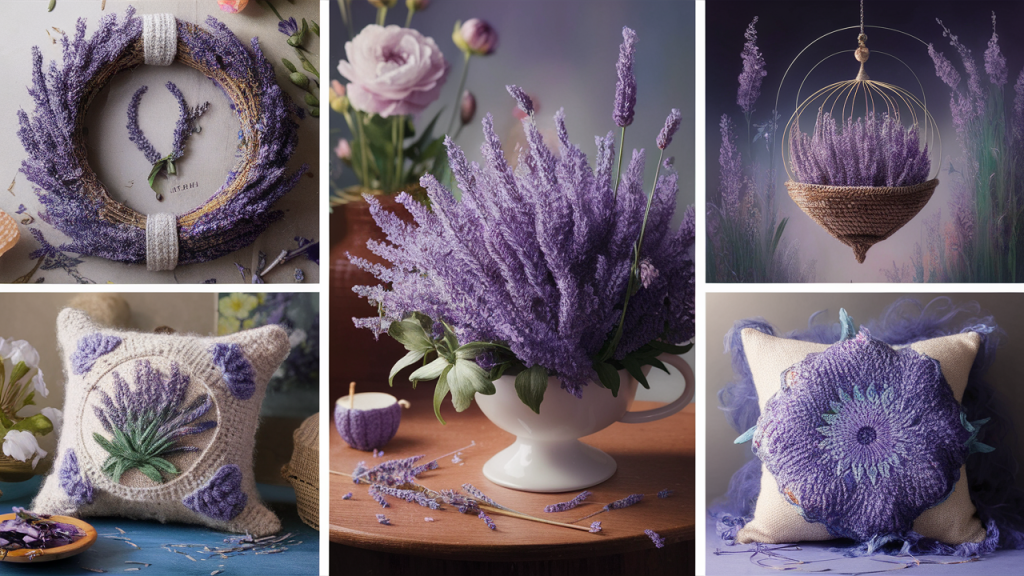
I love small crochet projects that’re easy to make and look beautiful when completed. Crochet lavender is one of my favorites. It’s soft, simple, and lasts forever.
Real lavender smells nice, but it fades over time. With yarn, you can create lavender that retains its shape and color throughout the year.
This project is great if you want to relax and create something lovely. It doesn’t take much time, and you only need a few basic stitches. I enjoy making a variety of stems and tying them with a ribbon. They look so nice in a little jar on my desk.
In this blog, I’ll show you how to make crochet lavender step by step. The pattern is beginner-friendly, allowing you to customize it by changing the colors or size to make it your own. Grab your yarn and hook. Let’s get started!
What Is Crochet Lavender?
Crochet lavender is more than just pretty; it’s a fun and calming way to be creative. The long, thin stems and soft purple buds make it a great beginner project, and the result is something you can use or gift in many ways.
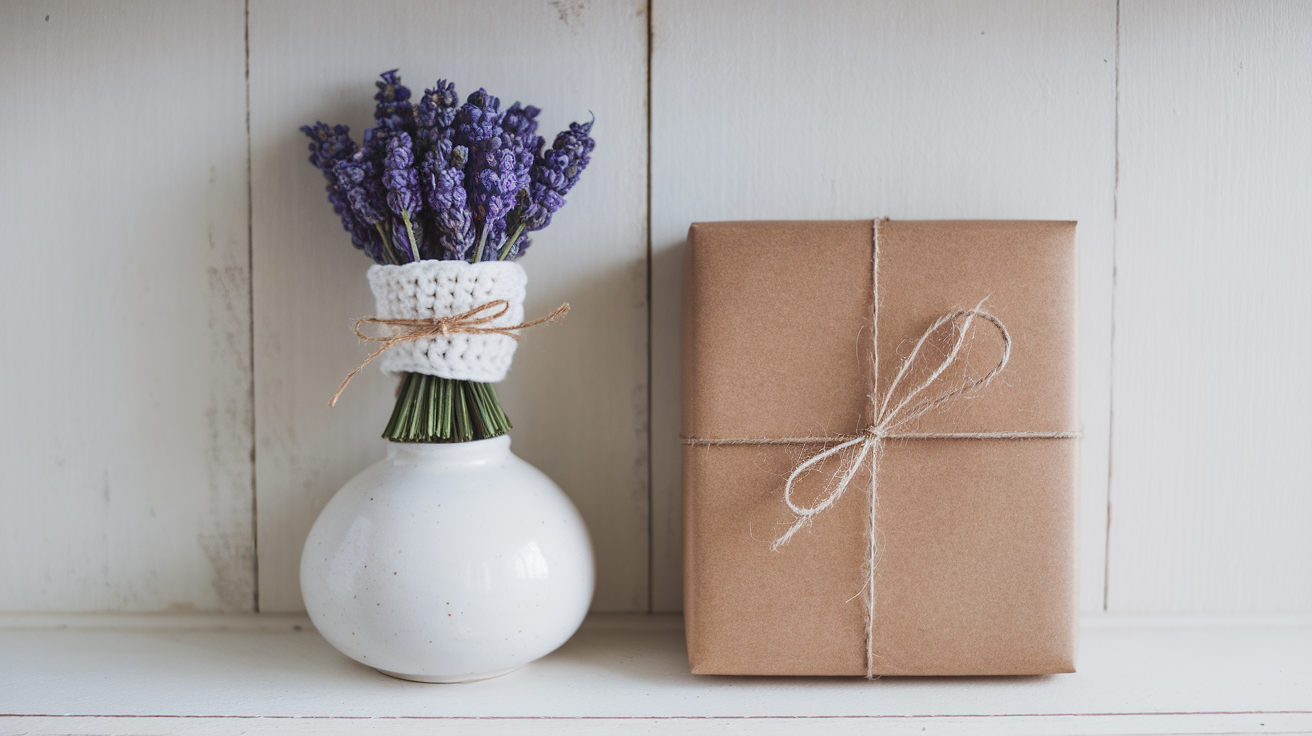
1. Lavender Makes Beautiful, Lasting Décor: Crochet lavender doesn’t wilt or fade. Place a bunch in a small vase, tie some together with ribbon, or add it to a table centerpiece. It brings a soft, handmade touch to any room.
2. A Perfect Handmade Gift: Give a crochet lavender gift for birthdays, holidays, or to bring a smile to someone’s face. You can also add it to gift baskets, cards, or tags.
3. Great for Beginners and Easy to Learn: The pattern is straightforward and utilizes only a few basic stitches. You’ll work in rows and rounds, and you can create one stem in under an hour.
4. Soothing and Fun to Make: Lavender is renowned for its calming properties, and crocheting with it can be a relaxing experience as well. It’s the perfect project for a cozy weekend or a quiet afternoon.
5. Customizable in Color and Style: Stick with classic purple or try soft pink, blue, or even white. Adjust the size, use textured yarn, or add extra leaves to suit your personal style.
Materials You Need
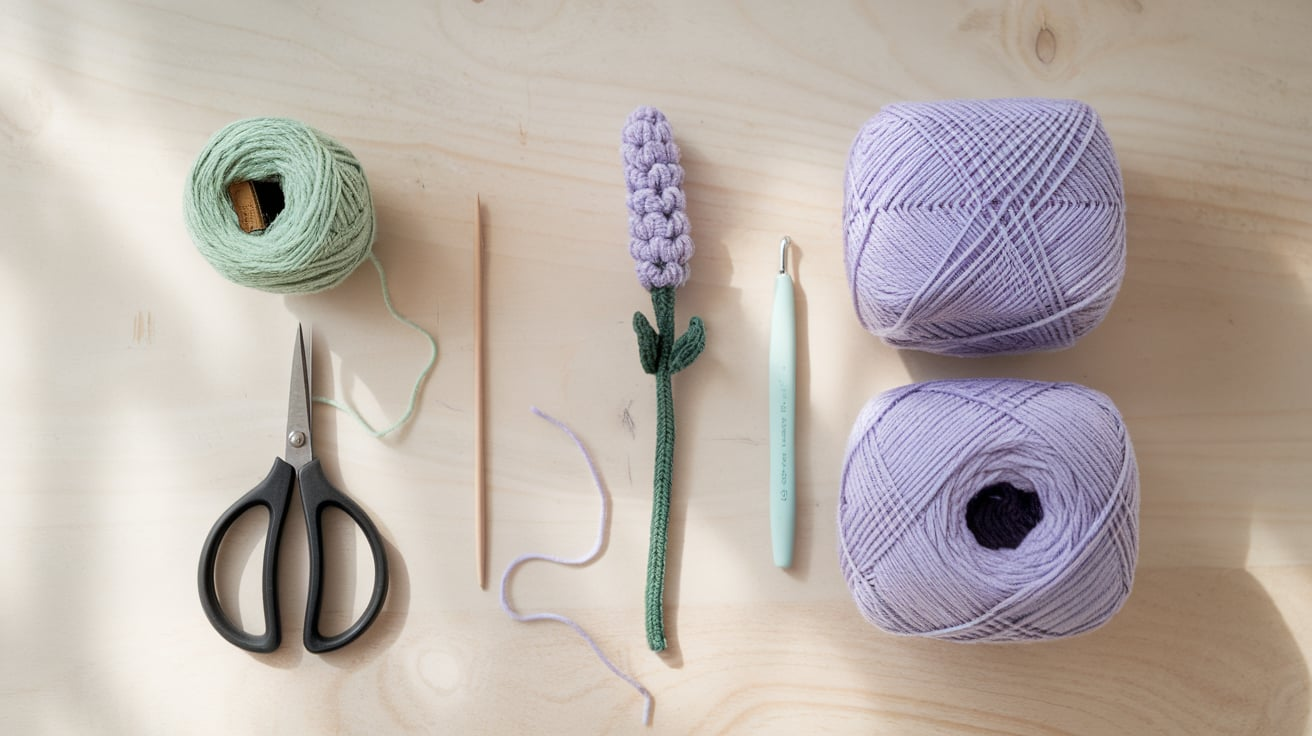
Before you begin creating your lavender sprigs, let’s gather all the necessary items.
- Light worsted weight cotton yarn in lavender purple.
- Sport weight yarn in sage green for stems.
- Lace-weight yarn in gray-green for the leaves.
- 3.5mm (E) crochet hook for flowers.
- 2.75mm (C) hook for leaves.
- Sharp scissors.
- Tapestry needle.
- 22-gauge floral wire.
- Green floral tape.
- Small wire cutters.
- Hot glue gun and glue sticks.
- Lightweight cardboard for leaf templates.
Step-by-Step Guide to Crochet Lavender Flowers
Let’s break down the flower-making process into bite-sized steps. I’ll guide you through creating one perfect sprig, and then you can make as many as you like.
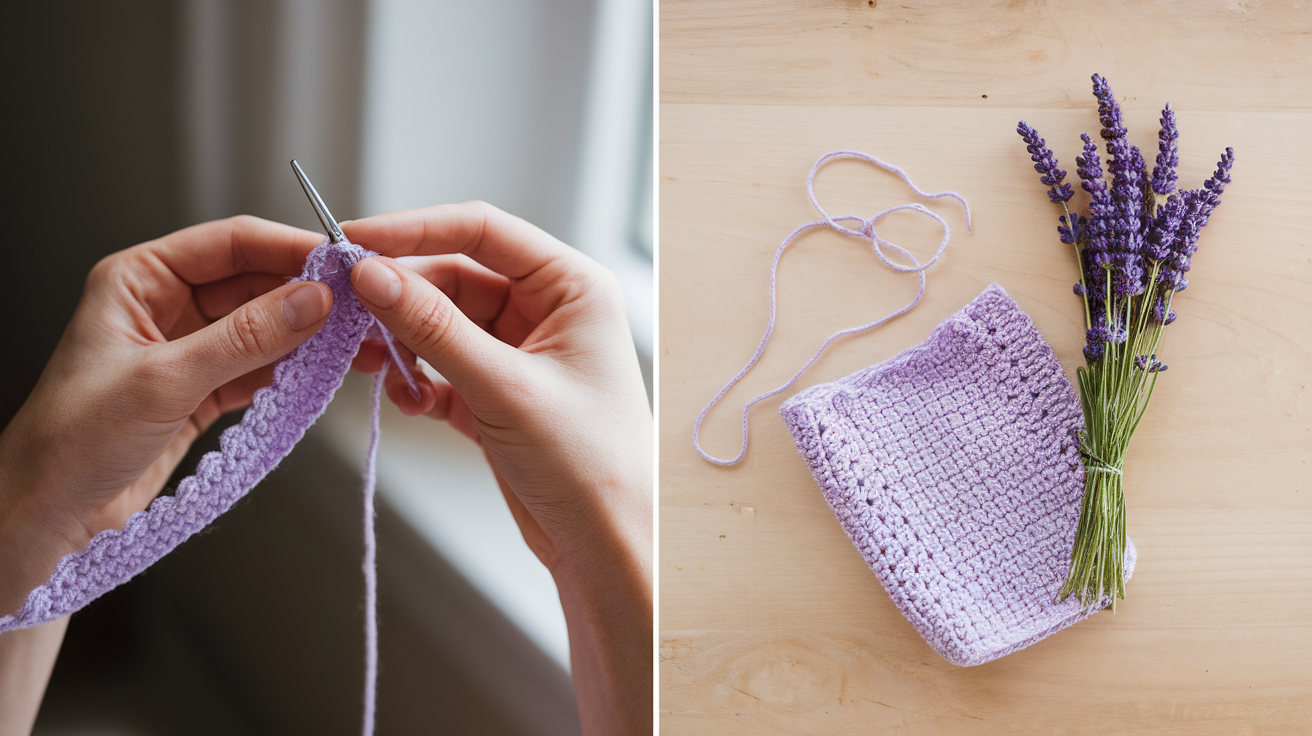
Step 1: Create the Base Chain
Start with your purple cotton yarn and 3.5mm hook. Chain 30 stitches loosely – this will be the foundation for your buds. Work these stitches gently to avoid a tight, rope-like look.
Step 2: Form the Flower Buds
- Single crochet in the second chain from the hook.
- Make 2 double crochet stitches in the same space.
- Skip the next chain.
- Repeat the pattern to the end of the row.
Step 3: Add Texture
Working back across your piece:
- Add small single crochet stitches between bud clusters.
- Make tiny picots every few stitches.
- Keep your tension loose for a natural, fluffy look.
Step 4: Create the Flower Column
Roll your worked piece gently around the wire, starting from the tip. The buds should spiral naturally upward. Secure with small stitches or a dab of hot glue.
Step 5: Finishing Touches
- Wrap the stem with floral tape.
- Fluff out your buds gently.
- Trim any loose threads.
Crochet the Stems and Leaves
Getting the stems and leaves right is just as important as getting the flowers right. These parts give your lavender that elegant, natural droop, making it look freshly picked.
1. Creating Life-Like Stems
Start with your floral wire and green yarn:
- Cut wire into 8-inch lengths.
- Wrap wire with floral tape.
- Work single crochet stitches loosely around the wrapped wire.
- Leave 2 inches unwrapped at the bottom for bundling.
2. Making Natural-Looking Leaves
With your gray-green yarn and 2.75mm hook:
- Chain 15 for each leaf.
- Single crochet back down the chain.
- Add a slight curve as you work.
- Make leaves of different lengths.
- Work 3-4 leaves per stem.
3. Putting It All Together
Here’s where the magic happens:
- Attach leaves 2 inches below the flower head.
- Space leaves naturally – avoid perfect symmetry.
- Secure with small stitches.
- Wrapping points with floral tape.
The stems should feel sturdy but flexible. If they’re too stiff, your lavender will look artificial – too floppy, and it won’t hold its shape in arrangements.
Assembling the Crochet Lavender
Now comes the fun part – bringing all your pieces together to create a realistic lavender sprig. This is where your lavender really comes to life!
1. Bundle Your Stems
- Gather 5-7 flower stems.
- Stagger the heights slightly.
- Twist stems gently together.
- Secure with floral tape at the base.
- Wrap tape up about 2 inches.
2. Position Your Leaves
- Add leaves at different heights.
- Point some up, some out.
- Work in groups of 2-3.
- Avoid perfectly matched pairs.
3. Final Shaping
- Bend stems into gentle curves.
- Fluff flower buds with your fingers.
- Adjust leaf angles.
- Give stems a slight twist.
The Final Check: Look at your lavender from all angles. Does it have that natural droop? Are the flowers clustered naturally? Give it a gentle shake – it should move like real lavender would in a breeze.
For a more detailed and visual guide, follow this YouTube Tutorial by @allynewbry:
Tips for Perfecting Your Crochet Lavender
Making crochet lavender is simple, but a few small tips can help your flowers turn out even better. These little changes can make a big difference in how your project looks and feels.
1. Keep Your Tension Even: Try to keep your stitches the same size throughout the flower and stem. If your tension is too tight, the flower may curl too much or feel stiff. If it’s too loose, the shape might not hold well.
2. Use a Stitch Marker for Longer Chains: When you’re making long chains for stems or leaves, place a stitch marker or a small scrap of yarn every 10 stitches. This helps you keep track and makes it easier to count without losing your place.
3. Roll the Flower Head Gently: When shaping the flower top, roll it slowly and loosely at first. You can adjust the shape more easily this way. Once it looks the way you want, sew the bottom securely with matching yarn.
4. Choose the Right Yarn Texture: Smooth, soft yarn is easier to work with and gives clean results. If you want a puffier flower, try yarn with a slight fuzz or halo. Avoid yarn that splits easily, as it can make small stitches harder to see.
5. Make a Few Practice Flowers: Try making one or two practice flower tops before you attach stems or leaves. This gives you a chance to find the look and size you like best. Once you’re happy with one, use it as your guide for the rest.
Why Crochet Lavender Makes a Great Gift

I’ve given countless crochet lavender bundles as gifts, and the reactions never disappoint. There’s something special about handmade flowers that last forever.
1. Perfect for Any Occasion
- Housewarming parties.
- Get-well gifts.
- Wedding favors.
- Teacher appreciation.
- Mother’s Day.
Unlike fresh flowers or candles, crochet lavender brings charm without fading or burning out. Your gift keeps its beauty year after year, gathering memories instead of dust.
2. Practical and Pretty
- Drawer sachets. (Add dried lavender inside!)
- Bookshelf decorations.
- Kitchen window brighteners.
- Wreath centerpieces.
- Lovely table arrangements.
3. The Personal Touch
Each sprig carries your time, skill, and care. I’ve had friends tell me they still have the lavender I made them years ago – try getting that staying power from a store-bought bouquet!
4. Budget-Friendly Bonus
One ball of yarn makes several bunches, so you can create meaningful gifts without breaking the bank. Plus, they’re lightweight to mail to far-away friends.
Remember to include a care card with your gift. Inform them that it’s safe to dust with a soft brush and keep it out of direct sunlight to maintain its beauty.
Conclusion
Crocheting lavender is a calm and fun way to spend your time. You don’t need to be an expert or have fancy tools. A little yarn, a hook, and some quiet time is all it takes. With a few simple stitches, you can make something soft, pretty, and handmade.
It’s a small project, but it brings a lot of joy. I really enjoy seeing the lavender stems come together one by one.
You can use your crochet lavender in so many ways. Put it in a vase, tie it on a gift, or use it in crafts. It also makes a sweet gift for a friend. You can create one stem or a whole bunch. Every piece you make can be a little different. That’s the fun part.
So take your time, enjoy the process, and be proud of what you make. Crochet lavender is simple, beautiful, and something you’ll enjoy again and again.


