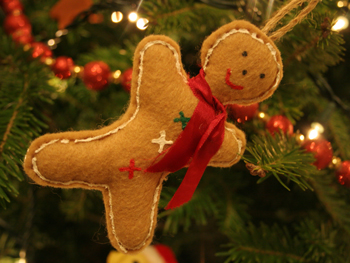
 This will be my son’s first Christmas, and I wanted to make him something special. I’m not really into stuffed animals, so I haven’t bought any for him. But since he’s taken an interest in the ones he already has, I decided to make him one using a fabric that’s inexpensive, washable, and easy to work with: felt.
You can make any animal you choose, I just chose a penguin since I’m really into birds right now, and I wanted his to be cute but also boyish. So first you’ll want to pick an animal, draw it out and then get it blow up using a copy machine, to however big you want it. Cut out the shapes and trace them onto cardboard, then cut those shapes out. When you’re cutting feet, arms, or anything that’s to go on the edge of the animal, you’ll want to add a little extra, maybe a quarter to a half-inch, to the place where you’ll adhere the piece to the edge.
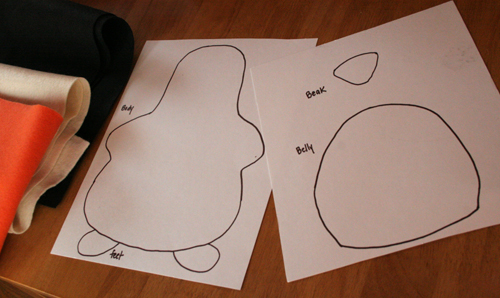
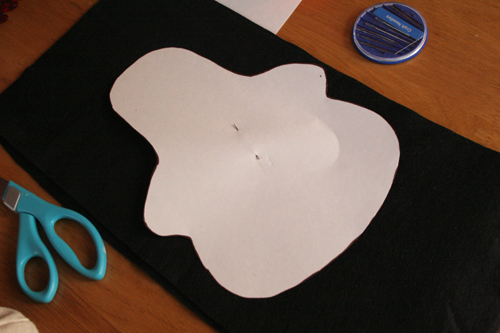
Place your shapes on the pieces of felt you’ve chosen and secure them with a needle or pin. Cut around the shapes. Since you’ll need a front and a back, and you have sharp enough scissors, you may want to double up the felt to cut the pieces so the pieces match up perfectly.
Next you’ll want to stitch your top pieces onto the body of the animal. Place pieces in desire places and secure with a pin or needle. Here I put the belly on first, then the beak. I also added a little polyfil to the belly and beak to give the pieces a little more dimension. I used a blanket stitch for all the pieces but you can use any stitch you’re comfortable with. I then stitched the eyes on using a seed stitch.

Next you’ll want to stitch together the feet, adding a little polyfill to them before closing. Stitch the feet onto the piece that will be the backside of your stuffed animal.
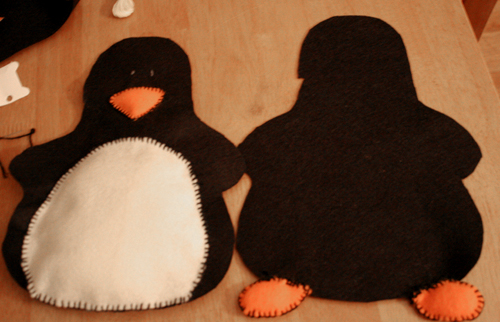
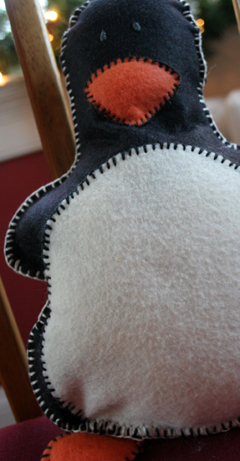
After all your pieces are placed, then you can stitch the front and back side together, stopping when you’re almost done to add the polyfil. Add as much fill as you want. You don’t want to overstuff your animal, but you also don’t want it really flat either. If your animals has tight corners, use the end of a pencil or pen to push the fill into them. Place a pin or needle close to the edge of where you’ll stitch to keep it close together so you’re final stitches will be straight. Finish up the seam and voila! A finished (and adorable) stuffed animal.
From start to finish this project took about 3 hours so it’s something you can do while watching TV or if you have some spare time. And as always, have fun with it. Don’t worry if your animal isn’t perfect or even a little choppy (like mine). I think imperfections add to it’s character and cuteness, and I’m sure who ever you’re making it for won’t mind at all.



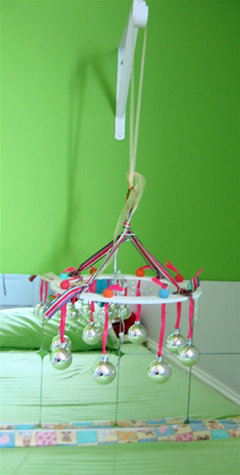 I’ve been learning a lot lately about Montessori for infants. I am excited to make my daughter’s room a fun place for her to grow and learn. In the book Montessori from the start, you are encouraged to begin with mobiles to help babies learn focus in their eyes. I have been wanting to make one for Lucy for a while. I used a floral design ring of some sort, I found it at Michaels. It is a flat ring of particle board with holes drilled in it. I decided I wanted to use ribbon and beads to hang the objects so I made my own beads using fimo and hung christmas balls from the ribbon. In the book it recomends using metalic objects to begin then moving to other ones she can bat at once she learns that she can hit things with her hands. Lucy loves looking at it for now. We mounted it on the wall with a hook for hanging plants so i can change the mobiles as she gets older.

 This will be my son’s first Christmas, and I wanted to make him something special. I’m not really into stuffed animals, so I haven’t bought any for him. But since he’s taken an interest in the ones he already has, I decided to make him one using a fabric that’s inexpensive, washable, and easy to work with: felt.


