


Embroidery: Lesson 4
September 5th, 2007 by CandaceToday will be the last day of basic stitches, and the final two weeks we’ll be doing a few more advanced albeit beautiful stitches. The ones we will cover today aren’t that common, but they are easy and are great finishes and accents to designs. One thing I do want to say is people are still having trouble with french knots. While they do seem easy, you must practice them and it may take awhile. The key is to keeping the thread taut into your fingers after you wrap it around the needle and are pulling it through the fabric. If you aren’t holding it tight enough, it will unravel, or knot prematurely. Some people offered Heather Bailey’s instruction on doing them and said this way works wonders, and you can find that here. If anyone has any other suggestions (besides the ones that are in the comments for Lesson 2), please let me know – I’d love to post them since french knots are beautiful and almost essential to embroidery. Now, Lesson 4.
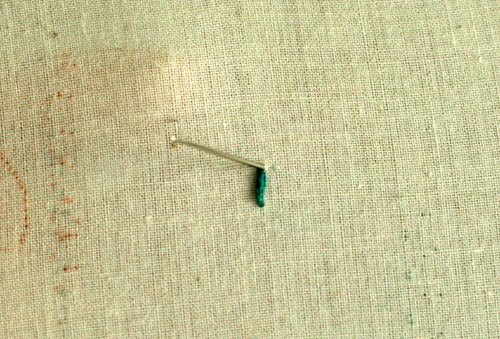
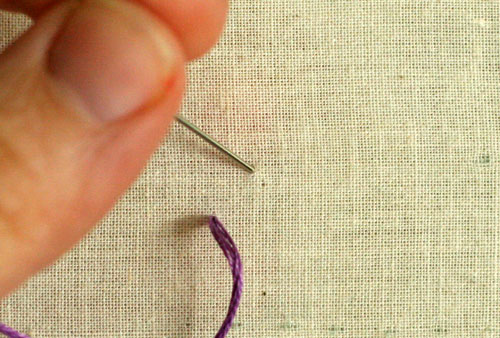
Stitch #9 Granitos Stitch
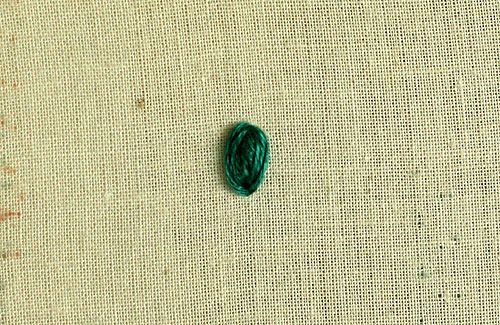
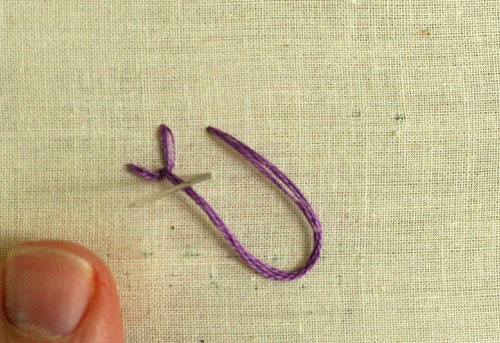
This stitch is complementary to the satin stitch (that we covered last week) as another way to fill certain shapes. They’re also great to do as leaves or petals instead of the lazy daisy (covered in lesson 2). This stitch is the same stitch in the same direction, coming and going in at the same point over and over. Sounds simple? That’s because it really is.
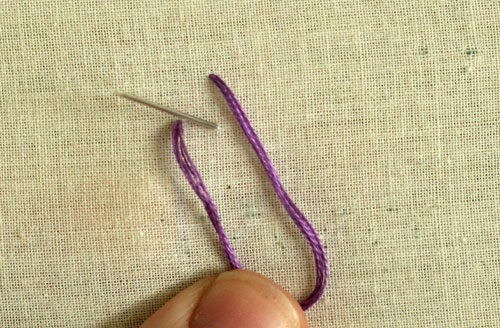
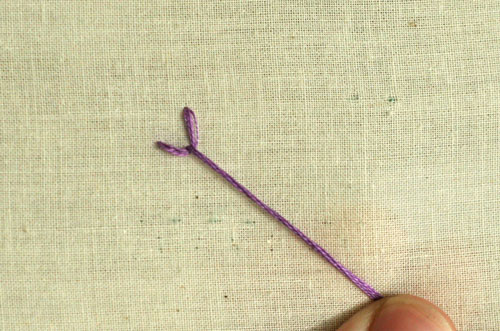
You’ll start by making a simple straight stitch (up at A, down at B). You’ll then bring your needle back up in the same hole as A and bring it back down in the same hole as B, pulling the thread all the way through, but so it goes to side (it helps if you hold the loop with your thumb as you’re pulling it through to make sure it lays beside the stitch and not on top of it).
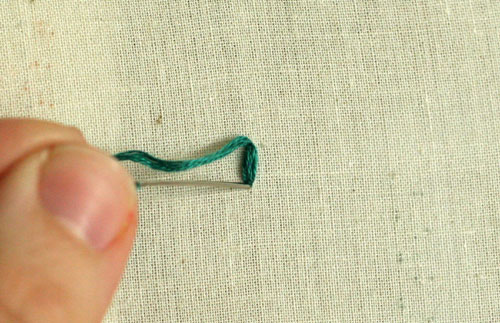
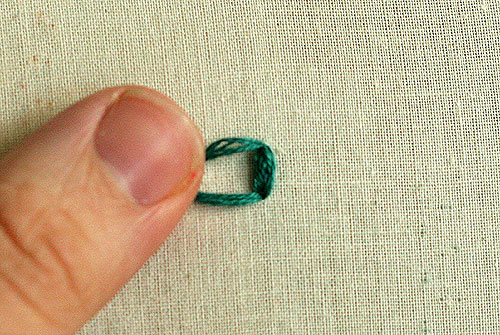
You’ll continue alternating sides until you’ve reached the size or fill that you need. For this picture I did four stitches on both sides.
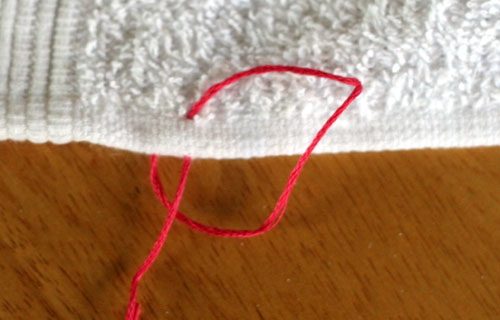
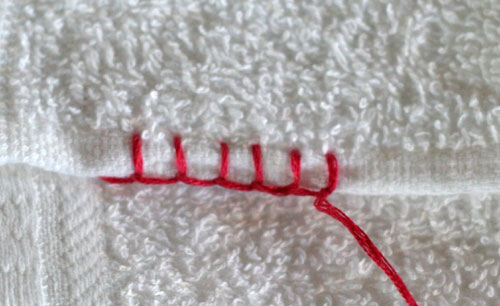
Stitch #10 Blanket Stitch
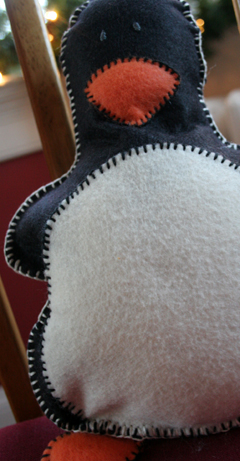
This is a great stitch to border items such as blankets (go figure), shirt collars, and also joining items together. The blanket stitch was the only stitch used to piece together this felt penguin.
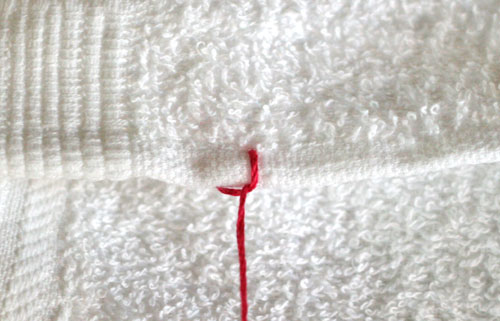
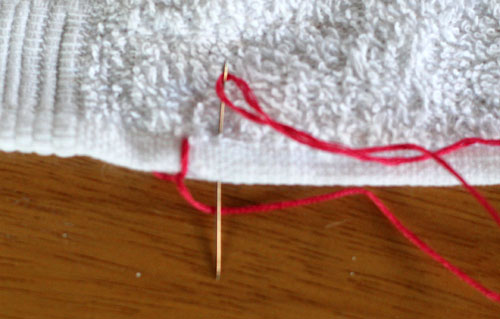
You’ll begin by bringing your needle up at the base of your work, or where you’ll need it to be lined up (at A). Next, you’ll bring your needle down at B, diagonal to point A, and then up at C, which will be beside point A (about 1/4″ away). You’ll need to have the thread looped underneath your needle when you come up at C, or else this stitch won’t work.
Then you’ll pull the thread taut and you have a backwards “L”.
You’ll do this over and over until you get to the end of your edge or completed the length that you need.
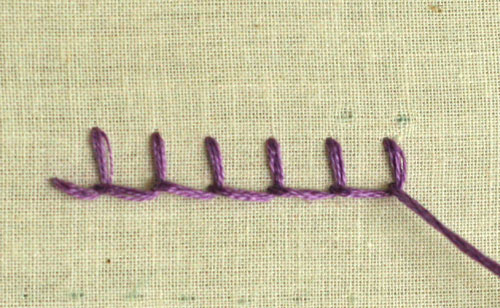
When you’re done, you’ll take the needle through on the opposite side of where you came up for the last time, planting that stitch and leaving your thread behind your work.

When doing this stitch on the edge of a garment or piece of fabric, you’ll execute in the same fashion, starting on the backside of the fabric. Take the needle and go down through the hem vertically (at A), turn your fabric over and go down at B (diagonal to A) and through the hem vertically, like you did at A.
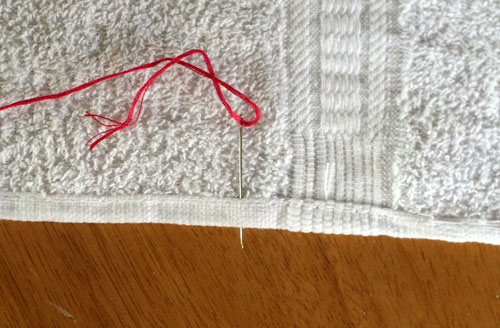
Make sure that your thread is looped behind/underneath the needle as you pull the thread taut.
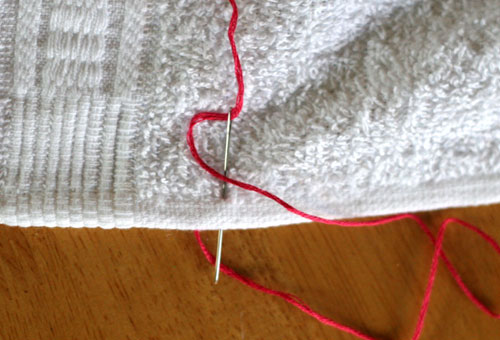
Continue until you reach the end, planting your stitch when you’re done.
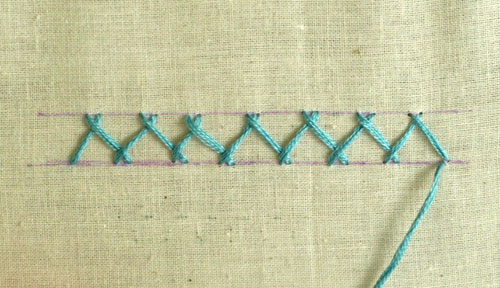
Stitch #11 Herringbone
These last two stitches aren’t the most common or the most used, but I love them, especially as a border for a garment or as a border within the design.
First, you’ll want to use one of your ink pens to draw two parallel lines on your fabric. You’ll bring your needle and thread up at point A on the base line. You’ll then take your needle up and diagonal to A and insert it at B and out at C (moving right to left as shown in the picture). You can actually go in at B, pulling the thread all the way through and then up at A, making two seperate actions, or you can do like I have done in the picture.
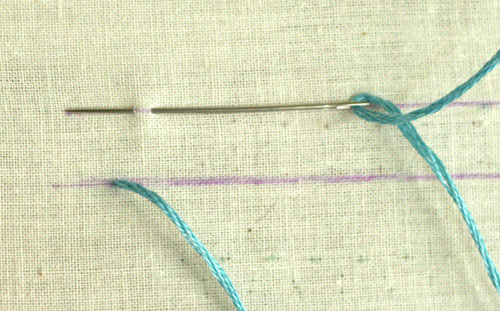
You’ll then move to the base line, put your needle through at D, diagonal to B & C, and out again at E, still moving right to left.
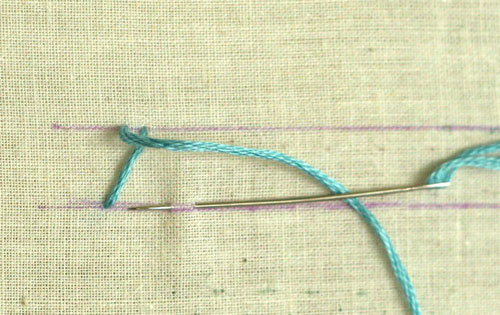
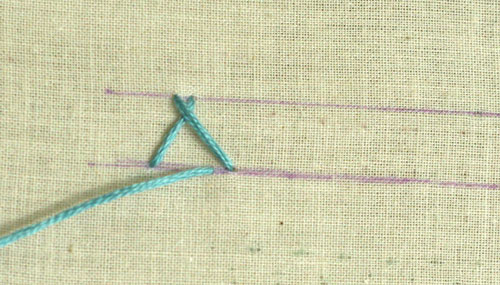
You’ll continue working this way until you reach the end of your lines.
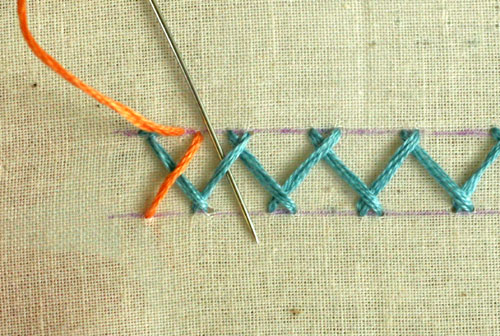
You’ll also end this the same way you do your blanket stitch, and that’s to take the needle down beside the last point you came up, leaving your thread behind your work. Now if you want to add another element to it, you can now incorporate the double herringbone stitch.
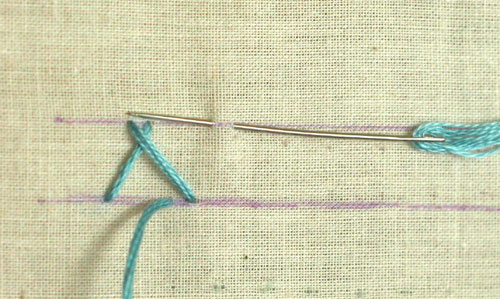
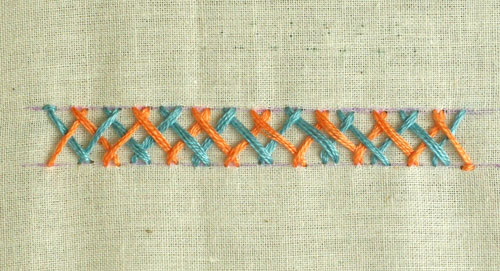
Stitch #12 Double Herringbone Stitch
You’ll basically use a contrasting thread color and do the exact same thing in between the original herringbone, except starting at the top line instead of the base. You’ll work in the same way, except you’ll alternate taking the thread behind the original stitch (so you’ll go over then under, over then under, etc).
Lesson 4 Homework
Continue working on all the stitches so far on this week’s design template. I left the dress plain so that you could use any stitch you like for embellishment on it. I can’t wait to see what everyone does!


September 5th, 2007 at 6:11 am
I have been hoping that you would teach the blanket stitch. That is the one I really want to learn, though the double herringbone is great too.
I love this week’s pattern. I can’t wait to give it a try!
September 5th, 2007 at 7:25 am
I am enjoying the lessons, but wanted to let you know that I am doing the homework (please don’t send me to the principal’s office) but with my husband prepping for deployment, I don’t have much computer time when home since I am with him and I can’t send the pics from work. Hopefully, I’ll get some time this weekend, since he wants to just take it slow and relax since the last few weekends have entailed weekend trips to visit family. Happy stitching …
September 5th, 2007 at 8:07 am
Such clear photos and instructions, as always. Mwaah, big kisses, you’re the best, Candace!
September 5th, 2007 at 2:58 pm
[...] Craft Daisies – New Lesson Forte 5 Sep, 2007 published in Interesting Websites Embroidery Lesson 4 is up! http://craftydaisies.com/2007/09/05/embroidery-lesson-4/ [...]
September 6th, 2007 at 5:38 am
[...] This week’s Crafty Daisies embroidery lesson covers the last in basic stitches. You’ll learn how to make the granitos stitch, blanket stitch, herringbone, and the double herringbone stitch. Link. [...]
September 6th, 2007 at 8:49 am
Holy cannoli, I hadn’t known about the Granitos stitch before, and that will be a HUGE help to my work. Thank you for this and especially for the lovely and clear photographs.
–Keet who heard about you from Jenni at sillylittlecreations.blogspot.com
September 6th, 2007 at 9:48 am
[...] Les 1 Les 2 Les 3 Les 4 [...]
September 10th, 2007 at 4:36 pm
[...] This week’s Crafty Daisies embroidery lesson covers the last in basic stitches. You’ll learn how to make the granitos stitch, blanket stitch, herringbone, and the double herringbone stitch. Link. [...]
September 14th, 2007 at 11:32 am
I have just found your blog following other links and I am so pleased I stumbled upon you. I have just started stitching and will be definitely be starting your lessons. Thanks for making the effort to do this.
November 5th, 2007 at 7:57 am
Great photos!
…I quilt, sew, knit, a little crochet…used to do loads of counted x-stitch and some embroidery. I do love crafting – almost entirely textile-ish with my methods & projects. Yarn is so comforting & flexible.
I wish to make many things before I leave this kooky planet dimension, so that someday a child or adult on down the line has something very special and hand -made by that eccentric old Hippie-coot they hear about from time-to-time.
Not reached “cootism” as yet, it’ll be a piece on down the road, but am looking forward to it!
This is a lovely site, thanks for sharing all the project info & wisdom…it is very generous of you to give of your crafting and time to make all our crafting lives just a bit easier!
Peace, Carol
April 23rd, 2008 at 10:24 am
I found your great embroidery instructions. Is there a way to save them. I keep having trouble getting back to them. I would like to start at the beginning and go all the way through. You have made some of the stitches I have tried much clearer. I have not done a lot of embroidery just off and on. I am 70 and still learning. I might get it yet:-)
I have tried to sign up but they say I have an invalid e-mail address. It works for other people. I don’t understand the problem
Betty
November 5th, 2010 at 9:51 am
Thank you so much for this post! I’ve always wanted to learn how to do blanket stitch and this was so clear! Big help! Thanks again <3
February 22nd, 2011 at 10:44 am
i have looked and looked tring to find out how to do a double stem stitch for an embroidery pattern and I can’t seem to find any one who knows how to do one can you please help me.