Personalizing Picture Frames
We just moved into a new place, and my decorating is pretty much non-existent. I’ve always had the “poor-student- misc-junk-thrown-together” look but now that I’m an adult and we have a nice place, I want that to change. One of the things that I wanted to do was frame and hang up some professional photos that we got taken when Elizabeth was a newborn. However, I cannot find the perfect frames that would go with our color scheme and look unique at the same time. So why not make them?
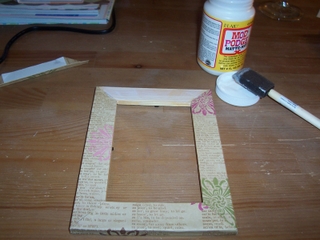
I found unfinished wooden frames at Ikea for super cheap (3 frames for $1.99), the fact that they are unfinished allows someone to finish them as they want. I dug through my scrapbooking supplies and found some beautiful paper that was the style I was looking for, plus it was quite unique. I cut strips of the paper to match the width of the front of the frame, plus allowed extra to wrap around the sides of the frame. I then folded the bottoms of the strips to match the angles of the frame’s corners. My next step was to adhere the paper to the frame using Modge Podge.

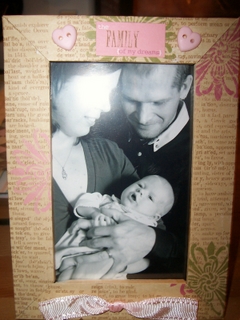
I found the Modge Podge worked great for adhering the paper to the wood, and it adhered really fast. To make the picture frame unique, I found some coordinating embellishments and adhered them to the frame. I added some buttons and ribbon for a 3D additions, which looks very different but beautiful at the same time. One last thin coat of Modge Podge over the entire frame for protection, and I ended up with a beautiful frame that you’ll never find in stores, matches our decor and taste perfectly, and took only 45 minutes to complete from start to finish.


