genericviagra

buy cheap cialis pill online lloyds pharmacy viagra cheapest without prescription farmacia online alprostadil

viagra no prescription required

cheap without prescription Cialis Super Active online meds where can i buy viagra cheap without prescription brand viagra online sildenafil online

canadian discount pharmacy

cheap without prescription Generic Levitra purchase tadalafil amoxicillin no prescription cheap without prescription pill online buy cheap generic viagra

yohimbe

Generic Viagra buy cheap cheap cialis impotence treatment cheapest without prescription buy viagra online stamina rx

buy prescriptions

buy cheap Viagra Super Active sildenafil citrate tablets soma pharmacy buy online cheap pharmacy cialis online

next day cialis

Zithromax cheap without prescription viagra sale online abortion pill online cheapest without prescription brooks pharmacy no prescription required

online pharma

buy cheap Viagra Soft viagra price comparison can i buy viagra online buy online order kamagra net pharmacy

viagra herbal

cheap without prescription Xenical discount viagra online lowest price viagra cheapest without prescription get viagra prescription online doctor

cialis generic

Levitra cheapest without prescription canadian rx canadian viagra online buy cheap canadian prescription drugs buy amoxil

Archive for December, 2007

A Ball, A Box, A Book. . .

Monday, December 31st, 2007
ballboxbook.jpg

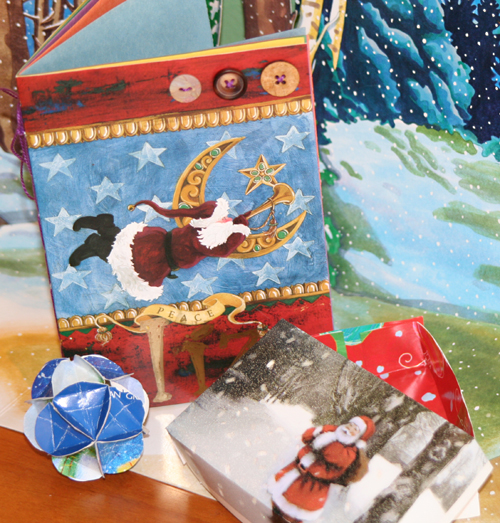
Okay, I understand, enough with the holiday theme already. However, as the year draws to a close and you are contemplating the pretty cards on your mantle, consider saving them for one of these projects:

A Ball

ball.jpg

All Free Crafts.com has a tutorial on making a ball shaped ornament out of a card. This is a fun little project that turned out better than I had expected.

A Box

hexbox-copy.jpg

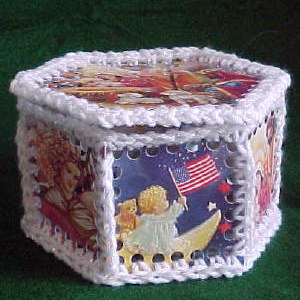
Julie Bolduc has instructions for a hexagon shaped lidded box. I actually didn’t receive enough suitable cards to make this box (16), but it looks like a cool project that you could make out of a variety of papers.

A Book

book.jpg

In July, Jennifer shared a guest posting on making a mini journal. You could follow her instructions and create a similar journal using a holiday card as a cover. The book could be left blank, you could turn it into an Advent journal with a little thought or activity for each day, or you could make a special address book for next year’s holiday cards.

A Luminary
luminary.jpg

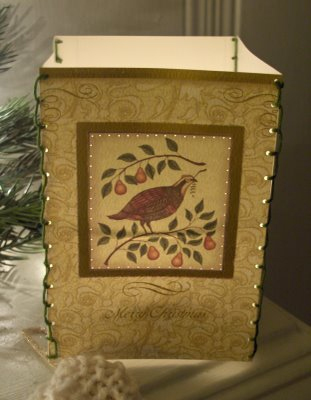
Kawaii Crafter made these pretty luminaries out of Christmas Cards. I think the picture says it all. They are the perfect thing for dreary days during the next three months, at least in the Northeast.

Other Cool Ideas
star_box.jpg

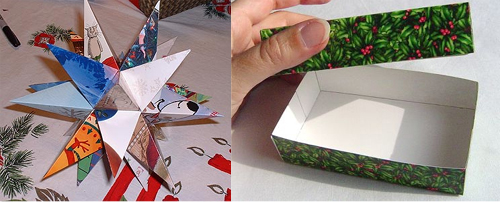
Jenny Harada made a funky star. It looks like you’ll need about 10 cards for this project.

And here is Diane Gilleland’s popular greeting card gift box as featured on her blog CraftyPod

I hope this is some inspiration to Reuse before you Recycle. Maybe you can make a little something before 2008 begins.

From all of us at Crafty Daisies: Happy New Year!

My Craft Space

Friday, December 28th, 2007

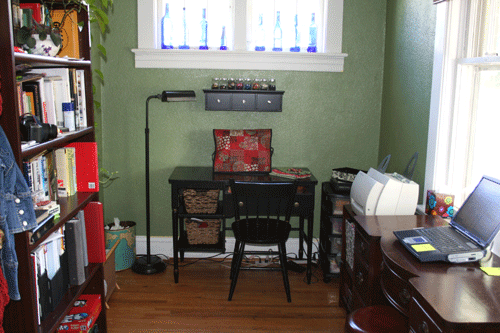
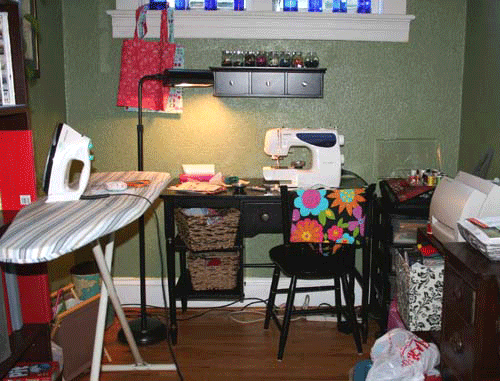
I haven’t shared my craft space before now because it was basically, well, the dining room table. We don’t have space for me to have my own studio but I have claimed a corner of our office as my own. This view is taken from my living room couch so you can see the need to keep it somewhat pleasing to the eye.

craft-space-full1.gif

I love this desk that I got at my favorite antique store. The drawer has an organizer it it for my scissors, marking chalk, pins, measuring tape, etc. I got the baskets separately and usually keep my current project in them for easy access. A bright, adjustable lamp provides good, direct lighting over my work. I like too that if we want it to look like a desk I can just stash my sewing machine away.

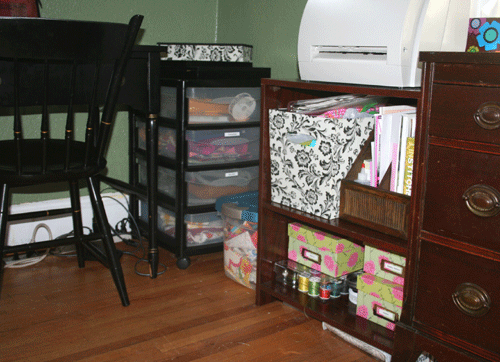
The rolling cart next to it is where I have organized my mailing envelopes, tags, and stock for etsy or swaps. I have a bamboo magazine holder for craft books and patterns, and matching photo boxes for ribbon and notions. Somehow I manage to fit it all in and store stuff that I only need occasionally in the attic.

craft-space-organizers1.gif

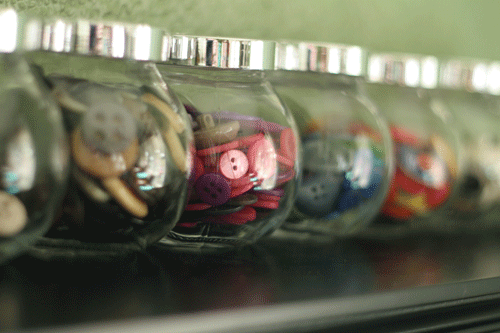
I love these cute little jars I got for cheap at IKEA to display all my colorful buttons. Seeing the colors makes me happy and the jar help to organize by color which is helpful for matching and very time saving! And I love the shelf above with drawers where I can just reach up and get often used tools.

craft-buttons.gif

So here’s the Oprah-with-her-makeup-off reality of what it looks like mid-project. But now that I have had it organized I am eager to get it back into shape!

craft-space-messy1.gif

See you can pack alot into a corner and make it work! The irony, now that I am organized, is that we are moving to another house this month where I will actually have a whole room for my crafting! I have so many ideas and can’t wait to show you when it is done!

From our family to yours

Tuesday, December 25th, 2007

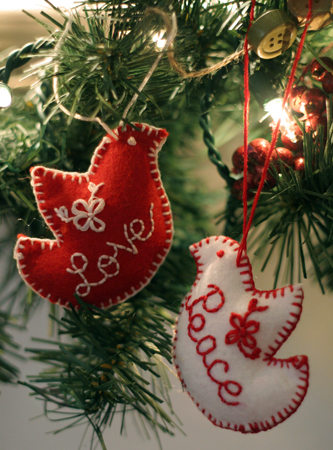
May your days be filled with peace, hope and love. Have a great holiday!

2turtledoves.jpg

O Star . . .

Thursday, December 20th, 2007

the fairest one in sight. . .
Choose Something Like A Star, Robert Frost

img_8222500.jpg

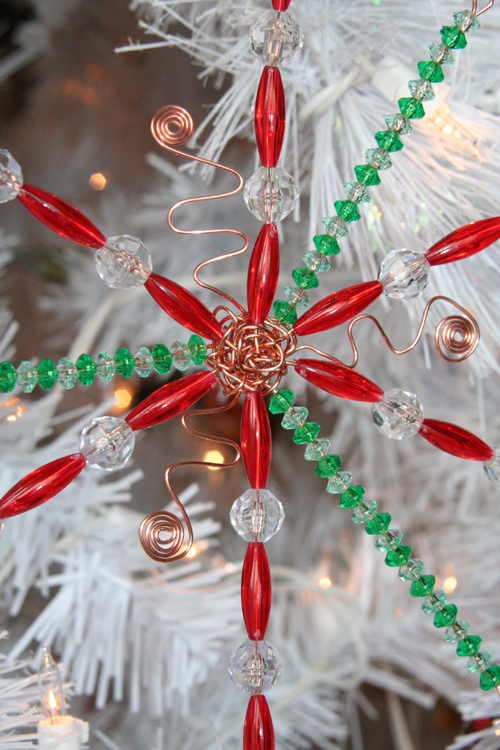
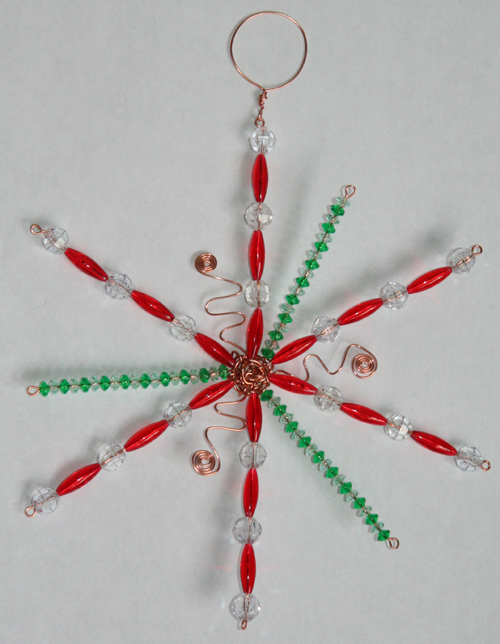
Here is an hour-long project for that last minute gift. My friend always gives me an ornament for Christmas and when I saw this year’s I had a “Hmm, I wonder if I can make one of those” moments. (Did I mention that I tend to procrastinate and suddenly making a star was way more important than typing up overdue PTA meeting minutes?)

So here it goes:

Materials

  • 20 gauge or slightly thicker wire. I used copper wire from the hardware store.
  • Wire cutter, pliers
  • Beads, washers, popcorn, buttons, or anything else you can think of to string on the wires

Step 1

For a six point star cut three 12 inch lengths of wire and one 6 inch length to tie the wires together.

Step 2

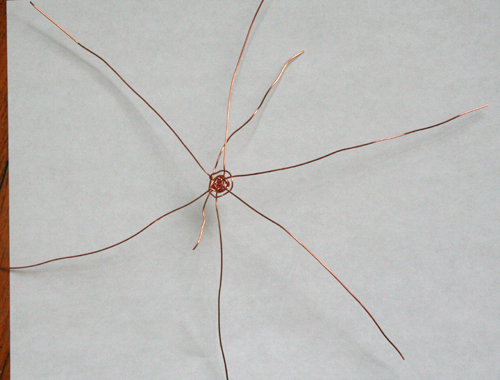
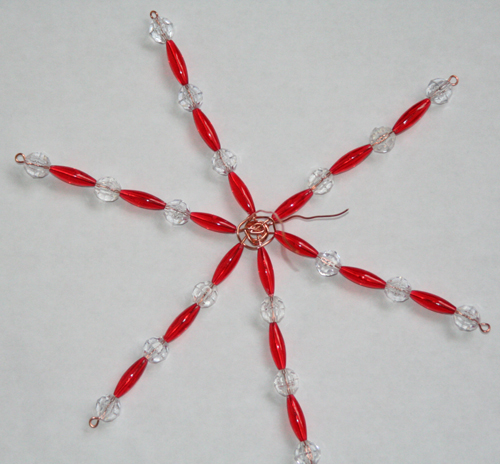
Lay out the three 12 inch wires to make a star shape. Then take the opposite ends of the bottom wire, cross them over the middle of the star and begin securing the wires. Repeat with the remaining 2 wires. This may require some fiddling. Basically you want to kind of wrap the wires around each other to make a star shape.

Step 3

Further secure your shape by using the 6 inch length of wire and basket weaving around the center of the star. Go over one wire and under the next, and so forth. Once you get to the beginning, you have to wrap the wire around the first “ray” so the securing wire can go the opposite way on the second round. In other words, if the wire went over the first “ray” the first time, it should go under the “ray” the second time. (Please let me know if there’s a better way to explain this.) Do this until you find that the ends of the wire are fairly secure and the whole contraption looks like a star. (Oooh, this could also make a good spider.)

img_8207500.jpg

Step 4

Start decorating your star. I used beads, but I think you could make a really cool star using stuff from the hardware store like washers and nuts and anything else you can thread. At the end of the wire, make a basic loop to prevent everything from sliding off. (See wigjig.com for instructions.) Repeat with the remaining wires. Tie a ribbon, string or wire off one point to hang up your star and you’re done.

img_8210500.jpg

Variations

  • Make a second star, stack the two stars and tie them together to make a 12 pointed star.
  • For a kid version, use chenille wire and decorate with beads or buttons
  • Use popcorn and dried cranberries to decorate the wires
  • Make a glam star with silver wire and crystal beads
  • Don’t decorate the wires, just use your pliers to bend them this way and that

img_8215500.jpg

Bling, Blong, Merrily on High

Friday, December 14th, 2007

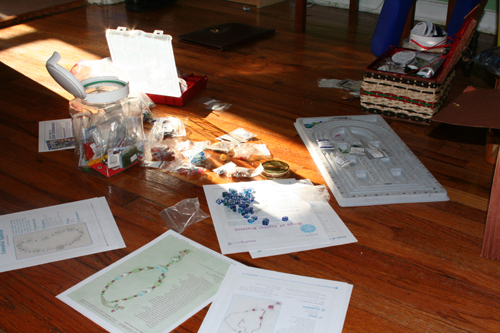
8160small.jpg

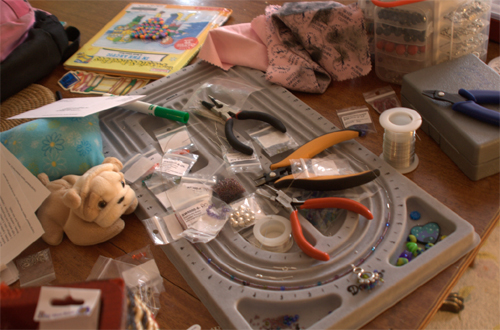
Reporting directly from Santa’s workshop: It’s a mess. Do you craft on the floor? I often do. It tends to be the last available spot for me to spread out since most of my table tops are covered with last month’s homework and advertisements. Also, when you’re beading the beads won’t roll off the table. (duh :) )

img_8158small.jpg

Given the current state of affairs at my household, my extreme handmade gifting pledge (I will only give handmade presents made by myself) will probably only extend to the female members of the family. The nice thing about making the kind of jewelry I’m capable of putting together is that it only takes a very finite amount of time. After one hour I feel like I was creative and actually finished something. For inspiration, check out Beading Daily. For how-to’s I like Rachel Nelson-Smith’s site. After following her tutorial on how to form a basic loop, I finally got it!

So who will get these pretties?

img_8177small.jpg

Crafty Daisies Handmade Christmas

Tuesday, December 11th, 2007
cdhandmade-300.jpg

As one could imagine from the content of our blog, we like to support hand-made. We also want our readers too, as well. That’s why we’re putting a special section on our blog from now until the end of December where you can upload your store logo and link and help us spread the love of hand-made. The requirements for posting your shop are as follows:

1) Your logo must be no larger than 100×100 pixels wide.

2) Your store description must be 100 words or less.

3) You must be selling hand-made items, not craft supplies in bulk or at a discount.

That’s all! So click here to upload your store (etsy, hyena cart, or anything else) and help us spread the love of hand-made this Christmas!

Throwing another school idea out there

Friday, December 7th, 2007

We’ve done a learn to crochet school and an embroidery school.

Now who would like to do a learn to knit school?

I just want to make sure the interest is there before I put all the work into it. I think it will be slightly different in style than the learn to crochet school, but the basic idea (weekly lessons and projects) will be the same.

It wont start until after the holidays, but let me know if this is something you would be interested in by leaving a comment :D

Bookmark Swap Wrap Up

Friday, December 7th, 2007

untitled.jpg

I want to send one last shout out to everyone who participated in the swap! I’ve heard good feedback and bad feedback, and I’ll keep in all in mind for the next one!

If you haven’t received your bookmark yet, send me an email at babyblossomsonline at gmail dot com with the subject “Bookmark Swap Not Received” and I’ll do my best to get some info, but remember we here at Crafty Daisies are not responsible for swap packages not received.

Thanks again everyone!

Your Kid, the Home Accessory Designer

Wednesday, December 5th, 2007

opening.jpg

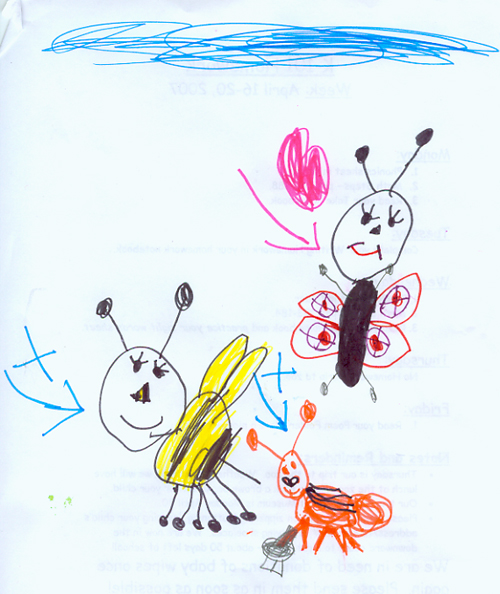
Here’s my confession: I live vicariously through the artistic abilities of my child. I believe she has a fantastic sense of color, line, and style (not that the state of her room is any indication of her design talents).

origart.jpg

Being the stage mother of a single child I intend to exploit her vision for this year’s holiday gifts. To put it simply, her artwork will serve as an embroidery pattern to give a humble flour sack tea towel some extraordinary flourish. Since your child is obviously equally as talented, why not give this idea a try:

materials.jpg

Materials

Copy of the artwork
Fabric
Transfer paper
Embroidery floss
Embroidery hoop

art.jpg

Select the Artwork and Make a Copy
I like simple line drawings because you don’t have to fill in planes of color with your embroidery. You can copy the drawing either with a copy machine, or scan it into your computer. If you have a scanned copy, you can use a graphics program and further expand on the original art by adding other elements like lettering.

trace.jpg

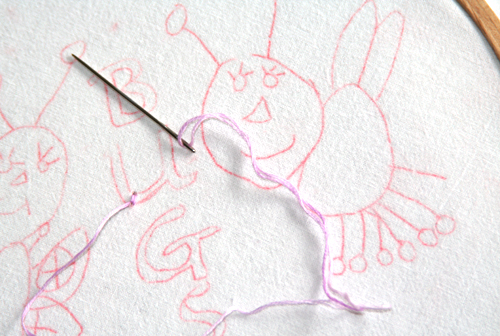
Trace the Design onto the Fabric
I’m using a dish towel, but you could also embellish a whole line of linens such as pillow cases, napkins, aprons; or clothing like a t-shirt or jeans jacket. Place the transfer paper on top of the fabric where you want your design to appear and the copy of the artwork on top of the paper. Trace the design.

embroider.jpg

Start Embroidering
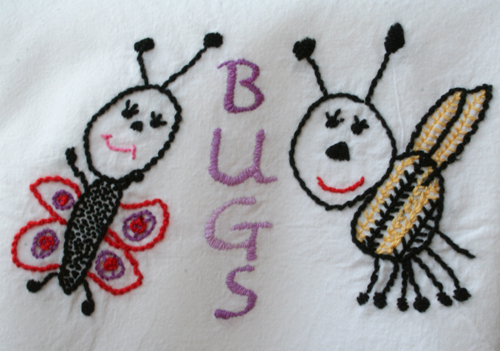
Take a look at Candace’s embroidery lessons to give you some ideas of what type of stitches might work well for your design. For this towel I used satin stitch for the letters, stem stitch for the outline, seed stitch for the butterfly’s body, a rosette stem stitch combination for the butterfly’s wings,and feather stitch for the bee’s body.

Tata
That’s it.

final.jpg