genericviagra

buy cheap cialis pill online lloyds pharmacy viagra cheapest without prescription farmacia online alprostadil

viagra no prescription required

cheap without prescription Cialis Super Active online meds where can i buy viagra cheap without prescription brand viagra online sildenafil online

canadian discount pharmacy

cheap without prescription Generic Levitra purchase tadalafil amoxicillin no prescription cheap without prescription pill online buy cheap generic viagra

yohimbe

Generic Viagra buy cheap cheap cialis impotence treatment cheapest without prescription buy viagra online stamina rx

buy prescriptions

buy cheap Viagra Super Active sildenafil citrate tablets soma pharmacy buy online cheap pharmacy cialis online

next day cialis

Zithromax cheap without prescription viagra sale online abortion pill online cheapest without prescription brooks pharmacy no prescription required

online pharma

buy cheap Viagra Soft viagra price comparison can i buy viagra online buy online order kamagra net pharmacy

viagra herbal

cheap without prescription Xenical discount viagra online lowest price viagra cheapest without prescription get viagra prescription online doctor

cialis generic

Levitra cheapest without prescription canadian rx canadian viagra online buy cheap canadian prescription drugs buy amoxil

Archive for March, 2007

Summer Craft Swap

Friday, March 30th, 2007

summer-craft-swap-copy.jpg

UPDATE: The swap entry is now closed. We will be doing another towards the end of the summer, so if you didn’t get a chance to participate in this one, have no fear, you’ll get another chance.

UPDATE: Due to the amount of participants already signed up, we’ve decided to close the swap entry on Tuesday, April 3. If you want to sign up, hurry and do so before Tuesday at 12 noon, EST.

While we missed the opportunity to do Valentine’s day and Easter craft swaps, we’ve decided to do one for the summer. This can include anything that you love about summer – flowers, butterflies, birds, whatever, and can range from sunglass cases to beach totes. You’ll just need to get a Priority Mail Flat Rate Box (11-7/8 x 3-3/8 x 13-5/8 inches) and stuff it as full as you can. Shipping will cost you $8.10 regardless of weight or destination (in the continental U.S.). Now, for all the technicals:

1) Drop us an email ([email protected]) to let us know if you will be participating in the swap. Please include your name, web or blog address (if you have one), shipping information, and if you would ship internationally. Also, tell us a little about yourself, if you have any children, what your favorite crafts are, anything that you love or are interested in. Sign up will begin today and continue until Friday, April 6 Tuesday, April 3. Once you email us, we will be contacting you by Monday, April 9 to let you know who you will be sending your swap items to.

2) If you sign up you must complete the swap or you will not be eligible for participation in future swaps. If you are unable to send your items, for whatever reason, you must contact the swap admin (Candace) as soon as possible. Please be mindful that this needs to be reciprocal – if you sign up, please follow through. In the same regards, we will try and accomodate everyone, however we at Crafty Daisies will not be responsible for items not shipped.

3) Packages must be sent out by Friday, May 4. If you can not send packages by this date, please contact the swap admin.

4) One of the items in the swap must be handmade. All other items can be handmade as well, or can be an assortment of craft-related items, regional items (such as seeds, photographs, etc), or anything fun and pretty.

5) Have fun!!!!

Making a onesie into a shirt

Thursday, March 29th, 2007

My daughter is really tall and thin, so she outgrows her onesies in length before she outgrows them in body size. I hated the fact that she would only wear them for a couple of months and they were still in nearly new condition, but they were no longer useful. I decided to make some into shirts for her, so that she can get more wear and use out of them.

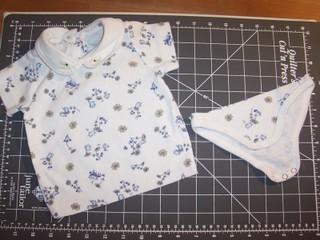
I started with a onesie that was too small lengthwise.

march12049.jpg

I then cut off the bottom snap part right above the leg elastic. I used a ruler to make sure I cut it straight across.

march12050.jpg

I finished the edge of the shirt using the rolled hem on my serger. However, if you don’t have a serger you could simply finish the edge with a zig zag stitch and then sew a hem.

march12051.jpg

And there you have it – a cute shirt that can be used for a little bit longer!

Hallowed Easter Eggs

Wednesday, March 28th, 2007

My brother and I used to make these eggs when we were younger and my mom liked it b/c they didn’t stink up the house after only a few days, like their hard-boiled counterparts. In fact, they’ll keep as long as you can keep from crushing them, since they’re made from real eggs.

They’re super easy, but b/c they take a bit of lung work and a gentle grasp, an adult should do the hollowing, leaving the decorating to the kiddies.

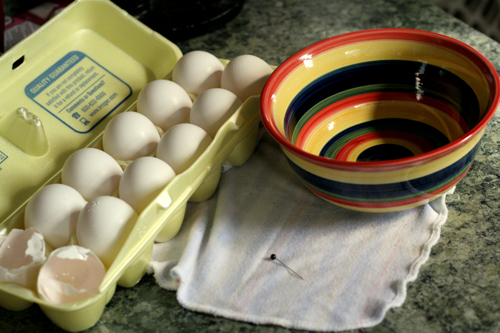
hollowedeggs1.jpg

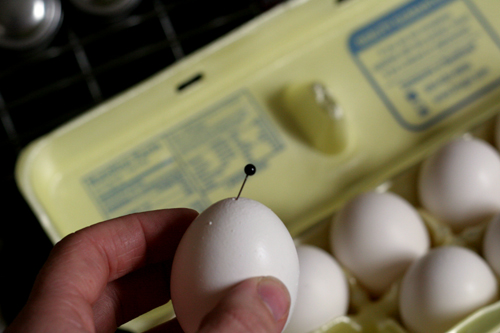
You’ll want to gently cleanse the eggs first. Then you’ll take a pin and puncture the top and the bottom of the egg.

hollowegg2.jpg

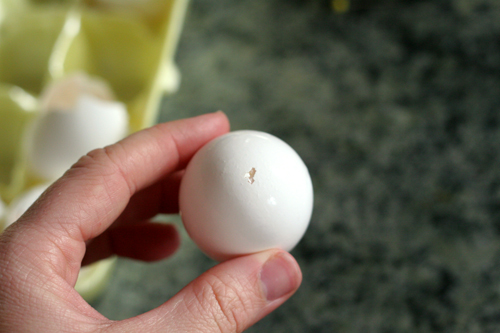
You’ll want to make sure the hole is large enough for air to go into the egg, and for the contents to empty. What I do, is make three pinholes close to each other and then connect them, making a larger hole.

hollowegg3.jpg

Then you’ll clean off the top of the egg that will touch your mouth. Hold the egg gently in your hands and blow through the hole, blowing the contents into a bowl (sorry, no picture for that, trust me, it’s quite disturbing). To make it easier, take the pin and insert it in the bottom of the egg, moving it around to break up the yolk. If you find you’re having a hard time, try and enlarge the hole some more, or shake the yolk around after you’ve broke it up. Once the egg is empty, run under cold water, and blow any excess water out. Let egg dry on a paper towel and decorate as desired, but be careful with the hollowed eggs – they are extremely fragile.

hollowegg4.jpg

holloweggs5.jpg

Mini Overall Hooks

Tuesday, March 27th, 2007

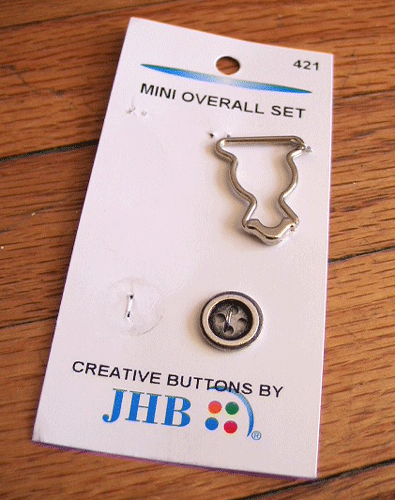
I have been hunting lately for new and easy ways to add a closure to the bags that I make. I wanted to share what I found this week on the button rack- mini overall hooks!

overall-hook.gif

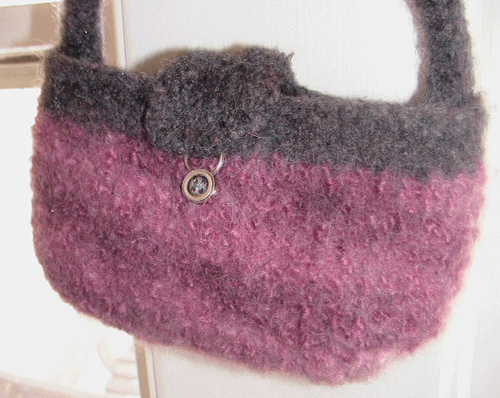
I liked the simple look of the hook and aged nickel finish of the button. It was simple to sew on and I think looked really cute. I am sure that I have passed these over before but I think they are a perfect finish, especially for small bags. Do you have any other things used for closures that were not originally intended for that?

overall-hook-done.gif

Knitting Bag

Monday, March 26th, 2007

I wanted to share with you a little project that has changed my knitting life…

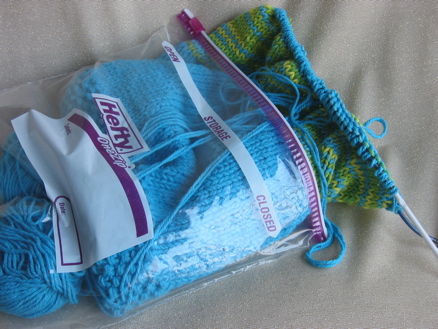
My knitting used to look like this:
img_0126.jpg

Sure I have a huge knitting bag with ALL my knitting in it, but what about taking the wip with me somewhere. Oh quick, grab a ziplock.. Sound familiar?

So I came up with this easy drawstring bag. Now I can stuff my knitting in anywhere and the drawstring keeps my yarn coming out nicely from the top. It only has one seam. It is one big piece of fabric folded over and stitched up the side. Tada.. This is a bag I’m working on for my future sister-in-law (apparently I can’t stop knitting bags – help!)
you likes?
img_0128.jpg

Happenings around Crafty Daisies

Friday, March 23rd, 2007

Lots of things going on around the daisy patch. We’re having an upcoming Summer Craft Swap, so if you’re interested, please check back as details will follow in the next week. There is also a lot of business behind-the-scenes as Heather, Jen and myself are getting ready to open individual online stores, and we’ll definitely post links to those as they’re finished. We’re also gearing up for a summer of fun roadtrips to Atlanta and New York City for two craft and gift trade shows and are so stoked about them! If you’re going to be attending either the AmericasMart Gift Show (in Atlanta) or the New York International Gift Fair as a vendor or there just for the eye-candy (like us), please let us know, we’d love to meet you! We’re also looking for extra help for about 8 weeks as our beloved Joy will be going to Nogales, Mexico for a ministry opportunity. If you’re interested in being a guest writer to help us fill in the gaps, please drop me an email at gals AT craftydaisies DOT com. We also want to take this opportunity to thank all of our readers for being so faithful in visiting – this website has been a blast to do and we thank each and every one of you for being a part of it!

A Few Finished Projects

Thursday, March 22nd, 2007

I’ve been busy the past couple of weeks with yarn crafts! I found a new love of dying yarn, so I’ve been playing with that a lot. Here are a few of the colorways I’ve dyed up.

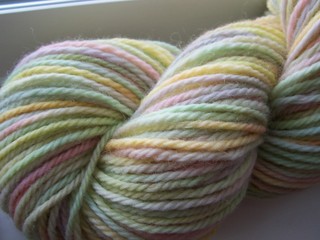
The first was my first attempt at kettle dying. It turned out so beautiful, the colors remind me of Easter.

march12045.jpg

The following are two other attempts I made. These didn’t turn out nearly as well because I didn’t have the water temperature high enough and the colors weren’t being absorbed quickly, causing muddying of the colors. But they aren’t too bad, not as orange as they look in the pictures :)

100_2336.jpg 100_2337.jpg

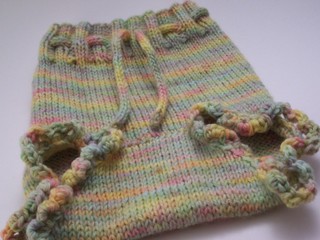
This is a soaker I made using the first kettle dye I did. I love how it turned out. Notice how there is no pooling of the colors, that is a huge plus to kettle dying. It is so random and color pooling is minimal. The pattern is a free soaker pattern I found online.

100_2339.jpg

These are some night time shorties that I made from a purchased Belladonna Designs pattern. They are made specifically for night time with a thicker stitch in the crotch, where more absorbency is needed. My daughter wore them last night and they worked perfectly. The yarn is another colorway I dyed, but I didn’t like how it turned out at all. I call it my “dye job gone bad” :D

100_2341.jpg

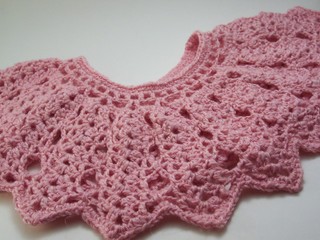
The final project is a poncho that I crocheted for my beautiful daughter. The yarn is a cotton linen blend that I received when participating in a “magic yarn ball swap” through a messageboard I’m active on. The pattern was a free one I found online.

100_2342.jpg

And who can resist a picture of a happy girl in her new top?

100_2303.jpg

So there you have it – what I’ve been up to the past couple of weeks :) Thanks for looking!!

Purse Problems

Tuesday, March 20th, 2007
jenbag1.jpg

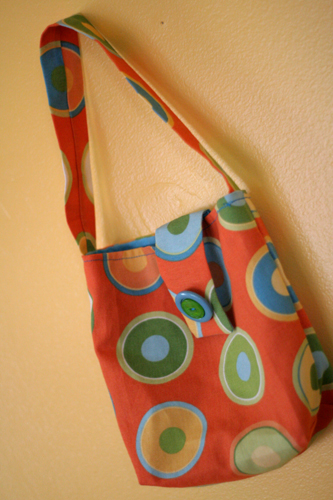
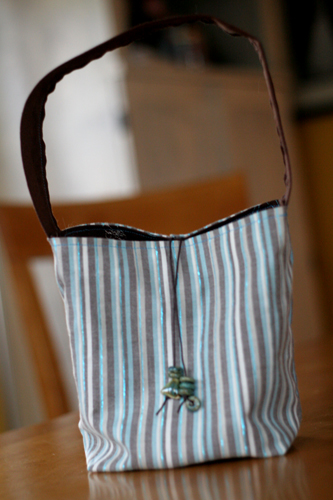
This orange bag is one of the first bags that I have attempted to sew and I have to say I’m pretty proud of myself. I still have some questions about lining and better construction, but pretty proud. I did make the lining a tad smaller in width than the outside fabric so that when I pinned it to sew, it did not line up all the way around. My husband though came up with a clever solution- I readjusted it so that there is a small pintuck in the front center of the bag that is hidden by the flap. (He often is the brains behind my projects!) I sewed two buttons together for more color and I like the way that turned out.

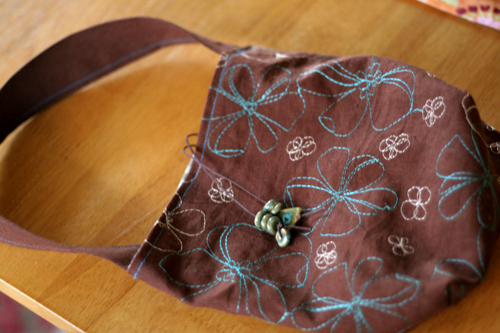
My next mission was to try and make some bags that were reversible. I am enjoying my sewing machine again (it comes and goes) so I whipped up this brown bag. With this second one again I thought I cut the 2 fabrics the same width and yet when I sewed them together there was still more of the outer fabric. Since I love the idea of making these I am now seeking outside of myself for further help. Do you cut both fabrics the exact same size when making it reversible? Does adding the handle between the 2 layers throw it off?

jenbag2.jpg
The second challenge I wanted to face was to find a way to make the bags stiffer no matter what fabric I choose. I bought some Iron-on Bond stuff to strengthen my lining and ironed it on the little piece of fabric I had left for the strap. I made the piece of iron-on too wide so when I folded the fabric together it bonded to itself and I had to leave the strap with the seam visible on the outside. Oops! Needless to say I did not want to iron-on to my main fabric. Any tips or feedback?

jenbag3.jpg

Quick Fix

Monday, March 19th, 2007

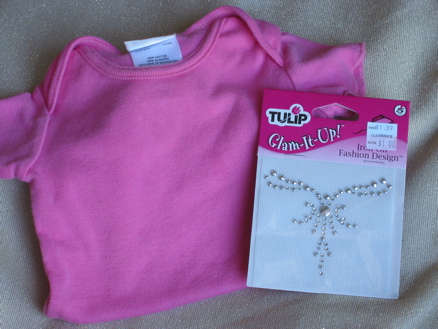
I have been feeling kinda poopy lately. Brian and I have been getting over a mean cold. It is so hard to be creative when you are feeling bad. I wanted to make something quick just to prove to myself that I’m still a crafting genius. Just something to make me feel better. Ah ha! Glam it up! Of course! What could be more fantastic and more importantly, FAST! I just needed a quick fix. Found this at Michaels for a $1 yippee! You just iron it on. Sweet!
img_0067.jpg

Ahhh Delight. I still have it in me, and my baby’s got bling :)

img_0095.jpg

Now as long as she doesn’t chew it off we’re good. tee hee.

A call for inspiration

Friday, March 16th, 2007

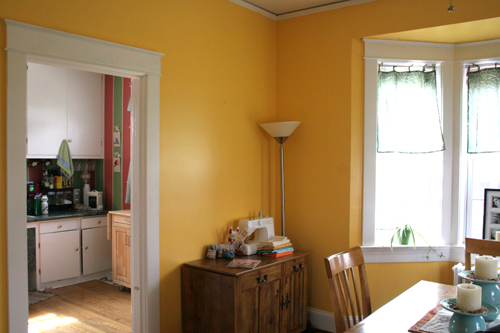
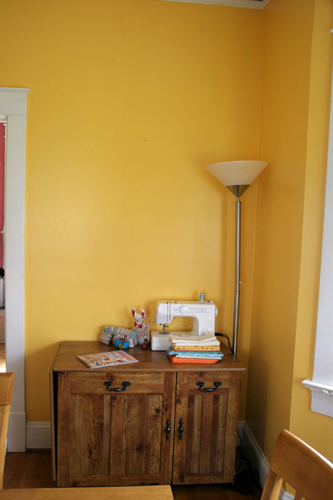
For those of you who don’t know, I don’t have an actual craft studio. As much as that bums me from time to time, I do have a craft corner which works perfectly for our house and for my crafting needs. I just recently decided to redecorate the dining room (which is where my corner is located) and switched around some of the artwork on the walls. I am now left with a blank spot that is located just above my workspace.

craft-corner1.jpg

How can I be inspired to create when there is nothing to look up and inspire me? I love this idea from the Purl Bee, but I’m just not a fan of embroidery hoops adorning my dining room walls. I thought about covering canvases of different shapes and sizes of my favorite textiles and then hanging them there. I dont really want shelves, nor do I want just one basic piece of artwork. So I am asking for suggestions. What do you have hanging above your work space that inspires you? What would you like to have there?

craft-corner2.jpg