genericviagra

buy cheap cialis pill online lloyds pharmacy viagra cheapest without prescription farmacia online alprostadil

viagra no prescription required

cheap without prescription Cialis Super Active online meds where can i buy viagra cheap without prescription brand viagra online sildenafil online

canadian discount pharmacy

cheap without prescription Generic Levitra purchase tadalafil amoxicillin no prescription cheap without prescription pill online buy cheap generic viagra

yohimbe

Generic Viagra buy cheap cheap cialis impotence treatment cheapest without prescription buy viagra online stamina rx

buy prescriptions

buy cheap Viagra Super Active sildenafil citrate tablets soma pharmacy buy online cheap pharmacy cialis online

next day cialis

Zithromax cheap without prescription viagra sale online abortion pill online cheapest without prescription brooks pharmacy no prescription required

online pharma

buy cheap Viagra Soft viagra price comparison can i buy viagra online buy online order kamagra net pharmacy

viagra herbal

cheap without prescription Xenical discount viagra online lowest price viagra cheapest without prescription get viagra prescription online doctor

cialis generic

Levitra cheapest without prescription canadian rx canadian viagra online buy cheap canadian prescription drugs buy amoxil

Archive for the 'Kids' Category

Rosie’s Sheets and other Goodies

Friday, October 10th, 2008

I’m on the road again, this time visiting my parents for my dad’s 70th birthday (the Munich airport has a big toy store that’s open at 7:00 a.m. if you’re ever in need for something like that) , but I wanted to share these links with you if you are looking for projects for this weekend.

First off, Jeannie of whatthehay is sharing a tutorial on sewing your own cribsheets. She writes:

After finding out that we were pregnant with our first baby, I began the long and fun process of collecting all of the things that a new human needs to survive. First on the list? A CRIB of course! Beyond the crib (which we found at a consignment sale, along with the crib mattress) a baby needs crib sheets. Happily, Rosie has a talented grandma who was more than happy to provide her with many of the essentials of baby survival – a quilt (with strict instructions to USE it), a few totally cute outfits and 4 crib sheets.

Rosie’s Grandma is a sewing kind of lady and back when I was a kid, money was tight and so, well, she sewed. Beyond making nearly all of our clothes that weren’t hand-me-downs, she also devised a pattern for a crib sheet. Back in the day, people actually made their own sheets for their big beds, too, and she adapted this pattern from one of those patterns.

If you have a baby shower coming up, check out her crib sheet tutorial for a very useful, unique gift.

Secondly, I started another blog called craftevolution.com. It’s still in early development, but come visit to see some ideas for Halloween costumes based on basic sewing patterns and let me know what you think about the blog.

Recycled Denim Fiesta Skirt: A Tutorial

Friday, June 13th, 2008

img_9289small.jpg

It’s 90 plus degrees and I could be sorting out summer clothes and putting winter stuff away, however, I’d rather be sewing! While attempting to deal with such mundane chores, I found a pair of Elizabeth’s jeans. While they are way to short for her, the waist still fits perfectly for my skinny child so they became the object of another refashioning exercise.

Part 1: Cutting up the Jeans

img_9316small.jpg

  1. Lay out the jeans and cut off the legs right below the crotch. This will be the top tier of the skirt.

    img_9318small.jpg

  2. Open up the seam between the legs.
  3. Look at the top part of the jeans and measure the distance from the waist to about one inch below the zipper of the jeans. In my case that was 6.5 inches/16.5 cm.
  4. img_9321small.jpg

  5. Mark this distance all around the tier.
  6. img_9322small.jpg

  7. Even out the bottom of the tier by cutting along your mark.

Part 2: The Math

Calculate the Width of the Ruffles

  1. Decide how long you want the skirt to be and subtract the length of the jeans top tier from this number.
  2. skirta.jpg

  3. Divide the remainder by the number of ruffles you wish to add for ruffles of equal width. This skirt is 16.5 inches long. 16.5 – 6.5 inches for the top tier = 10 inches. 10 inches divided by 2 ruffles = 5 inch width per ruffle.

Calculate the Length of the Ruffles

  1. Measure the circumference of the bottom edge of the top tier and multiply this number by two. This is the length of the second tier ruffle.
  2. Multiply the length of the second tier ruffle by two. This is the length of the third tier ruffle.

These calculations will give you two fairly full tiers of ruffles. If you want the skirt two be less full, make the ruffles a little shorter.

Part 3: Cut the Fabric

With these measurements, cut your ruffles. You may have to join one or more strips of fabric to get the requisite length. For example, my first ruffle had to be 50 inches long and the fabric was 45 inches wide, so I had to cut another 5 inch strip to make up the 50 inches.

Part 4: Ruffle the Ruffles

  1. For each ruffle, join the lengths of fabric you cut out to make a long strip.
  2. Use your preferred method to finish the raw edges of the strips. I sewed a zigzag stitch along the edges.
  3. For each ruffle, sew the long strip together to make a loop.
  4. Ruffle the second tier ruffle by sewing long basting stitches along the top edge of the fabric.
  5. Mark each quarter of the top jeans tier, e.g., front middle, left side, back middle, right side.
  6. img_9327small-copy.jpg

  7. Repeat this for the second tier ruffle.
  8. With right sides together, pin the second tier ruffle to the top jeans tier matching the quarter markings.
  9. img_9326small.jpg

  10. Gather the fabric between the markings by pulling the top thread of the basting stitch.
  11. Evenly distribute the gathers.
  12. Sew the second tier ruffle to the top jeans tier. Repeat this process for the next ruffle(s).

Part 5: Finish the Skirt

At this point you should have attached all the ruffles.

  1. Hem the bottom tier.

I’m currently infatuated with bias tape hems. This skirt features homemade tape made out of matching fabric. For instructions on making this tape check out Step Four of the cashmere blanket tutorial. You could also just make a traditional double fold hem. (Fold the bottom edge to the inside and press, fold again, press and stitch.)

Dance the night away. This is the perfect party skirt.

Half-hour Kid’s Summer Quilt

Sunday, April 27th, 2008

This is my first, simple attempt at “quilting”. Using only 1 yard each of 2 fabrics I made a lightweight summer toddler quilt.

img_2081.jpg

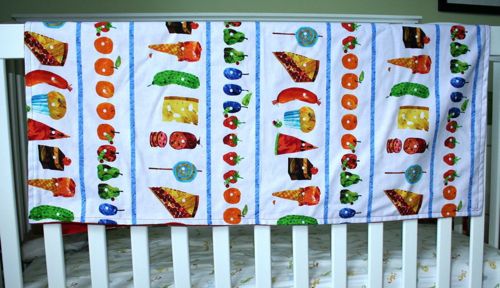
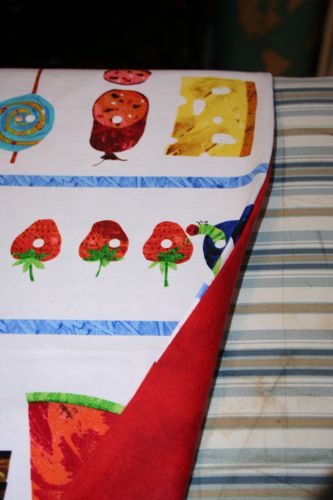
Now that I have done this once, I think I can seriously do it in half an hour (and you can too!) For the front I used 1 yard of nice cotton fabric- I love this series of prints from “The Hungry Caterpillar” books. The backing is 1 yard of lightweight cozy quilting fleece, a marbled red.

1) Line up fabrics wrong sides together and sew around 3 sides. I used a serger on all 3 sides but you could use a regular sewing machine too.

img_2061.jpg

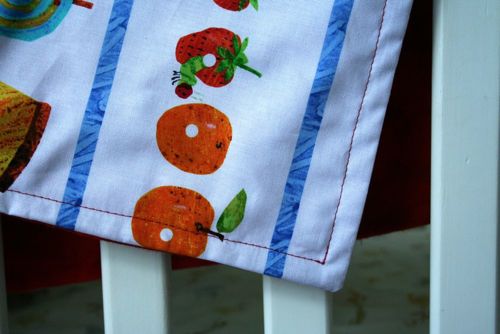
2) Turn fabric so it is right-side out and press neatly around all 3 sewn sides. Fold 4th side under and sew across the edge, starting and stopping just short of each corner.

img_2064.jpg

3) Lastly, starting with the 4th edge just sewn, sew on top of the fabric around right-side edge, turning just short of each corner. This will hold the 2 pieces together. I could have also sewn across the blue stripes for added accent since this fabric is patterned this way (but before sewing around right-side edge). You could also sew a pattern on top, or around the characters on the fabric.

img_2084.jpg

Very quick, easy and inexpensive! Great for summer traveling, picnics, for a crib or pack n’ play!

Your Kid, the Home Accessory Designer

Wednesday, December 5th, 2007

opening.jpg

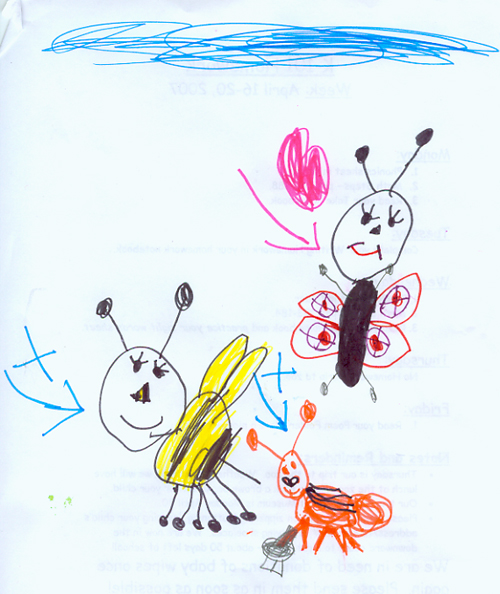
Here’s my confession: I live vicariously through the artistic abilities of my child. I believe she has a fantastic sense of color, line, and style (not that the state of her room is any indication of her design talents).

origart.jpg

Being the stage mother of a single child I intend to exploit her vision for this year’s holiday gifts. To put it simply, her artwork will serve as an embroidery pattern to give a humble flour sack tea towel some extraordinary flourish. Since your child is obviously equally as talented, why not give this idea a try:

materials.jpg

Materials

Copy of the artwork
Fabric
Transfer paper
Embroidery floss
Embroidery hoop

art.jpg

Select the Artwork and Make a Copy
I like simple line drawings because you don’t have to fill in planes of color with your embroidery. You can copy the drawing either with a copy machine, or scan it into your computer. If you have a scanned copy, you can use a graphics program and further expand on the original art by adding other elements like lettering.

trace.jpg

Trace the Design onto the Fabric
I’m using a dish towel, but you could also embellish a whole line of linens such as pillow cases, napkins, aprons; or clothing like a t-shirt or jeans jacket. Place the transfer paper on top of the fabric where you want your design to appear and the copy of the artwork on top of the paper. Trace the design.

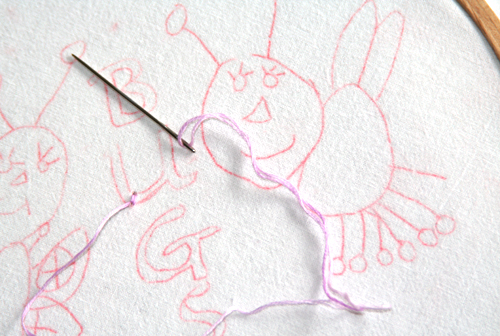
embroider.jpg

Start Embroidering
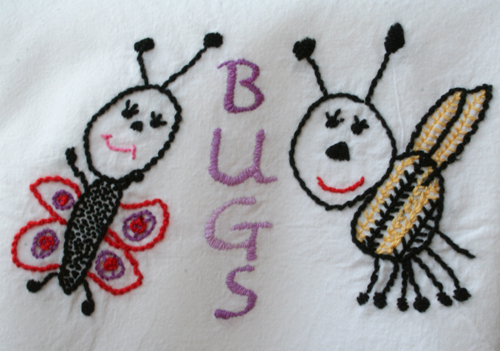
Take a look at Candace’s embroidery lessons to give you some ideas of what type of stitches might work well for your design. For this towel I used satin stitch for the letters, stem stitch for the outline, seed stitch for the butterfly’s body, a rosette stem stitch combination for the butterfly’s wings,and feather stitch for the bee’s body.

Tata
That’s it.

final.jpg

Making a Mane

Thursday, November 29th, 2007

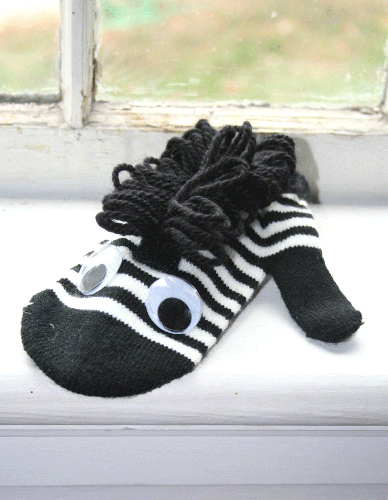
zebra-puppet-11.gif

These black and white striped mittens caught my eye as I walked through my favorite store. What an easy, instant way to make a zebra!
So I grabbed a variety pack of googley eyes, felt, and yarn and introduce Zeal the Zebra!
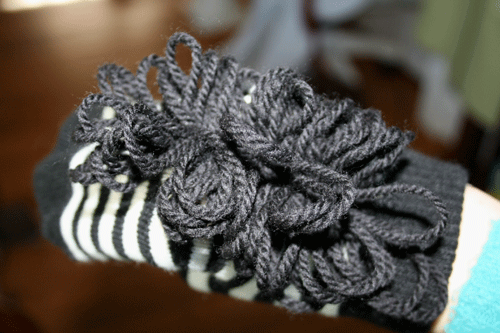
The part of Zeal that I was most proud of was his mane.

zebra-mane-for-cd.gif

To make the mane: I held out my index and middle finger and using black wool yarn, held the end of the yarn with my thumb and ran the yarn around my two fingers in a figure eight. Then I carefully slid the looped yarn off my fingers and onto a piece of velcro about 5″ long (the soft side). Spread the mane out on the velcro as you desire and sew down the middle holding the yarn in place. Then attach the mane strip to the mitten with fabric glue. I used fabric glue also to stick on the eyes and a rounded pink strip underneath for a tongue. A quick 10 minute addition to your kid’s puppet show!

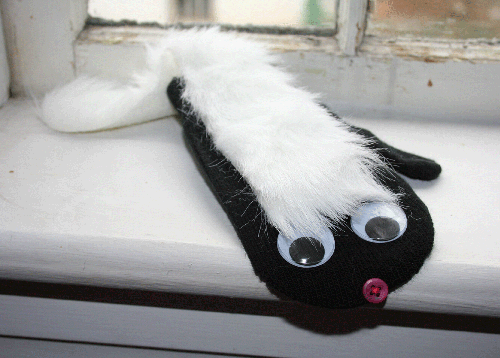
If Zeal is for you I have one left in my etsy shop and his sweet friend Skip the Skunk!

skunk-puppet-2.gif

Quick Costumes

Monday, October 29th, 2007

For those of you parents who are thinking of this last minute (and I’m assuming that you are if you are reading this on Oct. 30!) I have a few ideas that are quick and also cheap! Mostly made from clothes my son already had or stuff found around the house and best of all not wasteful!

Here are just a few on my favorite model:

First, using overalls, bandana, kids’ cowboy hat, and a party favor badge- the Cowboy!
j-as-cowboy.gif

Repeating with the overalls and bandana, a train bucket and whistle, and striped hat and jacket (that I got second hand for $1!) – the Train engineer!

j-as-train-eng.gif

Camo pants, vest, fisherman hat, toy fishing pole that came with a puzzle, a small camo backpack of mine, and I cut fish out of felt and strung through twine – the Lucky Sportsman!

j-as-fisher.gif

Why not borrow from another holiday? Green sweatpants, a red shirt inside out with felt cut out collar (also good on green for Kermit), a red gift bag or stocking for candy, green shoes, and a dollar store elf hat (which I would pin smaller) – the Cutest Little Elf!

j-as-elf.gif

Or try getting use out of that suit bought just for a wedding or Easter – carry a Bible and go as a Preacher, put on a campaign button and be a Politician, a bow tie, beard, and book as a Professor, a little suitcase as a salesman!

I saw a few other inspiring ideas on the Today show last week like a:
Train Conductor costume - a dark 3-piece suit with a pocket watch chain and piece of gold braiding glued on a hat with toy train in hand.
Cheerleader or Football player - with mop heads for pom pons and colorful electrical tape for uniform stripes and numbers.

Remember it just needs to be fun, cute, and easy for the child to wear. I like to dress my child up as something he can be when he grows up since he wants to copy his dad so much anyway. I like cute and simple better than scary! So look through the kid’s dresser and pair things together you wouldn’t normally. It will be fun to dig together and get their imagination going too!

Any other ideas you want to share?

Kid’s Paper Table Cover

Tuesday, October 23rd, 2007

kids-table-with-judah.gif

To make eating at the “kids table” seem like a more fun idea, I wanted to create a special spot decorated just for them. This would be great for Thanksgiving or family meals and if it’s messy when they are done, just throw it away! It would also be fun to stamp the child’s name at their place, or let them color in the stamps or draw on the paper if the meal is done and you want them to stick around a little longer with the family.

Supplies needed:
Craft paper, brown or white traditionally, but any color
Rubber stamps
Stamp ink
Tape

kids-table-1.gif

I went ahead and taped the runner to the bottom of the table to make it easier to stamp. Then I created a pattern around the paper with the pumpkin, leaf, acorn, and swirl of wind stamps in different colors. Obviously my boy couldn’t stay away from my display.

kids-table-detail.gif