Archive for the 'Now there’s an idea' Category
Thursday, November 29th, 2007
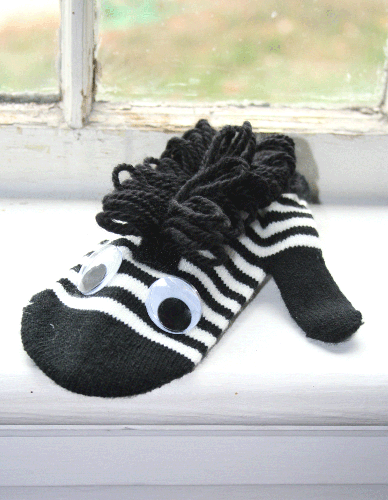
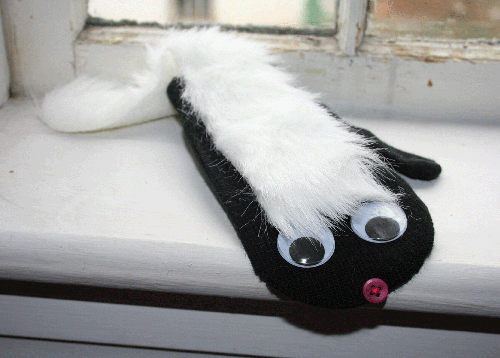
These black and white striped mittens caught my eye as I walked through my favorite store. What an easy, instant way to make a zebra!
So I grabbed a variety pack of googley eyes, felt, and yarn and introduce Zeal the Zebra!
The part of Zeal that I was most proud of was his mane.
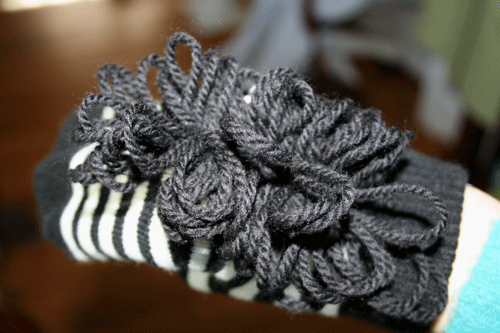
To make the mane: I held out my index and middle finger and using black wool yarn, held the end of the yarn with my thumb and ran the yarn around my two fingers in a figure eight. Then I carefully slid the looped yarn off my fingers and onto a piece of velcro about 5″ long (the soft side). Spread the mane out on the velcro as you desire and sew down the middle holding the yarn in place. Then attach the mane strip to the mitten with fabric glue. I used fabric glue also to stick on the eyes and a rounded pink strip underneath for a tongue. A quick 10 minute addition to your kid’s puppet show!
If Zeal is for you I have one left in my etsy shop and his sweet friend Skip the Skunk!
Posted in Jen, Kids, Now there's an idea, Quick, Toddler, Tutorials | 9 Comments »
Wednesday, September 26th, 2007
This is another idea I wanted to share from my brilliant friend Erica’s house. She found these beautiful, old, slim, doors at an antique store to make a unique window treatment.
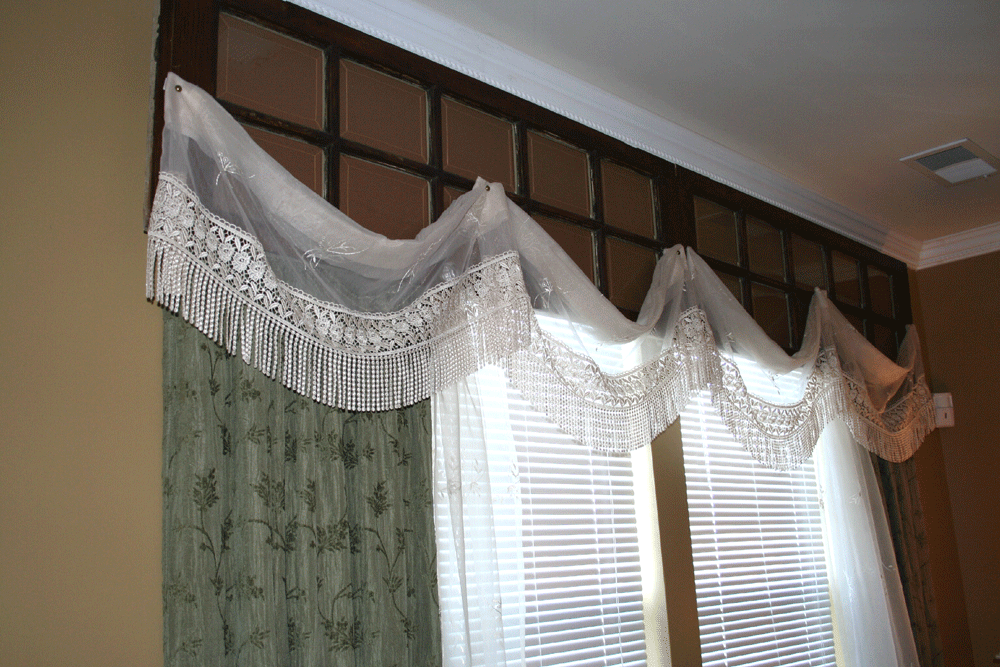
Over a very wide window in her living room she hung the doors and I love the depth the glass provides like a mirror. Her drapes and valances hang from the doors. And she cleverly put brown paper behind the window panes to hide the white moulding that would have partially shown above the windows. I love decorating like this that helps you peruse the antique shops in a whole new way!
Posted in Home, Jen, Now there's an idea | 4 Comments »
Tuesday, September 25th, 2007
I was searching the internet looking for crochet grocery bags, and I stumbled onto Marlo’s Crochet Corner. Posted there is an excellent tutorial on how to reuse your plastic grocery bags to make a tote bag.
I love this idea! It would make a nice, thick and sturdy bag to carry your groceries in, while helping the environment.
So then I did more searching, and I found lots of ideas for using plastic bags in your projects:
A crochet hat
A water bottle holder (I really like this one!)
A Pot scrubber
And I also found collections of ideas!
MyRecycledBags.com
Needlepointers.com
I find this very inspirational, and I can see some recycled products in my future!! Has anyone tried this? Have you had success or any pointers to share? 
Posted in Crochet, Heather, Now there's an idea | 5 Comments »
Friday, September 21st, 2007

Though I love the first apron I made, I found a much quicker formula. I simply converted a kitchen towel into a full apron. This is a quick 30 minute project and who can resist with such cute prints out there!

First, Run a needle and thread in and out evenly very close to the trim and draw it to the tightness of gathering you like. I loved this towel because it had the rust colored trim on the top and bottom already.
 <
<
Then pin your ribbons (20") in place and sew over the gathering, making sure it IS wrinkled under the needle and that the fabric doesn't flatten out. I also burn the edges of the ribbon with a lighter so that is does not unravel, very lightly so you don't change the color of the ribbon.
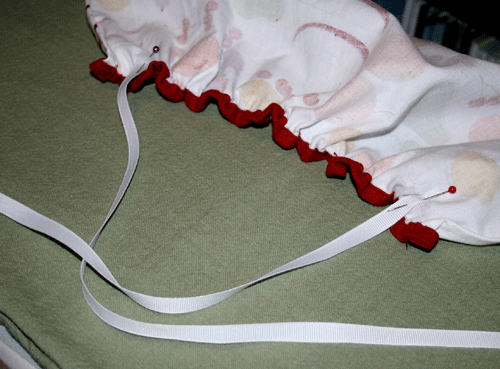
Last, I measured 2 ribbons 28" inches long and measured where at my waist I wanted to tie the apron. Again, I burned the ends of the ribbon and pinned them into place along the back right and left edges of the towel and sewed just over the ribbon, along the original towel seam.
Voila! So cute and automatically comes with a matching towel! This would be a great, quick, housewarming gift!
If this fruity set is perfect for your kitchen I have a couple of sets available here!
Posted in Clothing, Jen, Kitchen, Now there's an idea, Quick, Sewing, Tutorials | 22 Comments »
Monday, September 10th, 2007
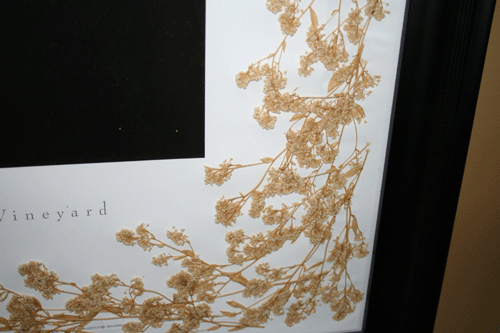
This is a great idea I couldn’t wait to share after visiting a friend’s house this week. I had never thought to ask if she had created this framed work herself. I assumed she had bought it this way, but I love the natural flowers with such a natural picture. It really draws your attention and adds dimension.

She bought the print on her honeymoon and the frame later. But my favorite part was that she got dried baby’s breath from a craft store to place around the print rather than buying expensive matting. She layered the flowers on the paper and then pressed the glass upon it, using no glue to damage the print. I loved this idea and her house is so inspiring! Thanks, E!
Posted in Bargain-crafting, Flowers, Home, Jen, Now there's an idea | 12 Comments »
Thursday, July 26th, 2007

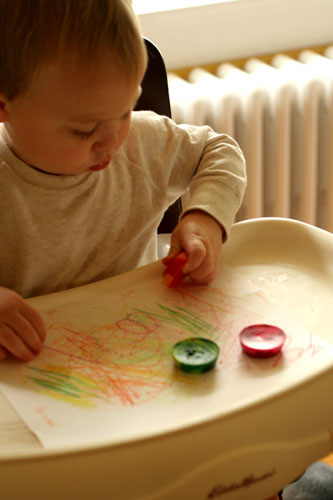
My son just turned 18 months, and is really into coloring. I absolutely love this because now we can be creative together. However, he is also a toddler (and a boy) which means most of the time breaking the crayons is often more fun than coloring with them. A friend of mine told me awhile back about melting down crayons to make chunkier ones that are easier for little hands to hold (and tougher for them to break). This is also a great way to use up broken crayons that you have laying around.

What you’ll need:
- Crayons (like I said, you could use ones you already have or buy some. I purchased 5 boxes of 24-pack crayons for 20 cents each – back to school bargains!)
- mini muffin pan (one that you don’t mind getting a little crayon on)
- exacto knife (optional)
You’ll want to preheat your oven to 265 degrees F. Peel off all the paper from the crayons (for the new ones, I found it much quicker to remove the paper in one smooth motion if I carefully ran the exacto knife down the center of the paper and peeled the paper back), and break them into 1/2″ to 1″ pieces. Arrange two to three like colors in each slot, then bake for 6-8 minutes (don’t over bake – you want them just melted so you can’t distinguish the crayon shape anymore). Let them congeal a little on the counter, then place them in the freezer until they are firm (approx. 30 minutes). They should then pop right out.
This is great for little hands that aren’t steady enough to hold thin crayons. They can wrap their whole hands around them and go to town without breaking them.

They also make great back to school and birthday gifts for other little artists in your life.
Posted in Bargain-crafting, Candace, Now there's an idea, Toddler, Tutorials | 179 Comments »
Monday, July 23rd, 2007
In a previous post I had toyed with using iron-on vinyl lining to make my bags waterproof, but I think I may have found a simpler, less expensive alternative- just using a vinyl tablecloth. I bought this fun fruity print off a large roll of tablecloth material. It came in a 60″ roll and I got 1 & 1/2 yds. I wanted to make a bag that was waterproof and easy to wipe off, something great to throw your wet towel or suit in after a day at the beach.

All you need:
(2) – 24″w x 18″h pieces, cut folded for outer bag and lining (or whatever size you desire)
(1) – 12″w x 10″h piece for outer pocket
1 yard of nylon strap
1 piece of cardboard the size of middle bottom of bag
(1) set of snaps or ribbon for closure

1. Fold over top edge of pocket and sew.
2. Choose a front for the bag and pin pocket into place, folding other 3 sides under and sew into place. Then I sewed a straight seam down the middle of my pocket to divide the pocket into 2.
3. Sew the bottom seam and square the corners of outer bag. Repeat for lining. (w or w/o pocket)
4. Measure piece of cardboard based on the squared bottom you now have looking down into your bag. Place cardboard piece on bottom of outer bag. Turn lining bag inside out and drop down into outer bag, lining up the bottom square over cardboard and top edges.
5. With thread and needle sew in 4 places around the outside edges of the cardboard to hold into place. Do not pull too hard on thread or the vinyl can rip. This will secure that the cardboard does not slip.
6. I hammered a silver snap toward the top middle of the bag but am a little worried this may rip when pulled open. I think I will insert ribbon in the next one to just make a center tie.
7. Your bag now is completely assembled except the the unsewn top seam. Fold bag and lining edges over 1/2″ all around, match and pin together. Cut yard of strap in half and line up your 2 straps along the top edge. Sew final seam around top of bag.
You can see that the bag is a little floppy but I used it at the beach and liked it! The fabric and strap total only cost me about $6, and I bought a few packaged vinyl tablecloths in some cool prints for only $3 that I am eager to try.
Posted in Bags, Bargain-crafting, Jen, Now there's an idea, Sewing, Summer, Tutorials | 17 Comments »
Wednesday, July 11th, 2007
I have been wanting to try this for a while- taking a cute fabric placemat and turning it into a purse. My first one must have been pretty successful since I sold it to a friend at the craft fair before the doors opened and it was so easy to make!
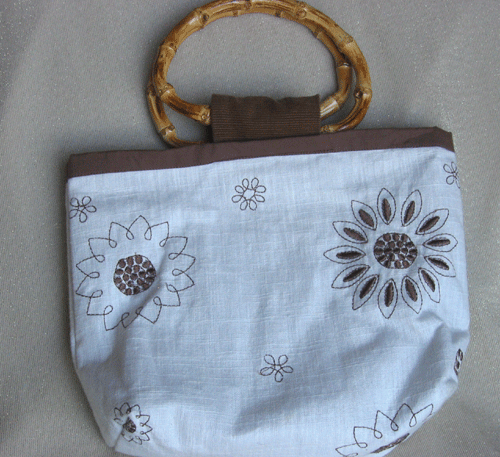
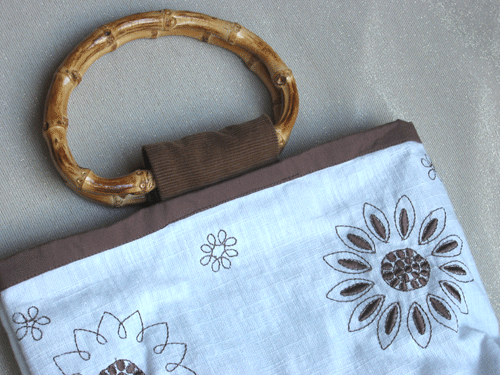
Shopping for a placemat is the first fun part. At most places you can buy them individually and usually for only a few dollars. I have even seen some cute placemats at the dollar store. The first one I made had a white background, brown trim, and brown flowers embroidered on it. All I did was turn it with right sides together and sew up the sides, gusset the bottom, and added handles. I had gotten several pairs of wooden and bamboo handles at the craft store for about $3. I found brown corduroy fabric to match and sewed a piece about 6″ long to the inside of the bag on the front and back, slipping the handle inside the corduroy piece and folding it over before sewing. The placemat was sturdy and had a solid brown fabric on the back so I did not need to add a lining. The only thing I wish I had done differently was to sew the handles a little closer to the bag or make a wider handle strap so the handles would not feel too loose in the strap.
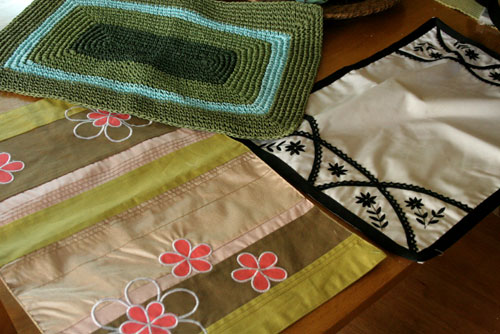
These are a few of the other placemats that I have bought to try out. I am working now on making a paper crocheted placemat into a purse, which I think will look great for summer. (After Heather’s tutorials I may even be able to do the crocheting myself one of these days too!) I will post it as soon as I am done!
Posted in Bags, Bargain-crafting, Jen, Now there's an idea, Quick, Sewing | 13 Comments »
Thursday, June 14th, 2007
For our sweet Joy’s birthday I wanted to give her something that fit with her knitting addiction but for Joy anything plain just won’t do. So I was anxious to try out adding bling with fabric glue.
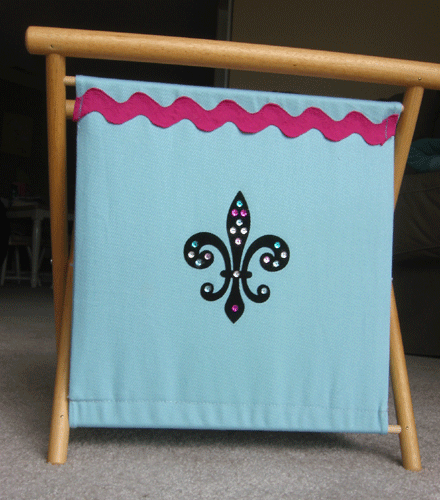
At the craft store I loaded up on huge pink rick-rack, multi-colored sequins, a velvety iron-on fleur d’ lis patch and fabric glue. I added on the patch and was glad to be able to add to the border of this knitting basket without having to take the basket and its lining apart. I simply turned under the ends of the ric-rack and sewed it vertically, then glued it, on the front and back. Then the fun part- arranging the sequin color order over the black patch. The only problem with the fabric glue was that it was a little stringy when you lifted it away from the fabric, just like using a glue gun. But when the sequins were all in place I just scraped away any excess dry glue with a pin.
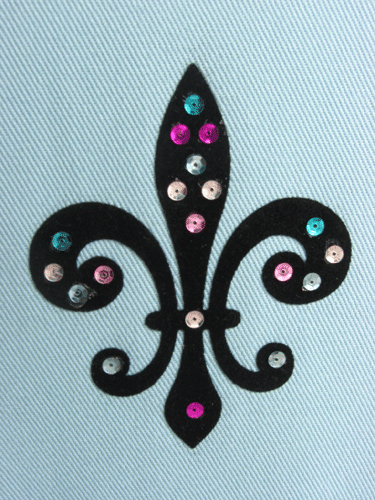
It was done in no time and I am looking around now at what else I can glue bling to! The first project will be to decorate the tan knitting basket I bought for myself, then maybe to add color to floral bags I have made on the flowers, then the cat bowl, and my husbands’ briefcase…
Posted in Bargain-crafting, Jen, Now there's an idea, Quick | 6 Comments »
Friday, June 8th, 2007
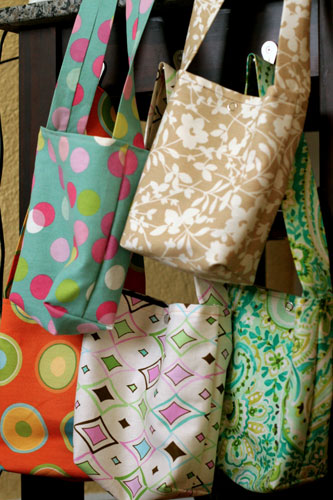
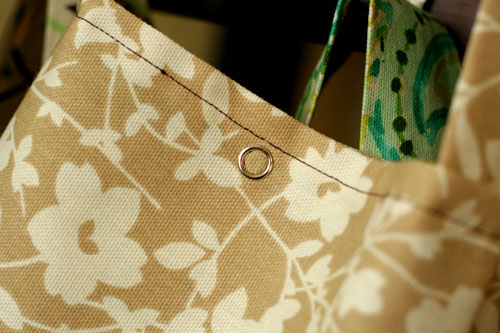
I have been excitedly working on a project recently, and for a good cause – a friends’ wedding. She asked me to make a small handbag like I had posted previously for each of the girls in her bridal party that she would fill with gifts. The bride shopped with me at the fabric store and we picked out a main fabric and lining to suit each of her close friends. We only needed a 1/4 yard of each, so this turned out to be a pretty inexpensive gift per person. I added a pocket for the first time and snaps that are easily hammered into place. I hope they enjoy them- the time on my part and the careful selection of the fabric on the bride’s part.
After shopping for fabric she and I also came back to my house and made different earrings for each of the bridesmaids to match their dresses. I love feeling like a vital part of someone’s special day!
So my encouragement this week is that your craft can also be a good excuse to spend time with people. Too easily we craft nerds can hide in our studio or craft corner and shut the world out so we can “work” but it can also be a fun opportunity to teach someone about your passion or talk while you craft. Don’t be afraid to let people into your creative world! Also, get creative with what can be made for bridesmaids gifts. My sewing isn’t totally professional but I think my little bags were a practical, cute idea for these gifts. Do you have any alternative gift ideas to share?
Posted in Bags, Bargain-crafting, Jen, Now there's an idea, Sewing, Show & Tell | 11 Comments »


