Archive for July, 2007
Learn to Crochet – Lesson #11
Tuesday, July 31st, 2007See all the posts in the Crochet School…
We’ve reached our last lesson! You did it!! You should now have a nice lapghan all sewn together, ready to finish off the edges?
There are two stitches I will go over for finishing the edges, the crab stitch and ruffles. Both are very easy to master, but create completely different looks.
Crab Stitch (a.k.a Reverse Single Crochet)
First of all, you will want to do a row of sc around your entire blanket, working 3 sc into each corner. This gives a nice clean edge to work off of.
From crochetcabana.com:
After completing a row of single crochet, do not turn the work around, chain one, *insert the hook into the next stitch to the right (not in the stitch you just completed, but the next one, draw up a loop. Here’s how you do that – You just angle your hook down and grab that sucker and pull it through. yo as normal and pull through both loops on the hook. rep from * across row.
Follow the link for pictures of the finished edge as well ![]()
Ruffled Edge
This edging uses a lot of yarn, so keep that in mind ![]() Again, you will want to do a row of sc around your entire blanket, working 3 sc into each corner.
Again, you will want to do a row of sc around your entire blanket, working 3 sc into each corner.
Begin with a chain 4. Triple crochet into the same space, and then triple crochet in the same stitch. Work 2 trc into each stich along the edge, work 4 trc into the stitch before the corner, 6trc in the corner, 4 trc in the stitch after the corner and then 2 trc in each stitch along the edge. Continue around. You can see a picture of the ruffled edge here.
That’s it!! You will now have a wonderful lapghan to keep you warm on the upcoming cool fall and winter nights!
If you want to be entered into the draw for the fun crochet goodies, send me a picture of your completed afghan to heccles at gmail dot com by 10pm EST on Sunday August 5. I will share everyone’s completed lapghans and announce the winner next Tuesday!!
Summer Headband
Monday, July 30th, 2007I got this pattern here from Heather Bailey’s site. My summer swap partner sent me this cute white and black headband that I really wanted to try.
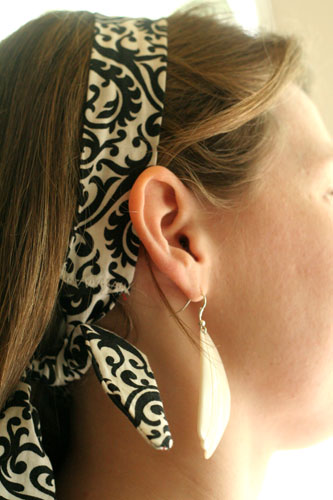
Heather’s pattern is free to download and was very simple to use. Her directions and diagrams were great, and this is a great way to use up those skinny pieces of fabric left over. Check it out!
I made these to send off to our Joy and a few other friends who are melting in Mexico.
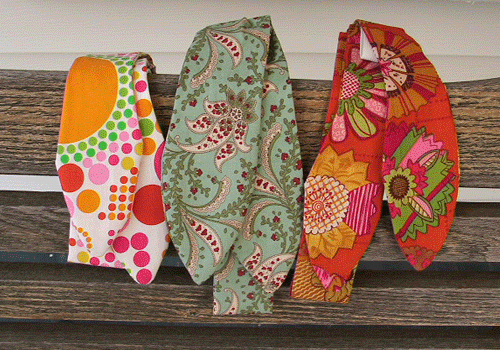
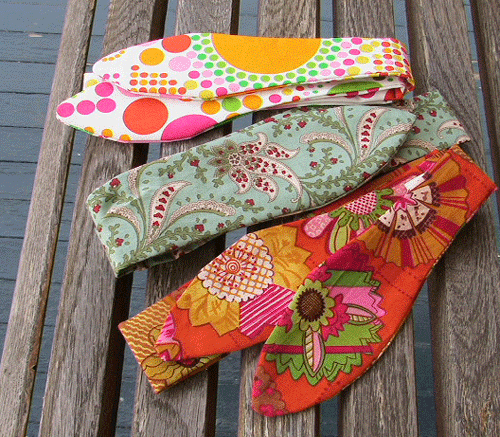
Sea shell shadowbox
Friday, July 27th, 2007Hi, I’m Gina. As do many others, I have always loved the beach. Growing up in Minnesota, though, there are few opportunities to be in the ocean, so I guess I tried to take advantage of all of mine by bringing the beach home with me. Thus I have accumulated a lot of shells, beach rocks, coral, and other beachy finds from various trips, some with sentimental value. For example, one of the rocks I used in the project was from the spot on a rocky beach in New Zealand where my husband proposed.
There are lots of ways to display shells – on countertops, in bowls, etc. But I wanted a way to look at the special ones all at once without them taking up too much space or requiring much dusting. So I decided to create a seashell shadow box.
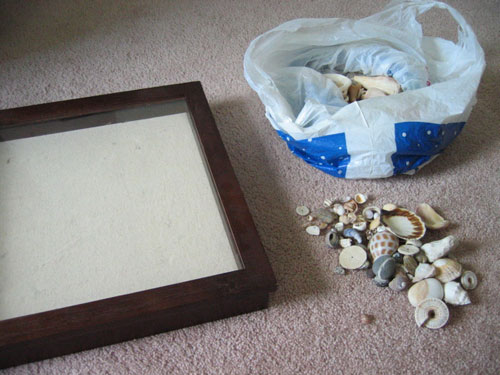
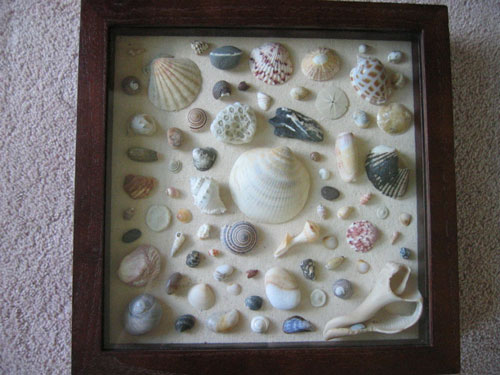
To begin, you need your collection of shells, your trusty glue gun, and a shadow box. Mine has a lovely dark wood frame and a neutral linen background that mimics sand:
Next, you lay your shells in a pleasing pattern. You could go with a more random arrangement if you like, but I preferred to arrange them so that I could balance shape, color, and size:

Then you glue! Most of mine were light enough not to require much glue, but obviously rocks or large, heavy shells will need more. Make sure when you’re gluing (and when you lay everything out) that your shells all fit when the lid is closed. One of mine (the large on in the bottom right corner) was oddly shaped and would only balance on one edge, so I paid attention to that while gluing to ensure I glued the correct edge.

I love the finished product! I had tons of shells left over, but I liked keeping some space between the shells. I think a tighter arrangement could also be lovely, though.
Here are close-ups of the shells and the linen background of the shadow box:

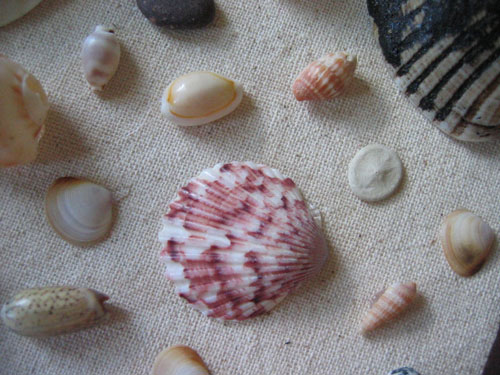
So have fun with your shells! I’m sure everyone has a collection of sorts that would fit nicely into a shadow box, even if it isn’t seashells.
Crayon Nibbles
Thursday, July 26th, 2007
My son just turned 18 months, and is really into coloring. I absolutely love this because now we can be creative together. However, he is also a toddler (and a boy) which means most of the time breaking the crayons is often more fun than coloring with them. A friend of mine told me awhile back about melting down crayons to make chunkier ones that are easier for little hands to hold (and tougher for them to break). This is also a great way to use up broken crayons that you have laying around.

What you’ll need:
- Crayons (like I said, you could use ones you already have or buy some. I purchased 5 boxes of 24-pack crayons for 20 cents each – back to school bargains!)
- mini muffin pan (one that you don’t mind getting a little crayon on)
- exacto knife (optional)
You’ll want to preheat your oven to 265 degrees F. Peel off all the paper from the crayons (for the new ones, I found it much quicker to remove the paper in one smooth motion if I carefully ran the exacto knife down the center of the paper and peeled the paper back), and break them into 1/2″ to 1″ pieces. Arrange two to three like colors in each slot, then bake for 6-8 minutes (don’t over bake – you want them just melted so you can’t distinguish the crayon shape anymore). Let them congeal a little on the counter, then place them in the freezer until they are firm (approx. 30 minutes). They should then pop right out.
This is great for little hands that aren’t steady enough to hold thin crayons. They can wrap their whole hands around them and go to town without breaking them.
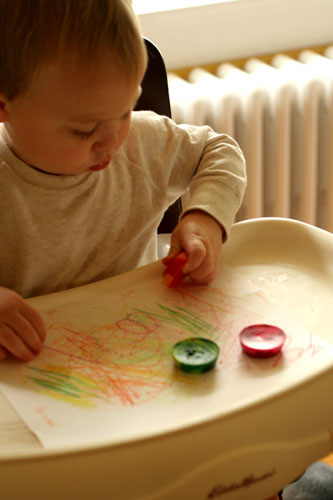

They also make great back to school and birthday gifts for other little artists in your life.

Learn to Crochet – Lesson #10
Tuesday, July 24th, 2007See all the posts in the Crochet School…
So now your squares should be nice and flat and even! Time to start assembling your lapghan.
There are a few different methods to seaming your squares together. I found some great pictures and explanations on Crochet911.com
The most common method of seaming is called the “mattress stitch” or “invisible weaving”. Place your squares together in front of you, and collect together some matching yarn with your darning needle. Beginning at the bottom, pick up the first stitch on the right, and then on the left square. Weave back to the right, and then to the left again. Continue the length of the side of the square. This method creates a nice flat seam.

Another method of seaming is backstitching. This method works really well, but the seams are a bit bulkier. You will hold the right sides of the squares together, and weave the yarn in and out along the top of the squares.

You can also slip stitch the squares together, however this also creates a bulkier seam. Holding the right sides of the squares together, you will slip your hook under the loops of both squares, yarn over and pull the yarn through both squares, then through the loop on the hook. Continue the length of the square.


The final method of seaming I will discuss is overcast, which again creates a bulky seam. With blunt-pointed needle and matching yarn, place right sides together and insert needle back to front, bringing the needle over the edge. Insert needle back to front again under the top loops of the squares. Continue the length of the sides.

Using your choice of method, or trying all of them, assemble your lapghans and next week will will talk about finishing the edges of them!!
Vinyl Tablecloth Beach Bags
Monday, July 23rd, 2007In a previous post I had toyed with using iron-on vinyl lining to make my bags waterproof, but I think I may have found a simpler, less expensive alternative- just using a vinyl tablecloth. I bought this fun fruity print off a large roll of tablecloth material. It came in a 60″ roll and I got 1 & 1/2 yds. I wanted to make a bag that was waterproof and easy to wipe off, something great to throw your wet towel or suit in after a day at the beach.

All you need:
(2) – 24″w x 18″h pieces, cut folded for outer bag and lining (or whatever size you desire)
(1) – 12″w x 10″h piece for outer pocket
1 yard of nylon strap
1 piece of cardboard the size of middle bottom of bag
(1) set of snaps or ribbon for closure

1. Fold over top edge of pocket and sew.
2. Choose a front for the bag and pin pocket into place, folding other 3 sides under and sew into place. Then I sewed a straight seam down the middle of my pocket to divide the pocket into 2.
3. Sew the bottom seam and square the corners of outer bag. Repeat for lining. (w or w/o pocket)
4. Measure piece of cardboard based on the squared bottom you now have looking down into your bag. Place cardboard piece on bottom of outer bag. Turn lining bag inside out and drop down into outer bag, lining up the bottom square over cardboard and top edges.
5. With thread and needle sew in 4 places around the outside edges of the cardboard to hold into place. Do not pull too hard on thread or the vinyl can rip. This will secure that the cardboard does not slip.
6. I hammered a silver snap toward the top middle of the bag but am a little worried this may rip when pulled open. I think I will insert ribbon in the next one to just make a center tie.
7. Your bag now is completely assembled except the the unsewn top seam. Fold bag and lining edges over 1/2″ all around, match and pin together. Cut yard of strap in half and line up your 2 straps along the top edge. Sew final seam around top of bag.
You can see that the bag is a little floppy but I used it at the beach and liked it! The fabric and strap total only cost me about $6, and I bought a few packaged vinyl tablecloths in some cool prints for only $3 that I am eager to try.
Fun with socks and gloves
Thursday, July 19th, 2007I just remembered that I didn’t post an update on the gift show we went to this weekend. Truth be told, there’s nothing to post. Vendors didn’t care about free press and links and why we were there – they were worried about people stealing their ideas, so as soon as they saw the camera (and neglected to see the press badge), they began giving us the third degree. We couldn’t even look without questions and disapproving glances being thrown our way. So unfortunately, nothing to show. Which is their loss, b/c there was some cuuuuuuute stuff we would’ve loved to show and thrown some business their way. Moving on…
I picked up more craft porn this weekend and got a copy of Sock and Glove by Miyako Kanamori. This book was originally written in Japanese, but what I love most about it is the ease at which the projects seem. Not only are the directions simple, but the pictures are as well. You’re not bombarded with a lot of type – just cute pictures that tell a story. And best of all, you don’t need any fancy crafting supplies – just needle, thread, scissors, stuffing and old socks and gloves.
The last time I ventured into this arena, I didn’t fare so well. But after seeing the adorable elephant on pg. 27, I decided to give it a go, and so without further ado, I give you Nigella
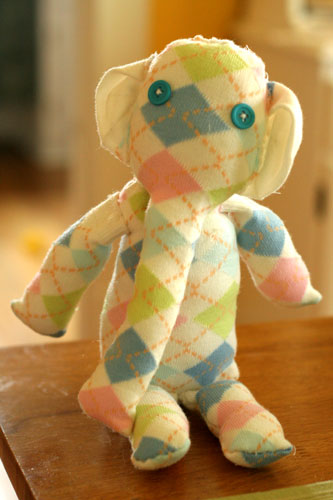
I made her with a certain little girl in mind, but truth be told I hate to part with her. Lucky for me, I have an extra set of socks identical to the ones I used, so I shall fashion another one for myself. While the project wasn’t super quick (three hours from start to finish), it was easy and was done while enjoying some evening down-time. Now, I have a pair of striped socks that are longing to become a zebra.
Recycling Plastic Bags
Wednesday, July 18th, 2007Mr. McGuire:I want to say one word to you. Just one word.
Benjamin: Yes, sir.
Mr. McGuire: Are you listening?
Benjamin: Yes, I am.
Mr. McGuire: Plastics.
–The Graduate
My name is Simone, and lately I’ve become completely obsessed with plastic shopping bags. I think it started when I couldn’t stuff another bag into the bottom of my holder without pushing fifteen more out of the top. On the other hand, I also could not bring myself to toss them because, after all, they were perfectly good bags. I then stumbled upon crocheting strips of plastic into, you guessed it, another bag. Since one tote-sized, crocheted bag takes at least 30 to 50 shopping bags, this project did make a dent into my collection.
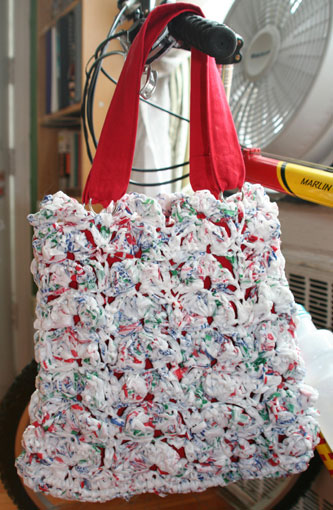
Oft cited My Recycled Bags.com provides excellent instructions on how to prepare recycled plastic yarn from shopping bags and shares some crochet patterns for this kind of yarn. Once you have a ball of plastic “yarn,” you can also mix it with other materials. For example, I made this bag by alternately crocheting rounds of plastic yarn and yarn made out of denim strips.

I think it would be kind of fun to follow the Daisies’ crochet instructions, make different kinds of plastic squares, and sew them all together into. . . a bag. (If anyone can come up with something else to crochet besides a bag, please let me know. A rain poncho perhaps?)
Recently, I saw a posting about fusing plastic bags to make a plastic fabric. That inspired me to make plastic beads out of fused plastic bags.

You use the same technique you would apply to making paper beads, i.e. cut a triangle out of the “fabric” and roll it up from the broad to the narrow end. You may encounter more resistance from the plastic than you would from paper. I first roll up a bead without applying glue. I then unfurl the bead, apply the glue (Uhu Mosaic) and roll it up again. Like paper beads, you can leave the bead like that or apply a layer of lacquer.
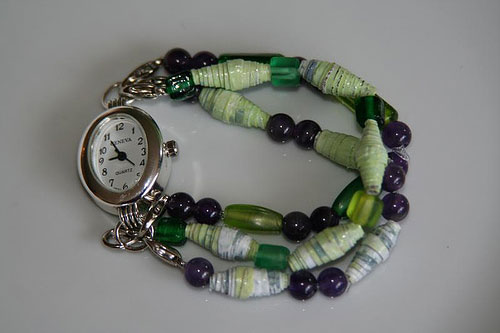
Lastly, I decided to make a wallet out of two ‘I Love NY’ bags and a white trashbag without any print on it.
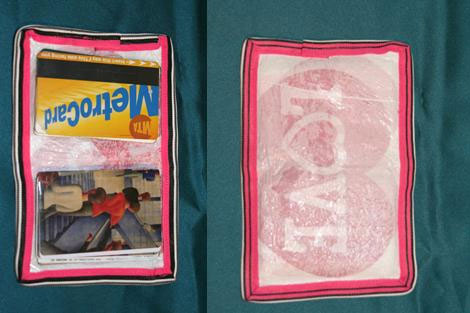
* I fused the three bags together and cut out a 6 1/2″ x 4 3/8″ rectangle.
* I then cut out two 4 3/8″ x 2 5/8″ rectangles out of clear vinyl left over from some bedding packaging that I had saved for just such an occasion. These will become the inside pockets on the left and the right side of the wallet.
* I then basted the pockets to the left and the right of the rectangle with a glue gun to keep everything in place.
* To finish it off, I trimmed the wallet with a 31″ long piece of 7/8 inch ribbon. The ribbon is folded in half and sewed on around the wallet through the fused plastic and the vinyl with a top stitch.
Start to finish the whole project took me a little over an hour. You could add a velcro closure to the wallet to keep everything in place, if you don’t stuff it with as many random pieces of plastic as I tend to do.
Now I’m worried that New York will encourage businesses to cease the use of plastic bags. In that case, where will I get my raw materials? Have fun with plastic. Let me know if you have any other ideas of what to do with this stuff.
Learn to Crochet – Lesson #9
Tuesday, July 17th, 2007See all the posts in the Crochet School…
First of all, a shout out to everyone who commented last week that they are still following along with the lessons! I haven’t had the time to reply to each comment individually, but thank you for letting me know you are still following the lessons – there were a lot of you!
And don’t forget that if you finish your lapghan by week 12 and you send a picture of it to me, you will be entered into a draw for a gift of crochet goodies!!
So we are done our squares! I don’t know how many you would have right now, it would depend on if you made 2 of each pattern each week, or one. You want to have enough to make a rectangle, say 4 squares x 3 squares. If you are at an uneven number, you will either want to go back and make a couple extra squares from the patterns we’ve had, or you could always leave out some of the squares you’ve made. Or, if you are feeling ambitious, check out this site for a listing of 7″ squares, and try a few new ones!
This week we will go over making our squares look better and getting them ready to seam together.
Weaving in Loose Ends
So, now we are done our squares and they all have long ends hanging from them – so its time to weave those ends in. To do this, you will need a large blunt end yarn needle, you can get them from any craft store in the yarn section for a dollar (they can be metal or plastic).
There are a couple of different methods you can use to weave in your ends. To weave in your ends at the top of your work, you will simply weave the yarn under the top chain back and forth.
To weave in the end in the middle of your work (good for color change ends), you can insert your needles down through the middle of your vertical stitches and pull the yarn into the stitch.
Both of these methods are shown in the video from nexstitch.com.
Yet another method is to weave the ends under the stitches moving horizontally. This picture from about.com explains it perfectly:

So there you have it! Now get on weaving those ends in ![]()
Blocking
Blocking is done before you seam your squares together. It helps to relax and even out your stitches, as well as shape your finished object. You can also stretch out your projects if they aren’t quite the size you were looking for – great for squares ![]()
I’m going to describe my favorite method of blocking crochet projects. You will need a stiff board with a soft surface (ie an ironing board works perfectly), a spray bottle of water and some rust proof pins. You can make your own blocking board by taking a piece of wood, laying cotton or polyester batting on top (like the stuff you would use to make a quilt), cover it with fabric and staple the fabric onto the underside of the board. I make a lot of squares to use up leftover yarn, so I drew 7″ squares on the fabric, so I knew exactly what to stretch them to without having to constantly measure while pinning.
Start by pinning your project onto the board into the shape you want. Stretch out any sides you need to in order to straighten them, or to get the square into the size you are looking for. Use lots of pins ![]() Once you have it pinned, spray the square with water until it is moderately wet. That’s it!! Let the square dry completely, and when you take it off the board it will be in the exact shape you blocked it to!
Once you have it pinned, spray the square with water until it is moderately wet. That’s it!! Let the square dry completely, and when you take it off the board it will be in the exact shape you blocked it to!
There are other methods of blocking as well, including submerging your squares and then pinning them wet, or steam blocking with an iron (DON’T iron your actual square – ask me how I know ![]() ). But I found the method I describes works the best!
). But I found the method I describes works the best!
So this week, weave in all your ends and block your squares! Next week we will be putting the lapghan together!!!


