genericviagra

buy cheap cialis pill online lloyds pharmacy viagra cheapest without prescription farmacia online alprostadil

viagra no prescription required

cheap without prescription Cialis Super Active online meds where can i buy viagra cheap without prescription brand viagra online sildenafil online

canadian discount pharmacy

cheap without prescription Generic Levitra purchase tadalafil amoxicillin no prescription cheap without prescription pill online buy cheap generic viagra

yohimbe

Generic Viagra buy cheap cheap cialis impotence treatment cheapest without prescription buy viagra online stamina rx

buy prescriptions

buy cheap Viagra Super Active sildenafil citrate tablets soma pharmacy buy online cheap pharmacy cialis online

next day cialis

Zithromax cheap without prescription viagra sale online abortion pill online cheapest without prescription brooks pharmacy no prescription required

online pharma

buy cheap Viagra Soft viagra price comparison can i buy viagra online buy online order kamagra net pharmacy

viagra herbal

cheap without prescription Xenical discount viagra online lowest price viagra cheapest without prescription get viagra prescription online doctor

cialis generic

Levitra cheapest without prescription canadian rx canadian viagra online buy cheap canadian prescription drugs buy amoxil

Archive for June, 2008

Guest Contributor Invitation

Monday, June 30th, 2008

max.jpg

Max is here!! Congratulations to our fellow daisy Candace and her family. On Thursday she gave birth to Max. Check out his cool nursery on his Mom’s blog laughingdaisies.com.

Now, moving on to business:

Top 10 Reasons
to Become a Crafty Daisies Guest Contributor

10 You don’t have a blog, but you would like to write about this project you’ve been obsessing over and that none of your friends want to hear about anymore.

9 You have a blog, but you are too embarrassed to post something about your newly found love for amigurumi on your motorcycle blog.

8 You have a blog, and see this as a way to invite other people to visit your place on the Web.

7 You need a writing sample to document your blogging experience.

6 You figured out how to explain the German Twisted Cast On in three sentences or less.

5 You never forgave the middle school teacher who gave you a D in home ec/shop/art and you wish to show that person that, yes, you can create some amazing things with a glue gun.

4 You found this really cool crafting/knitting/sewing/decoupage/[fill in the blank] book, tutorial, video, [fill in the blank] and you want to share it.

3 I asked you to write for us and you haven’t gotten back to me yet!

2 You were very impressed with the benefits and compensation package we offered you in exchange for your contribution (Not!).

1 It’s fun to hang out with your virtual crafty friends.

So, if you are interested in becoming a guest contributor, send us an email to craftydaisies(at)gmail(dot)com with a brief description of the topic you would like to write about. For past contributions, check out the Guest Contributor category on this blog.

Jiggety Jig

Wednesday, June 25th, 2008

img_9372small.jpg

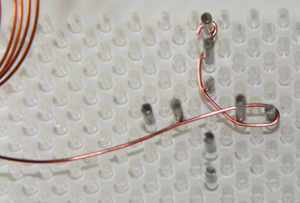
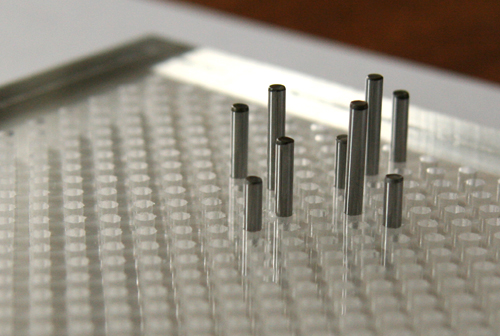
I have a new toy. It’s called a jig and you use it to shape wire into pretty, fun things. It’s essentially just a peg board with pegs.

img_9377small.jpg

You kind of guide the wire around the pegs. This one is going to be. . .

img_9378small.jpg

… an “interesting” bookmark.

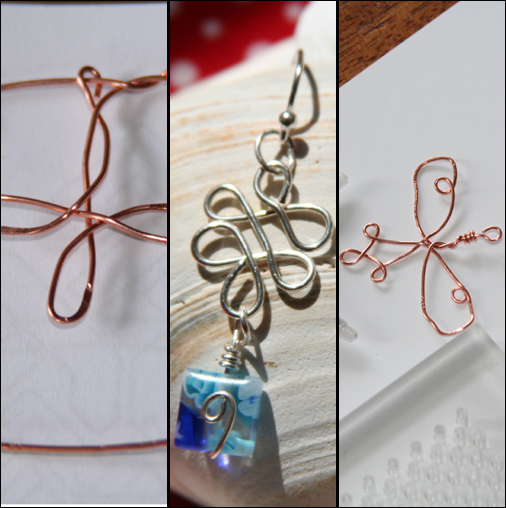
So far I like my earrings best (note to self: buy more wire).

jig-collage-copy.jpg

If you are interested in learning more about this tool, check out these links:

Jewelry Making Using a WigJig Jewelry Tool

Jewelry Making about.com: Wire Snake Jewelry Jig Component
There are other jig related articles at the end of that tutorial.

The WigJig company appears to have cornered the market on jig tutorials. Here is a collection of their videos on YouTube.


Recycled Denim Fiesta Skirt: A Tutorial

Friday, June 13th, 2008

img_9289small.jpg

It’s 90 plus degrees and I could be sorting out summer clothes and putting winter stuff away, however, I’d rather be sewing! While attempting to deal with such mundane chores, I found a pair of Elizabeth’s jeans. While they are way to short for her, the waist still fits perfectly for my skinny child so they became the object of another refashioning exercise.

Part 1: Cutting up the Jeans

img_9316small.jpg

  1. Lay out the jeans and cut off the legs right below the crotch. This will be the top tier of the skirt.

    img_9318small.jpg

  2. Open up the seam between the legs.
  3. Look at the top part of the jeans and measure the distance from the waist to about one inch below the zipper of the jeans. In my case that was 6.5 inches/16.5 cm.
  4. img_9321small.jpg

  5. Mark this distance all around the tier.
  6. img_9322small.jpg

  7. Even out the bottom of the tier by cutting along your mark.

Part 2: The Math

Calculate the Width of the Ruffles

  1. Decide how long you want the skirt to be and subtract the length of the jeans top tier from this number.
  2. skirta.jpg

  3. Divide the remainder by the number of ruffles you wish to add for ruffles of equal width. This skirt is 16.5 inches long. 16.5 – 6.5 inches for the top tier = 10 inches. 10 inches divided by 2 ruffles = 5 inch width per ruffle.

Calculate the Length of the Ruffles

  1. Measure the circumference of the bottom edge of the top tier and multiply this number by two. This is the length of the second tier ruffle.
  2. Multiply the length of the second tier ruffle by two. This is the length of the third tier ruffle.

These calculations will give you two fairly full tiers of ruffles. If you want the skirt two be less full, make the ruffles a little shorter.

Part 3: Cut the Fabric

With these measurements, cut your ruffles. You may have to join one or more strips of fabric to get the requisite length. For example, my first ruffle had to be 50 inches long and the fabric was 45 inches wide, so I had to cut another 5 inch strip to make up the 50 inches.

Part 4: Ruffle the Ruffles

  1. For each ruffle, join the lengths of fabric you cut out to make a long strip.
  2. Use your preferred method to finish the raw edges of the strips. I sewed a zigzag stitch along the edges.
  3. For each ruffle, sew the long strip together to make a loop.
  4. Ruffle the second tier ruffle by sewing long basting stitches along the top edge of the fabric.
  5. Mark each quarter of the top jeans tier, e.g., front middle, left side, back middle, right side.
  6. img_9327small-copy.jpg

  7. Repeat this for the second tier ruffle.
  8. With right sides together, pin the second tier ruffle to the top jeans tier matching the quarter markings.
  9. img_9326small.jpg

  10. Gather the fabric between the markings by pulling the top thread of the basting stitch.
  11. Evenly distribute the gathers.
  12. Sew the second tier ruffle to the top jeans tier. Repeat this process for the next ruffle(s).

Part 5: Finish the Skirt

At this point you should have attached all the ruffles.

  1. Hem the bottom tier.

I’m currently infatuated with bias tape hems. This skirt features homemade tape made out of matching fabric. For instructions on making this tape check out Step Four of the cashmere blanket tutorial. You could also just make a traditional double fold hem. (Fold the bottom edge to the inside and press, fold again, press and stitch.)

Dance the night away. This is the perfect party skirt.

Book Review: Cute Dolls & Softie Swap Pictures

Wednesday, June 4th, 2008

aranzi.jpg

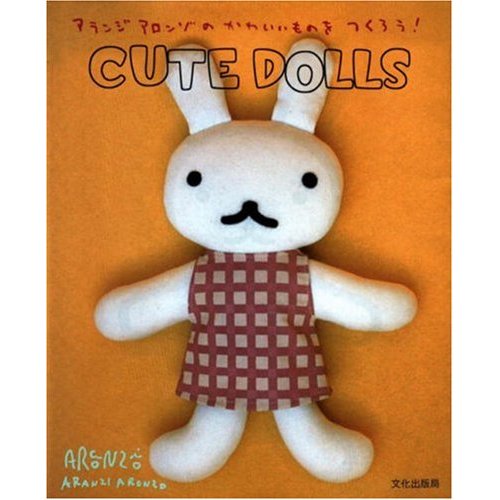
This post continues the series of book reviews with Cute Dolls by Aranzi Aronzo. At the end of this entry you’ll find a slide show of a selection of softies exchanged during the course of last month’s softie swap.

aronzo.jpg

This book provides instructions for 21 different cute dolls. The instructions are very simple and entertaining with comments such as

Bear is a slacker.
He’s always looking spaced out.
But it’s strange how relaxing his spaced-out, slacker look is.
It’s also strange how someone like him is actually an Aranzi Aronzo store manager.

Most of the patterns need to be enlarged by 125% to 150% for ultimate sizing. I scanned the pattern and enlarged it with Photoshop. You could also take the book to your local copy shop and enlarge the patterns there.

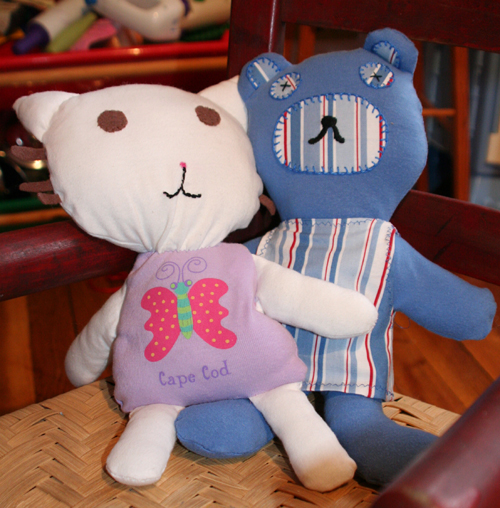
Each doll is made out of felt scraps and jersey fabric. “Jersey? Ugh, I don’t want to buy more fabric,” was my initial reaction. But then my glance fell on my Goodwill bag filled to the brim with ultra soft t-shirts from last year. So, if you have a special shirt you’d like to recycle, like Elizabeth’s Cape Cod t-shirt on the cat doll, take some shears to your clothing and create a softie. Speaking of softies, check out the softies made by the participants in our softie swap:

You can also read about them at the Flickr Crafty Daisies Softie Swap Group

HELP needed: Identifying Vintage Fabric!

Monday, June 2nd, 2008

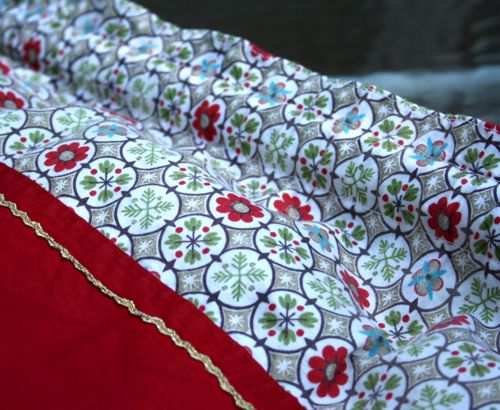
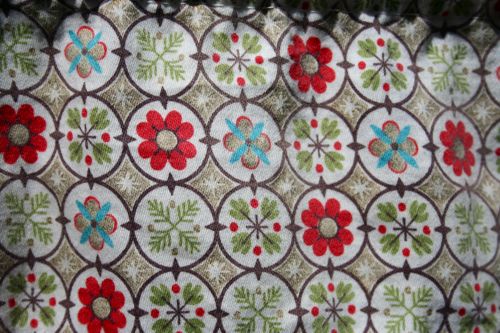
I bought a pair of vintage curtains at an antique shop and want to use them in my kitchen. But what seemed like 2 really long panels at the store are only enough to span 2 of my 3 windows.

img_2251.jpg

So I am asking for HELP in any of these ways!

1) You have some of this fabric in a bag from grandma and you would like to send it to me (or sell it to me)!
2) You have seen it for sale somewhere and how to contact the shop.
3) You know of any website that will help you find the pattern/number/code to identify old fabric so you can look it up to buy. I have tried to look for any such sight or discussion board but they are mostly about identifying the type of fabric (ie. wool, wool blend…)

img_2257.jpg

I know this may be a long-shop but any suggestions or leads would be great! Thanks!