Archive for the 'Bargain-crafting' Category

Making a onesie into a shirt

Thursday, March 29th, 2007

My daughter is really tall and thin, so she outgrows her onesies in length before she outgrows them in body size. I hated the fact that she would only wear them for a couple of months and they were still in nearly new condition, but they were no longer useful. I decided to make some into shirts for her, so that she can get more wear and use out of them.

I started with a onesie that was too small lengthwise.

march12049.jpg

I then cut off the bottom snap part right above the leg elastic. I used a ruler to make sure I cut it straight across.

march12050.jpg

I finished the edge of the shirt using the rolled hem on my serger. However, if you don’t have a serger you could simply finish the edge with a zig zag stitch and then sew a hem.

march12051.jpg

And there you have it - a cute shirt that can be used for a little bit longer!

Hallowed Easter Eggs

Wednesday, March 28th, 2007

My brother and I used to make these eggs when we were younger and my mom liked it b/c they didn’t stink up the house after only a few days, like their hard-boiled counterparts. In fact, they’ll keep as long as you can keep from crushing them, since they’re made from real eggs.

They’re super easy, but b/c they take a bit of lung work and a gentle grasp, an adult should do the hollowing, leaving the decorating to the kiddies.

hollowedeggs1.jpg

You’ll want to gently cleanse the eggs first. Then you’ll take a pin and puncture the top and the bottom of the egg.

hollowegg2.jpg

You’ll want to make sure the hole is large enough for air to go into the egg, and for the contents to empty. What I do, is make three pinholes close to each other and then connect them, making a larger hole.

hollowegg3.jpg

Then you’ll clean off the top of the egg that will touch your mouth. Hold the egg gently in your hands and blow through the hole, blowing the contents into a bowl (sorry, no picture for that, trust me, it’s quite disturbing). To make it easier, take the pin and insert it in the bottom of the egg, moving it around to break up the yolk. If you find you’re having a hard time, try and enlarge the hole some more, or shake the yolk around after you’ve broke it up. Once the egg is empty, run under cold water, and blow any excess water out. Let egg dry on a paper towel and decorate as desired, but be careful with the hollowed eggs - they are extremely fragile.

hollowegg4.jpg

holloweggs5.jpg

Cactus Pin Cushion

Monday, March 12th, 2007
cactus-pin-cushion-full-1.gif

I saw this cute pin cushion in a book and ran home to try it! I use pins all the time in my sewing but hate how lightweight the cushions usually are, slipping off the table as I try to work with one hand while holding fabric in place. This little pot adds stability to the cushion. The original used a pot about 1″ around larger than the cushion and was filled with sand around the cactus. With a young child I could see that quickly getting knocked over. Instead I made the cactus to fit snugly in the pot with just enough room to tuck in a few other necessary sewing supplies.

cactus-cut-out-2.gif

I handstitched 3 pieces of felt to make the cactus, one longer than the others to curve under and make the bottom. Then stuffed it in the pot. To weigh it even more you could glue a magnet or washer to the bottom of the cactus and glue that to the inside bottom of the pot. I am going to try this idea with other shapes as well to personalize a cushion for my sewing friends.

Stamped Notebook

Monday, February 26th, 2007

Today I wanted to show a gift my mom gave me: a beautifully stamped notebook. The cover, inside cover, dividers, and pockets are all stamped with a colorful flower theme. As you can see it is still blank inside because it’s almost too nice to be used, but I will fill it up soon when I find something worthy to fill it up with.

moms-journal-cover1.gif

And then on the inside, more surprises! Nothing that she makes is ever boring!

moms-journal-inside3.gif

I think decorating the dividers would be great for a child’s school notebook too, for the different subjects or a theme they like.

moms-journal-inside2.gif

I have also stamped large and tiny pocket notebooks, pens, pencil cases, and index card boxes. Target sells a lot of these blank brown, cardboard paper products that make great gifts, so get stamping!

stamped-pencil-case2.gif

Clone Yourself a Dress Form

Wednesday, February 21st, 2007

duct-tape-dress-form.jpg For those who like to make their own clothes, but can’t afford a store-made dress form, deck yourself in duct tape and you’ve got an inexpensive alternative. Threads magazine gives four easy and fun ways to create your own dress form using either papier-mâché or duct tape. They say you can complete this project in as little as two hours, using no more than $15 in materials. I’ll be trying this in the weeks to come, so check back to see my cloned dress form.

Crochet Coffee Cozies

Friday, February 16th, 2007

A crocheted coffee cup cozy is a great way to express yourself while doing your small bit to help the environment.

cozie-002.jpg

These are super easy to make, and make a great way to use up ends of skeins you may have laying around. To make them, I chained 35 and made sure it fit snugly around the cup (I had an empty cup from my favorite coffee joint to use for sizing), depending on the size you want or the yarn you use, you may need to chain more or less.

From there, I simply did single crochet in the round. About three rounds in, I did a round of repeat increases (2sc in one chain, 2 sc in the next two chains) so that it flared out slightly to fit the cups. Another three rounds of sc in each chain, and then I did a round of decrease (10sc, sc2tog) so that it was tighter around the cup. The rest of the cozy was single crochet and I finished when they were the width I wanted, about two and a half inches. Weave the ends in, and there you have it - a custom reusable coffee cozy.

cozie-005.jpg

These can be personalized in so many ways so you can make them to suit your personality, or the seasons, holidays - whatever you like! If you make them out of an acrylic yarn, you can simply throw them in the washer and dryer to clean, making them easy to care for. And they would make a great gift for a coffee lover :)

Sweets for your Sweetie

Tuesday, February 13th, 2007
vdaycookies1.jpg

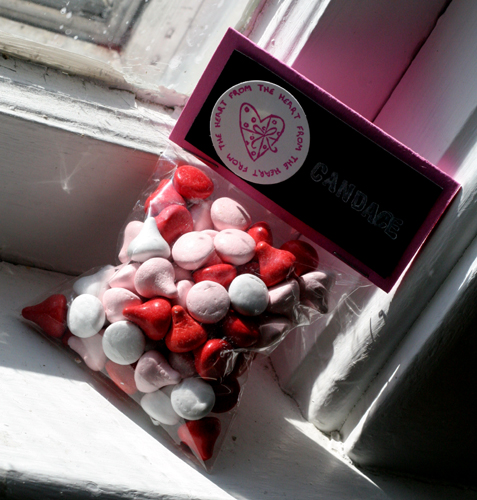
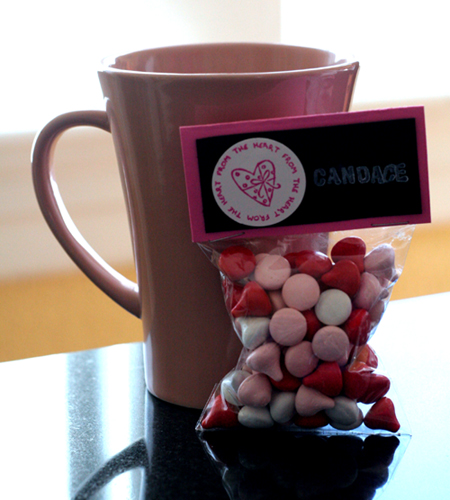
In addition to being a craft-nazi, I also love to bake. So when you love to be in the kitchen and have limited funds, making food gifts is the way to go. With Valentine’s Day just a few days away, you can make some easy and delicious cookies, and package them in boxes and bags perfect for the holiday.

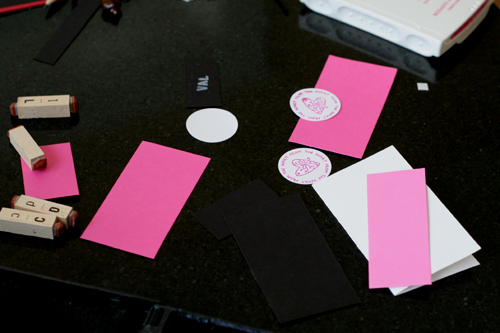
The box is made from posterboard and then covered in scrapbooking paper. The template I used I found here and just made it for how big I needed it. Then I glued scrapbooking paper to the outside once the box was assembled.

vdaycookies3.jpg

The cookies pictured here are sugar cookies and they are the easiest and yummiest cut-outs I’ve ever tried. The icing recipe that follows dries hard and shiny, making it a perfect recipe to stack your cookies. If you’re really not a fan of cooking or labor-intensive items, this cake cookie recipe is super easy, and takes no time and effort at all. Really really not a fan of cooking? Then head to your local bakery and snatch up some goodies and put them in homemade packaging. Your recipients will still thank you.

vdaycookies2.jpg

Cut-Out Sugar Cookies

1 cup butter, softened
3 3/4 cups all-purpose flour
1 cup white sugar
1/4 cup heavy whipping cream
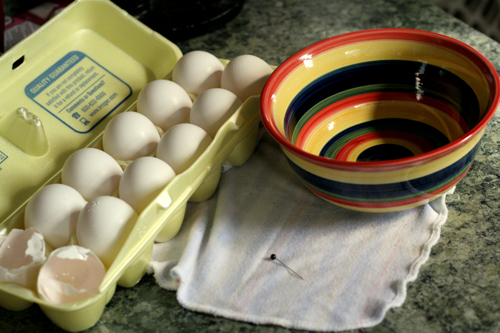
2 eggs
2 tsp baking powder
1 tsp vanilla extract

In a large bowl, cream together the butter and sugar. Add the eggs one at a time, then the vanilla and mix until smooth. Sift together the flour and baking powder and stir into the creamed mixture alternating with the heavy cream. Cover the dough and chill for 2 to 3 hours.

Preheat oven to 350 degrees F (175 degrees C). Grease cookie sheets.

On a lightly floured surface, roll out the dough to 1/4 inch thickness. Cut into desired shapes with cookie cutters and place them 1 inch apart on the baking sheets. Bake for 12 to 14 minutes, until bottoms and edges of cookies are light brown. Remove from baking sheet and cool on wire racks. Makes approx. 4 dozen cookies.

Sugar Cookie Icing

1 cup confectioners’ sugar
2 tsp milk
2 tsp light corn syrup
1/4 tsp vanilla or almond extract
food coloring

Combine the sugar and milk until smooth, then add the corn syrup and extract until the icing becomes stiff. Add more sugar to thicken or more milk to thin. Divide into seperate bowls and tint with food coloring. Let dry atleast an hour before stacking.
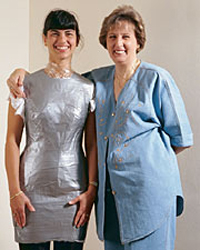
A special breed

Sunday, February 11th, 2007

I’ve been seeing these sock puppies around the internet lately and decided that I would try my hand at making one. I mean, how hard can it be? Pair of socks - check. Fiberfil - check. Matching thread and buttons - check, check. So with all my tools, I began cutting, sewing and filling my sock puppy. The finished product is one that, while it’s not entirely embarrassing, it’s definitely not something I want to put on display. But for your amusement, I shall.

sockpuppy1.jpg

As you can see, it’s hind legs are way too long and his front legs are too short. And uneven.

sockpuppy2.jpg

And it looks like he’s been *fixed* and the doctor didn’t do a very good job sutchering him.

sockpuppy3.jpg

It’s not too bad, but I do feel bad for the poor pup. I did have an overwhelming sense of pride that I completed it. But that faded when my son wouldn’t even play with it. *Sigh* I guess I shall stick with my love affair with felt and leave the sock puppies to a professional.

Stamped Candy Bags

Wednesday, February 7th, 2007

In need of a quick and inexpensive gift for Valentine’s day?
These candy gift bags are fun and versatile for any occasion.

jen-vday-candy4.jpg

I got these little plastic baggies in different sizes from the dollar store. I fill them with candy or marshmallows (and attach a packet of cocoa), or any small gift. I cut about a 3 3/4 x 4 1/2 inch sqare and folded it in half to decorate. I like to use black paper and stamp with white craft ink or write with a white color pencil so it looks like writing on a chalkboad. This one went to our beloved Candace!

jen-vday-candy2.jpg

I have a 1 1/2 inch circle punch that I stamped the heart message on and stuck it to the black cardstock with a piece of 3-D double-sided tape. I have a tiny set of alphabet stamps that are great to use for stamping the name or a message on the back. When I am done I just staple the card over the ziploc part of the baggie. Perfect for friends, co-workers, or classmates!

jen-vday-candy.jpg

Stamp your Calendar Cover

Thursday, February 1st, 2007

I love little calendars, just the right size to fit in a small purse, but usually hate the covers on them. It’s hard each January looking over the rack of pocket calendars and trying to choose the lesser of the evils: kittens & puppies, cheesy flower arrangements, stuffed animals in dresses…. Which will I feel less embarrassed to be seen carrying? So I decided to make my own.

calendar-stamp-supplies.gif

I took the calendar out of the plastic cover, traced it on bright paper, and cut it out. Fold the new cover in half and choose your stamps and ink colors. Decorate and personalize! Then slip back into the plastic cover. I didn’t even stick it to the calendar.

open-calendar-4.gif

You could even stamp something different on the back to flip over whenever you feel like it. This could make a cute, small gift or Valentine and these calendars can be found for about $.50. I wrote my name on the front and you could personalize it to fit any friends’ personality. This only took about 10 minutes so I may change it every season- obviously I am ready for spring. I am much more eager to look at these daisies every day!