genericviagra

buy cheap cialis pill online lloyds pharmacy viagra cheapest without prescription farmacia online alprostadil

viagra no prescription required

cheap without prescription Cialis Super Active online meds where can i buy viagra cheap without prescription brand viagra online sildenafil online

canadian discount pharmacy

cheap without prescription Generic Levitra purchase tadalafil amoxicillin no prescription cheap without prescription pill online buy cheap generic viagra

yohimbe

Generic Viagra buy cheap cheap cialis impotence treatment cheapest without prescription buy viagra online stamina rx

buy prescriptions

buy cheap Viagra Super Active sildenafil citrate tablets soma pharmacy buy online cheap pharmacy cialis online

next day cialis

Zithromax cheap without prescription viagra sale online abortion pill online cheapest without prescription brooks pharmacy no prescription required

online pharma

buy cheap Viagra Soft viagra price comparison can i buy viagra online buy online order kamagra net pharmacy

viagra herbal

cheap without prescription Xenical discount viagra online lowest price viagra cheapest without prescription get viagra prescription online doctor

cialis generic

Levitra cheapest without prescription canadian rx canadian viagra online buy cheap canadian prescription drugs buy amoxil

Archive for July, 2007

Ravelry!

Monday, July 16th, 2007

My fellow knitters and crocheters – who has signed up for Ravelry?

I signed up months ago, and I just got my invite the other day :D And let me tell you, it was well worth the wait!

Check out the 27 screen shots they have for a sneak peek! Have you already submitted your email? They have a page where you can check and see where you are on the waiting list!

I am giving this site a huge two thumbs up! Its such a neat idea and so amazing – the inspiration on there is unbelievable! Its easy to get lost looking at everyone’s projects, and chatting on the different groups. If we get enough readers on the site, we could even start up our own Crafty Daisies group!

Oh, and my username is “heccles” if anyone wants to add me as a friend!!

Hope to see you around Ravelry!

Gift Show!

Friday, July 13th, 2007

The posting has been light this week since Jen and I are in Atlanta attending the Americasmart Gift Show. If you’ve never been to one of these, you’re missing out because it is total eye candy! We’ll be meeting with vendors, especially those who started out crafting in their basements and grew their business to the successes that they are today. We’ll be posting pictures and all that jazz, so check back to read all about it and find some cool stuff to drain your wallets :)

Placemat Purse

Wednesday, July 11th, 2007

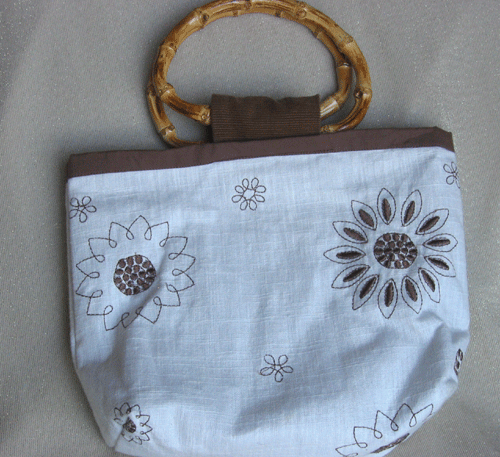
I have been wanting to try this for a while- taking a cute fabric placemat and turning it into a purse. My first one must have been pretty successful since I sold it to a friend at the craft fair before the doors opened and it was so easy to make!

placemat-bag-1.gif

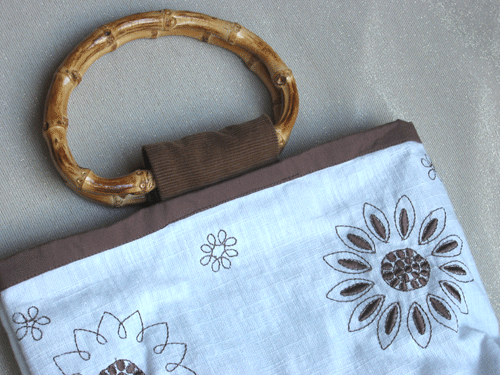
Shopping for a placemat is the first fun part. At most places you can buy them individually and usually for only a few dollars. I have even seen some cute placemats at the dollar store. The first one I made had a white background, brown trim, and brown flowers embroidered on it. All I did was turn it with right sides together and sew up the sides, gusset the bottom, and added handles. I had gotten several pairs of wooden and bamboo handles at the craft store for about $3. I found brown corduroy fabric to match and sewed a piece about 6″ long to the inside of the bag on the front and back, slipping the handle inside the corduroy piece and folding it over before sewing. The placemat was sturdy and had a solid brown fabric on the back so I did not need to add a lining. The only thing I wish I had done differently was to sew the handles a little closer to the bag or make a wider handle strap so the handles would not feel too loose in the strap.

placemat-bag-kim-1.gif

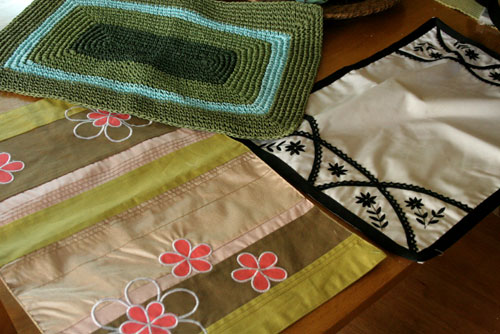
These are a few of the other placemats that I have bought to try out. I am working now on making a paper crocheted placemat into a purse, which I think will look great for summer. (After Heather’s tutorials I may even be able to do the crocheting myself one of these days too!) I will post it as soon as I am done!

before-placemats.jpg

Learn to Crochet – Lesson #8

Tuesday, July 10th, 2007

See all the posts in the Crochet School…

This week we are going to learn how to change colors while crocheting. I know a few of you already figured this out, as I’ve seen some beautiful multi-colored squares on the flickr group.

It is very easy to change colors when crocheting. When you’re about to change colors, work your last stitch until there are 2 loops left on your hook. Leaving a tail, draw the end of the new yarn / color through the 2 loops on your hook. Then continue working with the new color. With a large-eyed needle, weave in the tails of both balls of yarn to secure.

That’s it! Its really simple :)

Here is a great visual from about.com

Patterns

This week our patterns will be all about the color change :)

Amber Waves

Cluster Flowers Square

Maze Granny Square

Springtime Square

And don’t worry about those loose ends from all the color changes – we’ll go over how to weave those in for the next lesson!

Also, I was hoping for a bit of a check in..I’m curious how many people are still following the lessons. We had a huge sign up number, and I want to see who’s still around! Post a comment and let us know if you are still following the lessons!!

Thrifted Notions

Thursday, July 5th, 2007

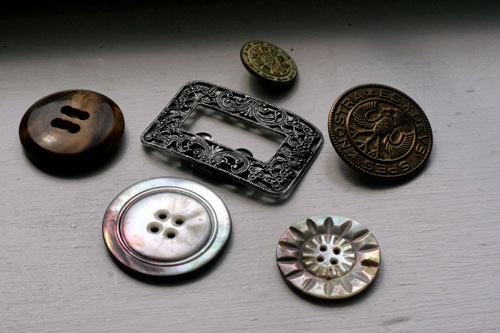
I just wanted to share with you some of my lucky finds at the antique stores lately. “Antiqueing” has pretty much become a hobby for my husband and me. He spends an hour scrounging in the basement looking at cabinets and tools while I make small talk with the shop owner, look for the resident kitty or fish with my son, or scour the jewelry counter! These are some of the vintage buttons and shoe buckles that I found recently to use on my bags. I love large buttons, and shell, mother of pearl, brass or wooden ones make great embellishment. Old strands of beads or plastic belts are also great finds for making earrings.

jens-notions.jpg

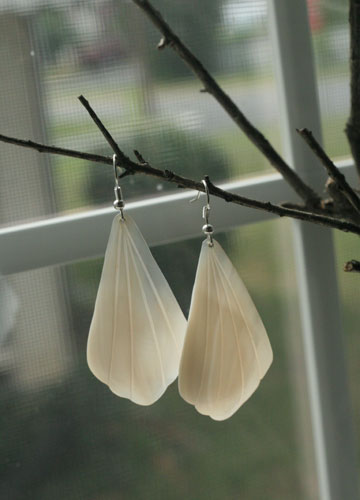
I fell in love with these shell earrings I found at a shop this week that I go to only about once a year. One earring hook was missing and the other definitely needed to be replaced but I would replace any hooks if buying used jewelry. This helps to brighten up the piece as well. This find was timely since my son broke an ornament and I felt bad not buying anything. (What a good excuse!)

jens-shell-earrings.jpg

Often I have gotten a bag of vintage beads or buttons for ~$2, and for that there are usually some treasures inside. Now that I am in with all the owners downtown the ladies will save out bags of buttons for me (and give me a great price!) Finding actual treasures may be a challenge but the character and uniqueness they come with may be worth it!

Making your own mini journal

Thursday, July 5th, 2007

mini-books.jpg

My name is Jennifer, and I love all things having to do with paper. But recently journals that I see in stores just haven’t been doing it for me. I don’t want just lined paper, scrapbook paper or watercolor paper… and I don’t want 15 different journals going all at once (though I must stress I have no problem with owning 15 journals at one time).

With this in mind I started to ponder making my own book. What better way to solve my dilemma than to make something with whatever kind of paper I wanted. I started to read and read on book binding, but I didn’t want to invest in an entirely new hobby, not yet anyway… I simply wanted to try it.

So I took all of this information that I gathered and made my very own mini journals. My supplies were as follows:

  • ~ paper (of all kinds)

  • ~ ruler
  • ~ yarn
  • ~ embroidery thread
  • ~ sewing and embroidery needles
  • ~ a Popsicle stick
  • ~ heavy books (I used Shakespeare’s Complete Works and a Norton Anthology)
  • ~ buttons
  • ~ other random crafty bits

I picked my size of paper (6×6 in this case) and cut the paper I had chosen to fit. I used all sorts of paper… from notebook paper to fancy scrapping paper to card stock. I also ended up using multiple sizes of paper- some 3×3 or 4×3. This created an interesting layering effect in the finished journal.

open-books.jpg

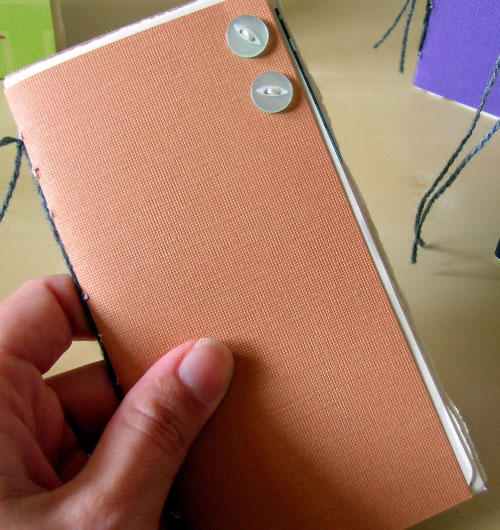
Once I cut my paper I folded it in half using my trusty Popsicle stick to make a proper fold. I then used my ruler to measure and punch 8 holes in the center of the fold. I used the needles to make the holes. Then came the fun bit of assembling the book. I put the paper together and then used my yarn and embroidery needle to sew the book together. Once it was together I placed the book under the heavy books and waited…… The next morning my lovely little journals emerged in all their splendor. I then used buttons, paper and chip board letters to decorate the covers of the journals.

blue-buttons.jpg

I may end up becoming more serious about book binding at some point, but for now this is a lovely and inexpensive way to try your hand at book binding and to have a journal that is uniquely yours.

To learn more about the proper way to bind a book take a look at this website, which is truly informative and offers some excellent tips that can be used in any paper binding experience.

Learn to Crochet – Lesson #7

Wednesday, July 4th, 2007

See all the posts in the Crochet School…

This week we are going to learn Tunisian crochet. This type of crochet is also known as “afghan crochet”, and is similar in many ways to knitting. It creates a very thick result, and a unique look.

An important difference about Tunisian crochet is that you don’t turn your work. You will work your stitches from right to left, and then back from left to right. Also, rather than working one stitch at a time, you are working one row at a time, carrying all the stitches on your hook.

For this reason, you will need to use an afghan or Tunisian hook. This hook looks like a long crochet hook with the other end looking like a knitting needle.

From skacelknitting.com

However, there is a trick that you can use to make a hook if you don’t have one, and you are making something small, like a square. Simply take your regular crochet hook and wrap an elastic several times around the end of the hook. This will prevent your stitches from falling off the end of the hook, and it works great because you don’t have to buy a bunch of different size afghan hooks, you can use the hooks you have on hand.

I will only be teaching the basic Tunisian stitches – there are many out there but we don’t have the time to go through them all :)

Base Row

Tunisian crochet starts with a base row, consisting of a forward pass and return. You will begin as with all other crochet projects, with a row of chains. You will then insert your hook into the first chain, yo and pull the yarn through, giving you two loops on your hook. Then insert into the next chain, yo and pull through, now three loops are on your hook. You continue this until the end of the row, carrying all the loops on your hook.

The return part of the row is completed by yo, and pulling the yarn through 2 loops on the hook. Then you yo, and pull through the next two loops. You repeat until you get to the end of the row.

This video from Nexstitch.com explains it perfectly.

Tunisian Simple Stitch

The Tunisian simple stitch is completed the same was as the base row, except when you are going from right to left, you will be inserting your hook under the vertical loop of the row before, rather than through the top of the stitch, then yo and bring yarn through.

This video from nexstitch.com shows the Simple stitch.

Tunisian Knit Stitch

The Tunisian knit stitch resembles stockinette stitch when it is completed, giving you the look of knit with the ease of crochet. The completed stitch is much thicker than knit stockinette, making it perfect for afghans.

It is explained perfectly at nexstitch.com, here.

Tunisian Purl Stitch

The tunisian purl stitch is similar in appearance to the knitted garter stitch in that both have a horizontal loopy effect. For this stitch, the yarn placement before you start is crucial. The yarn needs to be brought to the front of the work.

You can find the instructional videos on their website here.

Pattern

Afghan stitch Dishcloth This pattern calls for use of the afghan stitch, that is simply the Tunisian simple stitch :) Also, you can use your acrylic yarn rather than the cotton yarn they call for. The size of the completed dishcloth isn’t stated, so if it is smaller than our 7″ goal, simply continue your sc border until it reaches 7″ in width.

Knit Stitch Square Follow the above pattern, but instead of working the Tunisian simple stitch, work the Tunisian Knit Stitch in the rows. Complete the pattern with a sc border to 7″.

Purl Stitch Square Follow the above pattern, but instead of working the Tunisian simple stitch, work the Tunisian Purl Stitch in the rows. Complete the pattern with a sc border to 7″.

Have fun!

And have a fun and safe Fourth of July!!!!

The best granny square book ever

Tuesday, July 3rd, 2007

This post will begin as a shout-out to Amazon. I ordered these books Friday, qualified for the free super shipping (which usually takes 5-10 business days to arrive) and they arrived this morning. Woot woot! So what did I order? Let’s take a look, shall we?

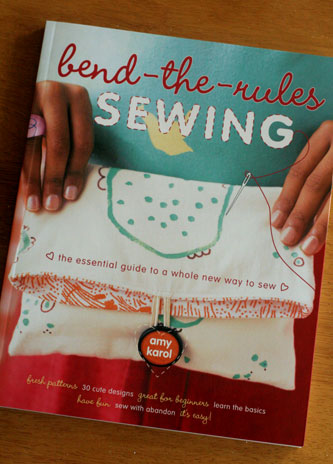
I’m sure we’ve all seen this book around lately:

amy-karol-book.jpg

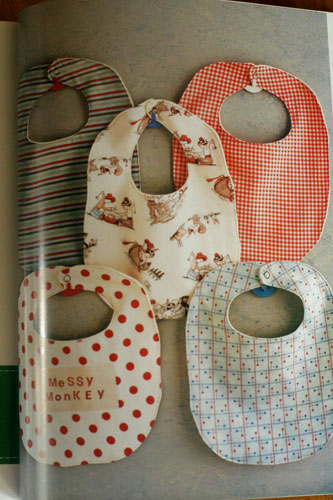
And the inside is just as pretty as the outside. The projects are beautiful and look relatively easy. I am a newbie at sewing, so the thought that I could make some of these things makes my heart flutter. And since everyone I know seems to be adding to the population, I’ll be making up some of these sweet baby bibs

amy-karol-bibs.jpg

Amy Karol, you’re a genius! If you haven’t purchased your copy yet, go here and get it.

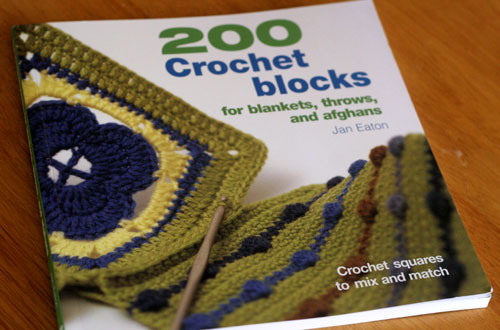
Next up is, hands down, the best granny square book I have found. This book is brought to you by Jan Eaton, the same author who gave us 200 Ripple Stitches (that I own and also love). In my last post, I told you I’ve been so inspired lately and have been on the lookout everywhere for patterns, designs and color combinations. And if that’s what you’re looking for as well, then this book has it.

200-blocks-book.jpg

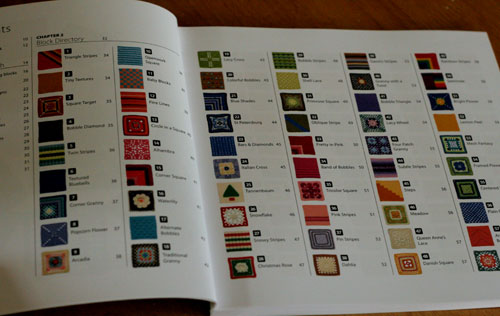
It starts out with three full-color pages of all the types of grannies available in the book. And it just gets better from there.

200-blocks-open.jpg

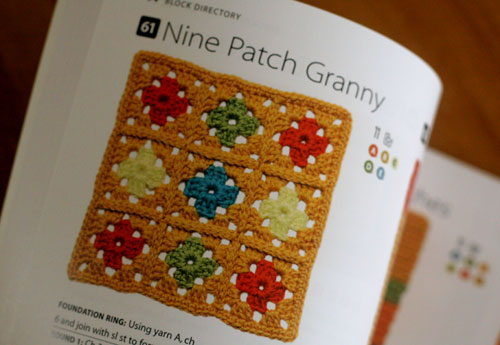
This is just one of my many favorites

200-blocks-sample.jpg

I wish I could post pictures of all the blocks because they’re so beautiful, but I can’t. So you must buy it for yourself. Click here to purchase this gem of a book.

And as an end note, the crochet lesson will be post-poned until tomorrow, so if you’re following that, check back tomorrow to get lesson #7.